
Red Velvet Cinnamon Rolls bring together everything you love about soft, fluffy cinnamon rolls and the rich, cocoa-kissed flavor of red velvet cake. With their beautiful red swirls, buttery cinnamon-sugar filling, and creamy cream cheese frosting, they’re the kind of homemade treat that makes an ordinary morning feel special.
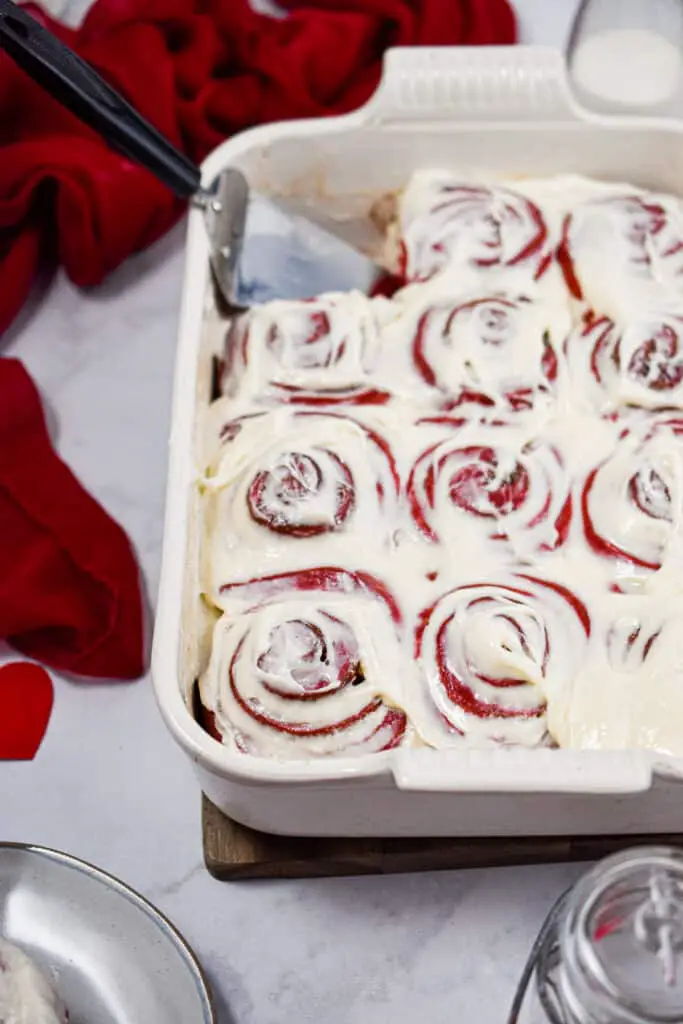
If you’ve ever wanted to make a bakery-style cinnamon rolls recipe at home, this is a wonderful place to start. The dough is soft and tender, the filling is sweet with just enough cinnamon, and the frosting melts into every warm spiral. Whether you’re baking for Valentine’s Day, Christmas morning, a weekend brunch, or simply because you’re craving something sweet, these rolls are sure to bring smiles to the table.
You can make them from scratch for that classic homemade texture, or try a shortcut with red velvet cake mix when you want to save a little time. Either way, the combination of red velvet and cinnamon is delicious, especially when finished with a generous layer of tangy cream cheese frosting.
Ingredient Notes & Substitutions
Here’s what each ingredient brings to the recipe, along with a few easy substitutions to help you bake with what you have.
ALL-PURPOSE FLOUR is the foundation of these rolls. You’ll need about 4 to 4½ cups, depending on how much moisture the dough absorbs. Choose fresh, unbleached all-purpose flour for soft, fluffy rolls. Bread flour also works if you prefer a slightly chewier texture, but avoid adding too much extra flour because that can make the finished rolls dense.
WARM MILK adds moisture and helps create a tender dough. About 1 cup of whole milk is ideal, although 2% milk works well too. It should feel comfortably warm rather than hot when you touch it. If the milk is too hot, it can damage the yeast and prevent the dough from rising properly.
ACTIVE DRY YEAST gives the rolls their light, airy texture. One standard packet, or about 2¼ teaspoons, is enough for this batch. Check the expiration date before using it. Instant yeast can be substituted in the same quantity, and you can mix it directly into the dry ingredients.
GRANULATED SUGAR adds sweetness and helps the yeast get started. Around ¼ cup is a good starting point for the dough. Regular white sugar works perfectly, while a little extra brown sugar in the filling gives the rolls a deeper caramel-like flavor.
UNSALTED BUTTER makes the dough soft and gives the filling its rich flavor. You’ll need roughly ¼ cup melted butter for the dough, plus another ⅓ cup softened butter for spreading. If you only have salted butter, use it and reduce any additional salt slightly.
EGGS help bind the dough and give the rolls a richer, softer crumb. Two large eggs at room temperature are ideal. If possible, take them out of the refrigerator about 20-30 minutes before baking so they mix more easily into the dough.
UNSWEETENED COCOA POWDER provides that subtle chocolate flavor associated with red velvet. About 1 tablespoon is enough to complement the cinnamon without making the rolls taste like a full chocolate pastry. Natural or Dutch-process cocoa can work, although the flavor and color may vary slightly.
RED FOOD COLORING creates the signature red velvet appearance. Start with about 1 tablespoon of concentrated red gel coloring, adjusting as needed for the shade you want. Gel coloring generally produces a brighter red without adding much liquid. A small amount of liquid coloring can also work, but you may need to use more.
SALT balances the sweetness and brings out the buttery, cocoa, and cinnamon flavors. About ¾ teaspoon is suitable for the dough. Fine table salt distributes evenly, but if you use a coarser salt, measure it carefully.
GROUND CINNAMON gives the filling its familiar warm, fragrant flavor. Use about 1 tablespoon of fresh, aromatic ground cinnamon. If the spice has been sitting in your cupboard for years and smells faint, replace it for a better result.
BROWN SUGAR creates the gooey cinnamon swirl inside each roll. About ¾ cup packed light or dark brown sugar works beautifully. Dark brown sugar has a stronger molasses flavor, while light brown sugar keeps the filling a little milder.
CREAM CHEESE makes the frosting tangy and smooth, balancing the sweetness of the rolls. Use about 4 ounces of full-fat block cream cheese, softened to room temperature. Block cream cheese is preferable to the spreadable tub variety because it creates a thicker frosting.
POWDERED SUGAR sweetens the frosting without leaving a grainy texture. Around 1 cup is a good starting point. Sift it if it has lumps, and add a little more if you prefer a thicker frosting.
VANILLA EXTRACT adds a lovely bakery-style aroma to the frosting. About 1 teaspoon is enough. Pure vanilla extract gives a rounded flavor, but a good-quality vanilla essence is fine too.
BUTTERMILK (OPTIONAL) is a useful variation if you want to experiment with red velvet cinnamon rolls with buttermilk. Replace part of the regular milk with buttermilk for a slight tang and a tender crumb. Because buttermilk is acidic, keep the dough balanced and avoid adding too much extra liquid. This variation works best with small adjustments to the flour.
RED VELVET CAKE MIX (OPTIONAL SHORTCUT) is handy when you want to explore red velvet cinnamon rolls with cake mix. You can replace some of the flour, sugar, and cocoa with a measured amount of cake mix, but the dough will need to be adjusted because cake mix already contains sugar and leavening agents. For the most reliable texture, follow a cake-mix-specific dough formula rather than replacing all the dry ingredients cup for cup.
Step-by-Step Instructions
1. Prepare the yeast mixture
Pour the warm milk into a large mixing bowl. Stir in a teaspoon of the measured sugar and the active dry yeast. Let the mixture sit for about 5-10 minutes.
You’ll know the yeast is active when the surface looks foamy and slightly bubbly. If nothing happens, check the milk temperature and yeast freshness before continuing.
2. Make the red velvet dough
Add the remaining sugar, melted butter that has cooled slightly, eggs, red food coloring, cocoa powder, and salt to the yeast mixture. Whisk until everything is evenly combined.
Gradually mix in the flour, starting with about 4 cups. The dough should look soft and slightly tacky rather than dry or crumbly. Add the remaining flour a tablespoon at a time only if the dough is too sticky to handle.
3. Knead until smooth
Transfer the dough to a lightly floured surface and knead for about 8-10 minutes by hand, or 5-7 minutes using a stand mixer with a dough hook.
At first, the dough may feel sticky, but it should gradually become smoother and more elastic. When you gently press it with a finger, it should spring back slowly. Avoid adding handfuls of flour just to make kneading easier; too much flour is one of the biggest reasons homemade rolls turn out dry.
4. Let the dough rise
Place the dough in a lightly greased bowl and turn it once to coat the surface. Cover with a clean kitchen towel or plastic wrap.
Leave it in a warm, draft-free place for about 60-90 minutes, or until it has roughly doubled in size. The exact timing depends on the room temperature, so look at the dough rather than relying only on the clock.
5. Prepare the cinnamon filling
While the dough rises, mix the softened butter, brown sugar, and ground cinnamon in a small bowl. You want a thick, spreadable mixture that holds together without being runny.
If your butter is melted, let it cool until it thickens slightly. A very liquid filling can leak out of the rolls during baking.
6. Roll out the dough
Once the dough has risen, gently press it down to release excess gas. Transfer it to a lightly floured surface and roll it into a rectangle about 16 × 12 inches.
Keep the thickness reasonably even, especially around the edges. An even rectangle helps the rolls bake at a similar rate and gives you attractive spirals when you slice them.
7. Spread the filling
Spread the cinnamon-sugar mixture evenly across the dough, leaving a small border along one long edge. Take your time with this step so every bite gets a good amount of filling.
For an extra dessert-like finish, you can sprinkle a small handful of mini chocolate chips over the filling. Keep the amount modest so the rolls remain easy to slice.
8. Roll and slice
Starting at the long edge covered with filling, roll the dough into a snug log. Avoid squeezing it too tightly, as the rolls need a little room to expand.
Pinch the seam closed, then slice the log into 12 even pieces using a sharp serrated knife or unflavored dental floss. Floss is especially useful because it cuts through the soft dough without squashing the swirls.
9. Arrange and proof the rolls
Grease a 9 × 13-inch baking dish and arrange the rolls cut-side up, leaving a little space between them. Cover loosely and let them rise for another 30-45 minutes.
They should look noticeably puffier and begin to touch one another. If your kitchen is cool, they may need a little longer. This second rise helps create the soft, pillowy texture you want in a good cinnamon rolls recipe.
10. Bake until fluffy
Preheat your oven to 350°F (175°C). Bake the rolls for about 22-28 minutes, checking them toward the end.
The tops should look set, and the centers should no longer appear raw or doughy. Because the dough is red, color alone can be misleading. If you’re unsure, check a center roll with a food thermometer; the dough should reach approximately 190°F (88°C) when fully baked.
If the tops are browning too quickly, loosely cover the dish with foil for the remaining baking time.
11. Make the cream cheese frosting
While the rolls bake, beat the softened cream cheese and butter until smooth and creamy. Add the powdered sugar and vanilla extract, then beat again until the frosting is thick but spreadable.
If it feels too stiff, add milk a teaspoon at a time. If you prefer a frosting that melts into the spirals, keep it slightly softer rather than adding extra sugar.
12. Frost and serve warm
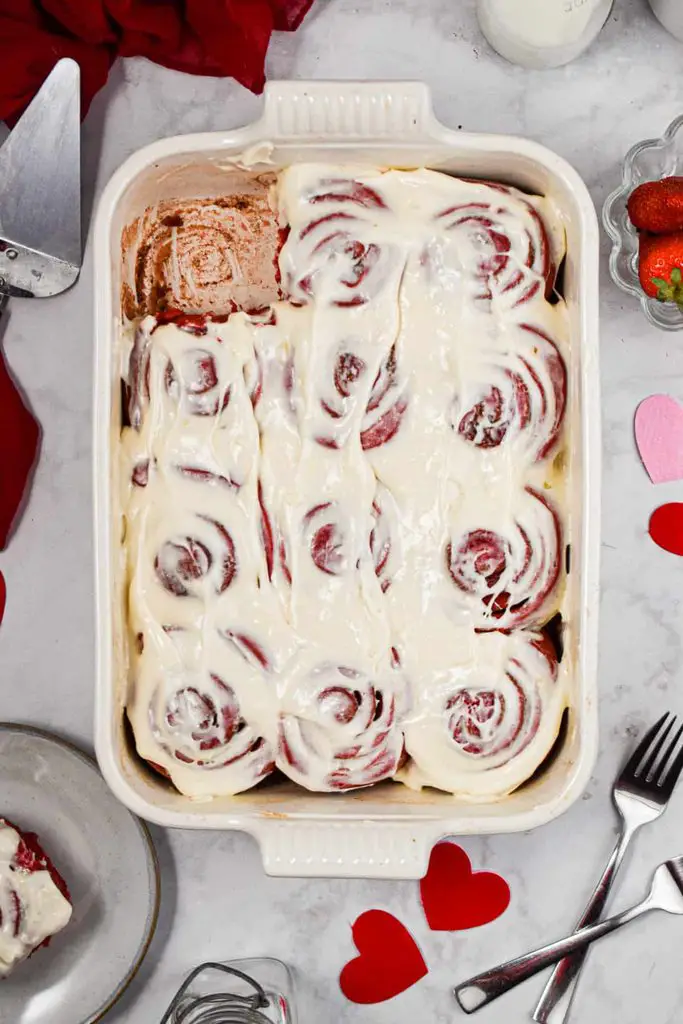
Let the rolls rest for about 5-10 minutes after removing them from the oven. Spread the cream cheese frosting over the warm tops, allowing it to soften and settle into the cinnamon swirls.
Serve them while they’re still warm and tender. The contrast between the buttery red velvet dough, fragrant cinnamon filling, and tangy frosting makes these rolls especially hard to resist.
Expert Tips
- Check your yeast first. If it doesn’t foam after 5-10 minutes in warm milk, replace it before mixing the full batch.
- Use gel food coloring. It gives the dough a vibrant red shade without adding too much liquid.
- Keep the dough slightly tacky. Adding too much flour can leave you with firm, dry rolls instead of fluffy ones.
- Use softened, not runny, filling butter. A spreadable mixture stays inside the swirls much better during baking.
- Slice with dental floss. Slide it underneath the log, cross the ends over the top, and pull to cut clean, round rolls.
- Watch the center rolls. The middle often takes longer to bake than the edges, so check doneness there first.
- Frost while gently warm. A short cooling period helps the frosting soften beautifully without disappearing completely into the rolls.
Storage & Make-Ahead
Store leftover Red Velvet Cinnamon Rolls in an airtight container in the refrigerator because of the cream cheese frosting. They’ll stay at their best for about 3-4 days. For the softest texture, let a refrigerated roll sit at room temperature for 10-15 minutes before reheating.
To warm a single roll, microwave it for about 10-20 seconds, then check the center. Add a few more seconds only if needed. For several rolls, cover the baking dish with foil and warm them in a 300°F (150°C) oven until heated through. Avoid overheating, which can dry out the dough and make the frosting greasy.
You can freeze the baked rolls for up to 2-3 months in a freezer-safe container. For the best results, freeze them without frosting and add freshly prepared cream cheese frosting after reheating. If they’re already frosted, freeze them individually and expect the frosting texture to change slightly after thawing.
For overnight preparation, arrange the sliced rolls in the baking dish, cover tightly, and refrigerate before the second rise is complete. The next morning, let them sit at room temperature until puffy, usually about 45-90 minutes depending on the room temperature, and bake as directed. Don’t leave dough containing milk and eggs out overnight at room temperature.
What to Serve With
These rolls are wonderful with a hot cup of coffee, a latte, or a mug of tea for a relaxed weekend breakfast. If you’re serving them at brunch, pair them with scrambled eggs, a vegetable omelet, or turkey sausage to balance the sweetness with something savory.
For a holiday table, serve them alongside fresh fruit, yogurt, and a simple breakfast casserole. They’re especially lovely for Valentine’s Day, Christmas morning, birthday breakfasts, or a family gathering where you want something homemade that looks as good as it tastes.
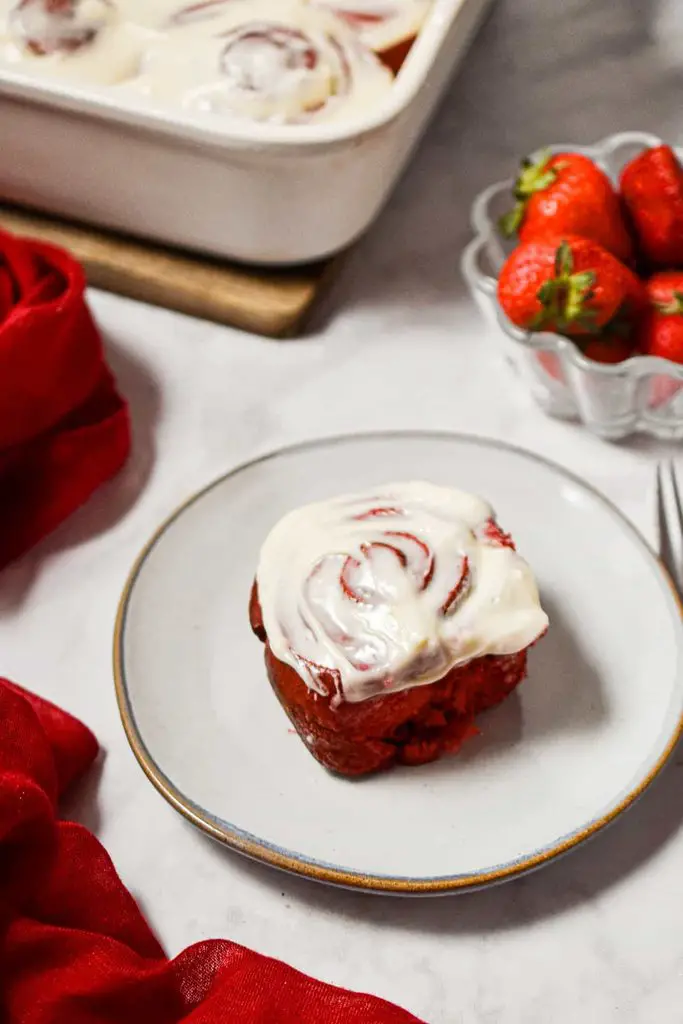
If you’re planning a casual dessert spread, add fresh strawberries or raspberries. Their slight tartness complements the cream cheese frosting and the cocoa notes in the red velvet cinnamon rolls.
FAQs
1. Can I make Red Velvet Cinnamon Rolls with cake mix?
Yes, you can make a cake-mix version for a shortcut. However, cake mix contains sugar, leavening agents, and other ingredients that change the dough’s behavior. Use a recipe specifically developed for red velvet cake mix rather than replacing all the flour and sugar directly in this scratch recipe.
2. Can I make red velvet cinnamon rolls with buttermilk?
Yes. Buttermilk adds a gentle tang and can help create a tender crumb. Replace part of the milk with buttermilk, and adjust the flour gradually so the dough remains soft and manageable. The rise may vary slightly depending on the recipe’s ingredient balance.
3. Why are my cinnamon rolls dry or dense?
The most common reasons are adding too much flour, using inactive yeast, or not allowing enough time for the dough to rise. Measure the flour carefully and look for a dough that feels soft and slightly tacky. Let the rolls become visibly puffy before baking.
4. Do Red Velvet Cinnamon Rolls taste like chocolate cake?
Not exactly. They have a mild cocoa flavor, buttery sweetness, and warm cinnamon filling rather than the strong chocolate flavor of a chocolate cake. The cream cheese frosting adds a tangy finish that gives them their classic red velvet character.
Red Velvet Cinnamon Rolls
Ingredients
- 1 cup 240 ml warm whole milk
- 2¼ teaspoons active dry yeast
- ¼ cup 50 g granulated sugar
- ¼ cup 57 g unsalted butter, melted and cooled
- 2 large eggs room temperature
- 1 tablespoon red gel food coloring
- 1 tablespoon unsweetened cocoa powder
- ¾ teaspoon salt
- 4-4½ cups 500-565 g all-purpose flour
- ⅓ cup 75 g unsalted butter, softened, for filling
- ¾ cup 150 g packed brown sugar
- 1 tablespoon ground cinnamon
- 4 oz 113 g cream cheese, softened
- 2 tablespoons 28 g unsalted butter, softened, for frosting
- 1 cup 120 g powdered sugar
- 1 teaspoon vanilla extract
- 1-2 teaspoons milk as needed
Instructions
- Combine warm milk, yeast, and a teaspoon of sugar. Let stand for 5-10 minutes until foamy.
- Mix in the remaining sugar, melted butter, eggs, red food coloring, cocoa, and salt. Gradually add flour and knead for 8-10 minutes until smooth and slightly tacky.
- Cover and let rise for 60-90 minutes, until doubled. Mix softened filling butter with brown sugar and cinnamon.
- Roll dough into a 16 × 12-inch rectangle. Spread filling evenly, roll into a log, and cut into 12 pieces. Arrange in a greased 9 × 13-inch baking dish.
- Cover and let rise for 30-45 minutes. Bake at 350°F (175°C) for 22-28 minutes, until the center rolls are cooked through.
- Beat cream cheese, frosting butter, powdered sugar, vanilla, and enough milk to make a smooth frosting. Spread over rolls after resting for 5-10 minutes, then serve warm.