
1. Cute Santa Claus Christmas Cake
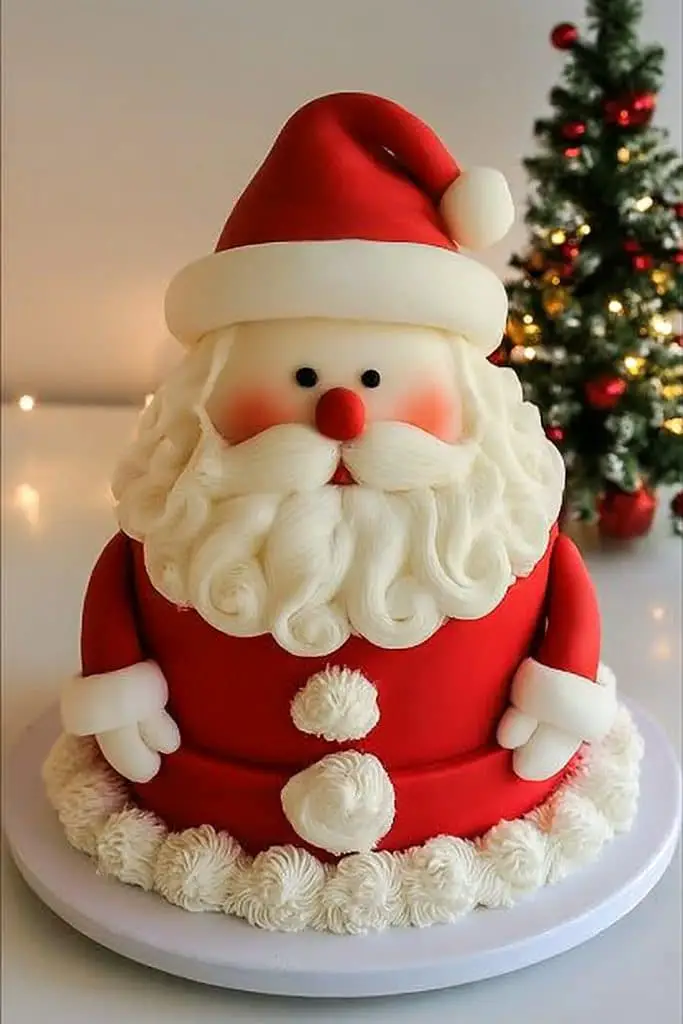
Santa is one of those Christmas designs that always makes me smile. I love how a simple round cake can be turned into a cute Christmas cake with just a little red and white buttercream, and you really don’t need to be an expert cake decorator to make it look festive.
This version is soft, buttery, and vanilla-flavored, with creamy buttercream used to create Santa’s hat, beard, and little face. I’d say it is easy to moderate, depending on how detailed you want the piping to be. A simple Santa face is perfect for beginners, while adding a piped beard and hat gives you a more detailed finish.
Prep Time: 30 minutes
Bake Time: 30–35 minutes
Decorating Time: 30–40 minutes
Total Time: About 1 hour 45 minutes
Difficulty: Easy to Moderate
Serves: 10–12
I’m using a classic vanilla butter cake as the base because it gives you a soft, simple flavor that works beautifully with buttercream. This kind of vanilla cake and buttercream combination is also a reliable starting point for beginner cake decorating.
Ingredients
For the Vanilla Cake
- 1½ cups (340g) unsalted butter, softened
- 2½ cups (500g) granulated sugar
- 5 large eggs, room temperature
- 1 teaspoon vanilla extract
- 3 cups (375g) all-purpose flour
- ¾ teaspoon baking powder
- ¼ teaspoon salt
- 1 cup (240ml) whole milk
For the Buttercream
- 1 cup (226g) unsalted butter, softened
- 4 cups (480g) powdered sugar, sifted
- 2–3 tablespoons milk or heavy cream
- 1 teaspoon vanilla extract
- Pinch of salt
For Decorating
- Red gel food coloring
- Black gel food coloring
- Optional white sprinkles or sanding sugar
- Small red candy or red fondant for Santa’s nose
This buttercream is based on a classic American-style buttercream, which is especially useful for decorating because you can make it softer for spreading or firmer for piping.
How to Make Cute Santa Claus Christmas Cake
1. Bake the Cake
Preheat your oven to 350°F (175°C).
Grease and line two 8-inch round cake pans with parchment paper.
In a large mixing bowl, beat the softened butter and sugar until light and fluffy. This usually takes about 3–4 minutes with an electric mixer.
Add the eggs one at a time, beating well after each addition. Mix in the vanilla extract.
In another bowl, whisk together the flour, baking powder, and salt.
Add the dry ingredients to the butter mixture in a few additions, alternating with the milk. Mix just until everything is combined.
Divide the batter between the prepared pans and smooth the tops.
Bake for 30–35 minutes, or until a toothpick inserted into the center comes out clean.
Let the cakes cool in the pans for about 10 minutes, then transfer them to a wire rack. Allow them to cool completely before decorating.
I always recommend waiting until the cake is completely cool before adding buttercream. Warm cake can soften the frosting and make decorating much harder.
2. Make the Buttercream
Beat the softened butter until smooth and creamy.
Gradually add the powdered sugar, about 1 cup at a time, mixing on low speed first so you don’t end up with powdered sugar everywhere.
Add the vanilla and a little milk or cream. Continue beating until the buttercream becomes light and fluffy.
If it feels too thick, add another small splash of milk. If it becomes too soft, add a little more powdered sugar.
Divide the buttercream into three portions:
- Keep the largest portion white.
- Tint one portion red.
- Tint a small amount black for Santa’s eyes and other details.
For a really bright white finish, you can use clear vanilla or another clear flavoring because regular butter and vanilla can give buttercream a slightly yellow tint.
3. Stack and Frost the Cake
Place one cooled cake layer on your cake board or serving plate.
Spread a layer of white buttercream over the top.
Place the second cake layer on top and gently press it into place.
Cover the entire cake with a thin layer of white buttercream. This is your crumb coat, and it helps keep loose cake crumbs from showing through your final decoration.
Chill the cake for about 15–20 minutes.
Once the first layer of frosting has set, spread another layer of white buttercream over the cake and smooth it as much as you can.
Don’t worry if it isn’t absolutely perfect. Santa’s beard will cover a good portion of the cake anyway.
4. Create Santa’s Hat
Now comes my favorite part!
Use the red buttercream to cover the upper section of the cake. You can spread it smoothly or pipe small stars if you want a more textured look.
Leave a white section underneath for Santa’s beard.
Pipe a thick line of white buttercream along the bottom of the red hat to create the fluffy trim.
You can also add a small white buttercream ball at the top of the hat for that classic Santa look.
5. Add Santa’s Face
Use white buttercream to build up Santa’s beard.
I like using a star piping tip because it gives the beard a soft, fluffy texture. Pipe small stars or short lines of frosting across the lower part of the cake.
Add two small black buttercream dots for the eyes.
For the nose, place a small red candy in the center of Santa’s face, or shape a little piece of red fondant into a ball.
Finally, pipe a small white mustache just above the beard.
And that’s it! Your cute Christmas cake is ready.
2. Easy Cute Christmas Snowman Cake
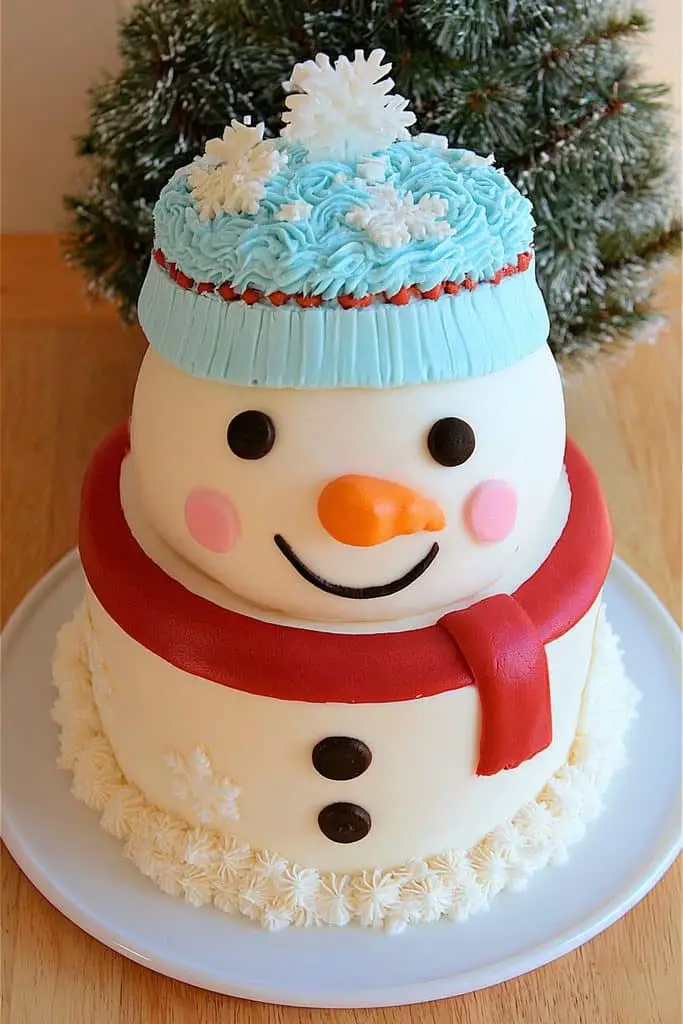
A snowman cake is one of my favorite cute Christmas cakes because it looks festive without requiring complicated decorating skills. I love the simple white frosting, little candy eyes, orange nose, and colorful hat, it feels playful and perfect for a holiday gathering.
This version uses a soft vanilla cake with creamy vanilla buttercream. The decorating is easy, so I’d recommend it for beginners or anyone looking for simple cute ideas for Christmas. Betty Crocker also uses a two-layer round cake, white frosting, candy eyes, an orange candy nose, and a simple colored hat for its Holiday Snowman Cake, so this is a well-established and beginner-friendly Christmas cake design.
Prep Time: 30 minutes
Bake Time: 30–35 minutes
Decorating Time: 25–30 minutes
Total Time: About 1 hour 35 minutes
Difficulty: Easy
Servings: 10–12
Ingredients
For the Vanilla Cake
- 1½ cups (340g) unsalted butter, softened
- 2½ cups (500g) granulated sugar
- 5 large eggs, at room temperature
- 1 teaspoon vanilla extract
- 3 cups (375g) all-purpose flour
- ¾ teaspoon baking powder
- ¼ teaspoon salt
- 1 cup (240ml) whole milk
For the Buttercream
- 1 cup (226g) unsalted butter, softened
- 4 cups (480g) powdered sugar, sifted
- 2–3 tablespoons milk or heavy cream
- 1 teaspoon vanilla extract
- Pinch of salt
This simple buttercream follows the same basic butter, powdered sugar, milk, vanilla, and salt combination used in classic vanilla buttercream recipes.
For the Snowman Decoration
- Orange gumdrop or orange fondant, for the nose
- 2 chocolate candies or chocolate buttons, for the eyes
- Black decorating gel, for the smile
- Green or red gel food coloring
- 1 large marshmallow, for the hat pom-pom
- Red, green, and white sprinkles, for the border
- White sanding sugar or sparkling sugar, optional
How to Make the Snowman Cake
1. Bake the cake
Preheat your oven to 350°F (175°C). Grease and line two 8-inch round cake pans with parchment paper.
Beat the softened butter and sugar together for about 3–4 minutes, until light and fluffy. Add the eggs one at a time, mixing well after each addition, then stir in the vanilla.
In another bowl, whisk together the flour, baking powder, and salt. Add the dry ingredients to the butter mixture in batches, alternating with the milk. Mix just until the batter is smooth.
Divide the batter between the prepared pans and bake for 30–35 minutes, or until a toothpick inserted in the center comes out clean.
Let the cakes cool in their pans for about 10 minutes, then transfer them to a wire rack to cool completely.
2. Make the buttercream
Beat the softened butter until smooth and creamy. Gradually add the powdered sugar and continue beating until fluffy.
Add the vanilla, salt, and 2 tablespoons of milk or cream. Beat until smooth and spreadable. If the frosting feels too thick, add a little more milk, a small amount at a time.
Keep most of the buttercream white. Transfer a small portion to another bowl and tint it green or red for the snowman’s hat.
3. Stack and frost the cake
Place one cooled cake layer on your serving plate. Spread a layer of white buttercream over the top, then place the second cake layer on top.
Cover the entire cake with a thin layer of buttercream first. This crumb coat helps keep loose cake crumbs from showing through the final frosting layer, and chilling the cake briefly helps set it.
Refrigerate for about 20–30 minutes, then spread on the remaining white buttercream. It doesn’t need to be perfectly smooth, the slightly textured frosting can actually make the snowman look softer and cuter.
4. Add the snowman’s face
Now comes the fun part.
Use two chocolate candies for the eyes. For the carrot-style nose, cut or shape an orange gumdrop into a small triangle and place it in the center of the cake.
Use black decorating gel to draw a small curved smile underneath the nose. Keep the face simple; you don’t need perfect lines for this design.
5. Make the snowman’s hat
Spread green or red buttercream over the upper portion of the cake to create the snowman’s hat.
Use a little extra buttercream to create the hat brim. You can pipe a simple border around it or just spread it with a small spatula.
Place a large marshmallow at the top of the hat to make the pom-pom. This little detail makes the cake look especially cute without requiring any special cake-decorating skills.
6. Finish with festive decorations
Sprinkle white sanding sugar over the lower part of the cake to give it a snowy look.
Press red, green, and white sprinkles around the bottom edge. You can also add a few snowflake sprinkles around the snowman’s face or hat.
For an even easier version, skip the piped hat completely and use colored fondant or a few candies to create the hat shape.
Easy Variations
Chocolate snowman cake: Use a chocolate cake instead of vanilla. The dark cake underneath the white frosting gives a nice contrast.
Peppermint version: Add a little peppermint extract to the buttercream and decorate with crushed peppermint candy for a fresh holiday flavor.
Kid-friendly version: Let children add the eyes, buttons, sprinkles, and hat decorations. It doesn’t have to look perfect, those little imperfections are part of the charm.
No fondant version: You don’t need fondant at all for this cake. Gumdrops, chocolate candies, marshmallows, and decorating gel are enough to create the face and hat.
3. Cute Christmas Reindeer Cake
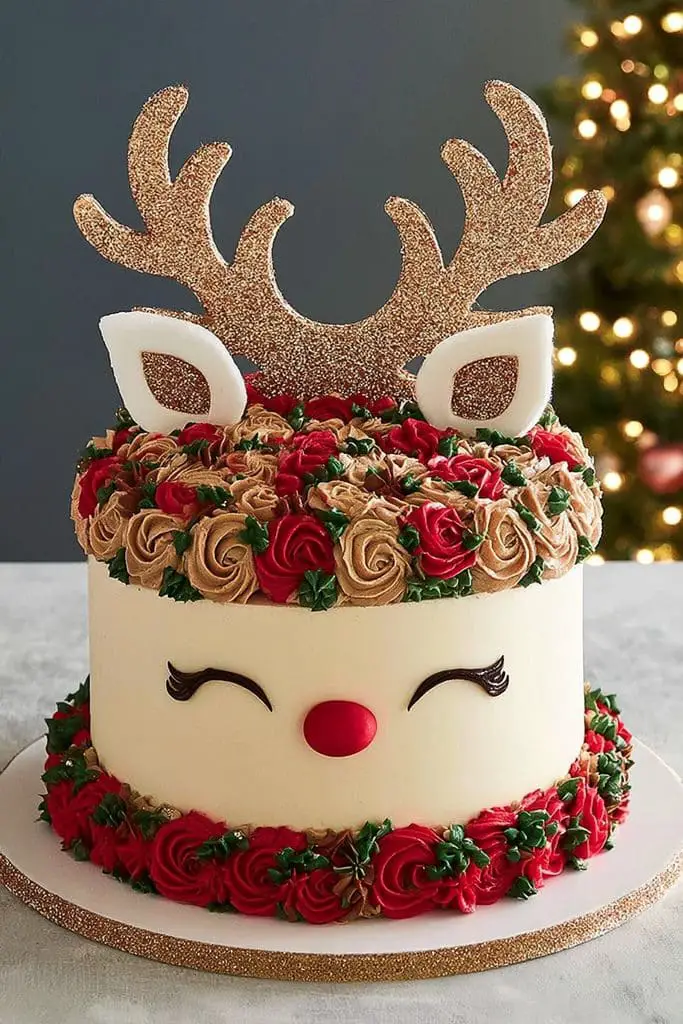
If you’re looking for a Christmas cake that is both adorable and a little chocolatey, this cute Christmas reindeer cake is such a fun choice. I love the combination of rich chocolate cake, creamy chocolate buttercream, little candy eyes, and pretzel antlers. It looks like one of those festive cakes that took hours to make, but the actual decorating can be kept quite simple.
This version is inspired by the classic reindeer cake style, including the chocolate cake, chocolate frosting, candy eyes, and pretzel-style antlers used in Wilton’s Christmas Reindeer Cake. Their version is listed as beginner level and serves 12.
Prep Time: 30 minutes
Bake Time: 30–35 minutes
Decorating Time: 25–30 minutes
Total Time: About 1 hour 35 minutes
Difficulty: Easy to Moderate
Servings: 10–12
For a variation, you can make the cake vanilla instead of chocolate, but I personally prefer chocolate here because it gives the reindeer face a deeper color and pairs really well with the sweet decorations.
Ingredients
For the Chocolate Cake
- 1½ cups (190g) all-purpose flour
- ½ cup (45g) unsweetened cocoa powder
- 1 teaspoon baking soda
- ½ teaspoon salt
- ½ cup (113g) unsalted butter, softened
- 1 cup (200g) granulated sugar
- 2 large eggs
- 1 teaspoon vanilla extract
- 1 cup (240g) sour cream
For the Chocolate Buttercream
- 1 cup (226g) unsalted butter, softened
- 3 cups (360g) powdered sugar, sifted
- ½ cup (45g) unsweetened cocoa powder
- 2–3 tablespoons milk or heavy cream
- 1 teaspoon vanilla extract
- Pinch of salt
For the Reindeer Decoration
- 2 large pretzel rods
- 6–8 small pretzel twists, optional
- 2 large white candies or candy eyes
- Black decorating gel or black icing
- 1 large red candy or red gumdrop for the nose
- A little white buttercream
- Optional red and green sprinkles
The decoration is based on the same basic idea as Wilton’s reindeer cake, which uses chocolate buttercream for the cake, candy-made antlers, pretzel rods, and piped details for the face.
How to Make the Reindeer Cake
1. Bake the chocolate cake
Preheat your oven to 350°F (175°C). Grease and line two 8-inch round cake pans with parchment paper.
In a medium bowl, whisk together the flour, cocoa powder, baking soda, and salt.
In a separate large bowl, beat the softened butter and sugar for about 3–4 minutes, until light and fluffy. Add the eggs one at a time, mixing well after each addition. Stir in the vanilla.
Add the dry ingredients gradually, alternating with the sour cream. Mix just until everything is combined. Don’t overmix the batter.
Divide the batter between the prepared cake pans and smooth the tops.
Bake for 30–35 minutes, or until a toothpick inserted into the center comes out clean.
Let the cakes cool in the pans for about 10 minutes, then transfer them to a wire rack and allow them to cool completely.
2. Make the chocolate buttercream
Beat the softened butter until creamy and smooth.
Add the powdered sugar and cocoa powder gradually, mixing on low speed at first to prevent the sugar from flying everywhere. Add the vanilla and 2 tablespoons of milk or cream.
Beat for another 2–3 minutes until the frosting becomes light and fluffy. If it feels too thick, add another tablespoon of milk.
The finished buttercream should be soft enough to spread but firm enough to hold its shape.
3. Prepare the reindeer antlers
The easiest option is to use pretzels for the antlers.
Break a few small pretzel twists into pieces and arrange them around the ends of two pretzel rods to create simple antler shapes. You can attach the pieces with a little melted chocolate and let them set before decorating the cake.
If you want an even simpler version, just use two large pretzel twists and skip the rods. They still give the cake an unmistakable reindeer look.
For a more detailed decoration, Wilton’s version creates edible antlers with melted dark cocoa candy melts and uses pretzel rods for support.
4. Stack and frost the cake
Place one chocolate cake layer on your serving plate.
Spread a generous layer of chocolate buttercream over the top. Place the second cake layer on top and gently press it down.
Cover the entire cake with a thin crumb coat. Chill it for about 15–20 minutes, then cover the cake with the remaining chocolate buttercream.
You don’t have to make the frosting perfectly smooth. In fact, I like leaving a little texture because it gives the reindeer face a cozy, homemade look.
5. Create the reindeer face
Now it’s time to turn the chocolate cake into a cute Christmas reindeer.
Place two large white candies or candy eyes near the upper half of the cake. Add small black dots with decorating gel for the pupils if you’re using plain white candies.
Place a large red candy or red gumdrop in the center for the nose. This gives you that classic Rudolph-inspired look.
Use black decorating gel to add a small smile underneath the nose. You can also pipe a few tiny dots on either side to suggest whiskers.
6. Add the antlers
Carefully place the pretzel antlers at the top of the cake.
Push them gently into the cake behind the frosting so they stay upright. If the pretzels feel too heavy, insert them at a slight angle rather than standing them completely straight.
Add a few small white buttercream dots around the face if you want extra detail.
7. Add a festive finishing touch
You can leave the cake simple with just the reindeer face and antlers, or add a few Christmas details around the bottom.
Try red and green sprinkles, mini chocolate candies, or small white buttercream stars around the border.
For a particularly cute presentation, place the cake on a white cake stand and scatter a few Christmas sprinkles around the base.
Easy Variations
Rudolph cake: Use a bright red candy for the nose and add a tiny white buttercream highlight to make it look shiny.
Vanilla reindeer cake: Replace the chocolate cake with a vanilla cake and cover it with light brown buttercream. This gives the reindeer a softer, lighter appearance.
Chocolate-and-peppermint version: Add a little peppermint extract to the chocolate buttercream and decorate the cake with crushed peppermint candy.
Mini reindeer cakes: Bake the batter in smaller round pans and decorate individual mini cakes with one red nose, two eyes, and little pretzel antlers.
No-piping version: Skip the decorating bag completely. Spread the buttercream with a spatula and use candies for almost all of the facial details.
4. Cute Christmas Tree Cake
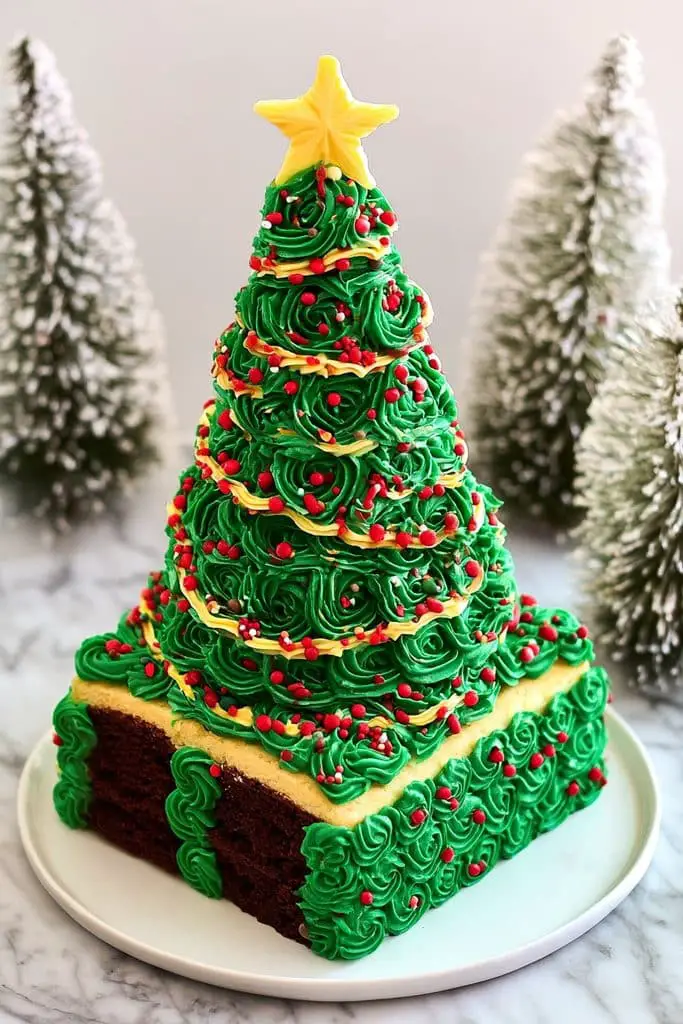
A Christmas tree cake is one of those cute Christmas cakes that instantly brings the holiday feeling to the table. I love how easy it is to make a simple cake look festive with green buttercream, little colorful ornaments, and a few white stars.
This version uses a soft vanilla cake covered with creamy buttercream and decorated to look like a Christmas tree. You can use a tree-shaped cake pan for a more obvious tree shape, but I prefer the simple round-cake version because it is easier for beginners. Wilton also has beginner-friendly Christmas tree cake designs that use green buttercream, piped stars or rosettes, and colorful decorations.
Prep Time: 30 minutes
Bake Time: 30–35 minutes
Decorating Time: 30 minutes
Total Time: About 1 hour 35 minutes
Difficulty: Easy to Moderate
Servings: 10–12
For a variation, you can make this cake chocolate instead of vanilla, or use different shades of green buttercream to give the tree more depth. Wilton also uses several shades of green in its Christmas tree cake designs.
Ingredients
For the Vanilla Cake
- 1½ cups (340g) unsalted butter, softened
- 2½ cups (500g) granulated sugar
- 5 large eggs, at room temperature
- 1 teaspoon vanilla extract
- 3 cups (375g) all-purpose flour
- ¾ teaspoon baking powder
- ¼ teaspoon salt
- 1 cup (240ml) whole milk
For the Buttercream
- 1 cup (226g) unsalted butter, softened
- 4 cups (480g) powdered sugar, sifted
- 2–3 tablespoons milk or heavy cream
- 1 teaspoon vanilla extract
- Pinch of salt
For Decorating
- Green gel food coloring
- Red gel food coloring
- Yellow or gold gel food coloring
- White buttercream
- Red and green sprinkles
- Small colorful candies, optional
- Star-shaped sprinkle or edible star, for the top
- White sanding sugar, optional
A basic buttercream made with butter, powdered sugar, milk or cream, and vanilla works well for this design. Wilton’s Christmas tree cake also uses buttercream tinted in different shades of green along with red and other festive colors.
How to Make the Cute Christmas Tree Cake
1. Bake the cake
Preheat your oven to 350°F (175°C). Grease and line two 8-inch round cake pans with parchment paper.
Beat the softened butter and sugar together for about 3–4 minutes, until light and fluffy.
Add the eggs one at a time, mixing well after each addition. Stir in the vanilla extract.
In a separate bowl, whisk together the flour, baking powder, and salt.
Add the dry ingredients to the butter mixture in batches, alternating with the milk. Mix just until the batter is smooth.
Divide the batter between the prepared pans and bake for 30–35 minutes, or until a toothpick inserted into the center comes out clean.
Let the cakes cool in the pans for about 10 minutes, then transfer them to a wire rack. Allow them to cool completely before decorating.
2. Make the buttercream
Beat the softened butter until creamy.
Gradually add the powdered sugar, mixing on low speed at first. Add the vanilla, salt, and 2 tablespoons of milk or cream.
Beat for another 2–3 minutes until the buttercream is light and fluffy. Add a little more milk if needed.
Set aside some white buttercream for the snow-like details and star decorations.
Tint most of the remaining buttercream green. If you want the tree to look more detailed, divide the green frosting into two or three bowls and make each one a slightly different shade.
3. Stack and frost the cake
Place one cake layer on a serving plate.
Spread a layer of buttercream over the top, then place the second cake layer on top.
Cover the cake with a thin crumb coat and chill it for about 15–20 minutes. Add another layer of buttercream afterward.
Don’t worry if the frosting isn’t perfectly smooth. Since we’re going to add a Christmas tree design on top, small imperfections will be hidden by the decorations.
4. Create the Christmas tree
There are two easy ways to create the tree.
Option 1: Pipe the tree directly onto the cake.
Use a piping bag fitted with a star tip. Start near the bottom of the cake and pipe small stars or rosettes close together, gradually making each row narrower as you move upward.
This creates a simple triangular Christmas tree shape.
Option 2: Create a tree-shaped design with a spatula.
Use green buttercream to make a large triangle on top of the cake. Spread the frosting with a small spatula, then gently pull the tip of the spatula outward to create branches.
This is the easier option if you don’t have piping tips.
Wilton uses similar star and rosette piping techniques for its beginner Christmas tree cake, filling the tree shape with different sizes of buttercream stars and rosettes.
5. Add the Christmas tree ornaments
Now add the colorful decorations.
Press small red, yellow, white, and green candies into the buttercream. You can arrange them randomly like Christmas ornaments or place them in rows for a more organized look.
I like using small round candies because they look like tiny baubles and don’t require any special decorating skills.
You can also pipe small dots of red and white buttercream around the tree.
For an extra festive touch, sprinkle a little white sanding sugar over the green frosting to make it look like the tree has a light dusting of snow.
6. Add the star
The star on top is my favorite part.
Place a large yellow or gold star sprinkle at the very top of the tree. If you don’t have a star sprinkle, pipe a small star with yellow buttercream instead.
You can also make a simple star from yellow fondant if you already have some on hand.
7. Finish the cake
Use white buttercream to pipe a simple border around the bottom of the cake.
Add a few white buttercream stars around the tree or sprinkle some white nonpareils over the top.
For a snowy look, add a little white sanding sugar around the base of the tree.
If you want the cake to look extra festive, place a few red and green candies around the serving plate as well.
Easy Variations
Chocolate Christmas tree cake: Replace the vanilla cake with your favorite chocolate cake. The green buttercream looks especially pretty against a chocolate base.
Snow-covered tree: Add more white buttercream stars and white sanding sugar to make the tree look freshly covered with snow.
Pink Christmas tree: Use pink buttercream instead of green for a fun, modern holiday cake. Add white and gold decorations for a softer look.
Gingerbread version: Add a little cinnamon and ginger to the vanilla cake and decorate the tree with tiny gingerbread cookies.
No-piping version: Spread green buttercream into a triangle and decorate it with candies. You can completely skip the piping bag.
5. Cute Christmas Wreath Cake
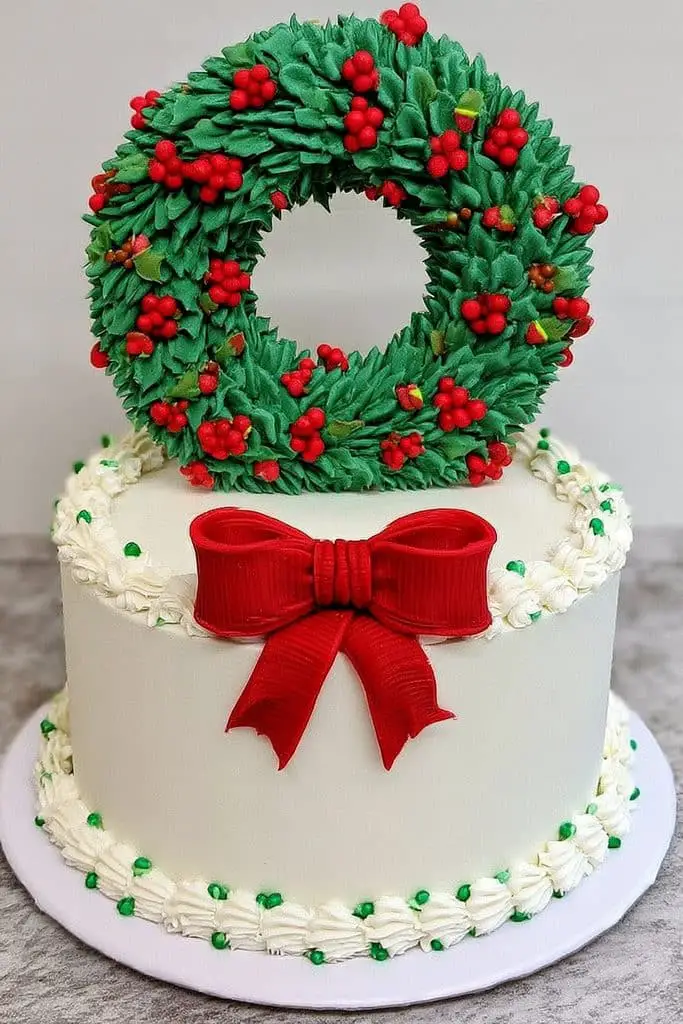
A Christmas wreath cake is such a pretty choice when you want something festive without making the cake too complicated. I love the way a simple round cake can be turned into a cute Christmas wreath with green buttercream leaves, little red berries, and a sweet bow in the middle.
This version starts with a soft vanilla cake and creamy buttercream. The wreath is piped around the top of the cake, leaving the center open, so it has that classic wreath shape. Buttercream dots are especially easy for beginners, and Wilton’s wreath technique uses different-sized dots to build a round wreath, with colored icing dots or sprinkles for ornaments and a piped bow.
Prep Time: 30 minutes
Bake Time: 30–35 minutes
Decorating Time: 25–30 minutes
Total Time: About 1 hour 35 minutes
Difficulty: Easy to Moderate
Servings: 10–12
For a variation, you can use a chocolate cake underneath, add white buttercream for a snowy wreath, or use gold and red decorations for a slightly more elegant holiday look.
Ingredients
For the Vanilla Cake
- 1½ cups (340g) unsalted butter, softened
- 2½ cups (500g) granulated sugar
- 5 large eggs, at room temperature
- 1 teaspoon vanilla extract
- 3 cups (375g) all-purpose flour
- ¾ teaspoon baking powder
- ¼ teaspoon salt
- 1 cup (240ml) whole milk
For the Buttercream
- 1 cup (226g) unsalted butter, softened
- 4 cups (480g) powdered sugar, sifted
- 2–3 tablespoons milk or heavy cream
- 1 teaspoon vanilla extract
- Pinch of salt
For the Wreath Decoration
- Green gel food coloring
- Red gel food coloring
- A little white buttercream
- Red candies or red sprinkles, for the berries
- White or gold sprinkles, optional
- Green sprinkles, optional
- Red fondant or red buttercream, for the bow
- Small star or pearl sprinkles, optional
How to Make the Cute Christmas Wreath Cake
1. Bake the vanilla cake
Preheat your oven to 350°F (175°C). Grease and line two 8-inch round cake pans with parchment paper.
Beat the softened butter and sugar together for about 3–4 minutes, until light and fluffy.
Add the eggs one at a time, mixing well after each addition. Stir in the vanilla extract.
In another bowl, whisk together the flour, baking powder, and salt.
Add the dry ingredients to the butter mixture in batches, alternating with the milk. Mix just until the batter is smooth.
Divide the batter evenly between the prepared pans. Bake for 30–35 minutes, or until a toothpick inserted into the center comes out clean.
Let the cakes cool for about 10 minutes in the pans, then transfer them to a wire rack to cool completely.
2. Prepare the buttercream
Beat the softened butter until smooth and creamy.
Gradually add the powdered sugar, mixing on low speed at first. Add the vanilla, salt, and 2 tablespoons of milk or cream.
Beat until the frosting becomes light and fluffy. Add another tablespoon of milk if needed to reach a smooth piping consistency.
Set aside about 1 cup of white buttercream. Tint most of the remaining buttercream green and a small portion red for the bow.
If you want a more natural-looking wreath, divide the green frosting into two bowls and make one slightly darker than the other.
3. Stack and frost the cake
Place one cake layer on your serving plate.
Spread a layer of white buttercream over the top, then place the second cake layer on top.
Cover the cake with a thin crumb coat and chill it for about 15–20 minutes.
Add another layer of white buttercream to the top and sides. You don’t need an extremely thick layer because the wreath decoration will be the main focus.
For an especially simple finish, leave the sides white and decorate only the top of the cake.
4. Mark the wreath shape
Before piping, lightly mark a circle on the top of the cake to guide your wreath.
You can use a small bowl or round cookie cutter as a guide. Place it gently in the center of the cake and press very lightly to leave a faint circle.
Remove the bowl, and you’ll have a simple outline to follow.
If you don’t want to mark the cake, you can also pipe the wreath freehand.
5. Pipe the green wreath
Fill a piping bag with green buttercream and fit it with a small or medium round tip.
Start following the circle you marked on the cake. Pipe small dots close together to create the wreath.
For a fuller wreath, add another row of dots just inside and outside the first row. Wilton’s buttercream wreath technique recommends using different-sized dots to build a full circular shape and filling gaps with smaller dots.
You can also use a small star tip instead of a round tip. Pipe small stars around the circle, overlapping them slightly to create the look of leafy branches.
Don’t worry about making every dot exactly the same. A little variation makes the wreath look more natural.
6. Add the red berries
Now add little red berries throughout the green wreath.
You can pipe small red buttercream dots directly onto the wreath or press small red candies into the frosting.
Try grouping the berries in small clusters of three. This gives the wreath a more balanced look without making you measure or plan every decoration.
For another option, use red sugar pearls or red sprinkles instead of buttercream.
7. Add the Christmas bow
A little bow makes the wreath instantly recognizable.
Use red buttercream to pipe two small loops near the bottom or top of the wreath. Add a small dot in the middle to connect them, then pipe two short lines underneath for the ribbon tails.
If piping a bow feels difficult, cut a small bow from red fondant and place it on the wreath instead.
You can also use a ready-made edible Christmas bow if you have one.
8. Add snowy or sparkly details
This step is completely optional, but I think it makes the cake extra cute.
Add a few small white buttercream dots around the wreath to look like snow. You can also sprinkle a little white sanding sugar over the green frosting.
For a more elegant version, use tiny gold or silver sprinkles instead of white ones.
Keep the center of the wreath mostly plain so the circular shape remains easy to see.
Easy Variations
Chocolate wreath cake: Use a chocolate cake base and cover it with vanilla buttercream. The green and red decorations stand out beautifully against the darker cake.
Snowy wreath cake: Pipe the wreath with green and white buttercream, then add white sanding sugar for a frosty finish.
Red and gold wreath: Use red berries, gold sprinkles, and a gold fondant bow for a more elegant Christmas cake.
Gingerbread wreath cake: Add a little cinnamon and ginger to the cake batter and decorate the wreath with tiny gingerbread cookies.
Cupcake wreath: Instead of a layered cake, arrange cupcakes in a circle and decorate them with green buttercream. Wilton also has a holiday wreath cupcake design that uses piped decorations arranged around cupcakes.
6. Cute Christmas Cookie Cake
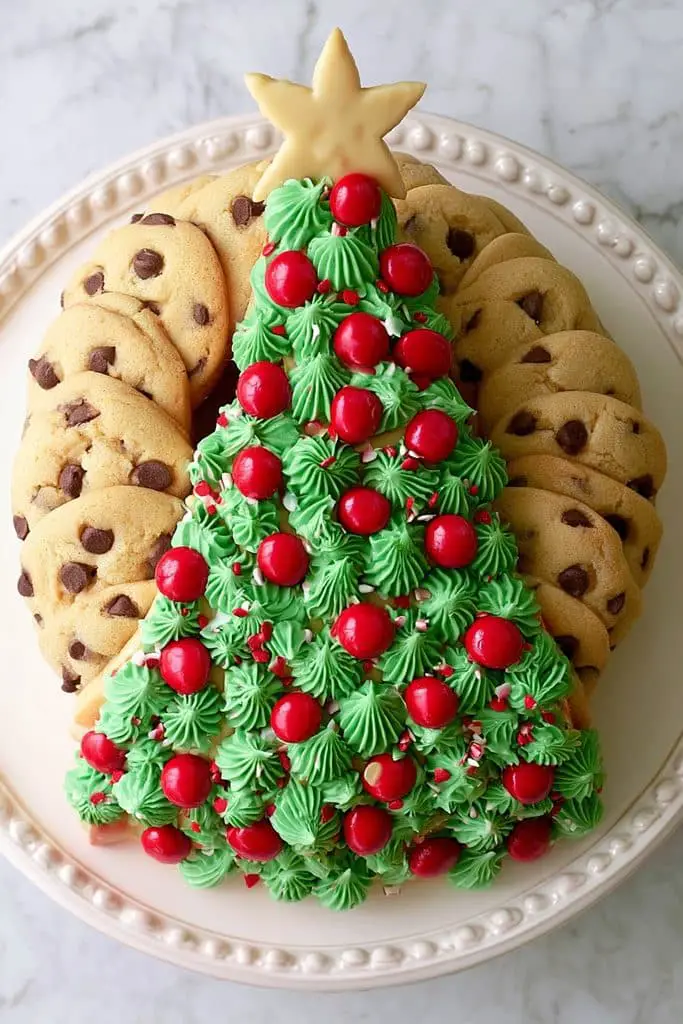
If you love cookies as much as cake, this cute Christmas cookie cake is the perfect holiday treat. I like this idea because it gives you the look of a decorated Christmas cake but with a soft, buttery cookie base underneath. It is also much easier to decorate than a traditional layered cake.
A large cookie cake can be shaped into a Christmas tree, round cookie, or even a festive wreath. Wilton has a beginner-friendly Christmas tree cookie cake made with a large butter cookie, green icing, white icing, and colorful candy decorations, while Betty Crocker also has a giant Christmas tree cookie made from sugar cookie dough and decorated with frosting and candies.
Prep Time: 20 minutes
Chill Time: 30 minutes
Bake Time: 20–25 minutes
Decorating Time: 20–30 minutes
Total Time: About 1 hour 30 minutes
Difficulty: Easy
Servings: 10–12
For a variation, you can keep the cookie round and decorate it like a Christmas wreath, or cut the baked cookie into a tree shape for one of the cutest Christmas cake recipes on your holiday table.
Ingredients
For the Cookie Cake
- 1 cup (226g) unsalted butter, softened
- 1 cup (200g) granulated sugar
- ½ cup (100g) light brown sugar, packed
- 1 large egg
- 2 teaspoons vanilla extract
- 2½ cups (315g) all-purpose flour
- ½ teaspoon baking powder
- ½ teaspoon salt
For the Buttercream
- ½ cup (113g) unsalted butter, softened
- 2 cups (240g) powdered sugar
- 1–2 tablespoons milk or heavy cream
- 1 teaspoon vanilla extract
- Pinch of salt
For Decorating
- Green gel food coloring
- Red gel food coloring
- Yellow or gold sprinkles
- Red and green candies
- White sprinkles
- Christmas-shaped sprinkles
- Optional mini candy canes or chocolate candies
How to Make the Cute Christmas Cookie Cake
1. Prepare the cookie dough
Beat the softened butter, granulated sugar, and brown sugar together until creamy and smooth.
Add the egg and vanilla extract and mix until combined.
In a separate bowl, whisk together the flour, baking powder, and salt. Gradually add the dry ingredients to the butter mixture and mix until a soft cookie dough forms.
The dough should be soft but not overly sticky. If it feels difficult to handle, cover it and refrigerate for about 30 minutes.
This type of large decorated cookie is a well-established Christmas baking idea. Wilton’s beginner Christmas tree cookie cake uses a butter-based cookie dough and bakes the large cookie before trimming and decorating it.
2. Shape the cookie
Preheat your oven to 350°F (175°C).
Line a large baking sheet with parchment paper.
Place the chilled dough on the sheet and press or roll it into an even layer about ¼ inch thick.
For a simple round cookie cake, use a large round cake pan or cake ring as a guide.
If you want a Christmas tree cookie cake, shape the dough into a large rectangle and plan to cut the tree shape after baking. This is an easy approach because the cookie is less likely to lose its shape while baking. Betty Crocker’s giant Christmas tree cookie uses this same basic idea: bake the large cookie first, then cut the tree shape from it.
3. Bake the cookie
Bake for about 20–25 minutes, or until the edges are lightly golden and the center looks set.
Keep an eye on the cookie during the final few minutes. You want it baked through but still soft enough to have that pleasant chewy cookie texture.
Let it cool completely on the baking sheet before decorating.
If you’ve made a rectangular cookie for a tree design, place a paper tree template over the cooled cookie and carefully cut around it with a sharp knife.
4. Make the buttercream
Beat the softened butter until creamy.
Gradually add the powdered sugar and mix until smooth. Add the vanilla, salt, and 1 tablespoon of milk or cream.
Beat for another 2–3 minutes until light and fluffy. Add a little more milk if the frosting feels too thick.
Divide the frosting into bowls and tint some green and some red. Keep a portion white for snowy details.
For this cookie cake, you don’t need a large amount of frosting. A few simple piped decorations are enough to make it look festive.
5. Decorate the cookie cake
Place the completely cooled cookie on a cake board or large serving plate.
For a round Christmas cookie cake, pipe a green border around the edge using a star tip. Add small red and white buttercream dots around the border to make it look like Christmas lights.
You can also pipe a simple message such as “Merry Christmas” in the center.
For a tree-shaped cookie cake, cover the top with green buttercream. Pipe zigzags or small stars across the surface to create the look of tree branches.
Wilton’s Christmas tree cookie cake uses green icing to cover the cookie, followed by white piped stars, colorful decorations, and yellow stars.
6. Add the Christmas decorations
Now add your favorite festive toppings.
Press small red and green candies into the frosting to look like Christmas ornaments. Add yellow or gold sprinkles for tiny lights.
Scatter a few white sprinkles over the green frosting to give the cookie a snowy appearance.
If you’re making a round cookie cake, you can also arrange the decorations in a circle so the whole cookie looks like a Christmas wreath.
Don’t worry about making everything perfectly symmetrical. A homemade cookie cake looks best when the decorations feel fun and relaxed.
7. Finish with a festive message
If you have a little extra red or green buttercream, pipe a simple message in the center.
Try:
- Merry Christmas
- Happy Holidays
- Let It Snow
- Joy
- Ho Ho Ho
For a beginner-friendly finish, use a small round piping tip and keep the lettering short.
You can also skip the message completely and cover the cookie with colorful Christmas sprinkles instead.
Easy Variations
Christmas tree cookie cake: Cut the large cookie into a tree shape and decorate it with green frosting, colorful candies, and a yellow star.
Christmas wreath cookie cake: Keep the cookie round and pipe a thick green wreath around the edge. Add red berries and a small buttercream bow.
Chocolate chip version: Replace part of the all-purpose flour with chocolate chips in the dough for a richer cookie cake.
Gingerbread cookie cake: Add 1 teaspoon ground ginger, 1 teaspoon cinnamon, and a pinch of nutmeg to the dough for a warm holiday flavor.
Chocolate cookie cake: Replace ¼ cup of the flour with unsweetened cocoa powder and decorate with white and red buttercream.
Candy cane cookie cake: Add crushed peppermint candy around the edges after frosting. The combination of buttery cookie, vanilla frosting, and peppermint is especially festive.
7. Cute Christmas Tree Cookie Cake
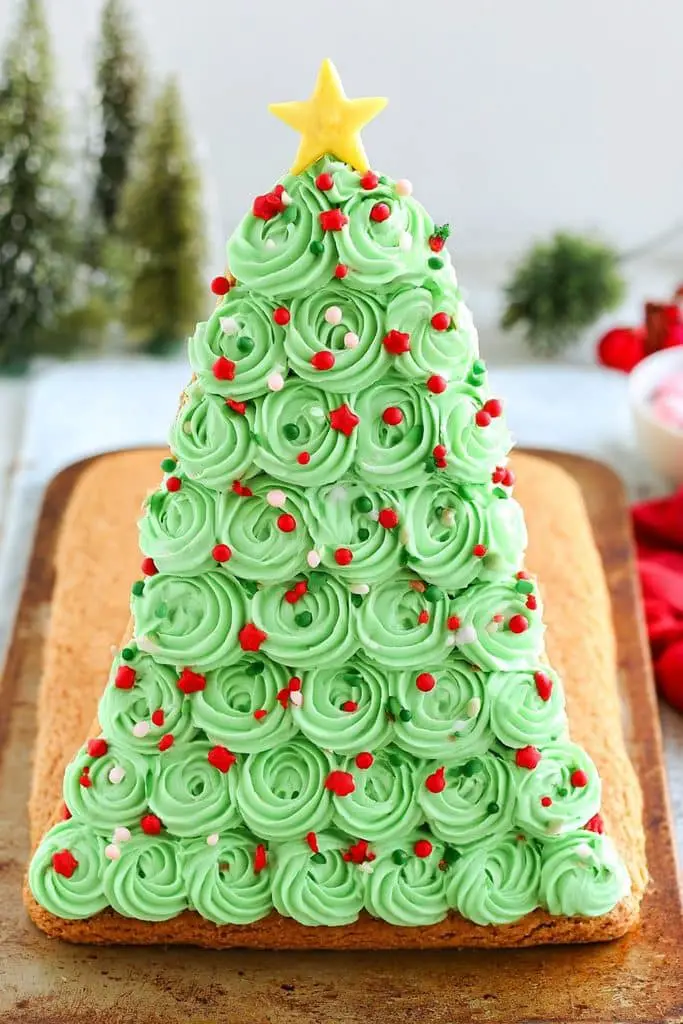
If you want a Christmas dessert that feels playful and homemade, this cute Christmas tree cookie cake is such a fun idea. It has all the charm of a decorated Christmas tree but uses a soft, buttery cookie as the base instead of a traditional cake.
I especially like this one for family baking because the decorating can be done together. You can keep the tree simple with green frosting and sprinkles, or let everyone add their own little candy ornaments. Wilton has a beginner Christmas tree cookie cake made by baking one large cookie, cutting it into a tree shape, and decorating it with green and white icing and colorful decorations.
Prep Time: 20 minutes
Chill Time: 30 minutes
Bake Time: 20–25 minutes
Decorating Time: 25–30 minutes
Total Time: About 1 hour 35 minutes
Difficulty: Easy
Servings: 10–12
For a variation, you can add peppermint extract to the cookie dough, use chocolate cookie dough, or decorate the tree with red and white candies for a more traditional Christmas look.
Ingredients
For the Cookie
- 1 cup (226g) unsalted butter, softened
- 1 cup (200g) granulated sugar
- ½ cup (100g) light brown sugar, packed
- 2 large eggs
- 2 teaspoons vanilla extract
- 2½ cups (315g) all-purpose flour
- ½ teaspoon baking powder
- ½ teaspoon salt
For the Buttercream
- ½ cup (113g) unsalted butter, softened
- 2 cups (240g) powdered sugar, sifted
- 1–2 tablespoons milk or heavy cream
- 1 teaspoon vanilla extract
- Pinch of salt
For Decorating
- Green gel food coloring
- Red gel food coloring
- Yellow or gold gel food coloring
- Red and green candies
- White sprinkles
- Yellow or gold star sprinkle
- Optional mini chocolate candies
- Optional white sanding sugar
How to Make the Christmas Tree Cookie Cake
1. Make the cookie dough
Start by beating the softened butter, granulated sugar, and brown sugar together until creamy and fluffy.
Add the eggs one at a time, mixing well after each addition. Stir in the vanilla extract.
In a separate bowl, whisk together the flour, baking powder, and salt.
Gradually add the dry ingredients to the butter mixture and mix until a soft dough forms. Don’t overmix once the flour has been incorporated.
Cover the dough and refrigerate it for about 30 minutes. This makes it easier to shape and helps prevent the cookie from spreading too much while baking.
2. Shape the large cookie
Preheat your oven to 350°F (175°C) and line a large baking sheet with parchment paper.
Place the chilled dough on the baking sheet and press or roll it into an even rectangle about ¼ inch thick.
You don’t have to make the rectangle perfect because you’ll be cutting it into a tree after baking.
This is similar to the method used by Betty Crocker for its Giant Christmas Tree Cookie: the dough is baked as one large cookie and then a tree shape is cut from the cooled cookie.
3. Bake the cookie
Bake the large cookie for about 20–25 minutes, or until the edges are lightly golden and the center is set.
Don’t let it become too dark. A slightly soft center will give you a much nicer cookie cake texture.
Let the cookie cool completely on the baking sheet. This is important because a warm cookie can break when you try to cut the tree shape.
4. Cut out the Christmas tree
Once the cookie is completely cool, place a Christmas tree template on top.
Using a sharp knife, carefully cut around the template to create the tree shape.
You can make a simple triangle with a small trunk at the bottom. Don’t worry if the shape isn’t perfectly symmetrical—once you cover it with frosting, little imperfections will hardly be noticeable.
Save the leftover cookie pieces. They’re perfect for snacking while you decorate!
If you don’t want to cut the shape yourself, you can also use a large tree-shaped cookie cutter if you have one big enough for the design.
5. Prepare the buttercream
Beat the softened butter until creamy and smooth.
Gradually add the powdered sugar and mix until combined. Add the vanilla, salt, and 1 tablespoon of milk or cream.
Beat for another 2–3 minutes until fluffy. Add a little more milk if the frosting feels too thick.
Set aside a small amount of white frosting and tint the remaining frosting green.
You can also divide the green frosting into two bowls and make one shade slightly darker. Different shades of green can make the tree look more detailed.
6. Cover the cookie with green frosting
Place the Christmas tree cookie on a cake board or large serving plate.
Spread the green buttercream over the entire surface using a small offset spatula.
You can make the frosting smooth, or use the tip of your spatula to create little lines that look like tree branches.
If you prefer a more decorated look, put the green frosting into a piping bag fitted with a star tip. Pipe small stars or zigzags across the cookie instead.
Wilton’s Christmas tree cookie cake uses green icing to cover the cookie before adding white stars and colorful decorations.
7. Add the Christmas lights
Now comes my favorite part, the little decorations.
Use red, yellow, white, and green candies to create Christmas lights across the tree.
You can arrange them in curved lines to look like strings of lights or simply scatter them around the tree like ornaments.
If you don’t have candies, pipe small dots of red, yellow, and white buttercream instead.
For a snowy effect, sprinkle a little white sanding sugar over the green frosting.
8. Add the star
Place a yellow or gold star sprinkle at the very top of the tree.
If you don’t have an edible star, pipe a small yellow buttercream star using a star-shaped piping tip.
You can also cut a star from yellow fondant if you have some available.
9. Decorate the trunk
Use brown buttercream or melted chocolate to create the tree trunk.
You can simply spread a small rectangle of chocolate frosting at the bottom of the tree.
For an even easier option, place a small rectangular chocolate candy underneath the tree.
Easy Variations
Peppermint tree cookie: Add ½ teaspoon peppermint extract to the cookie dough and decorate the finished tree with crushed candy cane pieces.
Chocolate tree cookie: Replace about ¼ cup of the flour with unsweetened cocoa powder. Use vanilla buttercream for the decorations so the colors stand out.
Snow-covered tree: Cover the green frosting with small white buttercream stars and a light dusting of powdered sugar.
Gingerbread tree: Add ground ginger and cinnamon to the cookie dough for a warm gingerbread flavor.
Candy-filled tree: Use lots of colorful candies and let children decorate their own sections of the tree.
Minimalist Christmas tree: Use only green frosting, white sprinkles, and one gold star for a simple and elegant look.
8. Cute Christmas Ornament Cake
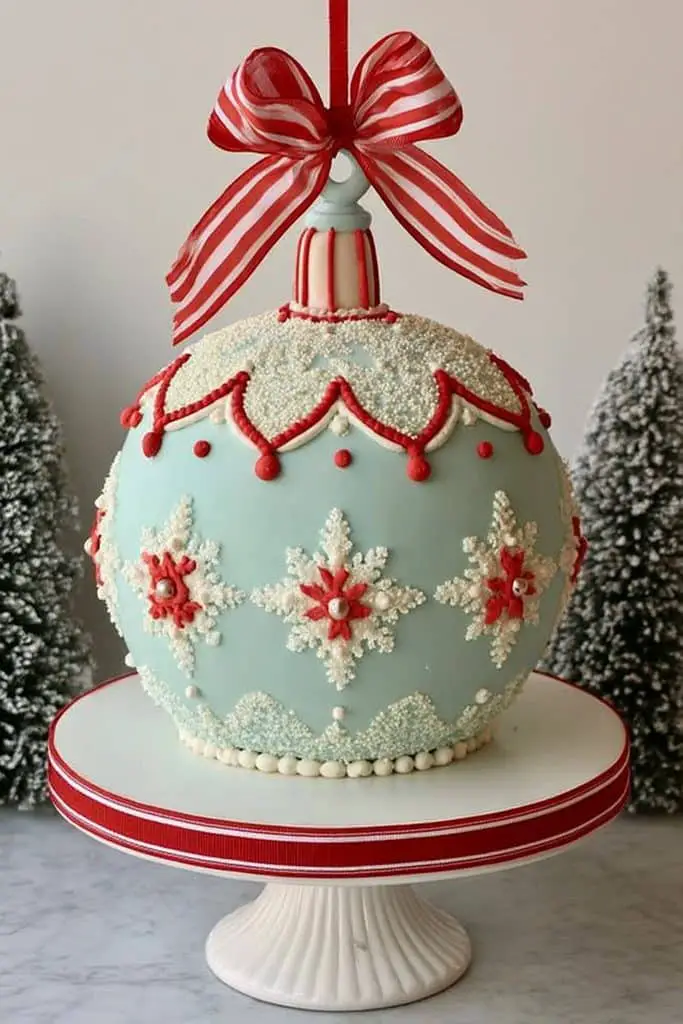
A Christmas ornament cake is such a fun idea when you want something colorful and cheerful for the holidays. I love how a simple round cake can be transformed with little red, green, gold, and white ornaments. It has that classic Christmas feeling but still looks cute and playful.
This version uses a soft vanilla cake covered with white buttercream, then decorated with colorful ornament shapes and small piped details. Wilton has a Sparkling Ornament Cake that uses a frosted round cake with edible ornament decorations arranged around the cake, showing that ornament-themed cakes can be made as a festive centerpiece.
Prep Time: 30 minutes
Bake Time: 30–35 minutes
Decorating Time: 30–40 minutes
Total Time: About 1 hour 45 minutes
Difficulty: Easy to Moderate
Servings: 10–12
For an easier variation, you don’t have to make separate candy ornaments. Small colorful candies, sprinkles, and piped buttercream dots can give you the same cute effect with much less work.
Ingredients
For the Vanilla Cake
- 1½ cups (340g) unsalted butter, softened
- 2½ cups (500g) granulated sugar
- 5 large eggs, at room temperature
- 1 teaspoon vanilla extract
- 3 cups (375g) all-purpose flour
- ¾ teaspoon baking powder
- ¼ teaspoon salt
- 1 cup (240ml) whole milk
For the Buttercream
- 1 cup (226g) unsalted butter, softened
- 4 cups (480g) powdered sugar, sifted
- 2–3 tablespoons milk or heavy cream
- 1 teaspoon vanilla extract
- Pinch of salt
For the Ornament Decorations
- Red gel food coloring
- Green gel food coloring
- Gold or yellow gel food coloring
- Optional blue or pink gel food coloring
- Red, green, and gold sprinkles
- Small round candies
- White buttercream
- Optional red and green fondant
- White sanding sugar, optional
How to Make the Cute Christmas Ornament Cake
1. Bake the vanilla cake
Preheat your oven to 350°F (175°C). Grease and line two 8-inch round cake pans with parchment paper.
Beat the softened butter and sugar together for about 3–4 minutes, until light and fluffy.
Add the eggs one at a time, mixing well after each addition. Stir in the vanilla extract.
In another bowl, whisk together the flour, baking powder, and salt.
Add the dry ingredients to the butter mixture in batches, alternating with the milk. Mix just until the batter comes together.
Divide the batter between the prepared pans and bake for 30–35 minutes, or until a toothpick inserted into the center comes out clean.
Cool the cakes in their pans for about 10 minutes, then transfer them to a wire rack. Let them cool completely before decorating.
2. Prepare the buttercream
Beat the softened butter until smooth and creamy.
Gradually add the powdered sugar, followed by the vanilla, salt, and 2 tablespoons of milk or cream.
Beat for another 2–3 minutes until fluffy. Add a little more milk if the buttercream is too thick for spreading.
Keep about half of the frosting white. Divide the rest into small bowls and tint them red, green, gold, and any other Christmas colors you want to use.
You don’t need large amounts of colored buttercream because most of it will be used for small ornaments and details.
3. Stack and frost the cake
Place one cake layer on a serving plate.
Spread a layer of white buttercream over the top, then place the second layer on top.
Cover the entire cake with a thin crumb coat and refrigerate for about 15–20 minutes.
Add the remaining white buttercream and smooth the top and sides.
I like keeping the cake mostly white for this design because the colorful ornaments stand out much better against a snowy background.
4. Plan the ornament design
Before you start piping, decide where you want the ornaments to go.
You can arrange them around the top edge of the cake, hang them from piped green or red lines, or place several large ornaments across the top.
For a simple beginner design, imagine the top of the cake as a Christmas tree branch. Pipe a few curved green lines across the surface, then add ornaments hanging from them.
You don’t need to make every ornament the same size. A mixture of large and small decorations makes the cake look more natural and festive.
5. Make the buttercream ornaments
The easiest method is to pipe little round ornaments directly onto the cake.
Fill a piping bag with red buttercream and pipe small circles onto the top or sides of the cake. Repeat with green, gold, and other colors.
Add a tiny white buttercream dot to each ornament to make it look shiny.
For a more detailed ornament, pipe a small gold or white line across the center.
Wilton’s ornament cake uses edible ornament shapes arranged around a frosted cake, while other Christmas cake designs from Wilton use simple buttercream dots and piped decorations to create ornament-like details.
6. Add the ornament hooks and strings
Use white, green, or gold buttercream with a small round piping tip.
Pipe a short vertical line above each ornament to make it look as though it is hanging from a Christmas tree.
Add a tiny curved hook at the top of each ornament.
If you don’t want to pipe such small details, simply press a small gold sprinkle or candy above each ornament.
This little detail makes a big difference because it gives the decorations the appearance of real hanging Christmas ornaments.
7. Add colorful candy decorations
Press small round candies into the buttercream around the cake.
Red, green, gold, white, and silver candies work especially well.
You can also use Christmas sprinkles to fill small gaps between the ornaments.
For a little sparkle, sprinkle white sanding sugar over parts of the cake. Keep it light so the individual ornaments remain easy to see.
8. Add a festive border
Finish the bottom edge of the cake with a simple buttercream border.
Pipe small white stars or dots around the bottom, or use red and green buttercream to create alternating dots.
If you want a more elegant look, use only white and gold for the border.
I prefer a simple border here because there are already plenty of colorful decorations on top.
9. Add the final Christmas details
For an extra cute finish, pipe a few tiny stars between the ornaments.
You can also add small snowflakes made from white buttercream.
If you’re using fondant, cut tiny stars, bows, or snowflakes and place them around the cake.
Another easy option is to add a few Christmas-shaped sprinkles. Wilton recommends using colorful holiday decorations and sprinkles to customize Christmas cake designs, so this is an easy way to change the look without changing the basic recipe.
Easy Variations
Red and gold ornament cake: Keep the frosting white and use only red and gold decorations for a classic Christmas look.
Pastel ornament cake: Use soft pink, light blue, mint green, and white for a cute modern holiday design.
Chocolate ornament cake: Use a chocolate cake underneath the white buttercream. The contrast makes the colorful decorations stand out.
Gingerbread ornament cake: Add cinnamon and ginger to the cake batter and decorate with red, green, and white buttercream.
Mini ornament cake: Make a smaller 6-inch cake and use fewer, larger ornaments for a simple dessert.
No-piping version: Use colorful candies as the ornaments and attach them directly to the buttercream. This is the easiest option if you’re new to cake decorating.
9. Cute Melting Snowman Cake
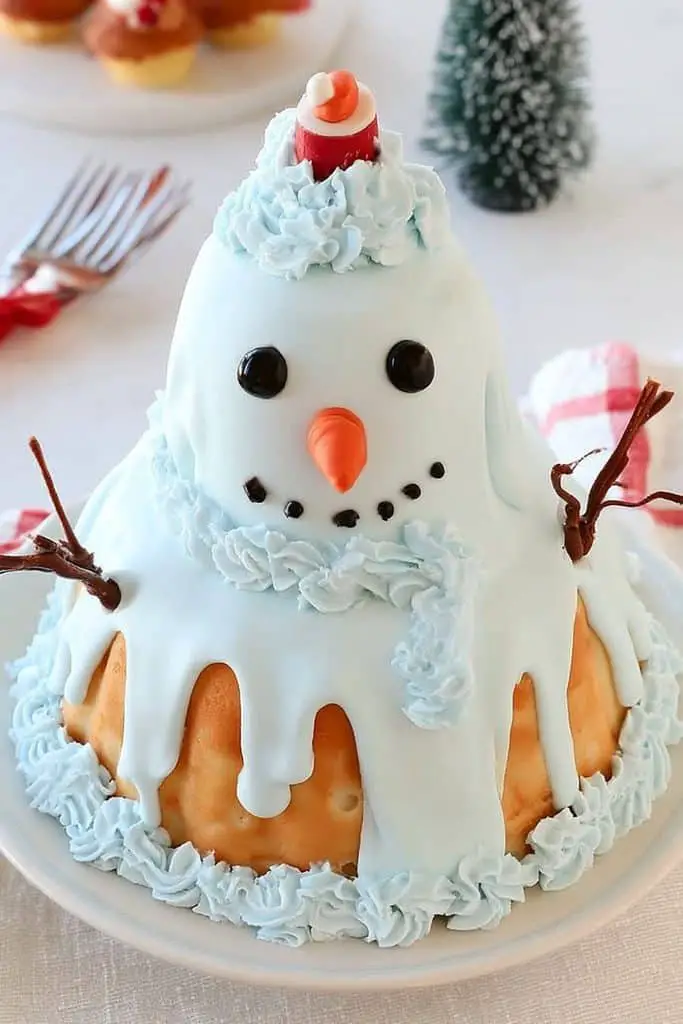
A cute melting snowman cake is one of those Christmas desserts that makes people smile as soon as they see it. Instead of making a perfectly shaped snowman, you let the white frosting spill slightly over the cake and add a little snowman face, hat, and buttons on top.
I love this design because it looks detailed but is actually quite forgiving. You don’t need perfectly smooth buttercream—the uneven “melting snow” is part of the design. Melting snowman decorations are also a well-established Christmas baking idea; Wilton uses white icing, marshmallows, pretzels, and simple face details for its melting snowman cookies.
Prep Time: 30 minutes
Bake Time: 30–35 minutes
Decorating Time: 30 minutes
Total Time: About 1 hour 35 minutes
Difficulty: Easy to Moderate
Servings: 10–12
For a variation, you can make the cake chocolate and use white vanilla buttercream for the melting snow. Or, for an extra festive flavor, add a little peppermint to the frosting.
Ingredients
For the Vanilla Cake
- 1½ cups (340g) unsalted butter, softened
- 2½ cups (500g) granulated sugar
- 5 large eggs, at room temperature
- 1 teaspoon vanilla extract
- 3 cups (375g) all-purpose flour
- ¾ teaspoon baking powder
- ¼ teaspoon salt
- 1 cup (240ml) whole milk
For the Vanilla Buttercream
- 1 cup (226g) unsalted butter, softened
- 4 cups (480g) powdered sugar, sifted
- 2–3 tablespoons milk or heavy cream
- 1 teaspoon vanilla extract
- Pinch of salt
For the Snowman Decoration
- Orange fondant or an orange gumdrop, for the nose
- Black decorating gel
- 2 large chocolate candies or candy eyes
- Red fondant or red buttercream, for the hat
- 1 large marshmallow, optional, for the top of the hat
- Small chocolate candies, for buttons
- Pretzel sticks, for the arms
- White sanding sugar, optional
- Red and green sprinkles, optional
How to Make the Melting Snowman Cake
1. Bake the cake
Preheat your oven to 350°F (175°C). Grease and line two 8-inch round cake pans with parchment paper.
Beat the softened butter and sugar together for about 3–4 minutes, until light and fluffy.
Add the eggs one at a time, mixing well after each addition. Stir in the vanilla.
In a separate bowl, whisk together the flour, baking powder, and salt.
Add the dry ingredients to the butter mixture in batches, alternating with the milk. Mix just until the batter is smooth.
Divide the batter between the prepared pans and bake for 30–35 minutes, or until a toothpick inserted into the center comes out clean.
Cool the cakes in the pans for about 10 minutes, then transfer them to a wire rack and let them cool completely.
2. Make the buttercream
Beat the softened butter until smooth and creamy.
Gradually add the powdered sugar, followed by the vanilla, salt, and 2 tablespoons of milk or cream.
Beat for another 2–3 minutes until fluffy. Add another tablespoon of milk if necessary.
Keep the buttercream mostly white because it will create the melted snow effect.
Set aside a small amount if you want to make colored details with buttercream.
3. Stack and frost the cake
Place one cake layer on your serving plate and spread a layer of buttercream over the top.
Place the second cake layer on top.
Apply a thin crumb coat over the cake and refrigerate for about 15–20 minutes.
Add another layer of white buttercream, but don’t worry about making the sides perfectly smooth.
The top is where you want the frosting to look especially soft and uneven.
4. Create the melting snow
Spoon a generous amount of white buttercream onto the center of the cake.
Use a small offset spatula to gently push the frosting toward the edges.
Let some of the frosting extend slightly over the edge in rounded sections. These little drips are what give the cake its melting-snow effect.
You don’t want long, thin drips running all the way down the cake. Instead, create a few short, uneven “puddles” around the edge.
This is actually one of the easiest parts of the cake because the frosting doesn’t have to look perfect.
5. Make the snowman face
Place two chocolate candies or candy eyes near the center of the cake.
For the carrot nose, cut a small triangle from orange fondant or shape an orange gumdrop into a pointed piece.
Place it below the eyes.
Use black decorating gel to pipe a small curved smile.
For an extra cute touch, add a few tiny black dots around the mouth to look like pieces of coal.
6. Add the snowman’s hat
Use red fondant to make a simple Christmas hat, or pipe one with red buttercream.
For the easiest version, shape a small triangle or cone from red fondant and place it toward the top of the snowman’s head.
Add a strip of white buttercream around the bottom of the hat.
Place a small marshmallow or white buttercream ball at the end for the pom-pom.
If you don’t want to use fondant, simply pipe a red triangle with buttercream and add a white buttercream border.
7. Add the snowman’s buttons
Place two or three small chocolate candies down the front of the snowman.
If the cake is large enough, you can add three or four buttons in a straight line.
You can also pipe small black buttercream dots instead.
Keep the buttons slightly different in size for a more homemade look.
8. Add the pretzel arms
Break two pretzel sticks into smaller pieces.
Carefully press one piece into each side of the snowman’s body to create his arms.
If the frosting is soft enough, the pretzels should stay in place. If they feel loose, add a tiny dab of buttercream behind each one.
Pretzel pieces are also used as simple snowman arms in Wilton’s melting snowman cookie design, making them a convenient edible decoration for this style of dessert.
9. Finish the snowy cake
For an extra snowy effect, sprinkle a little white sanding sugar over the buttercream.
You can also add red and green sprinkles around the bottom edge of the cake.
For a more playful design, place a few mini marshmallows around the snowman as little piles of snow.
I like keeping the decoration fairly simple because the melting shape itself is what makes this cake special.
Easy Variations
Chocolate melting snowman cake: Use chocolate cake layers and cover them with white vanilla buttercream. The white snow will really stand out against the dark cake.
Peppermint snowman cake: Add ½ teaspoon peppermint extract to the buttercream and sprinkle crushed candy cane around the base.
Melting Rudolph cake: Replace the snowman’s carrot nose with a large red candy and add small brown antlers made from pretzels.
Snowman family cake: Make three small snowmen on top of the cake instead of one large face. Use different-sized candies for their eyes and buttons.
Gingerbread version: Add cinnamon, ginger, and a little nutmeg to the cake batter for a warm Christmas flavor.
Extra-easy version: Skip the fondant completely. Use candy eyes, an orange gumdrop, chocolate candies, pretzels, and buttercream for all the decorations.
10. Cute Christmas Yule Log Cake
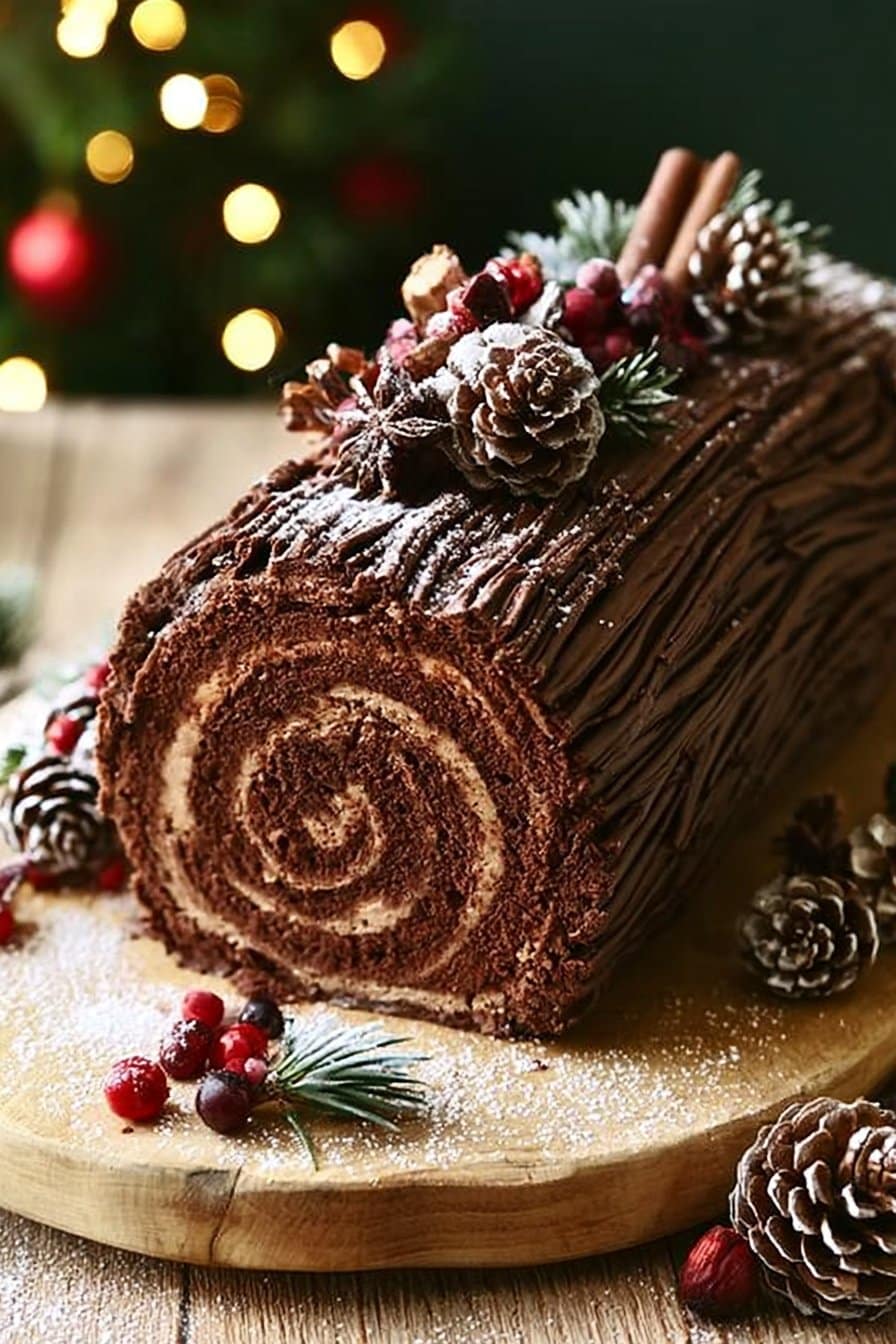
A cute Christmas Yule log cake, also called a Bûche de Noël, is one of those traditional Christmas desserts that always feels special. I love the combination of a light chocolate sponge, creamy filling, and rich chocolate frosting that makes the cake look like a little log from a winter forest.
This version is a simplified take on the classic Yule log. The chocolate sponge is baked in a shallow Swiss roll pan, filled with lightly sweetened cream, rolled, and covered with chocolate frosting. Traditional recipes use the same basic rolled-sponge technique, with the outside frosting textured to resemble tree bark.
Prep Time: 45 minutes
Bake Time: 12–14 minutes
Cooling Time: About 30 minutes
Decorating Time: 25 minutes
Total Time: About 2 hours
Difficulty: Moderate
Servings: 10–12
For a variation, you can fill the log with whipped cream and berries, use chocolate buttercream instead of ganache, or add powdered sugar and little Christmas decorations for a snowy finish.
Ingredients
For the Chocolate Sponge
- 6 large eggs, separated
- ¾ cup (150g) granulated sugar
- ½ cup (60g) all-purpose flour
- ¼ cup (25g) unsweetened cocoa powder
- 1 teaspoon vanilla extract
- Pinch of salt
For the Cream Filling
- 1½ cups (360ml) heavy cream
- 2 tablespoons powdered sugar
- 1 teaspoon vanilla extract
For the Chocolate Frosting
- 1 cup (170g) semisweet chocolate, finely chopped
- ¾ cup (180ml) heavy cream
- 2 tablespoons (28g) unsalted butter
- Pinch of salt
For Decorating
- Powdered sugar, for snow
- Fresh or sugared cranberries, optional
- Small rosemary sprigs, optional
- Red and green sprinkles, optional
- Small edible Christmas decorations, optional
The basic structure of this recipe follows the traditional Bûche de Noël method: a light sponge is rolled with a filling and then coated with chocolate frosting. King Arthur Baking also uses a rolled chocolate sponge with a creamy filling and chocolate frosting for its Yule log.
How to Make the Cute Christmas Yule Log Cake
1. Prepare the sponge pan
Preheat your oven to 425°F (220°C).
Lightly grease a 9 x 13-inch Swiss roll or jelly roll pan and line it with parchment paper. Leave a little parchment overhanging the sides so the cake is easier to lift out later.
A shallow pan is important for this cake because you want a thin, flexible sponge that can be rolled. Traditional Bûche de Noël recipes use Swiss roll-style pans for this reason.
2. Whip the egg yolks and sugar
Place the egg yolks and about half of the sugar in a large bowl.
Beat for several minutes until the mixture becomes pale, thick, and creamy. Stir in the vanilla extract.
In another clean bowl, beat the egg whites with the salt until soft peaks form. Gradually add the remaining sugar and continue beating until the whites form firm peaks.
The whipped egg whites help give the sponge enough lightness without needing a large amount of flour.
3. Make the chocolate batter
Sift the flour and cocoa powder together.
Add the dry ingredients to the egg yolk mixture and gently fold them in.
Add about one-third of the whipped egg whites and fold gently to loosen the batter. Add the remaining egg whites in two additions, folding carefully so you don’t knock out too much air.
The batter should be light and airy when you’re finished.
4. Bake the sponge
Pour the batter into the prepared pan and spread it evenly into the corners.
Bake for 12–14 minutes, or until the sponge is risen and feels just firm to the touch.
Don’t overbake it. A dry sponge is more likely to crack when you roll it.
Traditional Yule log recipes generally bake the thin sponge for only around 10–14 minutes, depending on the recipe and pan.
5. Roll the warm cake
While the cake is baking, place a clean sheet of parchment paper on your work surface and lightly dust it with powdered sugar.
As soon as the cake comes out of the oven, carefully turn it onto the prepared parchment.
Peel away the baking parchment from the bottom.
Starting at one short end, gently roll the warm sponge together with the clean parchment. Let it cool completely while rolled.
This step is important because the cake learns the rolled shape while it is warm, which makes it easier to fill and roll later without cracking. BBC Good Food and other traditional Bûche de Noël recipes use this rolling technique.
6. Make the cream filling
Pour the heavy cream into a mixing bowl.
Add the powdered sugar and vanilla, then whip until the cream forms medium-stiff peaks.
Don’t overwhip it because you want a smooth, spreadable filling.
If you’d like a little fruit in the center, fold in a handful of finely chopped raspberries or spread a thin layer of raspberry jam over the sponge before adding the whipped cream. A chocolate-and-raspberry filling is also used in traditional Bûche de Noël recipes.
7. Fill and roll the cake
Once the sponge has completely cooled, gently unroll it.
Spread the whipped cream evenly over the surface, leaving about 1 inch around the edges.
Carefully roll the cake back up, this time without the parchment inside.
Don’t worry if a little filling squeezes out at the ends. You can simply scrape it away.
Place the rolled cake seam-side down on a serving board or platter.
8. Make the chocolate frosting
Place the chopped chocolate in a heatproof bowl.
Warm the heavy cream in a small saucepan until it is hot but not boiling. Pour it over the chocolate and let it sit for about 2 minutes.
Add the butter and salt, then stir until the chocolate is completely melted and smooth.
Let the frosting cool until it thickens enough to spread.
This simple chocolate-and-cream mixture works like a ganache and is particularly useful for a Yule log because it spreads easily and can be textured to resemble tree bark. King Arthur’s Yule log uses a similar chocolate-and-cream frosting.
9. Create the log shape
For an extra cute Yule log, cut a small piece from one end of the cake at an angle.
Place that piece against the side of the main roll to look like a little branch.
Attach it with a little chocolate frosting.
This simple branch is what makes the cake look much more like a real log.
10. Cover the cake with chocolate frosting
Spread the chocolate frosting over the entire outside of the cake.
You don’t need to make it perfectly smooth.
Once the frosting is spread, drag a fork gently through it from one end to the other. This creates lines that look like tree bark.
You can also make a few curved lines around the ends to imitate the rings of a tree.
The bark effect is traditionally made by texturing the chocolate frosting with a fork or knife.
11. Add the Christmas decorations
Now you can turn the simple log into a cute Christmas cake.
Dust the top lightly with powdered sugar to make it look like freshly fallen snow.
Add a few sugared cranberries, small rosemary sprigs, or Christmas sprinkles around the log.
You can also place tiny meringue mushrooms, edible snowflakes, or little fondant decorations around the cake.
For a more traditional look, keep the colors simple: chocolate brown, white, red, and green.
Easy Variations
Chocolate and raspberry Yule log: Spread a thin layer of raspberry jam over the sponge before adding the whipped cream.
Peppermint Yule log: Add a small amount of peppermint extract to the cream filling and decorate with crushed candy cane.
White Christmas Yule log: Use white chocolate ganache instead of dark chocolate frosting and decorate with coconut and white sprinkles.
Gingerbread Yule log: Add ground ginger and cinnamon to the sponge and use vanilla buttercream for the filling.
Nutella-style filling: Spread a thin layer of chocolate-hazelnut spread over the sponge before adding the whipped cream.
Snowy forest Yule log: Cover the finished cake with powdered sugar and add rosemary sprigs, cranberries, and small white decorations to create a winter woodland look.
11. Cute Christmas Cakes With Little Christmas Trees
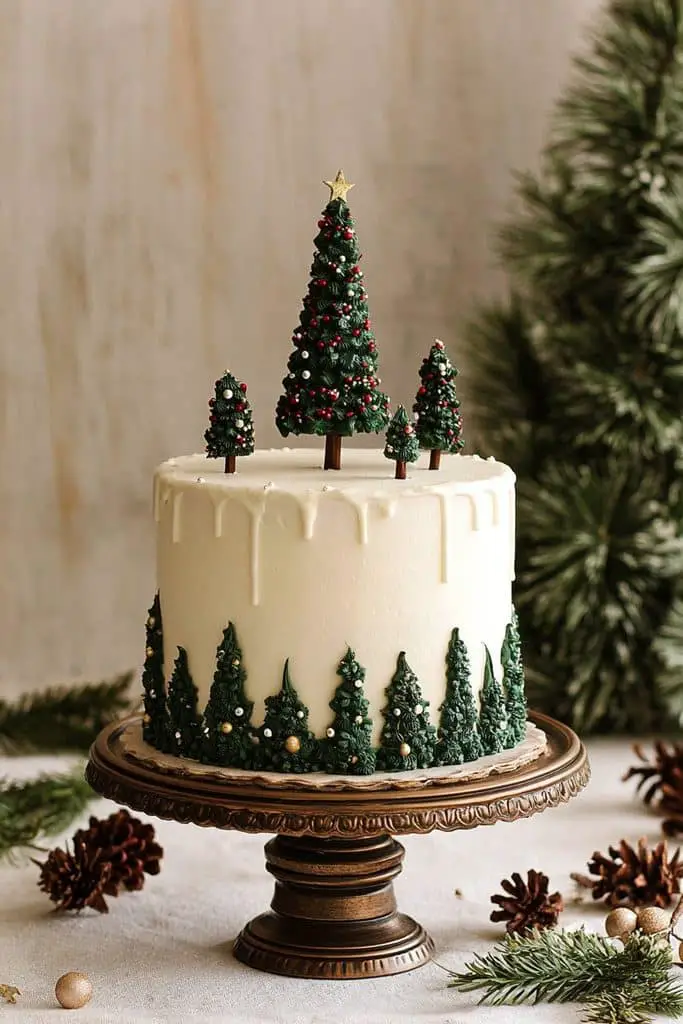
I love the idea of covering a Christmas cake with lots of little Christmas trees. It gives the cake a sweet winter-forest look without needing complicated decorations, and you can make each little tree slightly different in size and color.
This version uses a simple vanilla layer cake covered in white buttercream, then topped with small piped buttercream trees in different shades of green. Wilton uses a similar beginner-friendly technique, piping small cone-shaped swirls directly onto a frosted cake and adding white nonpareils to make them look snowy.
Prep Time: 30 minutes
Bake Time: 30–35 minutes
Decorating Time: 30–40 minutes
Total Time: About 1 hour 45 minutes
Difficulty: Easy to Moderate
Servings: 10–12
For a variation, you can make the little trees all green for a classic look, or use shades of green, white, and even pale blue for a cute winter wonderland effect.
Ingredients
For the Vanilla Cake
- 1½ cups (340g) unsalted butter, softened
- 2½ cups (500g) granulated sugar
- 5 large eggs, at room temperature
- 1 teaspoon vanilla extract
- 3 cups (375g) all-purpose flour
- ¾ teaspoon baking powder
- ¼ teaspoon salt
- 1 cup (240ml) whole milk
For the Buttercream
- 1 cup (226g) unsalted butter, softened
- 4 cups (480g) powdered sugar, sifted
- 2–3 tablespoons milk or heavy cream
- 1 teaspoon vanilla extract
- Pinch of salt
For the Little Trees
- Green gel food coloring
- Dark green gel food coloring
- Optional light green or teal gel food coloring
- White sanding sugar
- White nonpareils
- Red and gold sprinkles
- Optional small star sprinkles
How to Make the Cake With Little Christmas Trees
1. Bake the cake
Preheat your oven to 350°F (175°C). Grease and line two 8-inch round cake pans with parchment paper.
Beat the softened butter and sugar together for about 3–4 minutes, until light and fluffy.
Add the eggs one at a time, mixing well after each addition. Stir in the vanilla.
In a separate bowl, whisk together the flour, baking powder, and salt.
Add the dry ingredients to the butter mixture in batches, alternating with the milk. Mix just until the batter is smooth.
Divide the batter between the prepared pans and bake for 30–35 minutes, or until a toothpick inserted into the center comes out clean.
Let the cakes cool for about 10 minutes in the pans, then transfer them to a wire rack. Cool completely before decorating.
2. Prepare the buttercream
Beat the softened butter until creamy and smooth.
Gradually add the powdered sugar, followed by the vanilla, salt, and 2 tablespoons of milk or cream.
Beat for another 2–3 minutes until fluffy. Add a little more milk if needed.
Keep about half of the buttercream white for covering the cake.
Divide the remaining frosting into two or three bowls and tint them different shades of green. I like using a light green, medium green, and dark green because the little trees look more natural when they aren’t all the same color.
Wilton uses several shades of green for its Christmas tree cake designs, which is a simple way to add depth to a Christmas-themed decoration.
3. Stack and frost the cake
Place one cake layer on your serving plate.
Spread a layer of white buttercream over the top, then place the second cake layer on top.
Apply a thin crumb coat around the cake and chill for 15–20 minutes.
Add the remaining white buttercream and smooth the top and sides.
Try to make the top fairly smooth because this is where all the little Christmas trees will go.
You can leave the sides plain white, or add a simple border of white buttercream around the bottom.
4. Prepare the piping bags
Place each shade of green buttercream into a separate piping bag.
A medium star tip works particularly well for these little trees because it creates ridges that look like branches. A round tip can also work if you want a smoother, simpler tree.
You don’t need several different piping tips. One star tip is enough if you simply change the color of the frosting.
5. Pipe the little Christmas trees
Start with one of the darker green frostings.
Hold the piping bag straight up over the cake and squeeze gently. Pipe a small star-shaped base.
Without lifting the tip too far, continue squeezing while moving the bag slightly upward. Reduce the pressure as you move up so the tree becomes narrower toward the top.
Stop squeezing and pull the tip straight up.
You should have a small cone-shaped Christmas tree.
Repeat with the other shades of green, creating trees of different sizes.
Wilton describes a similar technique for its Christmas cake with tree decorations: start with a narrow base and pipe almost directly on top of the previous rotation to build a cone shape.
6. Create a little Christmas forest
Now fill the top of the cake with trees.
Place larger trees toward the back and smaller ones toward the front. You can also arrange them in small groups with a little space between them.
Don’t try to make the arrangement perfectly even. I actually think the cake looks cuter when the trees have different heights and shades.
You can also leave small areas of white buttercream between the trees so they look like they are sitting in fresh snow.
7. Add snow to the trees
Once all the trees are piped, sprinkle them lightly with white nonpareils or sanding sugar.
The tiny white sprinkles will stick to the buttercream and make the trees look as if they have a fresh coating of snow. Wilton uses white nonpareils on its piped Christmas trees for this exact snowy effect.
For a more subtle look, add only a few sprinkles to the tops and sides of the trees.
8. Add tiny ornaments
For extra color, add a few red and gold sprinkles to the trees.
Small round sprinkles work especially well because they look like tiny Christmas ornaments.
You can also pipe tiny red buttercream dots onto some of the trees.
Try not to decorate every tree. Leaving a few plain makes the decorated ones stand out.
9. Add stars
Place a tiny yellow or gold star sprinkle on top of a few of the trees.
If you don’t have star sprinkles, pipe a small yellow buttercream dot at the top of each tree instead.
For a snowy woodland look, you can leave the trees without stars and simply use white sprinkles.
10. Finish the cake
Add a simple white buttercream border around the bottom of the cake.
You can also sprinkle a little white sanding sugar around the base to make it look like the trees are sitting in snow.
If you want a more festive finish, scatter a few red and gold sprinkles around the cake board.
At this point, the cake should look like a little Christmas forest sitting on top of a snowy cake.
Easy Variations
Winter forest cake: Use dark green, light green, and pale blue buttercream, then add plenty of white sanding sugar.
All-white Christmas trees: Pipe white trees over a white buttercream cake and decorate them with silver or gold sprinkles for a simple snowy look.
Red and green forest: Use green trees with red sprinkle ornaments and a few gold stars.
Chocolate cake version: Use chocolate cake layers underneath the white buttercream. The contrast makes the little green trees stand out beautifully.
Gingerbread cake: Add cinnamon and ginger to the vanilla cake batter and decorate the trees with tiny gingerbread cookies.
Mini tree cupcake cake: Pipe the little trees onto cupcakes instead of a large cake and arrange the cupcakes together on a serving tray.
Candy tree version: If you want more structure, you can make small edible candy trees separately and place them on the cake. Wilton has a Christmas cake decorated with colorful candy trees, showing another way to create this look.
12. Cute Christmas Cake With Santa, Snowman and Reindeer
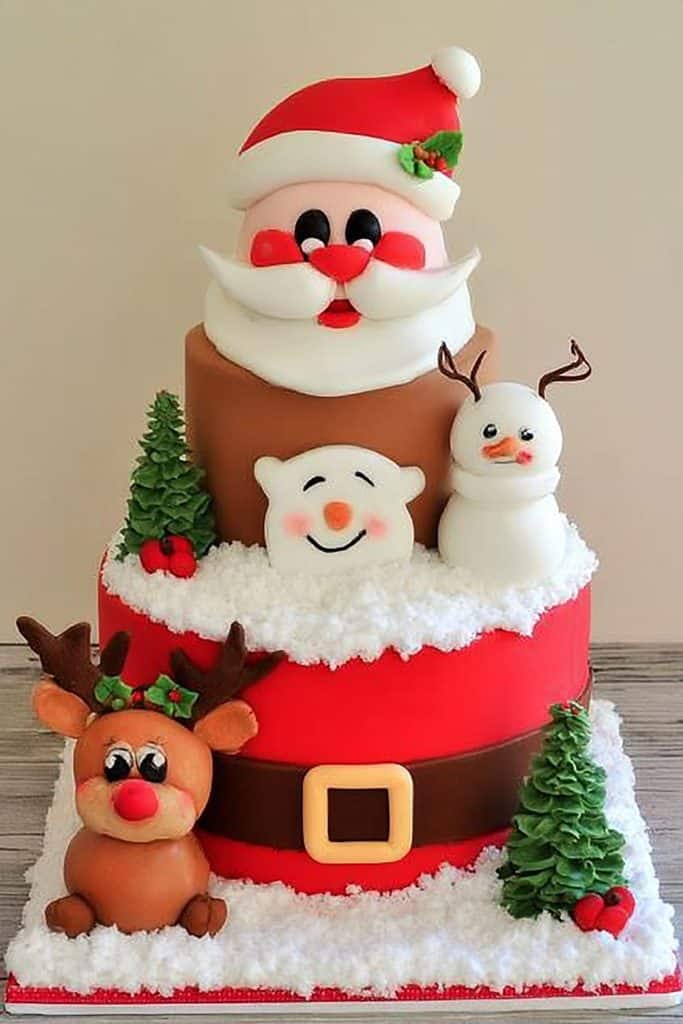
If you can’t decide between Santa, a snowman, or a reindeer, why not put all three on one cake? This cute Christmas cake with Santa, snowman and reindeer is one of my favorite ideas for a fun holiday gathering because every little face adds something different.
I’d use a soft vanilla cake with white buttercream as the base, then divide the top into three simple character sections. Santa gets his red hat and beard, the snowman gets his carrot nose and black buttons, and the reindeer gets brown frosting, little antlers, and a red nose. These are all established Christmas cake decoration themes, with Wilton featuring separate Santa-style, snowman, and reindeer designs using buttercream, candies, and simple edible decorations.
Prep Time: 35 minutes
Bake Time: 30–35 minutes
Decorating Time: 35–45 minutes
Total Time: About 2 hours
Difficulty: Easy to Moderate
Servings: 10–12
For a variation, you can make each character on a separate small cake and arrange them together on a large serving board. Or, for the easiest version, keep all three faces on one round cake.
Ingredients
For the Vanilla Cake
- 1½ cups (340g) unsalted butter, softened
- 2½ cups (500g) granulated sugar
- 5 large eggs, at room temperature
- 1 teaspoon vanilla extract
- 3 cups (375g) all-purpose flour
- ¾ teaspoon baking powder
- ¼ teaspoon salt
- 1 cup (240ml) whole milk
For the Buttercream
- 1 cup (226g) unsalted butter, softened
- 4 cups (480g) powdered sugar, sifted
- 2–3 tablespoons milk or heavy cream
- 1 teaspoon vanilla extract
- Pinch of salt
For the Character Decorations
- Red gel food coloring
- Green gel food coloring
- Brown or cocoa powder
- Black decorating gel
- Orange fondant or orange gumdrop
- Red candy or red gumdrop
- White sanding sugar, optional
- Chocolate candies, for eyes and buttons
- Pretzel sticks or pretzel twists, for reindeer antlers
- Optional red, green, and gold sprinkles
How to Make the Santa, Snowman and Reindeer Cake
1. Bake the vanilla cake
Preheat your oven to 350°F (175°C). Grease and line two 8-inch round cake pans with parchment paper.
Beat the softened butter and sugar together for about 3–4 minutes, until light and fluffy.
Add the eggs one at a time, mixing well after each addition. Stir in the vanilla extract.
In a separate bowl, whisk together the flour, baking powder, and salt.
Add the dry ingredients to the butter mixture in batches, alternating with the milk. Mix just until the batter is smooth.
Divide the batter between the prepared pans and bake for 30–35 minutes, or until a toothpick inserted in the center comes out clean.
Cool the cakes in the pans for about 10 minutes, then transfer them to a wire rack and allow them to cool completely.
2. Prepare the buttercream
Beat the softened butter until creamy.
Gradually add the powdered sugar, followed by the vanilla, salt, and 2 tablespoons of milk or cream.
Beat for another 2–3 minutes until light and fluffy. Add a little more milk if needed.
Keep most of the buttercream white for the cake base and snowman.
Divide the remaining frosting into separate bowls. Tint one portion red for Santa, another brown for the reindeer, and a small amount black for facial details.
You can also keep a little orange buttercream if you’d rather pipe the snowman’s carrot nose instead of using fondant or candy.
3. Stack and frost the cake
Place one cake layer on your serving plate.
Spread a layer of white buttercream over the top and place the second cake layer on top.
Cover the cake with a thin crumb coat and refrigerate for about 15–20 minutes.
Add the final layer of white buttercream and smooth the top and sides.
The top doesn’t need to be perfectly smooth, but try to create a clean white background because it will make the three characters easier to see.
4. Divide the cake into three sections
Before decorating, lightly mark three sections across the top of the cake.
You can imagine the cake as three large slices:
- Santa on the left
- Snowman in the middle
- Reindeer on the right
Don’t cut the cake. Just use a toothpick to make very faint guide marks in the frosting.
This makes it much easier to keep the three faces similar in size.
5. Create Santa
Start with the Santa section.
Spread or pipe red buttercream over the upper portion of his face to make the hat.
Leave a white strip underneath the red frosting for the fluffy hat trim.
Add a small white buttercream ball at the top of the hat.
For Santa’s face, keep the base white. Pipe two small black eyes and add a small red candy or red buttercream dot for his nose.
Use white buttercream to create a fluffy beard around the lower part of his face.
You can pipe little stars with a star tip to give the beard some texture. Simple Santa cakes commonly use white buttercream for the beard and red buttercream for the hat, making this a relatively approachable character to decorate.
6. Create the snowman
Move to the middle section.
Keep this face mostly white since it is already sitting on the white buttercream base.
Place two chocolate candies or candy eyes near the top.
For the carrot nose, cut a small triangle from orange fondant or shape an orange gumdrop into a point.
Add two or three small chocolate candies underneath the face for buttons.
Use black decorating gel to pipe a small smile.
For an extra cute touch, add a little red or green scarf underneath the face using colored buttercream.
Betty Crocker’s Holiday Snowman Cake uses a similar simple combination of candy eyes, an orange gumdrop nose, black writing gel, a marshmallow hat pom-pom, and colored frosting.
7. Create the reindeer
For the third section, spread brown buttercream into a rounded reindeer face.
You don’t need to cover the entire section perfectly. A simple oval or round face is enough.
Add two candy eyes near the top.
Place a large red candy in the center for the nose if you want a Rudolph-inspired look.
Use black decorating gel to add a small smile.
For the antlers, break pretzel twists into suitable pieces or use small pretzel sticks arranged into branches. Carefully push them into the frosting at the top of the reindeer face.
Pretzel rods and edible antlers are also used in Wilton’s Christmas Reindeer Cake, so they’re a practical way to get the reindeer shape without making complicated decorations.
8. Add little Christmas details
Now that the three faces are finished, add a few decorations around them.
Pipe small white stars between the characters to separate the sections.
Add red and green sprinkles around the outer edge of the cake.
You can also pipe a simple green buttercream border around the bottom.
For a snowy finish, sprinkle a small amount of white sanding sugar over the top.
Try not to add too many decorations because the three faces should remain the main focus.
9. Give each character a little personality
This is where you can have some fun.
Give Santa a slightly curved smile and fluffy beard.
Make the snowman’s eyes a little wider and add a colorful scarf.
Give the reindeer a big red nose and slightly raised antlers.
You can even add tiny white buttercream dots to the reindeer’s cheeks for a rosy look.
The faces don’t need to be identical or perfectly symmetrical. Small differences make the cake feel more homemade and cute.
Easy Variations
Chocolate base: Use chocolate cake underneath the white buttercream. The darker cake makes the colorful characters stand out when you cut into it.
Three mini cakes: Bake three small round cakes and decorate each one as a separate character. Arrange them together on one large serving board.
Cupcake version: Decorate three groups of cupcakes as Santa, snowmen, and reindeer. This is especially good for children’s Christmas parties.
Gingerbread cake: Add cinnamon, ginger, and a little nutmeg to the cake batter for a warm holiday flavor.
Peppermint buttercream: Add a small amount of peppermint extract to the white buttercream for a refreshing Christmas flavor.
No-piping version: Use candies, chocolate pieces, pretzels, and fondant for most of the faces. This is the easiest option if you don’t have decorating tips.
13. Cute Christmas Cake With Snowflakes
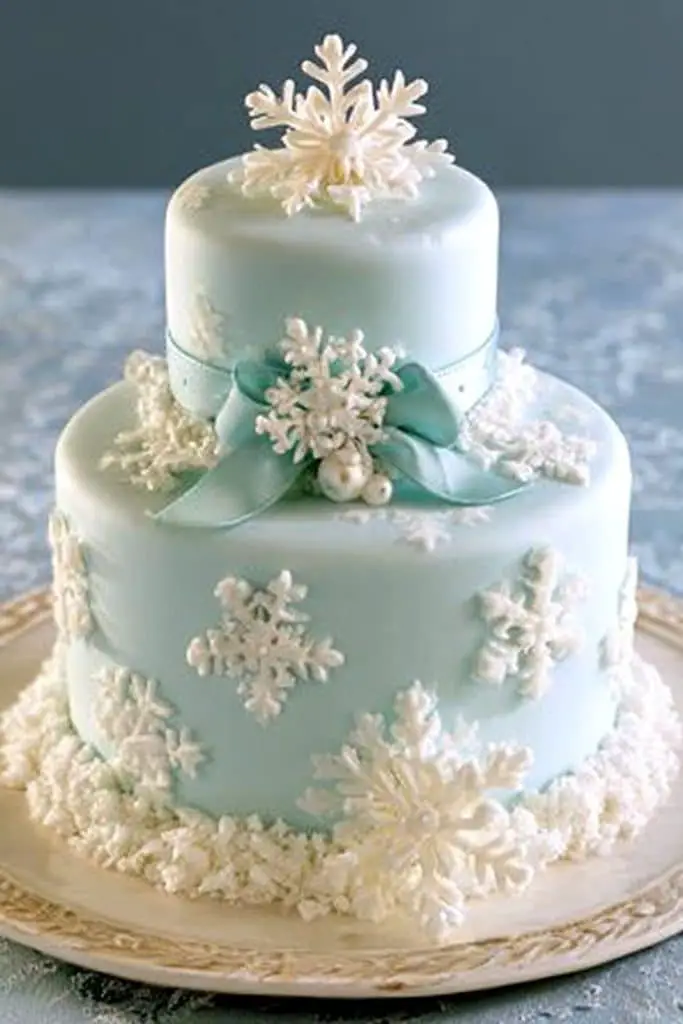
I love how pretty a cake looks when you keep the decoration simple and let snowflakes do all the work. A pale blue cake covered with white snowflakes feels like a little winter scene, and you don’t need complicated fondant work to get the look.
For this cute Christmas cake with snowflakes, I’d use a soft vanilla cake covered in pale blue buttercream, then add white piped snowflakes, sparkling sugar, and a few pearl sprinkles. Wilton uses a similar blue-and-white buttercream design, piping pale snowflakes over a blue background and finishing them with small dots and sparkling details.
Prep Time: 30 minutes
Bake Time: 30–35 minutes
Decorating Time: 30–40 minutes
Total Time: About 1 hour 45 minutes
Difficulty: Easy to Moderate
Servings: 10–12
If you don’t feel confident piping snowflakes, you can use ready-made snowflake decorations instead. Wilton’s beginner winter cake uses snowflake icing decorations, sprinkles, and pale blue buttercream for a similar effect.
Ingredients
For the Vanilla Cake
- 1½ cups (340g) unsalted butter, softened
- 2½ cups (500g) granulated sugar
- 5 large eggs, at room temperature
- 1 teaspoon vanilla extract
- 3 cups (375g) all-purpose flour
- ¾ teaspoon baking powder
- ¼ teaspoon salt
- 1 cup (240ml) whole milk
For the Buttercream
- 1 cup (226g) unsalted butter, softened
- 4 cups (480g) powdered sugar, sifted
- 2–3 tablespoons milk or heavy cream
- 1 teaspoon vanilla extract
- Pinch of salt
For the Snowflake Decoration
- Sky-blue or royal-blue gel food coloring
- White buttercream
- White sparkling sugar
- White nonpareils
- White pearl sprinkles, optional
- Silver or light-blue sprinkles, optional
- Ready-made snowflake sprinkles or icing decorations, optional
How to Make the Snowflake Cake
1. Bake the vanilla cake
Preheat your oven to 350°F (175°C). Grease and line two 8-inch round cake pans with parchment paper.
Beat the softened butter and sugar together for about 3–4 minutes, until light and fluffy.
Add the eggs one at a time, mixing well after each addition. Stir in the vanilla.
In another bowl, whisk together the flour, baking powder, and salt.
Add the dry ingredients to the butter mixture in batches, alternating with the milk. Mix just until everything is combined.
Divide the batter between the prepared pans.
Bake for 30–35 minutes, or until a toothpick inserted into the center comes out clean.
Let the cakes cool in the pans for about 10 minutes, then transfer them to a wire rack and cool completely.
2. Make the buttercream
Beat the softened butter until smooth and creamy.
Gradually add the powdered sugar, followed by the vanilla and salt.
Add 2 tablespoons of milk or cream and beat for another 2–3 minutes. Add a little more liquid if the frosting feels too thick.
Set aside about 1½ cups of white buttercream for the snowflakes and other decorations.
Tint the remaining buttercream a very pale blue.
I recommend starting with a tiny amount of gel coloring and adding more gradually. A soft icy blue looks especially pretty with white snowflakes.
3. Stack and frost the cake
Place one cake layer on your serving plate.
Spread a layer of white buttercream over the top.
Add the second cake layer and cover the entire cake with a thin crumb coat.
Chill for about 15–20 minutes.
Apply the pale blue buttercream over the cake, smoothing the sides and top with a spatula.
You don’t have to make the sides perfectly smooth. A few soft spatula marks can actually give the cake a snowy, handmade look. Wilton’s Winter Wonderland Snowflake Cake intentionally leaves horizontal spatula marks on the sides for texture.
4. Prepare the white snowflake frosting
Put the reserved white buttercream into a piping bag fitted with a small round decorating tip.
A small round tip works well because you want thin lines rather than thick snowflakes.
If you don’t have a piping tip, simply snip a very small opening from the end of the piping bag.
Before decorating the cake, practice a few snowflakes on a piece of parchment paper.
5. Pipe the snowflakes
Start with the largest snowflake on the center of the cake.
Pipe a simple six-pointed snowflake by making three crossed lines.
Add small branches to each line to create the familiar snowflake shape.
Don’t worry about making every snowflake identical. In nature, snowflakes are never perfectly uniform, and different sizes make the cake look more interesting.
Once the large snowflake is finished, add several smaller ones around it.
You can also pipe tiny white dots between the snowflakes.
Wilton’s snowfall cake uses small round piping tips to outline snowflakes and add dots, so this combination is a simple way to create the design without needing complicated decorating techniques.
6. Add snowflakes around the sides
For a more decorated cake, pipe a few smaller snowflakes around the sides.
Keep most of them toward the upper half of the cake and leave some blue space between them.
You can also pipe tiny white dots that look like falling snow.
I like this because it makes the cake feel like it’s snowing without covering the entire surface.
7. Add sparkling sugar
While the white buttercream is still soft, lightly sprinkle white sparkling sugar over the snowflakes.
Don’t use too much. A small amount catches the light and gives the cake a pretty frosty finish.
Wilton also uses sparkling sugar and white sprinkles to add a snowy effect to its snowflake cake designs.
8. Add a few pearl sprinkles
For a little extra detail, place white or silver pearl sprinkles at the ends of some snowflake branches.
You can also put one larger pearl in the center of each snowflake.
This is completely optional, but it gives the cake a slightly more elegant finish.
9. Add a snowy border
Finish the cake with a simple white buttercream border around the bottom.
You can use a star tip to pipe small white stars, or simply pipe a row of small dots.
Sprinkle a little sparkling sugar over the border to make it look like freshly fallen snow.
10. Add ready-made snowflake decorations
If piping snowflakes feels too difficult, use ready-made snowflake icing decorations.
Place a few larger snowflakes on top of the cake and smaller ones around the sides.
This is also a great shortcut if you’re making the cake with children.
For a more dramatic version, you can make edible white chocolate or candy snowflakes ahead of time. Wilton’s mirror-glaze snowflake cake pipes candy snowflakes in different sizes and chills them until set before placing them on the finished cake.
Easy Variations
Winter blue cake: Use two shades of blue buttercream, with darker blue on the bottom and lighter blue toward the top.
All-white snowflake cake: Cover the cake in white buttercream and decorate it with white snowflakes and sparkling sugar for a snowy monochromatic look.
Blue and silver: Add silver sprinkles and edible silver pearls instead of colorful Christmas decorations.
Snowy Christmas cake: Add small white buttercream trees, snowballs, and a few tiny edible stars between the snowflakes.
Chocolate version: Use chocolate cake underneath the blue-and-white buttercream for a fun contrast.
Peppermint cake: Add ½ teaspoon of peppermint extract to the buttercream for a classic Christmas flavor.
No-piping version: Use ready-made snowflake icing decorations and white sprinkles. You can skip the piping completely and still get a beautiful result.
14. Cute Christmas Cake Pops
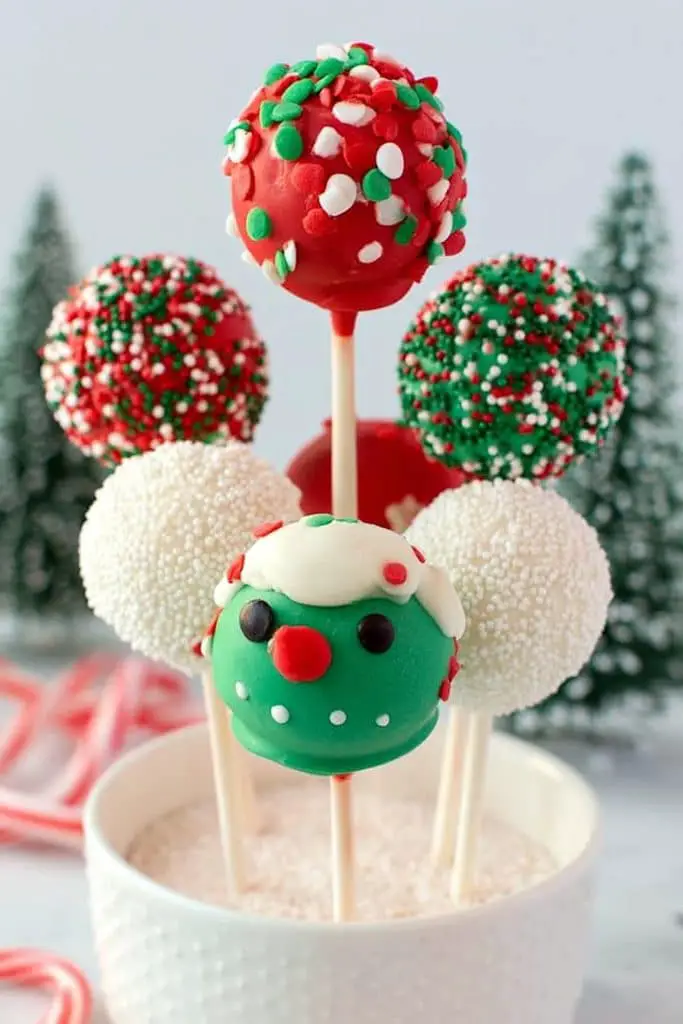
Cake pops are always fun for Christmas because they’re small, easy to serve, and everyone can grab one without needing a plate and fork. I especially like turning them into little Christmas treats with red, green, white, and gold decorations.
These cute Christmas cake pops start with a moist vanilla cake mixed with buttercream, rolled into small balls, chilled, and dipped in candy melts. Wilton uses the same basic method and notes that medium cake pops made with about 2 tablespoons of cake mixture yield around 24 pops.
Prep Time: 30 minutes
Bake Time: 35–40 minutes
Chilling Time: About 2½ hours
Decorating Time: 20–30 minutes
Total Time: About 3½–4 hours
Difficulty: Easy to Moderate
Makes: About 24 cake pops
For a cute variation, make half of them red and half green, then decorate them with white sprinkles. You can also turn a few into little snowmen or reindeer for a mixed Christmas cake pop platter.
Ingredients
For the Cake
- 1 box vanilla cake mix
- 1 box instant vanilla pudding mix, 3.4 oz
- 4 large eggs
- 1 cup water
- ⅓ cup vegetable oil
Wilton uses this combination for a moist cake pop base and bakes the cake in a sheet pan before crumbling it.
For the Cake Pop Mixture
- ½ cup vanilla buttercream frosting
You can use homemade buttercream or prepared frosting.
For the Coating
- 12 oz white candy melts
- 12 oz red candy melts
- 12 oz green candy melts
You don’t need all three bags if you’re making a smaller batch. You can also use white coating for all the pops and decorate them with red and green sprinkles.
For Decorating
- Red and green Christmas sprinkles
- White nonpareils
- Gold sprinkles
- White sanding sugar
- Mini candy eyes, optional
- Small red candies, optional
- Pretzel pieces, optional
- 24 paper lollipop sticks
How to Make Cute Christmas Cake Pops
1. Bake the cake
Preheat your oven to 350°F (175°C) and lightly grease a 13×9-inch baking pan.
In a large bowl, combine the vanilla cake mix, instant pudding mix, eggs, water, and vegetable oil.
Beat for about 2 minutes until the batter is smooth.
Pour the batter into the prepared pan and bake for 35–40 minutes, or until a toothpick inserted in the center comes out clean.
Let the cake cool in the pan for about 10 minutes, then transfer it to a rack and let it cool completely. Wilton follows this same baking and cooling method for its homemade cake pops.
2. Crumble the cake
Once the cake is completely cool, break it into large pieces and place them in a large bowl.
Use your hands to crumble the cake until there are no large chunks left.
Add the ½ cup of buttercream and mix until the crumbs hold together when pressed.
Don’t add all the frosting at once if the mixture already feels moist. Too much frosting can make the cake pops soft and difficult to dip.
3. Roll the cake balls
Scoop about 2 tablespoons of the mixture for each cake pop.
Roll each portion between your palms until you have a smooth ball.
Place the cake balls on a parchment-lined baking sheet.
This recipe should make around 24 medium cake pops. Using a cookie scoop can help keep them all the same size. Wilton recommends about 2 tablespoons per medium cake pop.
4. Chill the cake balls
Place the tray in the refrigerator and chill the cake balls for about 2 hours, or until firm.
You can also prepare the cake balls a day ahead and keep them refrigerated until you’re ready to decorate. Wilton notes that the mixture can be prepared a couple of days ahead and that formed cake balls can be chilled a day before dipping.
5. Melt the candy coating
Melt your candy melts according to the package directions.
If you’re making three colors, melt the red, green, and white coatings separately.
Use a tall, narrow bowl or cup for dipping. This makes it easier to completely cover each cake ball without needing a large amount of melted candy.
Keep the coating warm and fluid while you’re working.
6. Add the sticks
Dip the end of a lollipop stick about ½ inch into the melted candy.
Push the coated end into the center of a chilled cake ball, going no more than halfway through.
Repeat with the remaining cake balls.
Place them back in the refrigerator for about 10 minutes so the coating can set around the sticks.
This small step helps keep the cake balls attached to the sticks while you dip them.
7. Dip the cake pops
Hold one cake pop by the stick and gently dip it into the melted candy coating.
Make sure the entire cake ball is covered.
Lift it out and gently tap the stick against the edge of the bowl to allow excess coating to drip off.
Don’t shake the cake pop too hard because the cake ball can slide off the stick.
Place the finished pop upright in a cake pop stand, piece of craft foam, or another stable holder.
8. Add Christmas sprinkles
Decorate each cake pop while the coating is still wet.
For red cake pops, add white or gold sprinkles.
For green cake pops, add red and white sprinkles.
For white cake pops, add red and green sprinkles.
You can also sprinkle a little sanding sugar over the top for a snowy finish.
Wilton recommends adding sprinkles or other toppings immediately after dipping, before the candy coating sets.
9. Make little Christmas ornaments
For an extra cute look, decorate some of the cake pops like Christmas ornaments.
Dip them in red, green, or white coating.
Once the coating has set, drizzle a contrasting color over the top using a small piping bag.
Add a few tiny sprinkles to look like ornament patterns.
You can also pipe a small gold or white line from the top of the cake pop to make it look like an ornament cap.
10. Make snowman cake pops
Turn a few white cake pops into snowmen.
Dip the cake balls in white candy coating and let them set.
Add two small candy eyes, an orange sprinkle or tiny piece of orange fondant for the nose, and small black sprinkles for the buttons.
For an even cuter version, make two different-sized cake balls and stack them together before dipping.
Snowman cake pops are a well-established Christmas variation; Betty Crocker’s Bakerella’s Snowman Cake Pops uses white candy coating, lollipop sticks, and simple edible decorations to create the snowman design.
11. Make reindeer cake pops
Use brown candy melts for a few of the pops.
After dipping, add candy eyes and a small red candy for the nose.
Break pretzel pieces into small antler shapes and gently press them into the coating before it completely sets.
You can keep these very simple. Two eyes, one red nose, and two pretzel antlers are enough to make them instantly recognizable as little reindeer.
12. Let the coating set
Leave the decorated cake pops upright until the candy coating has completely hardened.
You can place them in the refrigerator for about 10–15 minutes to speed things up.
Once set, transfer them to a serving platter or wrap them individually in small clear treat bags.
Easy Variations
Christmas ornament cake pops: Use red, green, and white coatings with gold and silver sprinkles.
Snowman cake pops: Use white coating, candy eyes, orange noses, and black sprinkle buttons.
Rudolph cake pops: Dip in brown coating and add red noses and pretzel antlers.
Peppermint cake pops: Add ½ teaspoon peppermint extract to the buttercream and decorate with crushed peppermint candy.
Chocolate cake pops: Use chocolate cake mix and chocolate pudding mix, then coat the pops in white, red, or dark chocolate candy melts. Wilton recommends matching chocolate pudding with chocolate cake for chocolate cake pops.
Gingerbread cake pops: Use a spiced cake and decorate the finished pops with white icing to look like little gingerbread cookies.
Christmas tree cake pops: Shape the cake mixture into small cones before chilling, then dip them in green candy coating and add tiny sprinkles as ornaments.
How to Store Christmas Cake Pops
Keep finished cake pops in an airtight container in the refrigerator if your frosting or coating requires refrigeration.
For the best texture, let them sit at room temperature for a short time before serving.
You can also prepare the cake mixture and shaped cake balls ahead of time. Wilton notes that the mixture can be made a couple of days ahead, while formed cake balls can be chilled a day before dipping.
These cute Christmas cake pops are such a fun alternative to a traditional Christmas cake. You can make one basic batch and turn it into several different designs, from colorful Christmas ornaments to little snowmen and Rudolph reindeer. They’re also perfect for holiday parties, cookie exchanges, edible gifts, and kids’ Christmas gatherings.
15. Cute Christmas Cake With a Winter Wonderland Theme
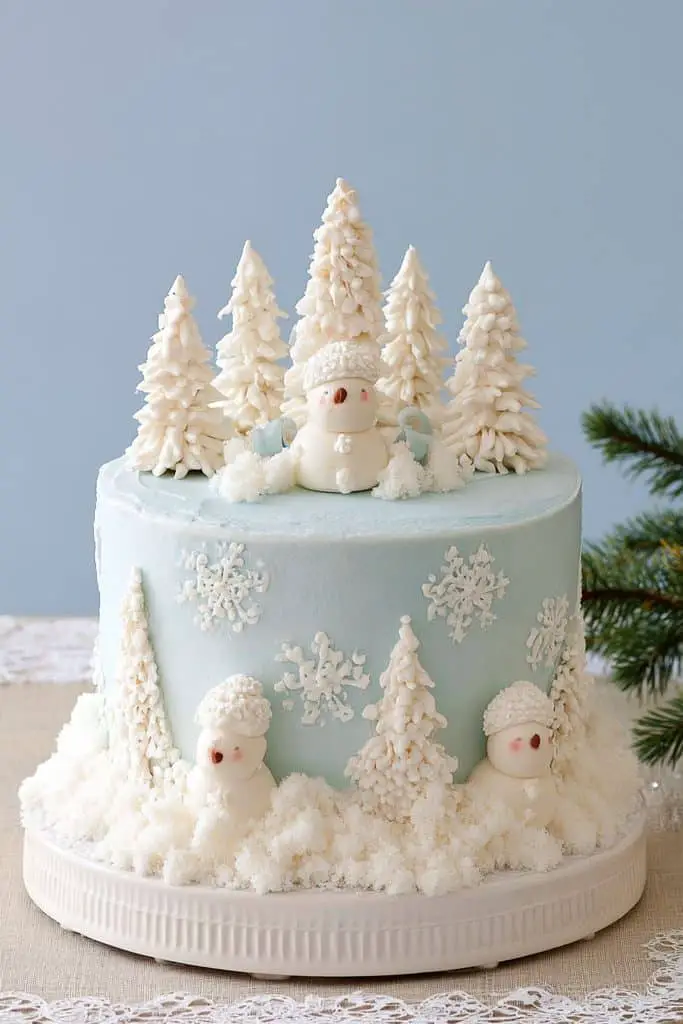
A winter wonderland Christmas cake is one of those designs that instantly feels magical. I love the combination of pale blue frosting, snowy white buttercream, little evergreen trees, and sparkling decorations because it gives you a beautiful Christmas cake without needing to make every detail complicated.
For this version, I’m using a simple vanilla layer cake with pale blue buttercream and a snowy top decorated with little Christmas trees, snowflakes, white sprinkles, and edible pearls. Wilton uses a similar beginner-friendly winter wonderland approach with pale blue icing, snowflake decorations, and sparkling sprinkles.
Prep Time: 35 minutes
Bake Time: 30–35 minutes
Decorating Time: 40–45 minutes
Total Time: About 2 hours
Difficulty: Easy to Moderate
Servings: 10–12
For a variation, you can add tiny gingerbread cookies, snowmen, or candy trees to turn the cake into a whole little winter village. Betty Crocker’s winter wonderland cake also uses gingerbread decorations to create a playful snowy scene.
Ingredients
For the Vanilla Cake
- 1½ cups (340g) unsalted butter, softened
- 2½ cups (500g) granulated sugar
- 5 large eggs, at room temperature
- 1 teaspoon vanilla extract
- 3 cups (375g) all-purpose flour
- ¾ teaspoon baking powder
- ¼ teaspoon salt
- 1 cup (240ml) whole milk
For the Buttercream
- 1 cup (226g) unsalted butter, softened
- 4 cups (480g) powdered sugar, sifted
- 2–3 tablespoons milk or heavy cream
- 1 teaspoon vanilla extract
- Pinch of salt
For the Winter Wonderland Decorations
- Sky-blue gel food coloring
- Green gel food coloring
- White sanding sugar
- White nonpareils
- White pearl sprinkles
- Silver or light-blue sprinkles
- Optional snowflake sprinkles or icing decorations
- Optional small star sprinkles
- Optional mini gingerbread cookies
- Optional small red candies
How to Make This Winter Wonderland Christmas Cake
1. Bake the vanilla cake
Preheat your oven to 350°F (175°C). Grease and line two 8-inch round cake pans with parchment paper.
Beat the softened butter and sugar together for about 3–4 minutes, until light and fluffy.
Add the eggs one at a time, mixing well after each addition. Stir in the vanilla.
In a separate bowl, whisk together the flour, baking powder, and salt.
Add the dry ingredients to the butter mixture in batches, alternating with the milk. Mix just until the batter is smooth.
Divide the batter evenly between the prepared pans.
Bake for 30–35 minutes, or until a toothpick inserted into the center comes out clean.
Cool the cakes in the pans for about 10 minutes, then transfer them to a wire rack and let them cool completely.
2. Prepare the buttercream
Beat the softened butter until smooth and creamy.
Gradually add the powdered sugar, followed by the vanilla and salt.
Add 2 tablespoons of milk or cream and beat until fluffy. Add another tablespoon if the frosting feels too thick.
Set aside about 1½ cups of white buttercream for the snowy decorations.
Tint the remaining buttercream a very pale blue.
Start with just a small amount of blue gel coloring. You want an icy blue rather than a strong royal blue.
3. Stack the cake
Place one cake layer on your serving plate.
Spread a layer of white buttercream over the top.
Add the second cake layer and cover the entire cake with a thin crumb coat.
Chill for about 15–20 minutes.
Add the pale blue buttercream and smooth the sides.
Don’t worry about making the frosting completely perfect. A little texture can actually make the cake look more like a snowy winter landscape. Wilton’s Winter Wonderland Snowflake Cake uses visible horizontal spatula marks on the sides for a similar effect.
4. Create the snowy top
Spread a little extra white buttercream around the top edge of the cake.
Use a small spatula to gently pull the white frosting inward so it looks like snow sitting on the blue cake.
Let some of the white buttercream drip slightly over the edge in a few places.
You don’t want perfectly even drips. Natural-looking snow is much easier and looks more charming.
5. Make little Christmas trees
Divide some of the remaining buttercream and tint it two or three shades of green.
Place the green frosting into piping bags fitted with a small star tip.
Pipe little Christmas trees directly onto the top of the cake.
To make each tree, hold the piping bag upright and pipe a small base. Continue squeezing while moving slightly upward, reducing pressure as you reach the top.
Make the trees different sizes.
A few taller trees at the back and smaller trees toward the front will make the cake look like a tiny Christmas forest.
Wilton uses different shades of green buttercream to create winter tree designs and adds nonpareils for a snowy effect.
6. Add snow to the trees
Sprinkle white nonpareils or sanding sugar over the green trees while the buttercream is still soft.
Concentrate the sprinkles toward one side of the trees so they look like fresh snow has settled on the branches.
You can also add a tiny white buttercream star to the top of each tree.
7. Add snowflakes
Now decorate the blue sides of the cake with small white snowflakes.
You can pipe them with a small round decorating tip, or use ready-made snowflake icing decorations if you want an easier option.
Make the snowflakes different sizes and leave plenty of blue space around them.
Wilton’s winter wonderland cake uses snowflake icing decorations along with pale blue frosting and sprinkles, making this a particularly easy shortcut for home bakers.
8. Create falling snow
Pipe small white dots around the cake to look like falling snow.
Add a few larger dots near the bottom and smaller ones toward the top.
You can also press white pearl sprinkles into the frosting.
This small detail makes the whole cake feel more like a snowy scene rather than simply a blue cake with decorations.
9. Add a snowy ground
Cover the top of the cake around the trees with white sanding sugar.
Use enough to create a snowy appearance, but don’t completely bury the trees.
You can also pipe little mounds of white buttercream around the bases of the trees.
For an especially snowy finish, add a little sparkling sugar around the bottom border as well.
10. Add tiny winter decorations
This is where you can make the cake your own.
Add a few small red candies to look like Christmas berries.
Place tiny gold or silver stars between the trees.
You can also add a few mini gingerbread cookies to create a little Christmas village.
If you want snowmen, make them from small white buttercream balls or use ready-made edible snowman decorations.
The goal isn’t to fill every inch of the cake. Leave some open space so the snowy landscape remains easy to see.
11. Finish the sides
For a simple finish, pipe a white buttercream border around the bottom of the cake.
A small star tip works well for this.
Sprinkle the border with white or silver sugar while the frosting is still soft.
You can also leave the bottom border plain if you want a cleaner look.
12. Add a little sparkle
Finish with a light scattering of silver or pearl sprinkles.
Try to place them around the snowflakes and trees rather than covering the entire cake.
Wilton’s winter-themed cakes commonly use white sparkling sugar, pearl sprinkles, and snowflake decorations to create this frosty effect.
Easy Variations
Snowy forest cake: Add more green buttercream trees and cover the top with extra white sanding sugar.
Winter village cake: Add tiny gingerbread houses or cookies around the trees.
Snowman wonderland: Add two or three small snowmen between the trees. Wilton uses meringue snowmen and candy-coated trees for a more detailed winter wonderland cake.
Blue ombré cake: Use several shades of blue buttercream, going from light at the bottom to darker blue near the top. Wilton also uses multiple blue shades to create a dramatic snowy background.
White winter cake: Skip the blue completely and cover the cake in white buttercream with white trees, snowflakes, and silver sprinkles.
Chocolate winter cake: Use chocolate cake layers underneath the pale blue and white buttercream.
Peppermint winter cake: Add a little peppermint extract to the buttercream and finish the cake with crushed candy cane pieces.
Candy snowflake cake: Pipe white candy-melt snowflakes onto parchment, chill until set, and stand them upright on the cake. Wilton uses this technique for its mirror-glaze snowflake cake.
This cute Christmas cake with a winter wonderland theme is a lovely way to finish the list because you can make it as simple or detailed as you want. The pale blue frosting, snowy white buttercream, little Christmas trees, and sparkling snowflakes create that magical holiday feeling without requiring advanced cake-decorating skills.