
Finding healthy snacks on the go can be a little tricky when life gets busy. I know how easy it is to grab chips, cookies, or something sugary when you are hungry and short on time. But with a little planning, you can enjoy simple, tasty snacks that keep you satisfied throughout the day.
The good thing is that healthy snacking does not have to be expensive or complicated. You can make plenty of delicious snack ideas at home using everyday ingredients like fruit, oats, yogurt, peanut butter, eggs, and nuts. Some take just a few minutes to prepare, while others can be made ahead for busy mornings.
In this guide, I’m sharing 25 healthy snacks on the go for work, school, travel, and everyday errands. You’ll find options packed with protein, quick bites for busy days, healthy snacks on the go for kids, and affordable choices if you’re looking for cheap healthy snacks on the go. There are also ideas that may fit into a weight-loss plan without leaving you feeling hungry an hour later.
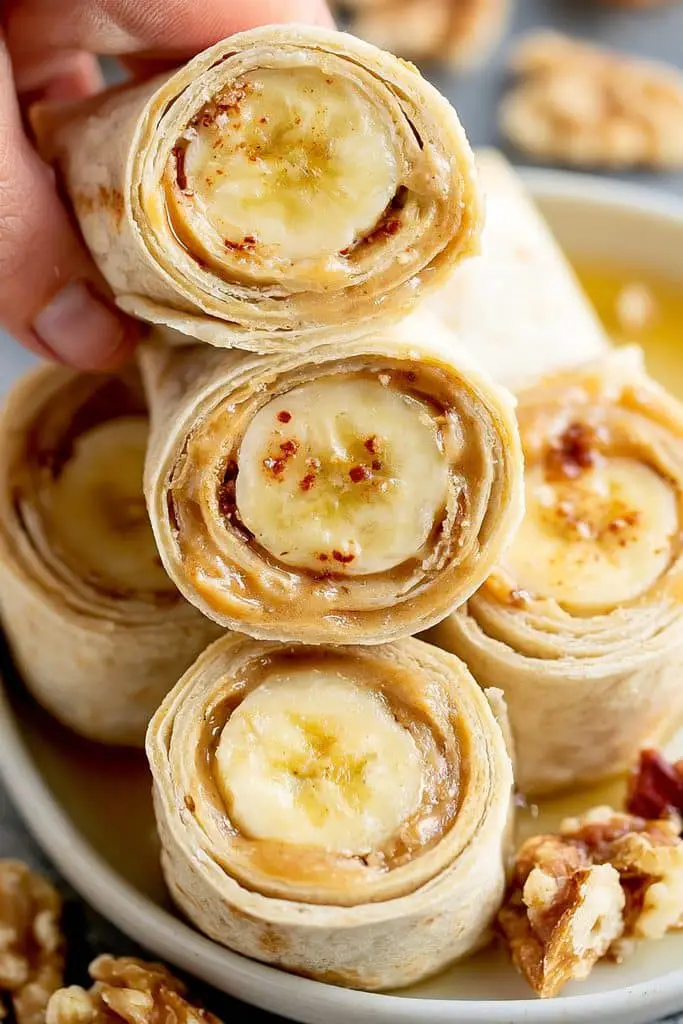
1. Peanut Butter Banana Roll-Ups
Prep time: 5 minutes · Cook time: 0 minutes · Difficulty: Easy · Servings: 1
Peanut butter banana roll-ups are one of those snacks I love because they are simple, filling, and naturally sweet. You only need a few ingredients, and there is no cooking involved.
I also like how easy it is to change this recipe depending on what I have at home. You can use a whole-wheat tortilla for extra fiber, add a sprinkle of cinnamon, or include a few chia seeds for a little crunch. It’s a handy choice for busy mornings, lunchboxes, or a quick bite before heading out.
These roll-ups can also work as healthy snacks on the go for weight loss when you keep the portion suitable for your needs. Peanut butter is nutritious but calorie-dense, so a little goes a long way.
Ingredients
- 1 small whole-wheat tortilla
- 1 medium banana
- 1 tablespoon peanut butter
- ¼ teaspoon ground cinnamon (optional)
- 1 teaspoon chia seeds (optional)
Instructions
- Spread the peanut butter. Lay the tortilla flat on a clean cutting board and spread the peanut butter evenly over the surface.
- Add the banana. Peel the banana and place it near one edge of the tortilla. Sprinkle with cinnamon or chia seeds if you like.
- Roll it up. Fold the sides in slightly, then roll the tortilla tightly around the banana.
- Slice and serve. Cut the roll into bite-sized pieces or leave it whole for easier eating on the go.
How to Pack Peanut Butter Banana Roll-Ups
For a quick breakfast or snack, wrap the whole roll-up in parchment paper or place the sliced pieces in a small food container. If you are packing it for later, keep it chilled when possible, especially in hot weather.
I find this snack works best when I want something sweet but still satisfying. Pair it with plain yogurt or a glass of milk if you want a more substantial snack with extra protein.
The title, introduction, and first recipe are complete. When you’re ready, say “Continue” and I’ll write Section 2: Greek Yogurt With Fresh Berries in the same simple, personal style.
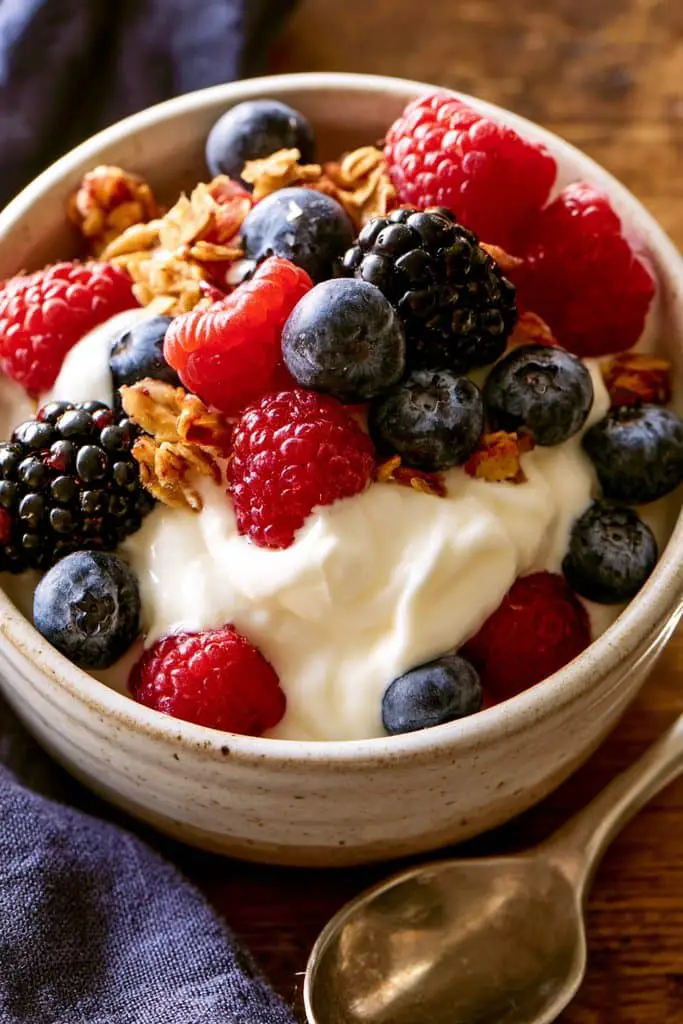
2. Greek Yogurt With Fresh Berries
Prep time: 5 minutes · Cook time: 0 minutes · Difficulty: Easy · Servings: 1
Greek yogurt with fresh berries is one of my favorite healthy snack ideas when I want something creamy, refreshing, and easy to prepare. Best of all, this snack takes only five minutes to put together.
Greek yogurt is a good source of protein, which helps make this snack more satisfying. Berries also provide fiber and vitamins, making this a simple way to add more fruit to your day. I like using strawberries, blueberries, and raspberries, but you can choose whichever fruits you have in your fridge.
This is one of those healthy snacks on the go for work that you can prepare the night before. It also works well for busy mornings, an afternoon snack, or a light bite after exercise.
Ingredients
- 1 cup plain Greek yogurt
- ½ cup fresh strawberries, sliced
- ¼ cup blueberries
- ¼ cup raspberries (optional)
- 1 teaspoon honey or maple syrup (optional)
- 1 tablespoon chopped almonds, walnuts, or granola (optional)
Instructions
- Add the yogurt. Spoon the Greek yogurt into a small bowl or a clean, sealable food container.
- Prepare the berries. Wash the strawberries, blueberries, and raspberries under running water. Slice the strawberries into bite-sized pieces.
- Add the fruit. Arrange the berries over the yogurt and gently mix them in if you prefer an even blend of flavors.
- Sweeten to taste. Add a small drizzle of honey or maple syrup if you want extra sweetness. Plain yogurt and ripe berries are often sweet enough on their own.
- Finish with a topping. Sprinkle chopped nuts or granola over the top for extra crunch, if desired.
Tips and Variations
- Choose plain yogurt: I usually recommend plain Greek yogurt because it lets you control the sweetness. Flavored varieties can contain added sugar, so check the label if that matters to you.
- Use frozen berries: Frozen berries work well when fresh ones are unavailable. Thaw them in the refrigerator first, or add them frozen if you don’t mind a slightly colder, juicier snack.
- Make it more filling: Add a tablespoon of chia seeds, oats, or chopped nuts for extra texture and fiber.
- Try different fruits: Sliced banana, diced apple, peaches, or mango are all delicious alternatives.
- Make it dairy-free: Use a plant-based yogurt alternative. Protein levels vary between products, so check the label if you’re specifically looking for a high-protein snack.
How to Pack Greek Yogurt With Fresh Berries
To make this snack ahead, layer the yogurt and berries in a small container with a tight-fitting lid. If you are adding granola or nuts, pack them separately and sprinkle them on just before eating to keep them crunchy.
Because yogurt is perishable, keep it in a refrigerator or an insulated lunch bag with an ice pack until you’re ready to eat. Avoid leaving it at room temperature for more than two hours, or one hour when temperatures are above 90°F (32°C).
Is Greek Yogurt With Berries Good for Weight Loss?
It can be a useful choice if you’re looking for healthy snacks on the go for weight loss. Greek yogurt provides protein, and berries add natural sweetness and fiber. Together, they can make a satisfying snack without requiring much preparation.
Portion size and toppings make a difference, though. If you want to keep the snack lighter, use plain Greek yogurt, plenty of berries, and a modest amount of nuts or granola. You don’t need to avoid toppings completely; just choose amounts that suit your appetite and daily needs.
I love this recipe because it’s easy to adjust to whatever I have on hand. Whether you enjoy it as a quick breakfast or pack it for work, it’s a fresh, simple option that makes healthy eating feel much easier.
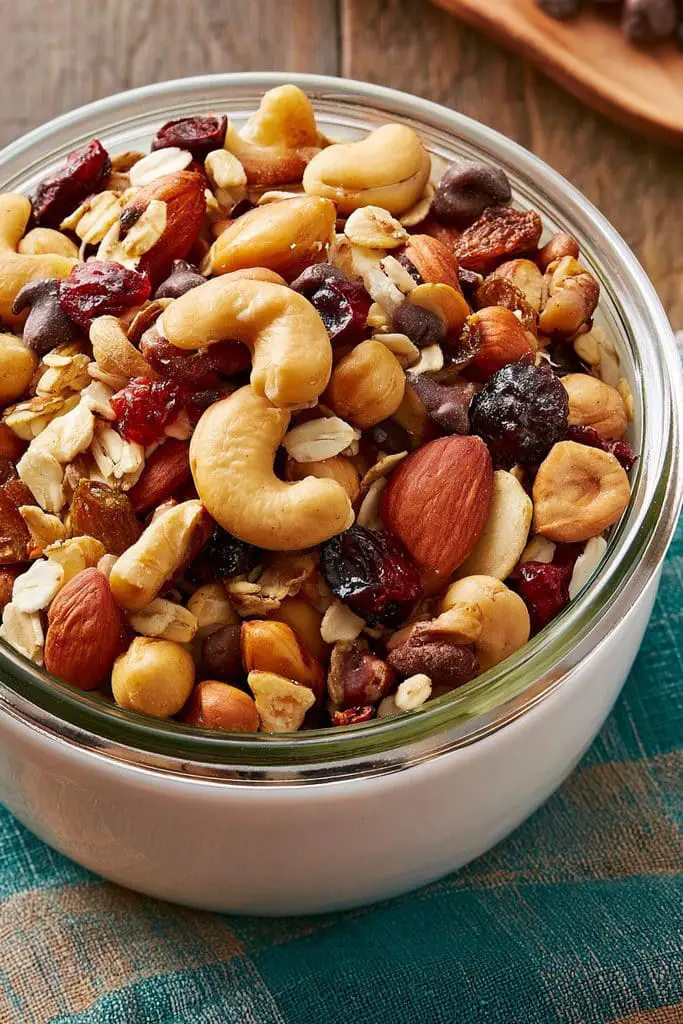
3. Homemade Trail Mix
Prep time: 5 minutes · Cook time: 0 minutes · Difficulty: Easy · Servings: 4
Homemade trail mix is one of the easiest healthy snacks on the go when you need something crunchy, tasty, and simple to pack. I love that you can make a batch in just five minutes using ingredients you already have in your pantry. There is no cooking involved, and you can change the ingredients to suit your taste.
It’s a great snack for road trips, busy workdays, school breaks, or those moments when you need something quick between meals.
Another thing I like about homemade trail mix is that it can be cheaper than buying prepackaged snack bags. You can purchase ingredients in larger quantities, mix them together, and divide them into small portions for the week.
Ingredients
- ½ cup almonds
- ½ cup cashews or walnuts
- ¼ cup pumpkin seeds
- ¼ cup sunflower seeds
- ½ cup raisins or dried cranberries
- ¼ cup unsweetened coconut flakes (optional)
- ¼ cup dark chocolate chips (optional)
Instructions
- Gather your ingredients. Measure the nuts, seeds, dried fruit, and any optional extras.
- Combine everything. Add all the ingredients to a large mixing bowl.
- Mix well. Stir gently until the ingredients are evenly distributed.
- Divide into portions. Spoon the trail mix into small reusable containers or snack bags. Aim for roughly ¼ to ⅓ cup per portion, adjusting the amount to your appetite and needs.
- Store for later. Keep the portions in an airtight container in a cool, dry place.
How to Pack Homemade Trail Mix
Trail mix is perfect for packing because it doesn’t need to be assembled each morning. I like to prepare several small portions at once so they’re ready to grab before heading out.
Use airtight snack containers or reusable bags to keep everything fresh. Store the mix away from heat and moisture, and follow the storage guidance on the ingredient packages. If you use chocolate chips, keep the mix somewhere cool so they don’t melt.
For healthy snacks on the go for work, keep a small portion in your desk drawer or bag for busy afternoons. You can also pack it for travel, hikes, or family outings.
Is Homemade Trail Mix Good for Weight Loss?
Homemade trail mix can fit into a weight-loss plan, but portion size is worth paying attention to. Nuts and seeds provide protein, fiber, and healthy fats, but they are also energy-dense. Dried fruit and chocolate chips can add extra sugar and calories, too.
If you’re looking for healthy snacks on the go for weight loss, try measuring a portion into a small container instead of eating straight from a large bag. Pairing trail mix with a piece of fresh fruit can also give you a satisfying mix of flavors and textures.
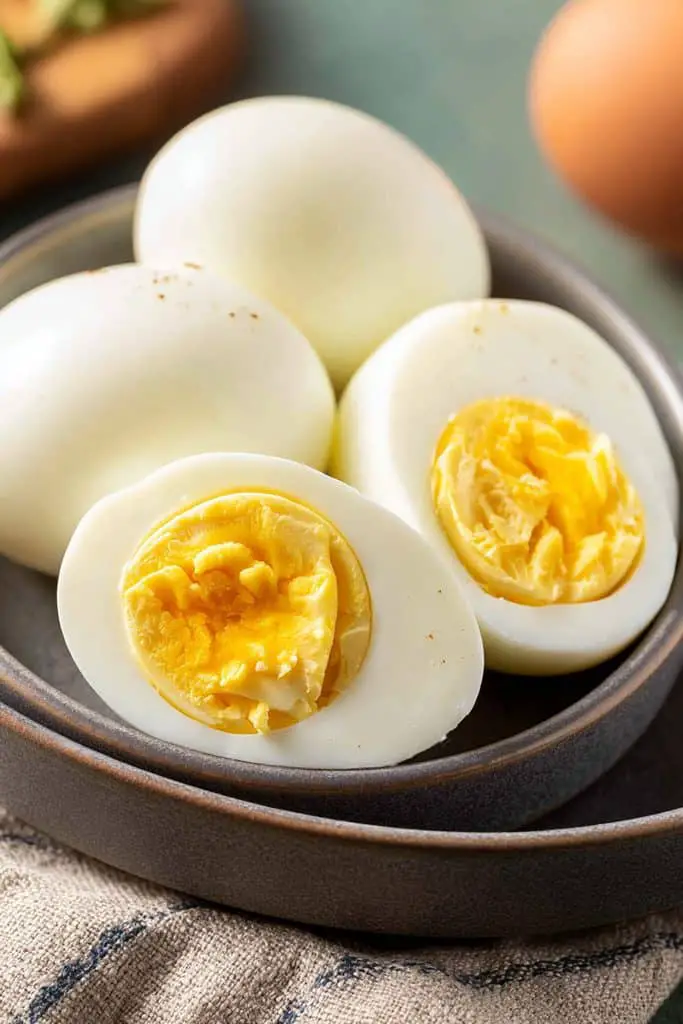
4. Hard-Boiled Eggs
Prep time: 2 minutes · Cook time: 10-12 minutes · Difficulty: Easy · Servings: 2
Hard-boiled eggs are one of the simplest healthy snacks on the go when you want something filling without spending much time in the kitchen.
The eggs have a soft, firm texture and a mild flavor that goes well with a little salt, black pepper, or paprika. You can eat them on their own, pair them with whole-grain crackers, or enjoy them with fresh vegetables for a more balanced snack.
They are also a practical option if you’re looking for healthy snacks on the go for work. Make a few at the beginning of the week, keep them refrigerated, and you’ll have a convenient snack ready whenever hunger strikes.
Ingredients
- 4 large eggs
- Water, enough to cover the eggs
- A pinch of salt (optional)
- Black pepper or paprika, for serving (optional)
Instructions
- Place the eggs in a saucepan. Arrange the eggs in a single layer and add enough cold water to cover them by about 1 inch.
- Bring the water to a boil. Place the saucepan over medium-high heat and bring the water to a full boil.
- Cook the eggs. Once the water boils, cover the pan, remove it from the heat, and let the eggs sit for 10-12 minutes, depending on their size and how firm you like the yolks.
- Cool the eggs. Transfer them to a bowl of ice water or very cold water for about 5 minutes. This stops the cooking process and makes peeling easier.
- Peel and season. Gently tap each egg on a hard surface, peel away the shell, and sprinkle with salt, black pepper, or paprika if desired.
- Serve or store. Enjoy immediately or refrigerate for later.
Are Hard-Boiled Eggs Good for Weight Loss?
Hard-boiled eggs can be a helpful choice if you’re looking for healthy snacks on the go for weight loss. They provide protein, which helps support fullness, and they’re easy to pair with vegetables or whole-grain foods.
One large egg contains roughly 6 grams of protein, although the exact amount varies with size. For a more satisfying snack, try one or two eggs with sliced vegetables or a piece of fruit, depending on your appetite and nutritional needs.
5. Apple Slices With Peanut Butter
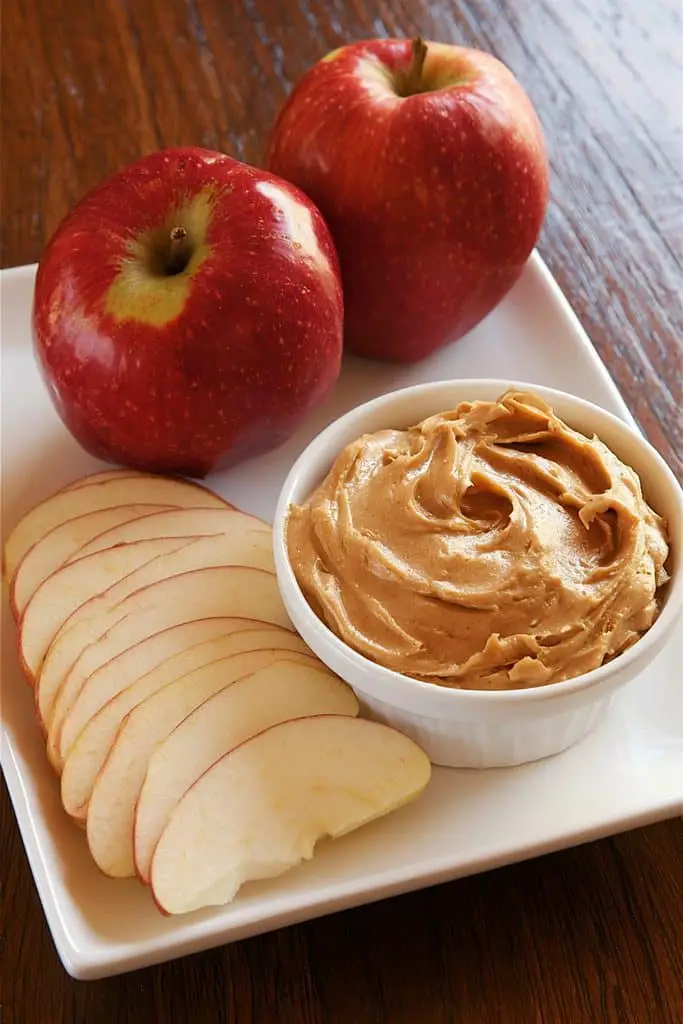
Prep time: 5 minutes · Cook time: 0 minutes · Difficulty: Easy · Servings: 1
Apple slices with peanut butter are one of those healthy snacks on the go that never feel boring.
This recipe is perfect for busy afternoons, school lunchboxes, or a quick bite before heading out the door. You only need two main ingredients, and there is no cooking involved. It is also easy to adjust with toppings like cinnamon, chia seeds, or chopped nuts.
If you’re looking for cheap healthy snacks on the go, this is a great place to start. Apples are easy to find in most grocery stores, and a jar of peanut butter can last for several snack portions.
Ingredients
- 1 medium apple
- 1-2 tablespoons peanut butter
- ¼ teaspoon ground cinnamon (optional)
- 1 teaspoon chia seeds or chopped nuts (optional)
- A small squeeze of lemon juice (optional, to help slow browning)
Instructions
- Wash the apple. Rinse it under running water and dry it with a clean towel.
- Slice the apple. Cut the apple into thin wedges and remove the core and seeds.
- Add the peanut butter. Arrange the apple slices on a plate and serve with peanut butter for dipping. You can also spread a little peanut butter directly onto each slice.
- Add your toppings. Sprinkle with cinnamon, chia seeds, or chopped nuts if you like.
- Pack for later. Place the slices in a food container and pack the peanut butter separately in a small sealed cup.
Easy Ways to Enjoy This Snack
You can serve apple slices with peanut butter on their own or pair them with plain Greek yogurt if you want extra protein. A sprinkle of cinnamon makes them taste a little sweeter without adding sugar.
I like this recipe because it proves that healthy snacking doesn’t have to involve complicated meal prep. With just an apple and a spoonful of peanut butter, you have a crunchy, creamy snack that works at home, at your desk, or on the go.
6. Roasted Chickpeas
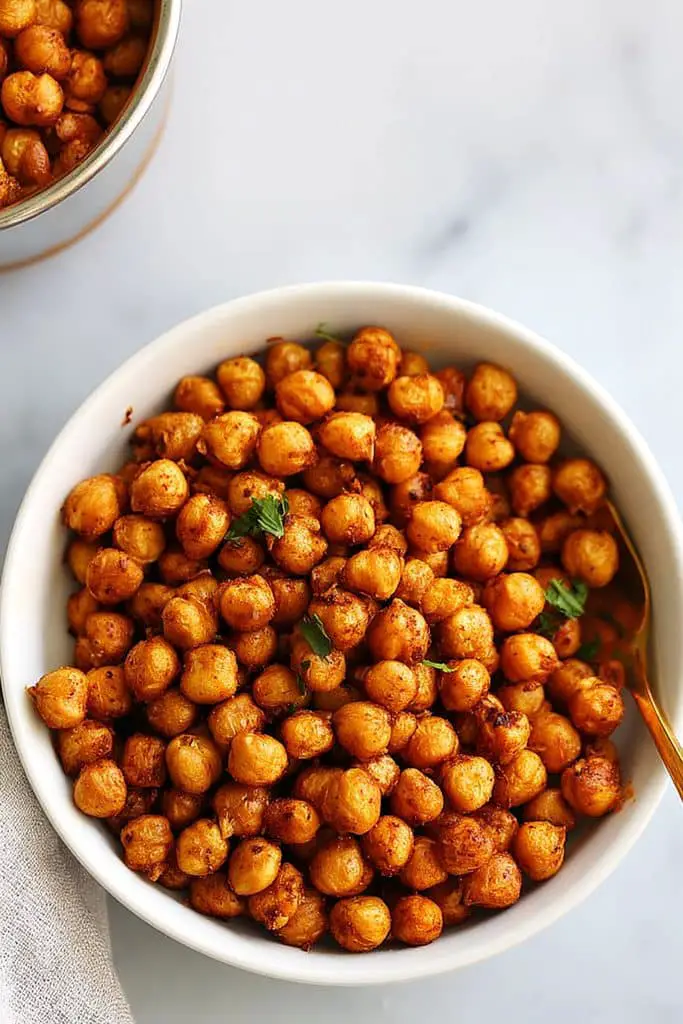
Prep time: 10 minutes · Cook time: 25-35 minutes · Difficulty: Easy · Servings: 3-4
If you enjoy crunchy snacks but want something a little more nutritious than chips, roasted chickpeas are worth trying. I love how easy they are to season, whether I want something spicy, smoky, or simply salty.
Chickpeas are a good source of plant-based protein and fiber, so they make a satisfying addition to your list of healthy snacks on the go. They are also budget-friendly, especially if you use canned chickpeas or cook dried chickpeas at home.
The best part is that you only need a few basic ingredients. Once the chickpeas are in the oven, you can get on with other things while they roast. They are perfect for work breaks, road trips, or an afternoon snack when you want something crunchy.
Ingredients
- 1 can (15 ounces or about 425 g) chickpeas, drained and rinsed
- 1 tablespoon olive oil
- ½ teaspoon paprika
- ½ teaspoon ground cumin
- ¼ teaspoon garlic powder
- ¼ teaspoon salt, or to taste
- A pinch of black pepper (optional)
Instructions
- Preheat the oven. Heat your oven to 400°F (200°C). Line a baking tray with parchment paper if desired.
- Drain and rinse the chickpeas. Empty the can into a colander, rinse under running water, and drain well.
- Dry the chickpeas. Spread them on a clean kitchen towel or paper towels and pat them dry. Remove any loose skins if you like. Drying helps them crisp up.
- Add the oil and seasoning. Transfer the chickpeas to a bowl. Toss with olive oil, paprika, cumin, garlic powder, salt, and black pepper until evenly coated.
- Spread on the tray. Arrange the chickpeas in a single layer, leaving a little space between them so they roast rather than steam.
- Roast until crisp. Bake for 25-35 minutes, shaking the tray halfway through. Start checking around 25 minutes, as oven temperatures and chickpea sizes vary.
- Cool before packing. Let the chickpeas cool completely. They will become a little crispier as they cool.
How to Pack Roasted Chickpeas
Roasted chickpeas are a convenient option when you need fast healthy snacks on the go. Once they’re completely cool, pack them into a clean, dry, airtight container for travel or a workday snack.
Homemade roasted chickpeas can soften as they sit, especially in humid weather. For the best texture, eat them within a day or two and keep them in a cool, dry place. If they lose their crunch, you can spread them on a baking tray and reheat them briefly in the oven until crisp again.
For longer storage, let the chickpeas cool fully before sealing the container. Trapping steam inside can make them soggy.
7. No-Bake Peanut Butter Oat Energy Balls
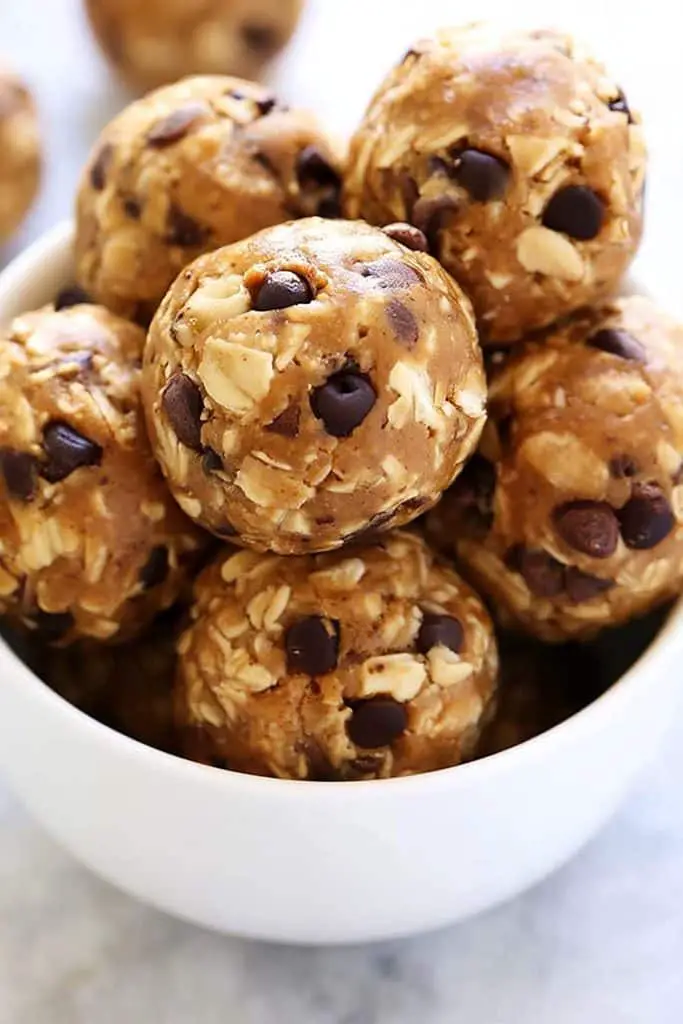
Prep time: 10 minutes · Chill time: 20-30 minutes · Cook time: 0 minutes · Difficulty: Easy · Servings: 10-12 balls
When I want a quick snack that tastes a little like a treat but is made with simple ingredients, I love making peanut butter oat energy balls. Best of all, you don’t need an oven or any special equipment to make them.
You can add chia seeds, ground flaxseed, or a few chocolate chips to change the flavor and texture.
If you’re collecting healthy snacks on the go for work, school, or travel, these energy balls are a convenient option. They’re also easy to portion, which can be helpful when you’re planning snacks for the week.
Ingredients
- 1 cup rolled oats
- ½ cup peanut butter
- ¼ cup honey or maple syrup
- 2 tablespoons ground flaxseed or chia seeds (optional)
- 2 tablespoons mini dark chocolate chips (optional)
- ½ teaspoon vanilla extract (optional)
- 1-2 tablespoons water or milk, only if needed
Instructions
- Add the dry ingredients. Place the rolled oats and optional flaxseed or chia seeds in a medium mixing bowl. Stir to combine.
- Mix in the wet ingredients. Add the peanut butter, honey or maple syrup, and vanilla extract. Stir until everything is evenly mixed.
- Check the texture. The mixture should be sticky enough to hold together when pressed. If it seems too dry, add water or milk a teaspoon at a time. If it’s too sticky, mix in a little more oats.
- Add the chocolate chips. Fold them into the mixture if you’re using them.
- Shape the balls. Scoop out about one tablespoon of mixture at a time and roll it between your palms to form small balls.
- Chill until firm. Arrange the balls on a plate or tray and refrigerate for 20-30 minutes.
- Store for later. Once firm, transfer them to an airtight container and keep refrigerated.
Are Peanut Butter Oat Energy Balls High in Protein?
They provide some protein from the peanut butter and oats, but the exact amount depends on your ingredients and the size of each ball. They aren’t necessarily as high in protein as a snack made with Greek yogurt, eggs, or another concentrated protein source.
If you’re looking for more protein in your snack ideas, you can add a small amount of protein powder, provided it mixes well with the other ingredients. You may need to adjust the peanut butter or liquid to keep the mixture from becoming too dry.
8. Cheese and Whole-Grain Crackers
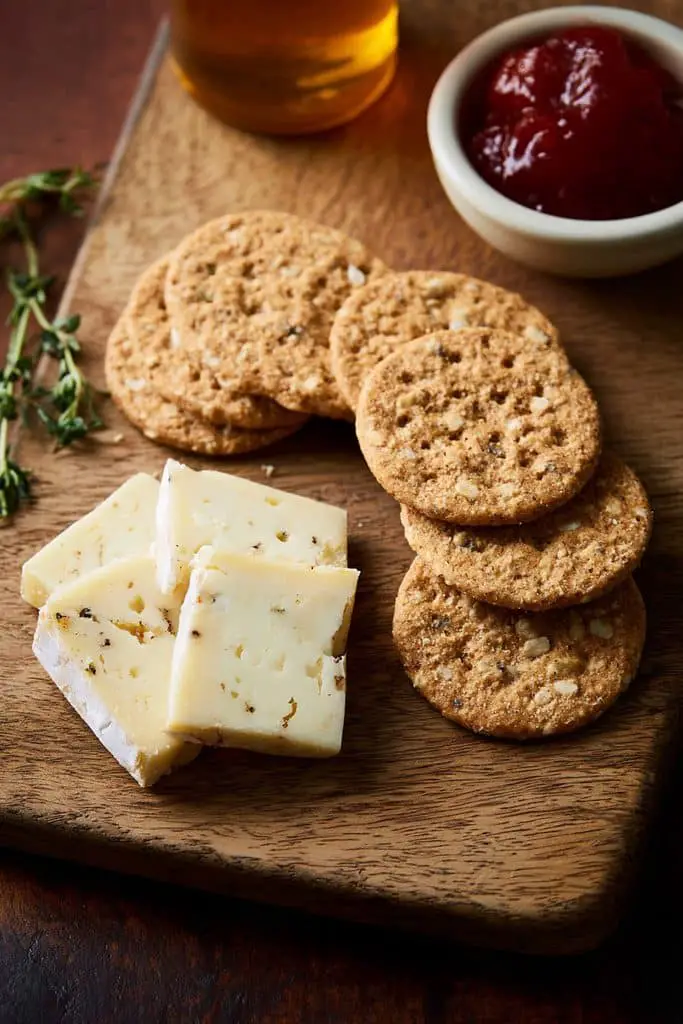
Prep time: 5 minutes · Cook time: 0 minutes · Difficulty: Easy · Servings: 1
Cheese and whole-grain crackers are a simple snack that feels a little special without requiring much effort.
Whole-grain crackers provide carbohydrates and some fiber, while cheese adds protein and calcium. Together, they make a convenient snack that can help keep you satisfied between meals. You can also add fresh fruit or vegetables for extra color, flavor, and nutrients.
This is one of the easiest healthy snacks on the go for work because you can prepare it in just a few minutes. It’s also a flexible option for lunchboxes, road trips, or an afternoon break when you don’t have time to cook.
Ingredients
- 6-8 whole-grain crackers
- 1-2 ounces (28-56 g) cheddar, mozzarella, or your favorite cheese
- ½ cup grapes or apple slices (optional)
- A few cucumber slices or cherry tomatoes (optional)
- A pinch of black pepper or dried herbs (optional)
Instructions
- Choose your crackers. Place the whole-grain crackers on a small plate or clean cutting board. Look for crackers with whole grains listed among the first ingredients.
- Prepare the cheese. Cut the cheese into thin slices or small cubes that fit comfortably on the crackers.
- Assemble the snack. Place a slice of cheese on each cracker. If you prefer, keep the cheese and crackers separate so they stay crisp.
- Add fresh sides. Wash the grapes or vegetables, or slice an apple into bite-sized pieces.
- Season if desired. Add a little black pepper or dried herbs for extra flavor.
- Pack and enjoy. Transfer everything to a food container with separate compartments if possible.
Are Cheese and Whole-Grain Crackers a Healthy Snack?
They can be a balanced option when you choose portions that suit your appetite. The crackers provide energy and potentially fiber, while cheese contributes protein and calcium. Adding fruit or vegetables makes the snack more varied.
If you’re looking for healthy snacks on the go for weight loss, pay attention to the amount of cheese and crackers you pack rather than avoiding either food completely. Whole-grain crackers paired with a moderate portion of cheese and some fresh produce can fit into a balanced eating pattern.
9. Hummus and Vegetable Sticks
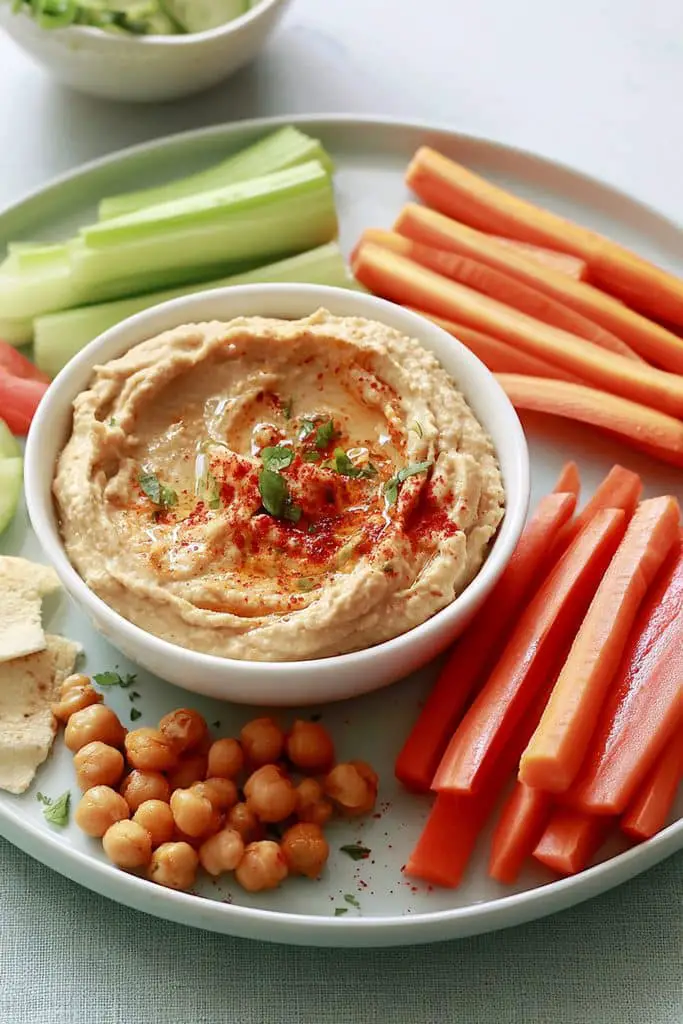
Prep time: 10 minutes · Cook time: 0 minutes · Difficulty: Easy · Servings: 2
Hummus and vegetable sticks are one of my favorite healthy snacks on the go when I want something fresh, crunchy, and savory.
You can buy ready-made hummus at the grocery store or make your own at home if you have a little extra time.
This snack is perfect for busy workdays, afternoon breaks, or a light bite before dinner. It’s also a useful option when you’re looking for healthy snacks on the go for kids, since the vegetables can be cut into fun shapes and served with a dip. Just make sure the pieces are suitable for the child’s age.
Ingredients
- ½ cup hummus, store-bought or homemade
- 1 medium carrot
- ½ cucumber
- 1 small red or yellow bell pepper
- 2 celery stalks (optional)
- A pinch of paprika or black pepper (optional)
Instructions
- Wash the vegetables. Rinse the carrot, cucumber, bell pepper, and celery under running water.
- Prepare the carrot. Peel it if desired, then cut it into sticks that are easy to hold and dip.
- Slice the other vegetables. Cut the cucumber and bell pepper into sticks. If using celery, trim the ends and cut it into manageable pieces.
- Portion the hummus. Spoon the hummus into a small container or individual dipping cup.
- Arrange the snack. Place the vegetable sticks beside the hummus. Sprinkle a little paprika or black pepper over the dip if you like.
- Pack for later. Put everything in a food container with a tight-fitting lid and refrigerate until you’re ready to leave.
Is Hummus and Vegetables Good for Weight Loss?
Hummus and vegetable sticks can fit nicely into a balanced eating plan. Vegetables provide fiber and volume, while hummus contributes plant-based protein and healthy fats. This combination can be satisfying without needing a complicated recipe.
If you’re choosing healthy snacks on the go for weight loss, start with a portion of hummus and a generous serving of vegetables. You can adjust the amount depending on your appetite and daily needs. If you need more staying power, add a small whole-grain pita or another protein-rich food.
10. Homemade Popcorn
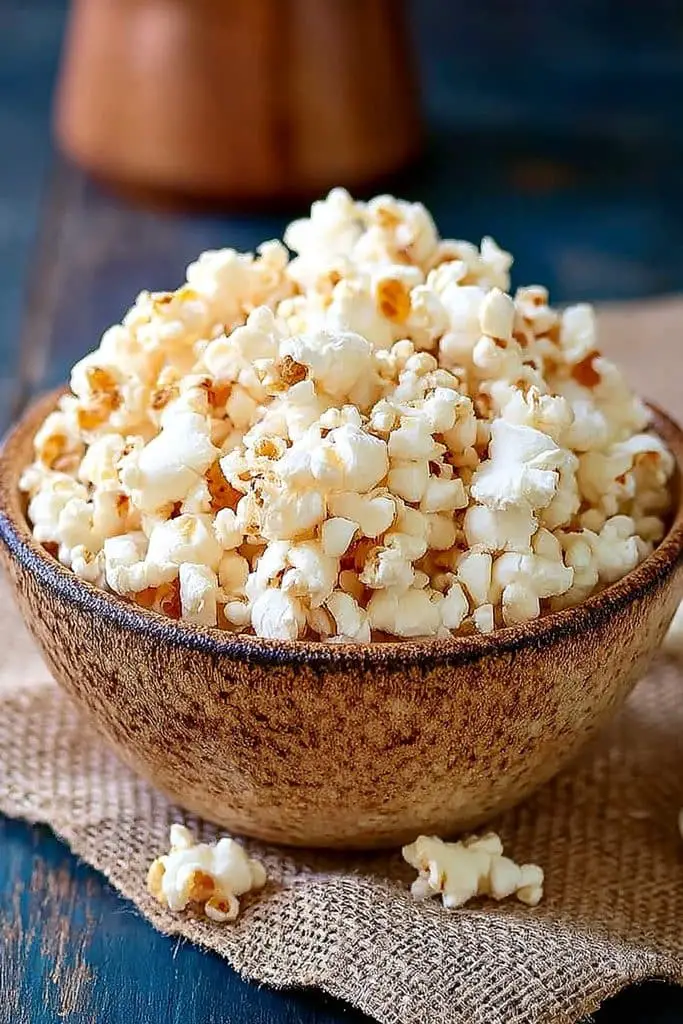
Prep time: 2 minutes · Cook time: 5 minutes · Difficulty: Easy · Servings: 2-3
I love how a handful of simple popcorn kernels can turn into a big bowl of fluffy popcorn in just a few minutes. You can enjoy it plain or add your favorite seasonings to give it more flavor.
Popcorn is a whole grain, so it provides fiber. Making it at home also gives you control over how much oil, salt, butter, or other toppings you use. Unlike some packaged snacks, you can keep the ingredients simple and adjust the flavor to suit your taste.
This is one of my favorite cheap healthy snacks on the go because popcorn kernels are usually affordable and a small amount makes several servings. It’s handy for work breaks, road trips, picnics, or a quick snack when you want something savory.
Ingredients
- ¼ cup popcorn kernels
- 1 tablespoon olive oil or another cooking oil
- ¼ teaspoon salt, or to taste
- ¼ teaspoon paprika or garlic powder (optional)
- 1 teaspoon melted butter (optional)
Instructions
- Heat the oil. Add the oil to a medium or large saucepan with a lid. Heat it over medium heat.
- Test the temperature. Add two or three popcorn kernels to the pan and cover it. When they pop, the oil is ready.
- Add the remaining kernels. Pour in the rest of the popcorn kernels, spread them into an even layer, and cover the pan.
- Shake the pan gently. As the kernels begin popping, carefully shake the covered pan from side to side every few seconds. Keep the pan over medium heat.
- Listen for the popping to slow. When there are about two or three seconds between pops, remove the pan from the heat.
- Let the steam escape. Carefully open the lid away from your face to avoid hot steam.
- Season and serve. Sprinkle with salt, paprika, garlic powder, or a little melted butter. Toss gently so the seasoning spreads evenly.
How to Pack Homemade Popcorn
Homemade popcorn is easy to carry because it doesn’t need refrigeration when prepared without perishable toppings. Once it has cooled completely, put it in a clean, airtight container or resealable snack bag to help maintain its crunch.
For work or school, divide the popcorn into individual portions before leaving home. This makes it easy to grab during a busy day and helps you avoid carrying a large container around.
If you’re packing popcorn for young children, remember that popcorn is a choking hazard for children under four years old. Choose an age-appropriate snack for younger children instead.
Is Homemade Popcorn Good for Weight Loss?
Homemade popcorn can be a useful snack when you’re looking for healthy snacks on the go for weight loss. Because popcorn is a whole grain and contains fiber, it can provide a satisfying, crunchy snack.
The toppings make a difference, though. Large amounts of butter, oil, cheese, or sugar can increase the energy content quickly. For a simple everyday option, use a modest amount of oil and season with herbs or spices. You can adjust the serving size to your appetite and nutritional needs.
11. Cottage Cheese With Pineapple
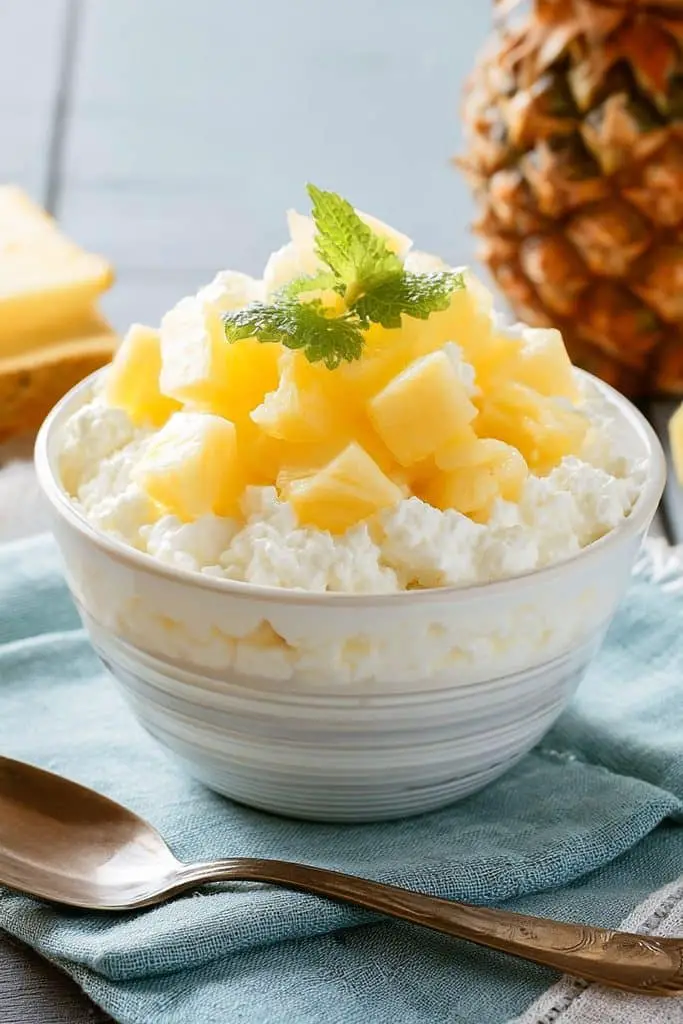
Prep time: 5 minutes · Cook time: 0 minutes · Difficulty: Easy · Servings: 1
One of the best things about this snack is its protein content. Cottage cheese is a convenient source of protein, which helps make this a satisfying option between meals. Pineapple adds natural sweetness, a juicy texture, and vitamin C.
This recipe takes only five minutes to prepare, and there is no cooking involved. It’s a great choice for busy mornings, afternoon breaks, or anyone looking for healthy snacks on the go for work. You can use fresh pineapple or well-drained canned pineapple to make preparation even easier.
Ingredients
- ¾ cup cottage cheese
- ½ cup fresh pineapple, cut into bite-sized chunks
- 1 teaspoon chia seeds (optional)
- A pinch of ground cinnamon (optional)
- 1 tablespoon chopped walnuts or almonds (optional)
Instructions
- Prepare the pineapple. If using fresh pineapple, remove the skin and core, then cut the fruit into small chunks. If using canned pineapple, drain it well.
- Add the cottage cheese. Spoon the cottage cheese into a small bowl or a sealable food container.
- Add the fruit. Arrange the pineapple chunks over the cottage cheese.
- Add optional toppings. Sprinkle with chia seeds, cinnamon, or chopped nuts if you want extra texture.
- Mix and enjoy. Stir everything together or leave the pineapple on top for a layered look.
How to Pack Cottage Cheese With Pineapple
This snack is easy to prepare ahead, making it useful for work, school, or travel. Spoon the cottage cheese into a small container, add the pineapple, and close the lid securely. If you prefer to keep the fruit from mixing into the cheese, pack it in a separate compartment.
Because cottage cheese is perishable, keep the snack refrigerated until you’re ready to leave. Use an insulated lunch bag with an ice pack if you won’t have access to a fridge, and avoid leaving it at room temperature for more than two hours, or one hour in temperatures above 90°F (32°C).
For the freshest texture, prepare it the same day you plan to eat it. Pineapple releases juice as it sits, which can make the cottage cheese a little watery.
Is Cottage Cheese With Pineapple Good for Weight Loss?
It can be a useful choice if you’re looking for healthy snacks on the go for weight loss. Cottage cheese provides protein, while pineapple adds fruit and natural sweetness. This combination can help you put together a snack that feels satisfying without much preparation.
The nutritional content varies by the type of cottage cheese and the portion you use. If you want a lighter option, choose a portion that suits your appetite and add plenty of fruit. If you need more energy, a few nuts or whole-grain crackers can make the snack more substantial.
12. Peanut Butter Stuffed Dates
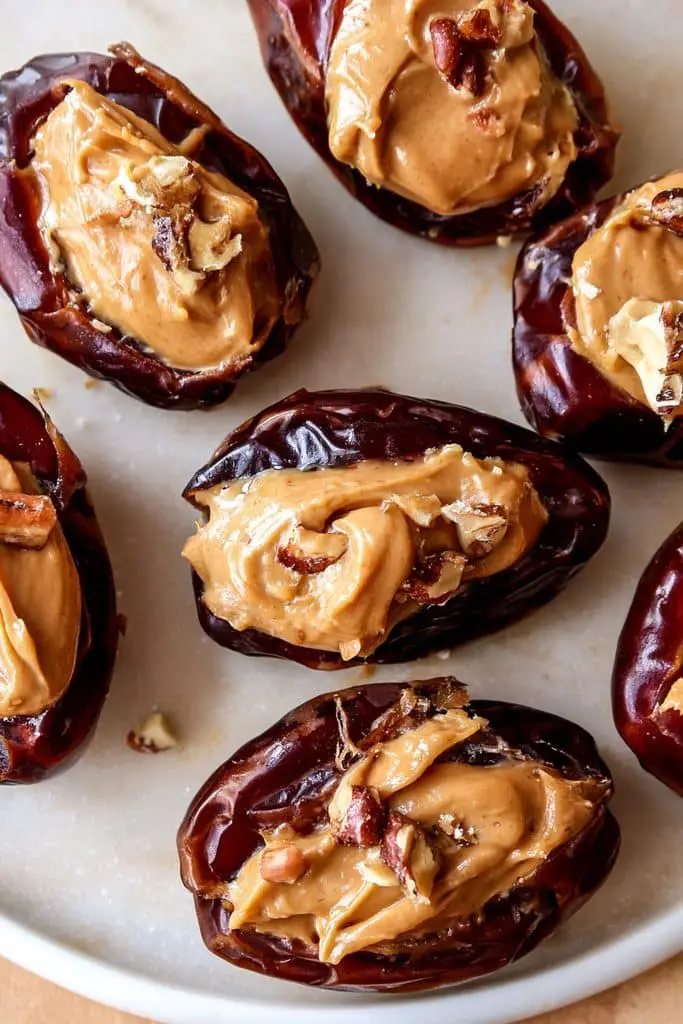
Prep time: 10 minutes · Cook time: 0 minutes · Difficulty: Easy · Servings: 2 (about 6 dates)
Peanut butter stuffed dates are a lovely choice when you’re craving something sweet but want to keep your snack simple. I love how the soft, chewy dates pair with creamy peanut butter.
This recipe needs just two main ingredients and takes about ten minutes to prepare. Dates provide carbohydrates and fiber, while peanut butter adds some protein and healthy fats. You can also finish them with chopped nuts, shredded coconut, or a little dark chocolate if you want to make them feel more like a treat.
These stuffed dates are perfect for busy afternoons, lunchboxes for older children, or a quick bite before heading out. They’re also convenient healthy snacks on the go for work because you can prepare a few ahead of time and pack them in a small container.
Ingredients
- 6 Medjool dates
- 3 tablespoons peanut butter
- 1 tablespoon chopped peanuts or almonds (optional)
- 1 teaspoon unsweetened shredded coconut (optional)
- 1 teaspoon mini dark chocolate chips (optional)
Instructions
- Prepare the dates. Place the dates on a clean cutting board. If they still have pits, carefully slice each date lengthwise and remove the pit.
- Open the dates. Gently press each date apart to create a small pocket, keeping the two sides connected.
- Add the peanut butter. Spoon about ½ tablespoon of peanut butter into each date. Adjust the amount depending on the size of the dates.
- Add your toppings. Sprinkle chopped nuts, shredded coconut, or a few mini chocolate chips over the peanut butter if desired.
- Serve or chill. Enjoy immediately, or arrange the stuffed dates in a container and refrigerate until you’re ready to eat.
How to Pack Peanut Butter Stuffed Dates
These little bites are easy to pack for a commute, a work break, or a day out. Arrange them in a small airtight container, leaving a little space between them so the filling doesn’t get smeared.
If you use fresh nut butter or add toppings such as chocolate, keep the container cool, especially in warm weather. For longer outings, an insulated lunch bag with an ice pack is a good choice.
For children, remove all pits and cut the dates into age-appropriate pieces. Dates can be sticky and chewy, so take extra care when serving them to young children. If you’re packing snacks for school, check the school’s allergy policy before using peanut butter.
13. Banana Oat Muffins
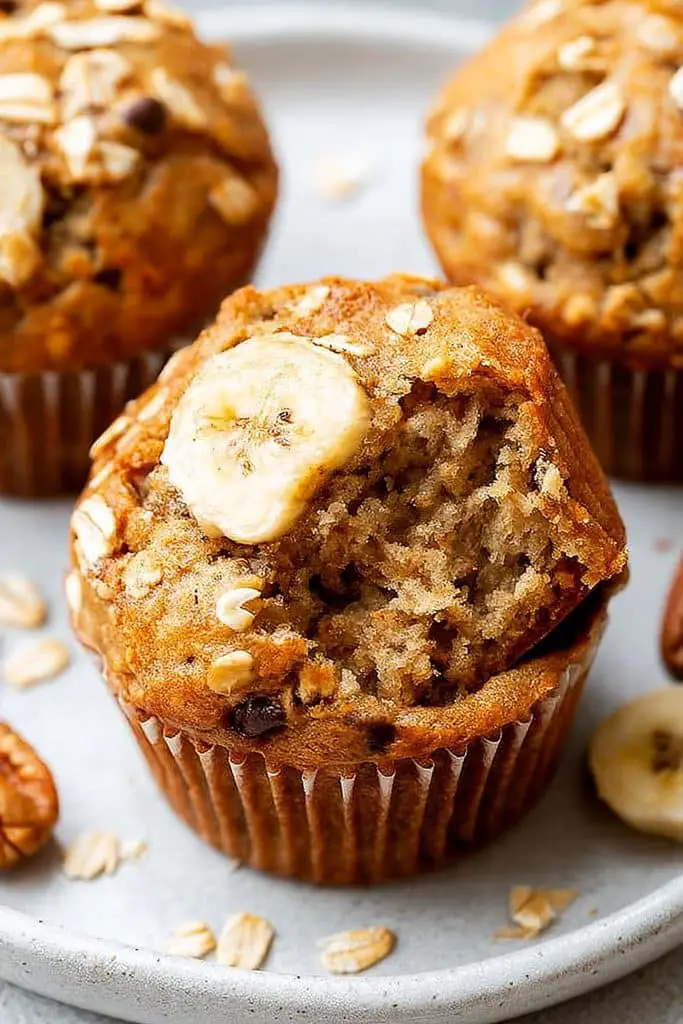
Prep time: 10 minutes · Cook time: 18-22 minutes · Difficulty: Easy · Servings: 8 muffins
Banana oat muffins are one of my favorite snacks to make when I have ripe bananas sitting on the kitchen counter. They’re soft, slightly sweet, and have a lovely banana flavor without needing a lot of extra sugar. The oats give them a hearty texture, making them a nice option for breakfast or a quick snack between meals.
I also love that these muffins are easy to prepare ahead of time. You mix the ingredients in one bowl, divide the batter into a muffin tin, and let the oven do the rest. They’re perfect for busy mornings, lunchboxes, or anyone searching for healthy snacks on the go for work.
This recipe uses simple ingredients such as bananas, oats, eggs, and milk. You can keep the muffins plain or add cinnamon, chopped nuts, or a few dark chocolate chips. They’re naturally sweet from the bananas, although the final sweetness will depend on how ripe your fruit is.
Ingredients
- 2 medium ripe bananas, mashed
- 1 cup rolled oats
- ¾ cup whole-wheat flour
- 1 large egg
- ⅓ cup milk of your choice
- 2 tablespoons honey or maple syrup (optional)
- 1 teaspoon baking powder
- ½ teaspoon ground cinnamon
- 1 teaspoon vanilla extract (optional)
- A small pinch of salt
- 2 tablespoons chopped walnuts or dark chocolate chips (optional)
Instructions
- Preheat the oven. Heat your oven to 350°F (175°C). Line a standard muffin tin with eight paper liners or lightly grease the cups.
- Mash the bananas. In a large bowl, mash the ripe bananas with a fork until mostly smooth.
- Add the wet ingredients. Whisk in the egg, milk, vanilla extract, and honey or maple syrup if using.
- Mix the dry ingredients. Add the oats, whole-wheat flour, baking powder, cinnamon, and salt. Stir until just combined. Avoid overmixing, as this can make the muffins dense.
- Add optional extras. Fold in the chopped walnuts or chocolate chips if desired.
- Fill the muffin cups. Divide the batter evenly among eight muffin cups, filling each about three-quarters full.
- Bake. Bake for 18-22 minutes, or until the tops are set and a toothpick inserted into the center comes out clean or with a few moist crumbs.
- Cool before serving. Let the muffins rest in the tin for about five minutes, then transfer them to a wire rack to cool completely.
How to Pack Banana Oat Muffins
These muffins are handy for busy mornings because you can bake a batch and have several snacks ready at once. I like to make them on the weekend, then pack one or two for work or an outing during the week.
Let the muffins cool completely before storing them in an airtight container. This helps prevent trapped steam from making the tops soggy. Because they contain banana, egg, and milk, refrigerate them if keeping them beyond a short period at room temperature. For best quality, use refrigerated muffins within about four days or freeze them for longer storage.
To take one with you, wrap it individually or place it in a small food container. If it’s frozen, thaw it in the refrigerator overnight or reheat it until warmed through.
Are Banana Oat Muffins Healthy?
They can be a nutritious homemade snack, especially when made with whole grains and ripe bananas. The oats and whole-wheat flour provide carbohydrates and fiber, while the egg contributes some protein.
Keep in mind that these muffins are not necessarily high in protein on their own. If you want a more protein-rich snack, pair one with Greek yogurt, milk, or a small handful of nuts.
For healthy snacks on the go for weight loss, you can skip the optional honey or maple syrup if the bananas are sweet enough. You can also make smaller muffins so it’s easier to choose a portion that suits your appetite.
14. Turkey and Cheese Roll-Ups
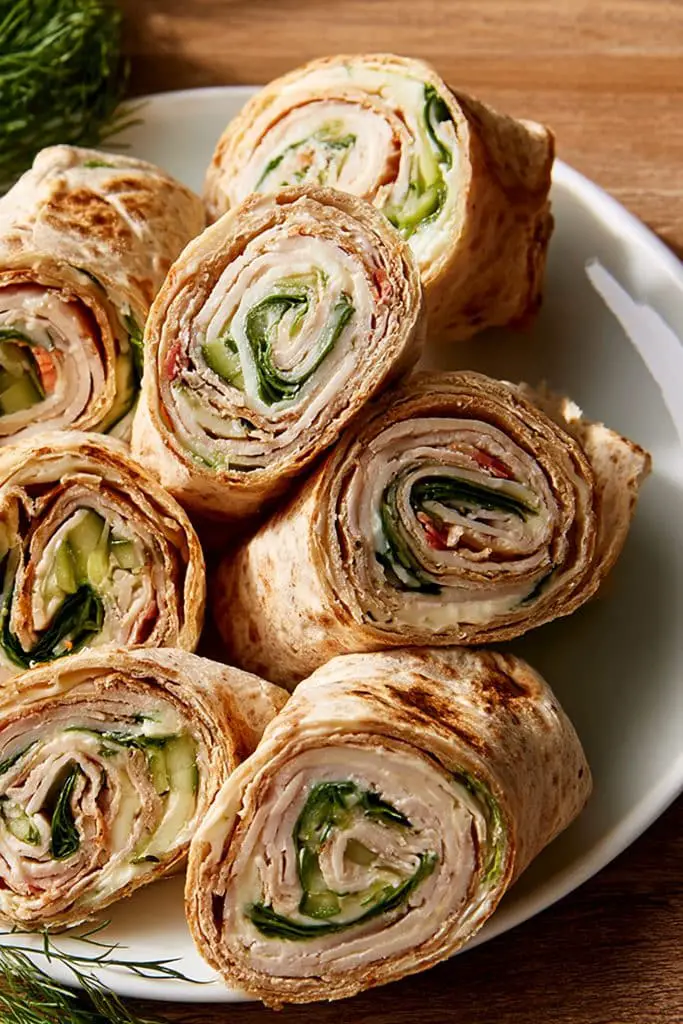
Prep time: 5 minutes · Cook time: 0 minutes · Difficulty: Easy · Servings: 1-2
You can keep the recipe simple or add cucumber, spinach, or bell pepper strips for extra crunch. If you enjoy savory snack ideas more than sweet ones, this is a handy option to keep in your rotation.
These roll-ups are especially useful for healthy snacks on the go for work because they’re easy to portion and pack. They’re also a convenient choice for lunchboxes, picnics, or a quick bite between errands, as long as you keep them chilled.
Ingredients
- 4 slices cooked turkey breast deli meat
- 2 slices cheddar, Swiss, or mozzarella cheese
- 2-4 thin cucumber strips (optional)
- A few baby spinach leaves (optional)
- 1 teaspoon mustard or plain Greek yogurt (optional)
- A pinch of black pepper (optional)
Instructions
- Prepare the ingredients. Lay the turkey slices flat on a clean cutting board. Slice the cheese into strips if needed, and wash the cucumber and spinach.
- Add the cheese. Place a strip of cheese near one edge of each turkey slice.
- Add vegetables. Lay a cucumber strip or a few spinach leaves over the cheese if you want extra crunch and freshness.
- Add a little flavor. Spread a thin layer of mustard or plain Greek yogurt over the turkey, if desired.
- Roll them up. Starting at the filled edge, roll each turkey slice firmly around the cheese and vegetables.
- Secure and serve. Place the roll-ups seam-side down. If needed, use a toothpick to keep them closed, but remove it before serving to young children.
- Pack for later. Arrange the roll-ups in a sealed food container and refrigerate until you’re ready to leave.
How to Pack Turkey and Cheese Roll-Ups
These roll-ups are easy to carry in a small lunch container. I like to place them in a single layer so they stay neat and don’t come apart. Add cucumber sticks, cherry tomatoes, or whole-grain crackers on the side if you want a more complete snack.
Because turkey and cheese are perishable, keep them refrigerated until you’re ready to go. If you’re taking them to work or on a trip, use an insulated lunch bag with an ice pack. Don’t leave them at room temperature for more than two hours, or more than one hour when temperatures are above 90°F (32°C).
If you’re preparing these for children, cut the roll-ups into age-appropriate pieces and remove toothpicks before serving.
Are Turkey and Cheese Roll-Ups Good for Weight Loss?
They can be a useful option if you’re looking for healthy snacks on the go for weight loss. Turkey and cheese both provide protein, which can help make a snack more satisfying. Adding vegetables brings extra crunch and variety without much preparation.
The best portion depends on your appetite and overall eating pattern. For a more balanced snack, try a couple of roll-ups with fresh vegetables or a piece of fruit. If you prefer a lighter option, use one slice of cheese across two turkey roll-ups and add plenty of vegetables.
15. Fresh Fruit Salad Cups
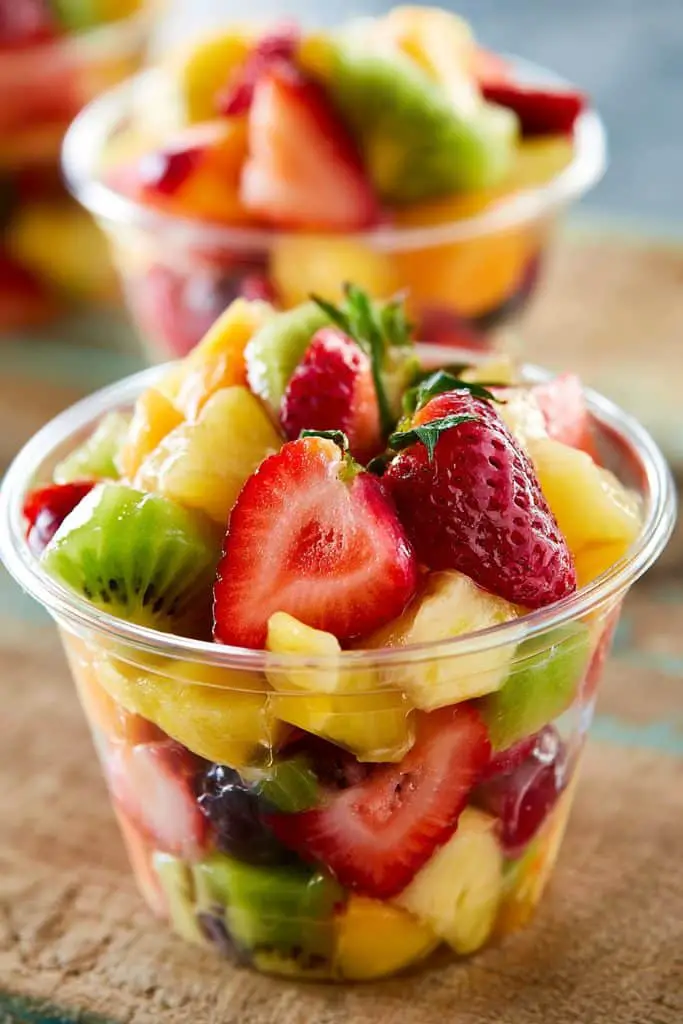
Prep time: 10 minutes · Cook time: 0 minutes · Difficulty: Easy · Servings: 2
This snack is easy to prepare, requires no cooking, and is a simple way to enjoy a variety of fruits. Fruit provides vitamins, minerals, fiber, and natural sweetness, making it a refreshing alternative to many packaged sweet snacks.
I also like this recipe because it’s flexible and budget-friendly. You don’t need to buy every type of fruit listed below. Choose two or three fruits that are in season to make cheap healthy snacks on the go without spending too much.
Ingredients
- 1 cup strawberries, hulled and chopped
- 1 cup pineapple, cut into small chunks
- 1 kiwi, peeled and diced
- ½ cup grapes, halved lengthwise
- ½ cup blueberries or diced mango (optional)
- 1-2 teaspoons fresh lemon or lime juice (optional)
- A few fresh mint leaves (optional)
Instructions
- Wash the fruit. Rinse the strawberries, grapes, kiwi, blueberries, and other fresh fruit under running water before cutting.
- Prepare the ingredients. Remove the strawberry stems, peel and dice the kiwi, and cut the pineapple into bite-sized pieces. Halve the grapes lengthwise.
- Combine the fruit. Place the prepared fruit in a large bowl and gently toss it together.
- Add a little citrus. Squeeze lemon or lime juice over the fruit if you like. It adds a fresh, tangy flavor and can help slow browning in fruits such as apples.
- Divide into cups. Spoon the fruit salad into small reusable containers or cups with lids.
- Chill before serving. Refrigerate the cups until you’re ready to enjoy them.
How to Pack Fresh Fruit Salad Cups
Fruit salad cups are perfect for busy mornings because you can prepare them in advance and store them in the refrigerator. I like using small containers with tight-fitting lids so the fruit is easy to carry without spilling.
For the freshest taste, prepare the cups the same day you plan to eat them. Some fruits, especially bananas and apples, can brown as they sit, while watermelon and pineapple release juice over time. A little lemon or lime juice can help with browning, but it won’t keep cut fruit fresh indefinitely.
Since cut fruit is perishable, keep it chilled in an insulated lunch bag with an ice pack when taking it to work, school, or on a trip. Don’t leave it at room temperature for more than two hours, or one hour when temperatures are above 90°F (32°C).
If you’re making fruit cups for children, cut the fruit into age-appropriate pieces. Halve grapes lengthwise and avoid serving whole grapes to young children because they can be a choking hazard.
Are Fresh Fruit Salad Cups Good for Weight Loss?
Fresh fruit salad can be a useful part of a balanced eating plan, including one focused on weight management. Fruit provides fiber, water, and important nutrients, while its natural sweetness can help satisfy a craving for something sweet.
If you’re looking for healthy snacks on the go for weight loss, start with a cup of mixed fruit and adjust the amount to your hunger. For a snack that keeps you satisfied longer, add Greek yogurt or cottage cheese for protein, or pair the fruit with a small serving of nuts.
16. Edamame With Sea Salt
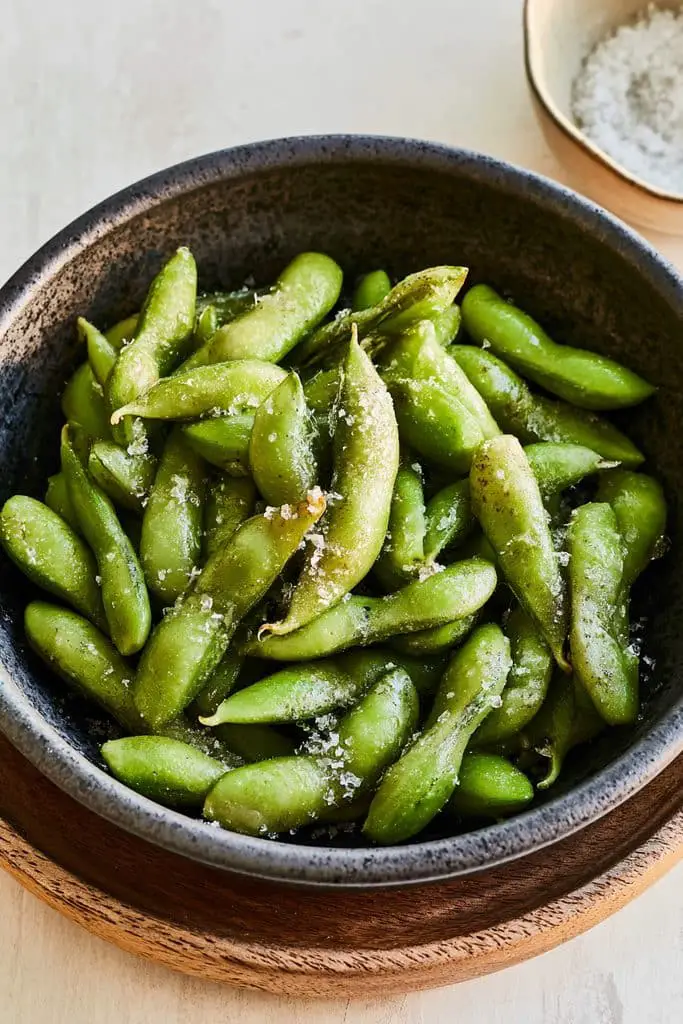
Prep time: 2 minutes · Cook time: 5-7 minutes · Difficulty: Easy · Servings: 2
You can enjoy it warm or chilled, so it works well for a quick afternoon bite or a snack packed for work.
Frozen edamame is widely available in many grocery stores, which makes this recipe especially convenient. With just a few minutes of cooking, you can prepare a batch of healthy snacks on the go using very little effort.
Ingredients
- 2 cups frozen edamame in pods
- Water, enough to boil the edamame
- ¼ teaspoon sea salt, or to taste
- A squeeze of fresh lemon juice (optional)
- A pinch of chili flakes or garlic powder (optional)
Instructions
- Bring the water to a boil. Fill a medium saucepan with water and bring it to a boil over medium-high heat.
- Add the edamame. Place the frozen edamame pods into the boiling water.
- Cook until tender. Boil for about 5-7 minutes, or follow the package instructions, until the beans are tender and heated through.
- Drain well. Pour the edamame into a colander and let the excess water drain away.
- Season the pods. Transfer the edamame to a bowl and sprinkle with sea salt. Add lemon juice, chili flakes, or garlic powder if desired.
- Serve and enjoy. Eat the beans by gently squeezing them out of the pods. Discard the pods rather than eating them.
How to Pack Edamame With Sea Salt
Edamame is easy to prepare ahead of time, and I like that it tastes good both warm and cold. Once cooked, cool it promptly and place it in a sealed food container in the refrigerator.
If you’re taking it to work or on a trip, pack it in an insulated lunch bag with an ice pack. Cooked edamame is perishable, so keep it chilled until you’re ready to eat. Avoid leaving it at room temperature for more than two hours, or one hour when temperatures are above 90°F (32°C).
For a less messy snack, use shelled edamame and pack it with a small fork. If you use pods, bring a separate small container for the discarded shells.
Is Edamame a High-Protein Snack?
Yes, edamame is a useful source of plant-based protein. A cup of shelled, cooked edamame typically provides around 18 grams of protein, although the exact amount depends on the variety and serving size.
It also provides fiber and other nutrients, making it a great addition to a range of healthy snack ideas. If you’re looking for protein without relying on meat or dairy, edamame is a convenient option.
17. Avocado Whole-Wheat Toast Bites
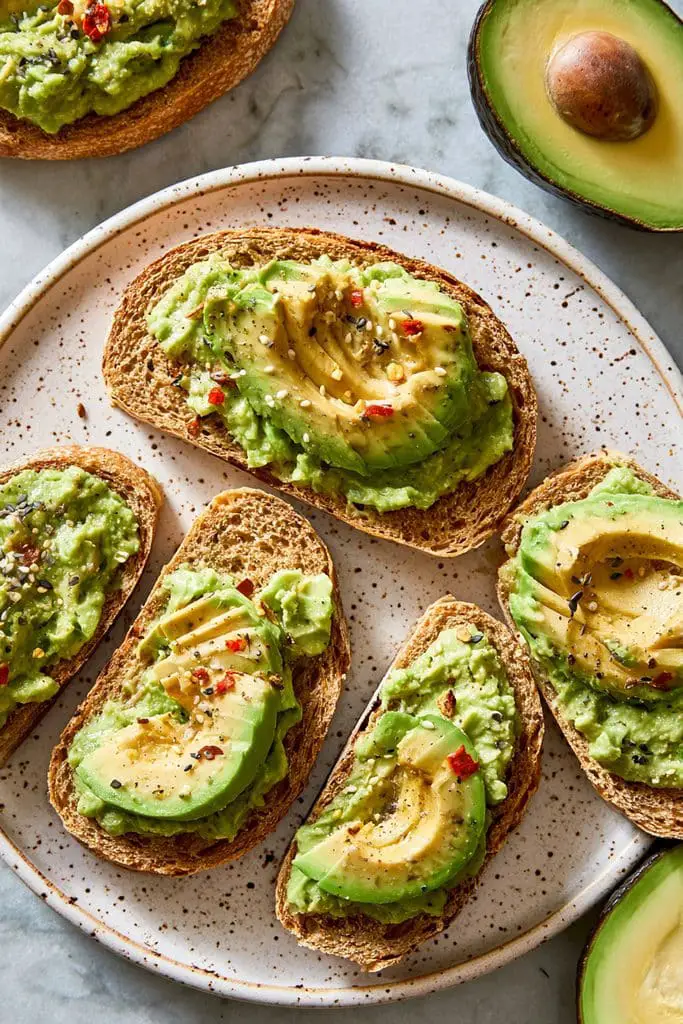
Prep time: 5 minutes · Cook time: 3-5 minutes · Difficulty: Easy · Servings: 2
These little bites are great for busy mornings, afternoon cravings, or a quick snack before heading out. Whole-wheat bread provides fiber, while avocado adds healthy unsaturated fats that help make the snack satisfying. You can keep the toppings simple or add an egg for extra protein.
If you’re looking for healthy snacks on the go that feel a little more special than plain fruit or crackers, these toast bites are a lovely option. They take only a few minutes to prepare and use everyday ingredients.
Ingredients
- 2 slices whole-wheat bread
- 1 ripe avocado
- 1 teaspoon fresh lemon or lime juice
- A pinch of salt, to taste
- ¼ teaspoon black pepper
- ½ teaspoon sesame seeds or chili flakes (optional)
- 1 teaspoon olive oil (optional)
Instructions
- Toast the bread. Toast the whole-wheat slices until golden and crisp. You can use a toaster or toast them in a dry skillet over medium heat.
- Prepare the avocado. Cut the avocado in half, remove the pit, and scoop the flesh into a small bowl.
- Mash and season. Mash the avocado with the lemon juice, salt, and black pepper. Leave it slightly chunky if you enjoy a little texture.
- Spread the mixture. Divide the mashed avocado between the toasted bread slices and spread it evenly.
- Add your toppings. Sprinkle with sesame seeds or chili flakes. Add a small drizzle of olive oil if you like.
- Cut into bites. Slice each piece of toast into four small squares or triangles.
- Serve fresh. Enjoy immediately while the bread is still crisp and the avocado is fresh.
How to Pack Avocado Toast Bites
These bites taste best when freshly made, but you can prepare the parts ahead to save time. Toast the bread and store it separately, then mash the avocado just before eating. A little lemon juice can help slow browning, although it won’t prevent it completely.
If you need to pack them for work or school, keep the avocado mixture in a small airtight container and the toast in a separate bag or container. Assemble them when you’re ready to eat. If you pack the prepared avocado mixture, keep it chilled in an insulated lunch bag with an ice pack.
For a more filling snack, pack a boiled egg or a small serving of plain yogurt alongside the toast bites.
Are Avocado Toast Bites a Healthy Snack?
Yes, they can be a nutritious choice as part of a balanced diet. Whole-wheat bread offers carbohydrates and fiber, while avocado provides mostly unsaturated fats and a range of vitamins and minerals.
For more protein, add egg, cottage cheese, or another protein-rich topping. The amount of energy in each serving will depend on the bread, avocado size, and toppings you use, so adjust the portion to suit your appetite.
18. Chocolate Chia Pudding
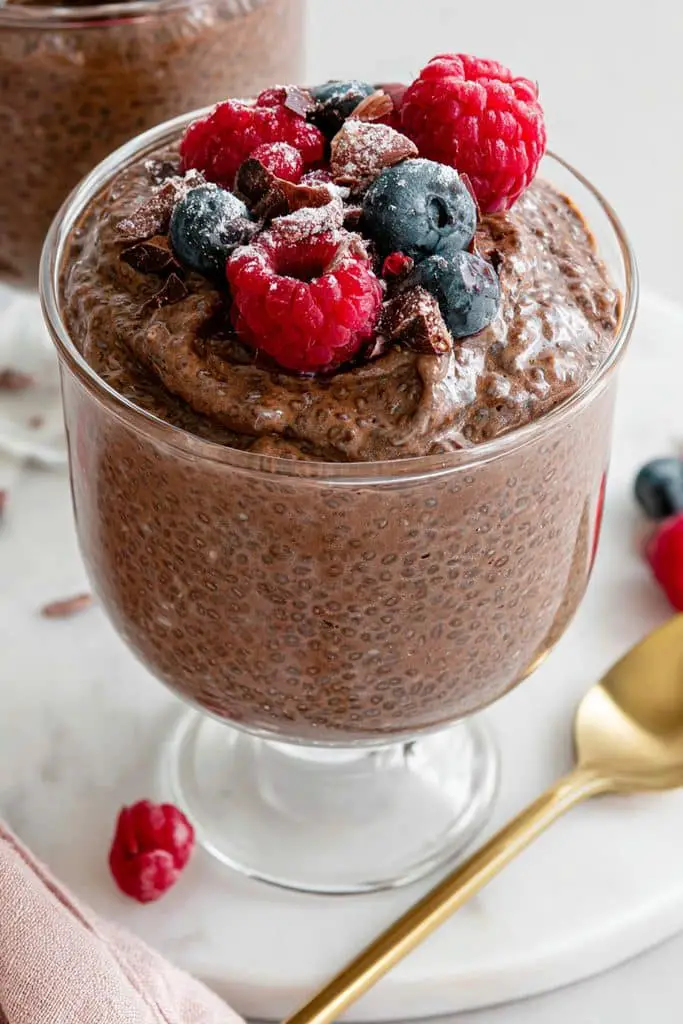
Prep time: 5 minutes · Cook time: None · Chilling time: 2 hours or overnight · Difficulty: Easy · Servings: 2
This recipe needs only a handful of ingredients, and there’s no cooking involved. Chia seeds provide fiber and some plant-based protein, while milk adds extra protein depending on the type you use. A little cocoa powder gives the pudding its chocolate taste without needing a lot of added sugar.
It’s one of those healthy snacks on the go that works for busy mornings, afternoon cravings, or a quick snack at work. Make it in small jars, chill it overnight, and you’ll have an easy treat ready when hunger strikes.
Ingredients
- ¼ cup chia seeds
- 1 cup milk of your choice (dairy or unsweetened plant-based milk)
- 1 tablespoon unsweetened cocoa powder
- 1-2 teaspoons maple syrup or honey, to taste
- ½ teaspoon vanilla extract
- A small pinch of salt (optional)
- Fresh berries or sliced banana, for topping (optional)
Instructions
- Mix the cocoa and milk. Add the milk, cocoa powder, maple syrup or honey, vanilla extract, and optional salt to a bowl or jar. Whisk until the cocoa is evenly mixed into the milk.
- Add the chia seeds. Stir in the chia seeds, making sure they are spread throughout the mixture rather than sitting in clumps.
- Wait and stir again. Let the mixture sit for about 5-10 minutes, then stir well once more. This helps prevent the seeds from sticking together.
- Chill the pudding. Cover the bowl or divide the mixture between two small jars. Refrigerate for at least 2 hours, or overnight, until thick and spoonable.
- Check the texture. If the pudding is too thick, stir in a splash of milk. If it’s too thin, add a little more chia seed and refrigerate until thickened.
- Add toppings. Finish with fresh berries, sliced banana, or a few dark chocolate shavings just before serving.
How to Pack Chocolate Chia Pudding
This pudding is especially convenient for meal prep because you can make several portions at once. Divide it into small, leakproof jars with tight-fitting lids, then store them in the refrigerator.
For work, school, or travel, carry a jar in an insulated lunch bag with an ice pack. Because it contains milk or a milk alternative, keep it cold until you’re ready to eat. Add fruit shortly before serving for the best texture.
For food safety, refrigerate the pudding promptly and use it within about 3-4 days. If you prepare multiple jars, label them with the date so you know which ones to eat first.
Is Chocolate Chia Pudding a Healthy Snack?
It can be a nourishing option, depending on the ingredients and portion size. Chia seeds provide fiber, plant-based omega-3 fatty acids, and some protein. Cocoa adds a rich chocolate flavor, while milk can contribute protein and calcium.
For a balanced snack, top the pudding with berries or banana. If you want more protein, choose dairy milk or unsweetened soy milk rather than a lower-protein plant milk. You can also reduce the added sweetener to suit your taste.
19. Homemade Granola Bars
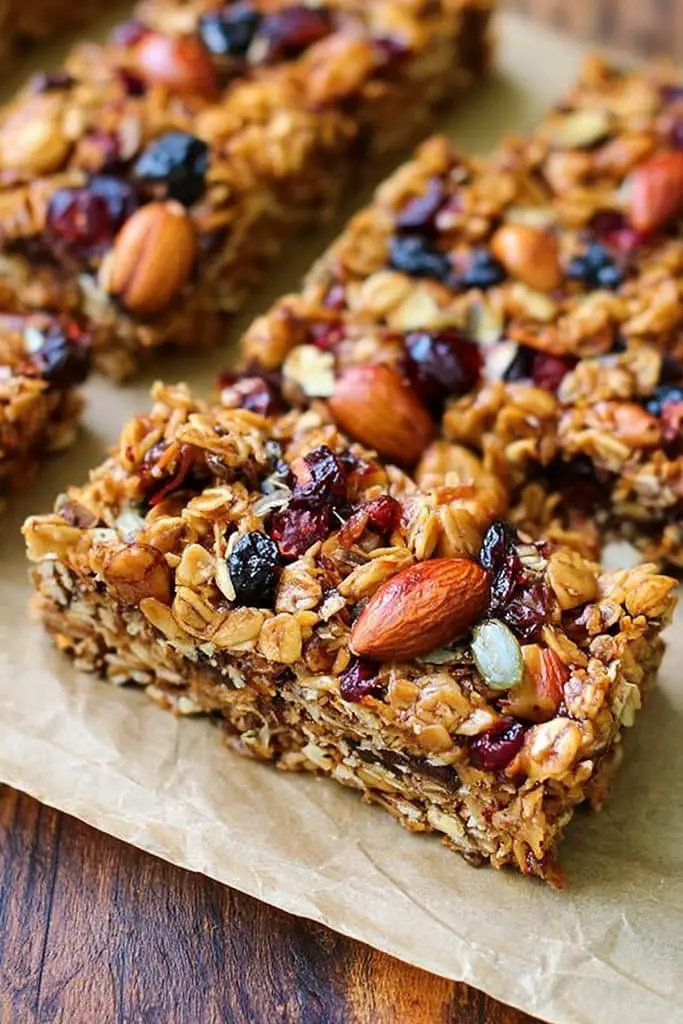
Prep time: 10 minutes · Cook time: 20-25 minutes · Difficulty: Easy · Servings: 8 bars
These bars are great for breakfast on the run, a mid-afternoon snack, or something to tuck into your bag before heading out. Oats provide fiber, while nuts and seeds add healthy fats and a little protein. A spoonful of peanut butter helps bring everything together and gives the bars a lovely nutty flavor.
If you’re looking for healthy snacks on the go for work, school, or travel, these homemade granola bars are a practical choice. Make a batch, let it cool, and you’ll have several grab-and-go snacks ready for the week.
Ingredients
- 2 cups rolled oats
- ½ cup chopped almonds or your favorite nuts
- ¼ cup pumpkin seeds or sunflower seeds
- ⅓ cup dried cranberries or raisins
- ½ teaspoon ground cinnamon
- A small pinch of salt
- ⅓ cup peanut butter or almond butter
- ⅓ cup honey or maple syrup
- 1 teaspoon vanilla extract
Instructions
- Preheat the oven. Heat your oven to 350°F (175°C). Line an 8-inch square baking pan with parchment paper, leaving a little overhang to help lift out the bars later.
- Mix the dry ingredients. In a large bowl, combine the rolled oats, chopped nuts, seeds, dried fruit, cinnamon, and salt.
- Warm the wet ingredients. Add the peanut butter and honey to a small saucepan. Warm over low heat, stirring until smooth. Remove from the heat and mix in the vanilla extract. You can also warm them briefly in the microwave, stirring carefully.
- Combine everything. Pour the peanut butter mixture over the oats. Stir thoroughly until the dry ingredients are evenly coated.
- Press into the pan. Transfer the mixture to the prepared pan. Press it down firmly and evenly with the back of a spoon or the bottom of a measuring cup. Pressing well helps the bars hold together.
- Bake until lightly golden. Bake for 20-25 minutes, until the edges are lightly golden. The center may still feel a little soft, which is fine.
- Cool completely. Let the granola slab cool in the pan, then chill it for 30-60 minutes to help it firm up.
- Slice into bars. Lift it out using the parchment paper and cut into eight bars with a sharp knife.
How to Pack and Store Homemade Granola Bars
Once the bars have cooled completely, wrap them individually in parchment paper or place them in small reusable containers. They’re easy to slip into a lunch bag, backpack, or work bag for a quick snack between meals.
For the best quality, store the bars in an airtight container at room temperature for about 3-5 days, or refrigerate them for up to a week. If your kitchen is very warm or humid, refrigeration is a better option. You can also freeze them in a sealed container for up to about three months; thaw a bar in the refrigerator or at room temperature before eating.
For kids, cut the bars into smaller pieces and adjust the nuts and seeds to suit their age and chewing ability. If you’re packing them for school, check the school’s allergy policy first.
Are Homemade Granola Bars Healthy?
Homemade granola bars can be a useful snack because you control the ingredients and sweetness. Oats provide carbohydrates and fiber, while nuts and seeds contribute unsaturated fats, minerals, and some protein.
Keep in mind that honey and maple syrup are still added sugars, even when used in a homemade recipe. For a less-sweet version, reduce the sweetener slightly, add chopped dates for flavor, or use unsweetened dried fruit. The bars may be more crumbly if you reduce the binding ingredients too much.
For a more balanced snack, enjoy a granola bar with plain yogurt or a piece of fruit, depending on how hungry you are.
20. Cucumber and Cream Cheese Sandwich Bites
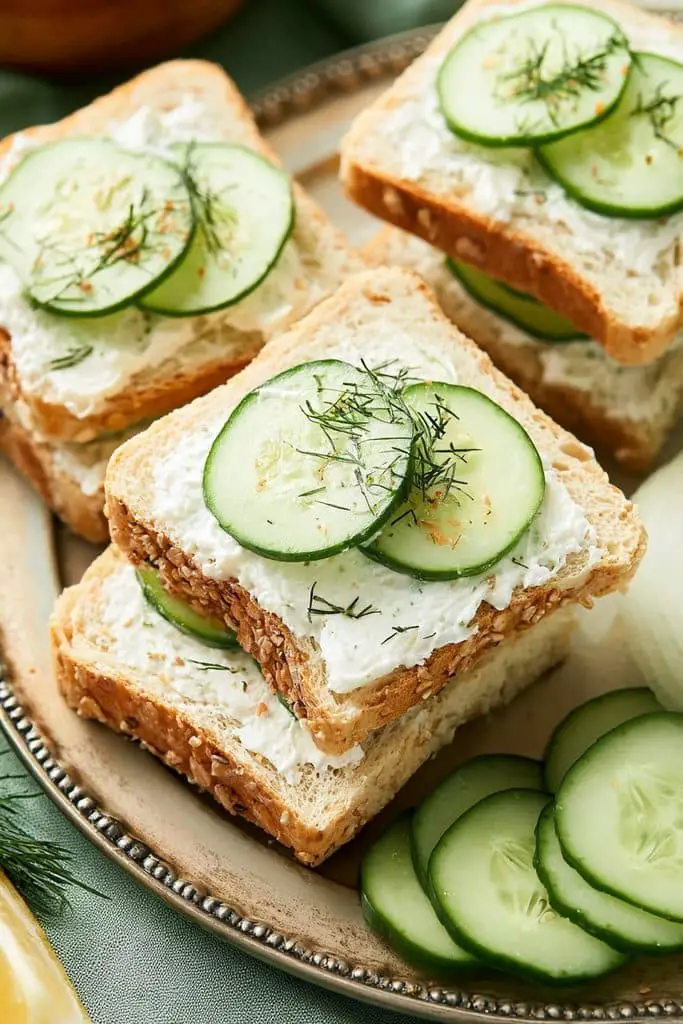
Prep time: 10 minutes · Cook time: None · Difficulty: Easy · Servings: 2
You can put everything together in just a few minutes, and the ingredients are easy to find. These little sandwiches are ideal for lunch boxes, afternoon snacks, picnics, or days when you need something quick between errands.
If you’re searching for healthy snacks on the go, these sandwich bites are an easy option to add to your list. Use whole-wheat bread for extra fiber, and add fresh herbs or a little black pepper to give them more flavor.
Ingredients
- 4 slices whole-wheat bread
- 3 tablespoons cream cheese, softened
- 1 small cucumber, thinly sliced
- 1 teaspoon fresh lemon juice (optional)
- 1 tablespoon chopped fresh dill or parsley
- A pinch of black pepper
- A small pinch of salt, to taste
- A few lettuce leaves (optional)
Instructions
- Prepare the cucumber. Wash the cucumber and slice it thinly. Pat the slices dry with a clean paper towel to remove excess moisture.
- Season the cream cheese. Place the softened cream cheese in a small bowl. Mix in the lemon juice, chopped dill or parsley, and black pepper until smooth.
- Spread the mixture. Lay out the bread slices and spread a thin, even layer of the cream cheese mixture over each slice.
- Add the cucumber. Arrange the cucumber slices over two pieces of bread. Add lettuce if you’d like a little extra crunch.
- Close the sandwiches. Place the remaining bread slices on top, cream cheese side facing down.
- Trim and slice. Remove the crusts if you prefer, then cut each sandwich into small squares, rectangles, or triangles.
- Serve fresh. Arrange the bites on a plate and enjoy while the cucumber is crisp and the bread is soft.
How to Pack Cucumber and Cream Cheese Sandwich Bites
These bites are best when freshly assembled, but you can prepare the ingredients ahead to save time. Mix the cream cheese with the herbs and slice the cucumber in advance, storing each separately in the refrigerator. Assemble the sandwiches shortly before eating to help keep the bread from becoming soggy.
If you’re packing them for work, school, or a picnic, place the bites in a sealed food container and keep them cold in an insulated lunch bag with an ice pack. Cream cheese is perishable, so don’t leave the sandwiches at room temperature for more than two hours, or one hour in temperatures above 90°F (32°C).
For a complete snack box, add some grapes, carrot sticks, or a boiled egg. You’ll have a simple mix of textures and flavors without much extra preparation.
Are Cucumber and Cream Cheese Sandwich Bites Healthy?
They can be part of a balanced snack. Cucumber adds freshness and crunch, while whole-wheat bread provides carbohydrates and fiber. Cream cheese contributes some fat and a little protein, although the amount of protein is usually modest.
For a more filling option, choose whole-grain bread and add a protein-rich ingredient such as egg or turkey. You can also mix a little plain Greek yogurt into the cream cheese for a tangy flavor and a small protein boost.
21. Spiced Roasted Almonds
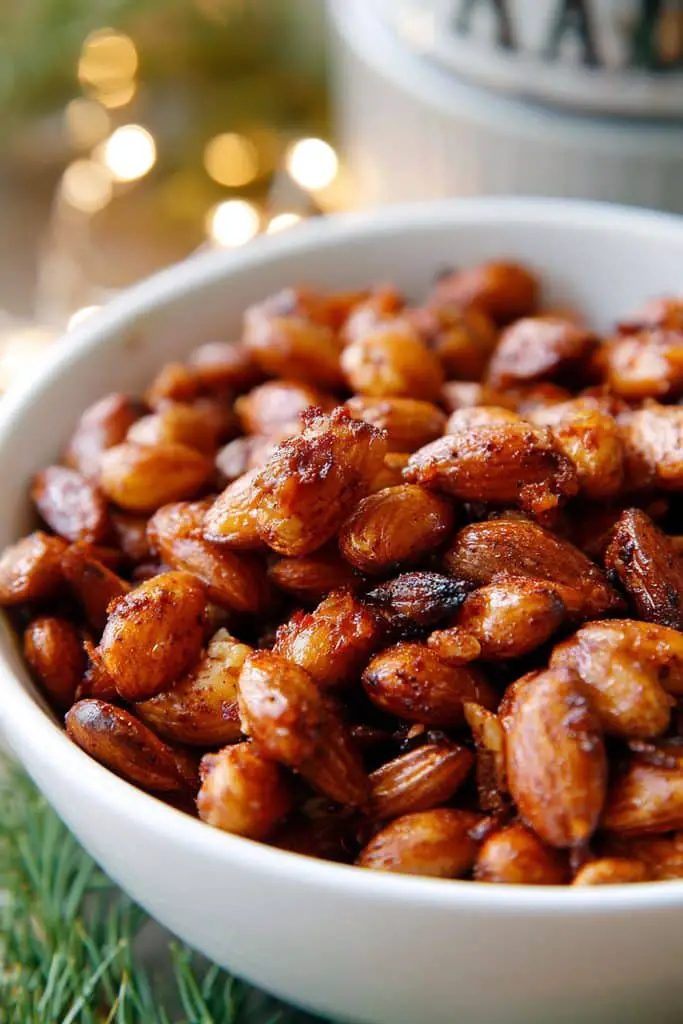
Prep time: 5 minutes · Cook time: 10-15 minutes · Difficulty: Easy · Servings: 4
If you enjoy a crunchy, savory snack, these spiced roasted almonds are definitely worth making. These almonds are also wonderfully portable. Pack a small portion for work, school, road trips, or busy days out, and you’ll have one of the easiest healthy snacks on the go ready whenever hunger strikes.
Ingredients
- 2 cups raw almonds
- 1 teaspoon olive oil
- ½ teaspoon paprika
- ¼ teaspoon ground cumin
- ¼ teaspoon garlic powder
- ¼ teaspoon black pepper
- ¼ teaspoon salt, or to taste
- A pinch of cayenne pepper (optional)
Instructions
- Preheat the oven. Heat your oven to 350°F (175°C). Line a baking sheet with parchment paper.
- Prepare the almonds. Place the raw almonds in a mixing bowl. If they’re damp, pat them dry first so they roast evenly.
- Add the seasoning. Drizzle the olive oil over the almonds, then add the paprika, cumin, garlic powder, black pepper, salt, and optional cayenne pepper.
- Mix well. Toss everything together until the almonds are lightly and evenly coated with the oil and spices.
- Spread on the baking sheet. Arrange the almonds in a single layer so they roast evenly.
- Roast until fragrant. Bake for 10-15 minutes, stirring once halfway through. Watch them closely toward the end, as nuts can burn quickly.
- Cool completely. Remove the tray from the oven and let the almonds cool. They’ll become crunchier as they cool.
- Pack or serve. Enjoy a small handful right away, or transfer the cooled almonds to an airtight container for later.
How to Pack and Store Spiced Roasted Almonds
These almonds are excellent for meal prep because they stay crunchy when stored properly. Let them cool completely before putting them in an airtight container; packing them while warm can trap moisture and soften their texture.
Divide them into small snack-size portions so you can grab one container before leaving home. They’re a handy addition to a work bag, lunch box, or travel snack kit. If you’re packing them for children, check for nut allergies and follow any school allergy rules.
Store the cooled almonds in an airtight container in a cool, dry place for about 1-2 weeks for the best flavor and texture. If your kitchen is hot or humid, keep them in the refrigerator to help maintain freshness. Discard them if they develop an unusual smell or taste.
Are Spiced Roasted Almonds a Healthy Snack?
Yes, almonds can be a nutritious addition to a balanced diet. They provide plant-based protein, fiber, vitamin E, and unsaturated fats. Roasting them with a small amount of oil and spices adds flavor, while making them at home lets you control the salt.
Almonds are also energy-dense, so portion size matters. A serving of around 1 ounce (28 grams), or roughly 23 almonds, is a common snack portion, although your needs may differ.
For a more balanced snack, pair a small handful with fresh fruit or plain yogurt. This adds variety and can make your snack more satisfying.
22. Mini Egg Muffins With Vegetables
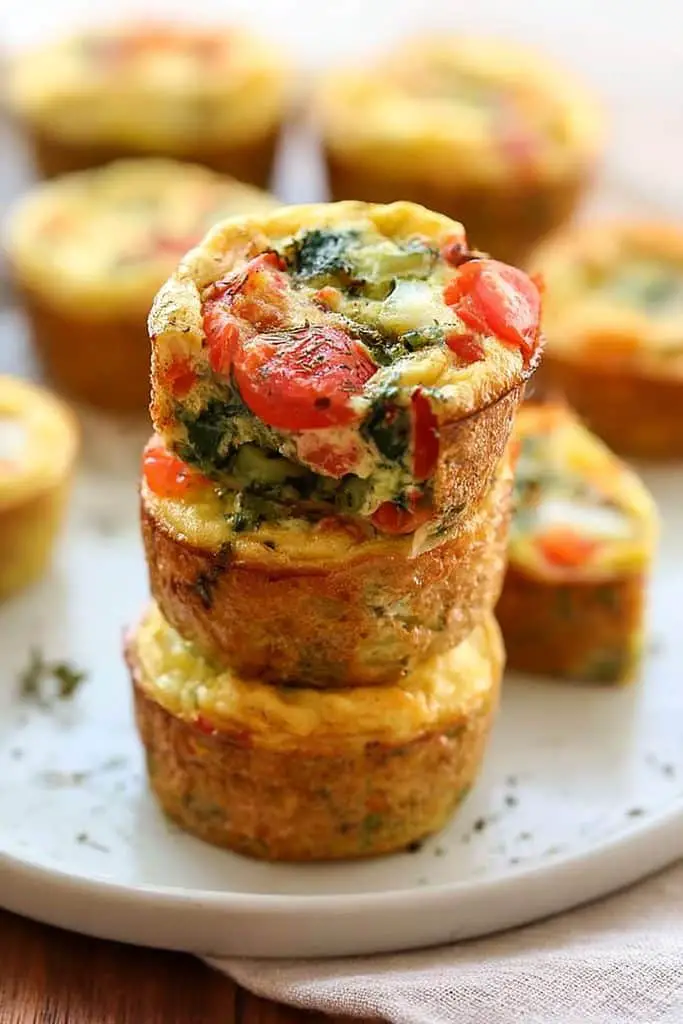
Prep time: 10 minutes · Cook time: 15-20 minutes · Difficulty: Easy · Servings: 3 (6 mini muffins)
Mini egg muffins with vegetables are one of those recipes I love making when I know the week ahead will be busy. Best of all, you can prepare a batch in advance and enjoy them for breakfast or as a quick snack.
Eggs provide protein, while vegetables like spinach and bell peppers add flavor, color, and useful nutrients. You can also add a little cheese if you like a richer taste. The recipe is flexible, so it’s easy to use whatever vegetables you already have in the fridge.
If you’re looking for healthy snacks on the go for work or school, these mini egg muffins are a convenient choice. They’re naturally portioned, easy to pack, and delicious warm or cold.
Ingredients
- 4 large eggs
- ¼ cup finely chopped red bell pepper
- ¼ cup chopped spinach
- 2 tablespoons finely chopped onion
- 2 tablespoons grated cheese (optional)
- 1 tablespoon milk (optional)
- ¼ teaspoon salt, or to taste
- ¼ teaspoon black pepper
- ¼ teaspoon garlic powder (optional)
- A little olive oil or cooking spray for greasing the muffin tin
Instructions
- Preheat the oven. Heat your oven to 375°F (190°C). Lightly grease six cups of a standard muffin tin with olive oil or cooking spray.
- Prepare the vegetables. Wash and finely chop the bell pepper, spinach, and onion. If the vegetables are particularly wet, pat them dry to help prevent watery muffins.
- Beat the eggs. Crack the eggs into a bowl and whisk until the yolks and whites are fully combined. Add the milk if using, along with the salt, pepper, and optional garlic powder.
- Add the vegetables. Stir the chopped vegetables and grated cheese into the egg mixture.
- Fill the muffin cups. Divide the mixture evenly among the six prepared cups, filling each about two-thirds to three-quarters full.
- Bake until set. Bake for 15-20 minutes, or until the egg muffins are puffed and the centers are fully set. For food safety, the center should reach 160°F (71°C).
- Cool briefly. Let the muffins rest in the tin for a few minutes, then carefully loosen the edges and remove them.
- Serve or store. Enjoy them warm, or let them cool before placing them in a covered container for later.
How to Pack and Store Mini Egg Muffins
These egg muffins are especially handy for meal prep. Once baked, let them cool briefly and refrigerate them in a shallow, airtight container within two hours of cooking.
They’ll generally keep in the refrigerator for 3-4 days. When you’re ready to eat one, reheat it until steaming hot, or enjoy it cold if it has been stored safely. You can also freeze the muffins for up to about two months for best quality; thaw them in the refrigerator before reheating.
For work or school, pack the muffins in a sealed container inside an insulated lunch bag with an ice pack. Eggs are perishable, so don’t leave them at room temperature for more than two hours, or more than one hour when temperatures are above 90°F (32°C).
Pair two mini muffins with fruit or whole-grain crackers if you want a more substantial snack.
Are Mini Egg Muffins a Healthy Snack?
Yes, mini egg muffins can be a nutritious option because eggs provide high-quality protein and vegetables add fiber and a range of vitamins and minerals. You can also control the amount of cheese and salt, depending on your preferences.
They’re particularly useful when you want a savory snack rather than something sweet. For a more balanced mini meal, enjoy them with whole-grain toast or a piece of fruit.
23. Frozen Yogurt Berry Bites
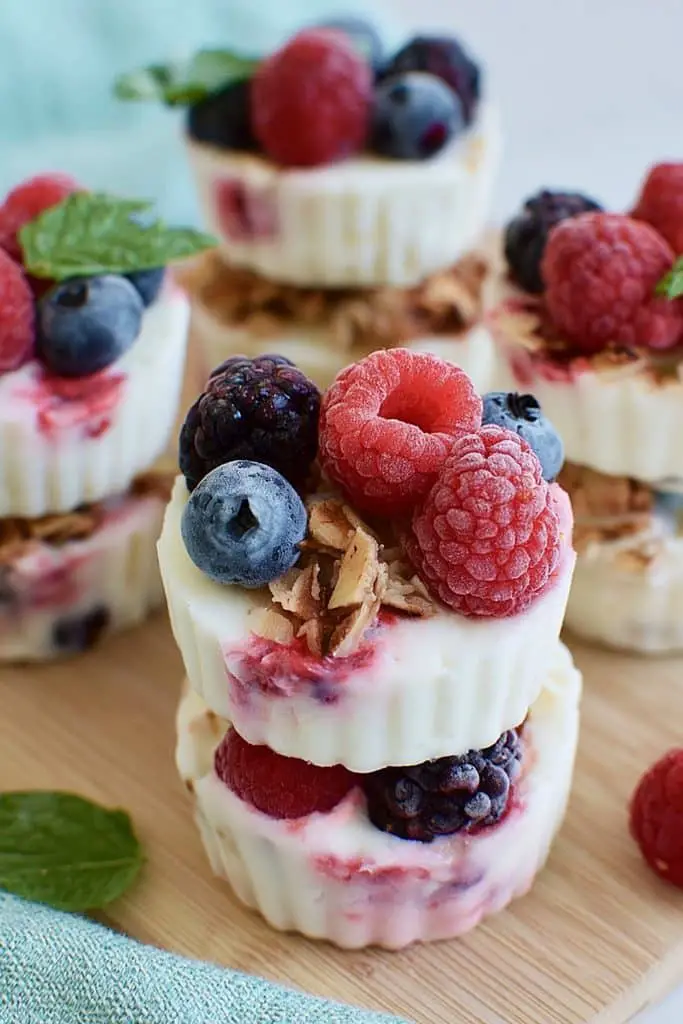
Prep time: 10 minutes · Freezing time: 2-3 hours · Cook time: None · Difficulty: Easy · Servings: 4
On warm days, I love having something cold and refreshing ready in the freezer, and these frozen yogurt berry bites are perfect for that. The best part is that you only need a few ingredients and a little patience while they freeze.
These bites are a fun addition to your list of healthy snacks on the go, particularly when you’re craving something cold instead of chips or cookies. Just remember that they need to stay frozen until you’re ready to enjoy them.
Ingredients
- 1 cup plain Greek yogurt
- ½ cup fresh blueberries
- ½ cup chopped strawberries or raspberries
- 1-2 teaspoons honey or maple syrup (optional)
- ½ teaspoon vanilla extract (optional)
- 1 tablespoon finely chopped nuts or granola (optional)
Instructions
- Prepare the tray. Line a baking sheet or flat freezer-safe tray with parchment paper. Make sure it fits comfortably in your freezer.
- Mix the yogurt. Add the Greek yogurt to a bowl. Stir in the honey and vanilla extract if using.
- Prepare the berries. Wash the berries and dry them thoroughly. Cut larger strawberries into small pieces so they’re easy to mix and bite into.
- Combine the ingredients. Gently fold the berries into the yogurt. If you prefer, keep some berries aside to place on top of each bite.
- Make small portions. Spoon small mounds of the mixture onto the lined tray, leaving a little space between each one. You can also spoon the mixture into a silicone mini-muffin tray.
- Add toppings. Sprinkle with chopped nuts or granola if desired, pressing them gently into the yogurt.
- Freeze until firm. Place the tray in the freezer for 2-3 hours, or until the bites are completely solid.
- Store for later. Transfer the frozen bites to a freezer-safe container or bag. Enjoy them straight from the freezer, allowing them to soften briefly if they’re too firm.
How to Pack Frozen Yogurt Berry Bites
These bites are easy to prepare ahead, but they’re best suited to outings where you can keep them frozen or very cold. Store them in a sealed freezer container and take out only the amount you plan to eat.
For a picnic, school lunch, or commute, use an insulated cooler bag with plenty of ice packs. They will soften and eventually melt if left warm, so they’re not the best choice for a long day in a regular handbag or backpack. Keep them frozen until packing and return any uneaten bites to the freezer only if they’ve remained safely frozen.
For an everyday work snack, you can also pack plain Greek yogurt and fresh berries in a chilled container instead. It’s easier to transport and offers a similar combination of fruit and protein.
Are Frozen Yogurt Berry Bites Healthy?
They can be a nutritious snack, particularly when made with plain Greek yogurt and whole fruit. Yogurt provides protein and calcium, while berries contribute fiber and other beneficial nutrients. Using unsweetened yogurt also lets you control how much added sugar goes into the recipe.
For a more filling snack, sprinkle on a little granola or add chopped nuts. Keep in mind that toppings and sweeteners change the overall nutrition, so use amounts that suit your appetite and preferences.
24. Roasted Sweet Potato Wedges
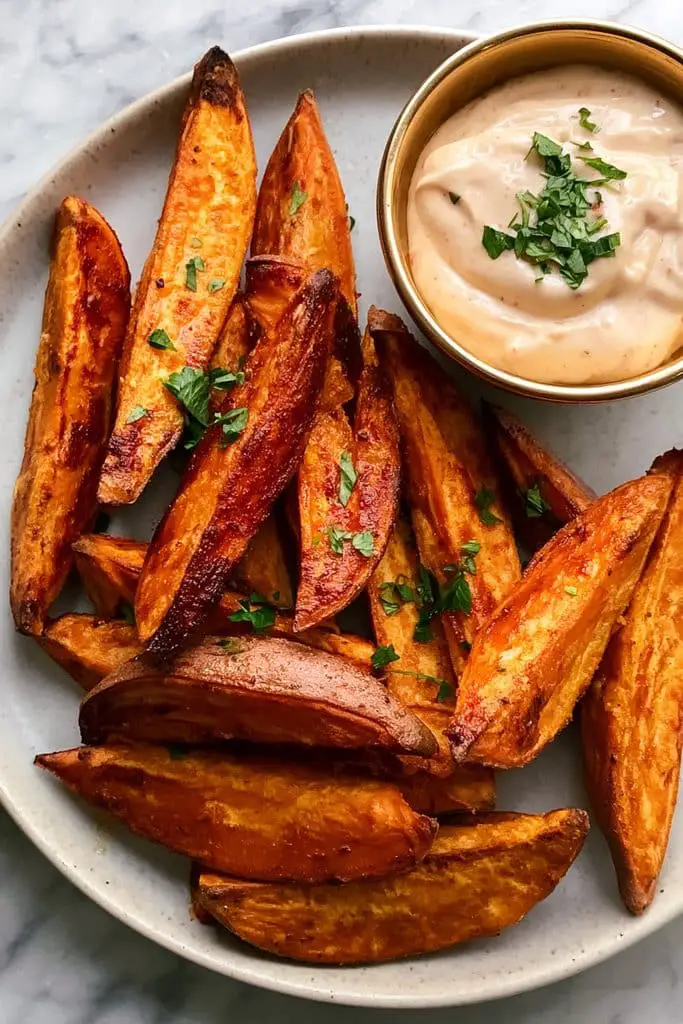
Prep time: 10 minutes · Cook time: 25-35 minutes · Difficulty: Easy · Servings: 2-3
When I’m craving something warm, crispy, and a little savory, roasted sweet potato wedges are one of my favorite snacks to make. They have naturally sweet, tender centers and beautifully golden edges, especially when tossed with a little olive oil and the right spices.
If you’re looking for healthy snacks on the go that can be prepared ahead, these roasted wedges are a great option. They taste delicious fresh from the oven, but they’re also easy to pack for lunch or enjoy as part of a snack box.
Ingredients
- 2 medium sweet potatoes
- 1 tablespoon olive oil
- ½ teaspoon paprika
- ¼ teaspoon garlic powder
- ¼ teaspoon black pepper
- ¼ teaspoon salt, or to taste
- ½ teaspoon dried oregano (optional)
- Chopped fresh parsley, for garnish (optional)
Instructions
- Preheat the oven. Heat your oven to 425°F (220°C). Line a baking sheet with parchment paper for easier cleanup.
- Wash the sweet potatoes. Scrub them thoroughly under running water and pat dry. You can leave the skin on for extra texture and fiber, or peel them if you prefer.
- Cut into wedges. Slice each sweet potato in half lengthwise, then cut each half into evenly sized wedges. Keeping the pieces similar in thickness helps them cook evenly.
- Season the wedges. Place them in a large bowl and toss with olive oil, paprika, garlic powder, black pepper, salt, and optional oregano.
- Arrange on the tray. Spread the wedges in a single layer, leaving a little space between them. Crowding the tray can cause them to steam instead of roast.
- Roast until tender. Bake for 25-35 minutes, turning the wedges halfway through. They’re ready when the edges are browned and the centers are tender when pierced with a fork.
- Finish and serve. Sprinkle with fresh parsley if desired. Let them cool slightly before eating, or allow them to cool completely if you’re packing them for later.
How to Pack and Store Roasted Sweet Potato Wedges
These wedges are easy to make ahead, especially if you roast a few extra for the next day. Let them cool, then place them in a covered container in the refrigerator within two hours of cooking.
They’ll generally keep in the fridge for 3-4 days. Reheat them in an oven or air fryer to bring back some of their crisp edges; the microwave works too, although the texture will be softer.
For work, school, or a day out, pack them in a sealed container inside an insulated lunch bag with an ice pack. Cooked sweet potatoes are perishable, so don’t leave them at room temperature for more than two hours, or one hour when temperatures are above 90°F (32°C).
You can pack a small container of yogurt dip separately to keep the wedges from getting soggy.
Are Roasted Sweet Potato Wedges a Healthy Snack?
Yes, roasted sweet potato wedges can be a nutritious choice. Sweet potatoes contain fiber and beta-carotene, while olive oil adds unsaturated fat. Baking them at home also lets you control the amount of oil and salt.
For a more balanced snack, pair the wedges with a protein-rich dip, boiled egg, or a small serving of hummus. This adds variety and can make the snack more satisfying.
25. Tuna and Whole-Grain Crackers
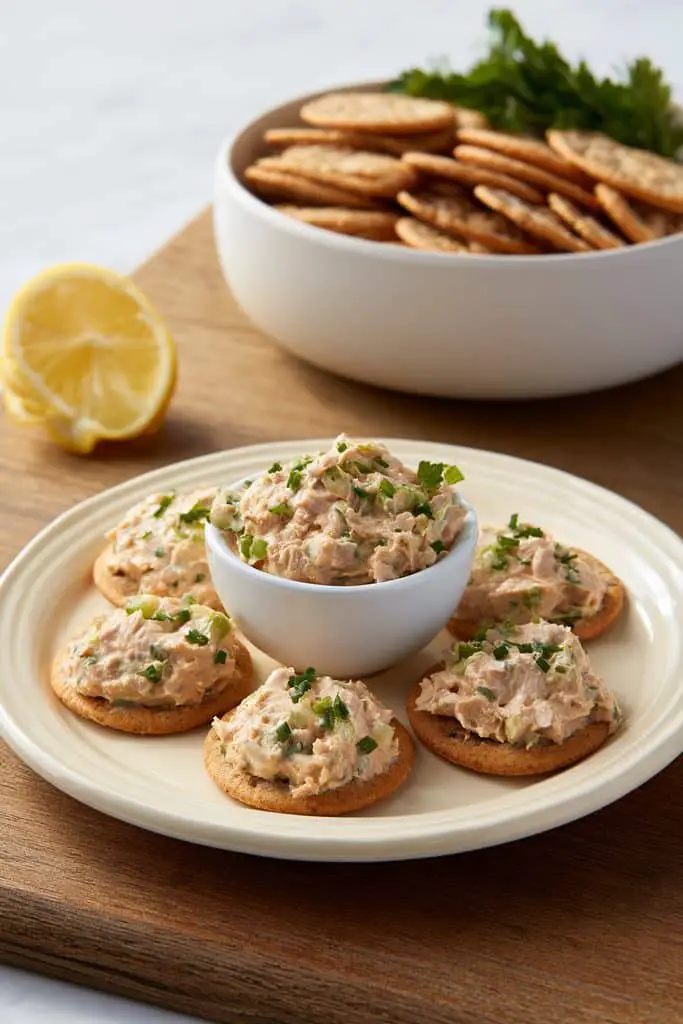
Prep time: 10 minutes · Cook time: None · Difficulty: Easy · Servings: 2
Tuna provides protein, while whole-grain crackers add crunch and some fiber. You can mix the tuna with plain Greek yogurt for a lighter, tangy filling or use a little mayonnaise for a richer flavor. Chopped cucumber, celery, or fresh herbs add even more texture.
If you’re looking for healthy snacks on the go for work, this recipe is convenient because the tuna mixture can be prepared ahead. Just pack it separately from the crackers and assemble them when you’re ready to eat so they stay crisp.
Ingredients
- 1 can tuna in water, about 5 ounces (142 g), drained
- 2 tablespoons plain Greek yogurt or mayonnaise
- 1 teaspoon fresh lemon juice
- 1 tablespoon finely chopped cucumber or celery
- 1 tablespoon chopped fresh parsley (optional)
- ¼ teaspoon black pepper
- A small pinch of salt, if needed
- 12-16 whole-grain crackers
- A few cucumber slices or lemon wedges, for serving (optional)
Instructions
- Drain the tuna. Open the can and drain away the liquid. Use a fork to flake the tuna into a small bowl.
- Mix the filling. Add the Greek yogurt or mayonnaise, lemon juice, chopped cucumber or celery, parsley, and black pepper.
- Combine well. Stir everything together until the tuna is evenly coated. Taste before adding salt, as canned tuna can already be salty.
- Prepare the crackers. Arrange the whole-grain crackers on a plate or serving board.
- Add the tuna mixture. Spoon a little tuna onto each cracker just before serving.
- Finish with toppings. Add a small cucumber slice, a sprinkle of parsley, or a little extra black pepper if desired.
- Enjoy fresh. Serve immediately for the best crunchy texture.
How to Pack Tuna and Whole-Grain Crackers
This snack is easy to prepare ahead, but the trick is to keep the tuna and crackers separate until you’re ready to eat. Put the tuna mixture in a small, leakproof container and pack the crackers in a dry bag or separate container. Assemble them just before snacking to prevent sogginess.
Because tuna is perishable, keep it chilled in an insulated lunch bag with an ice pack. Refrigerate the prepared mixture promptly and use it within 3-4 days when stored at 40°F (4°C) or below. Don’t leave it at room temperature for more than two hours, or one hour when temperatures are above 90°F (32°C).
For a more complete snack box, add carrot sticks, cherry tomatoes, or a piece of fruit. You’ll have a convenient mix of protein, crunch, and freshness.
Are Tuna and Whole-Grain Crackers a Healthy Snack?
They can be a balanced snack, offering protein from tuna and carbohydrates from the crackers. Whole-grain crackers may provide more fiber than crackers made with refined flour, while adding vegetables gives the snack extra texture and nutrients.
Check the labels when choosing crackers and canned tuna, particularly if you’re keeping an eye on sodium. You can also choose tuna canned in water with no added salt when available.
One thing to keep in mind is that tuna can contain mercury. Choose a variety such as canned light tuna more often than albacore, and vary your protein choices rather than relying on tuna every day. People who are pregnant or feeding young children should follow current local guidance on fish choices and serving amounts.