
High protein bowls are one of my favorite ways to put together a meal that is filling, tasty, and easy to make. You can combine your favorite protein with rice, fresh vegetables, a flavorful sauce, and a few simple toppings to create a meal that works for lunch or dinner.
The best part is that there are so many ways to make them. You can prepare a chicken burrito bowl, try a Mediterranean bowl with chickpeas, or make one of the low carb high protein bowls with cauliflower rice instead of regular rice. There is something for almost every taste and eating preference.
These protein bowl recipes are also great for busy days. Many ingredients can be prepared ahead of time, making them useful for meal prep when you want a homemade lunch without cooking from scratch every day. You can change the vegetables, sauces, and seasonings to keep things interesting throughout the week.
In this list, I’m sharing 15 high protein bowls that are simple to prepare and full of flavor. You’ll find ideas for chicken, ground beef, seafood, tofu, and more, along with options for healthy meal prep and balanced lunches.
Whether you’re looking for high protein bowls for weight loss, easy high protein bowls for meal prep, or a new way to enjoy your favorite ingredients, these recipes are a great place to start.
1. High Protein Chicken Burrito Bowl
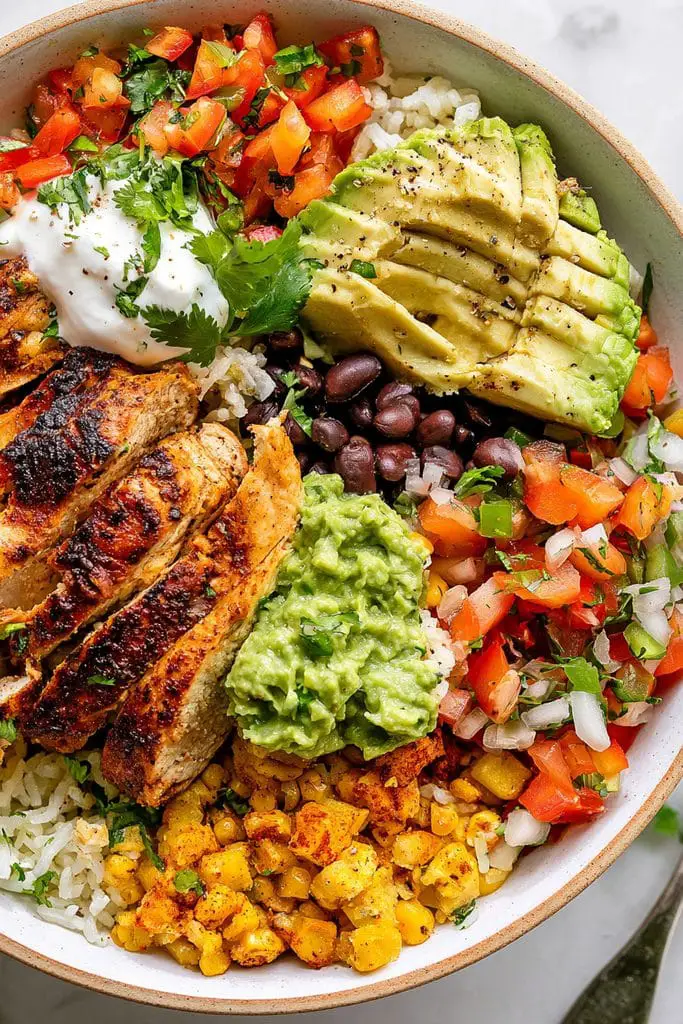
A chicken burrito bowl is a great choice when you want all the flavors of a burrito without wrapping everything in a tortilla. It combines seasoned chicken, rice, black beans, corn, and fresh toppings in one satisfying bowl.
I like this kind of bowl because it is easy to adjust to whatever I have in the kitchen. You can add extra vegetables, swap white rice for brown rice, or use cauliflower rice if you want a lower-carb option. A little salsa and a squeeze of lime bring everything together.
Prep time: 15 minutes · Cook time: 20 minutes · Total time: 35 minutes · Servings: 2 · Difficulty: Easy
Ingredients
- 2 small boneless, skinless chicken breasts (about 300-350 g total)
- 1 cup uncooked rice (about 185 g)
- 1 cup canned black beans, drained and rinsed
- 1 cup corn kernels, fresh, frozen, or canned
- 1 small avocado, sliced
- 1 small tomato, diced
- 2 tablespoons salsa
- 1 tablespoon olive oil
- 1 teaspoon paprika
- 1 teaspoon ground cumin
- 1/2 teaspoon garlic powder
- Salt and black pepper, to taste
- 1 lime, cut into wedges
- Fresh cilantro, optional
Instructions
1. Cook the rice. Rinse the rice under cold water. Cook according to the package instructions, then fluff it with a fork and set it aside.
2. Season the chicken. In a small bowl, mix the paprika, cumin, garlic powder, salt, and black pepper. Rub the seasoning over both chicken breasts.
3. Cook the chicken. Heat the olive oil in a skillet over medium heat. Add the chicken and cook for about 5-7 minutes per side, depending on thickness, until golden and cooked through. The center should reach 165°F (74°C). Let the chicken rest for a few minutes before slicing.
4. Prepare the toppings. Warm the black beans and corn in a small pan or microwave. Dice the tomato and slice the avocado.
5. Build the bowls. Divide the cooked rice between two bowls. Add the sliced chicken, black beans, corn, tomato, and avocado.
6. Finish and serve. Spoon the salsa over the top, squeeze on some fresh lime juice, and add cilantro if you like. Serve warm.
2. Greek Chicken Bowl with Tzatziki Sauce
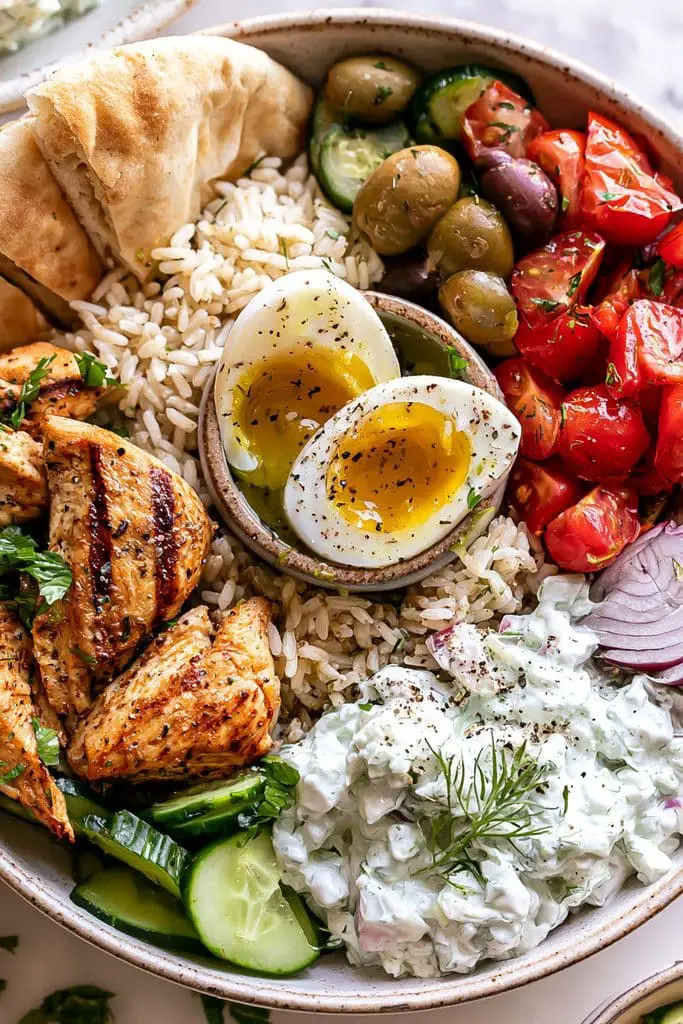
If you enjoy fresh vegetables, lemony chicken, and creamy sauces, this Greek chicken bowl is a lovely option to try.
I like this bowl because the ingredients are simple, but the flavors work so well together. You can serve it with rice for a more filling meal or use lettuce instead if you prefer a lighter, lower-carb option.
This is one of those protein bowl recipes that works well for lunch or dinner. You can also prepare the chicken and sauce ahead of time, making it a convenient choice for healthy meal prep.
Prep time: 15 minutes · Cook time: 20 minutes · Total time: 35 minutes · Servings: 2 · Difficulty: Easy
Ingredients
For the chicken bowls
- 2 small boneless, skinless chicken breasts (about 300-350 g total)
- 1 cup uncooked rice (about 185 g)
- 1 small cucumber, diced
- 1 cup cherry tomatoes, halved
- 1/4 small red onion, thinly sliced
- 1/4 cup crumbled feta cheese (about 30 g)
- 2 tablespoons sliced Kalamata olives (optional)
- 1 tablespoon olive oil
- 1 tablespoon lemon juice
- 2 garlic cloves, minced
- 1 teaspoon dried oregano
- 1/2 teaspoon paprika
- Salt and black pepper, to taste
For the tzatziki sauce
- 1/2 cup plain Greek yogurt (about 120 g)
- 1/4 cucumber, finely grated
- 1 teaspoon lemon juice
- 1 small garlic clove, minced
- 1 teaspoon chopped fresh dill, or 1/2 teaspoon dried dill
- A small pinch of salt
Instructions
1. Cook the rice. Rinse the rice under cold water, then cook it according to the package instructions. Once it is tender, fluff it with a fork and set it aside.
2. Season the chicken. In a bowl, combine the olive oil, lemon juice, minced garlic, oregano, paprika, salt, and black pepper. Add the chicken and coat it well with the mixture.
3. Cook the chicken. Heat a skillet over medium heat. Add the chicken and cook for about 5-7 minutes per side, depending on thickness, until cooked through. The thickest part should reach 165°F (74°C). Let the chicken rest for a few minutes before slicing.
4. Make the tzatziki sauce. Grate the cucumber and squeeze out as much excess water as you can. Mix it with the Greek yogurt, lemon juice, garlic, dill, and salt. Taste and adjust the seasoning if needed.
5. Prepare the vegetables. Dice the cucumber, halve the cherry tomatoes, and thinly slice the red onion. Crumble the feta cheese if it is not already prepared.
6. Assemble the bowls. Divide the cooked rice between two bowls. Add the sliced chicken, cucumber, tomatoes, red onion, feta, and olives.
7. Add the sauce and serve. Spoon the tzatziki over the chicken and vegetables. Serve with an extra squeeze of lemon if you like.
How to Make Greek Chicken Bowls for Meal Prep
These bowls are easy to prepare ahead of time. Cook the chicken and rice, chop the vegetables, and mix the tzatziki sauce. Divide the chicken and rice between airtight containers, then store the vegetables and sauce separately to keep everything fresh.
Refrigerate the cooked chicken and rice promptly and use within 3-4 days. Keep the tzatziki refrigerated, and add it just before eating. If you’re packing the bowls for lunch, you can reheat the chicken and rice separately while keeping the vegetables and sauce cold.
Greek chicken bowls are a simple way to add variety to your weekly lunches. With lean chicken, Greek yogurt sauce, and fresh vegetables, they offer a satisfying mix of protein, flavor, and texture without requiring complicated cooking.
3. High Protein Ground Beef Taco Bowl
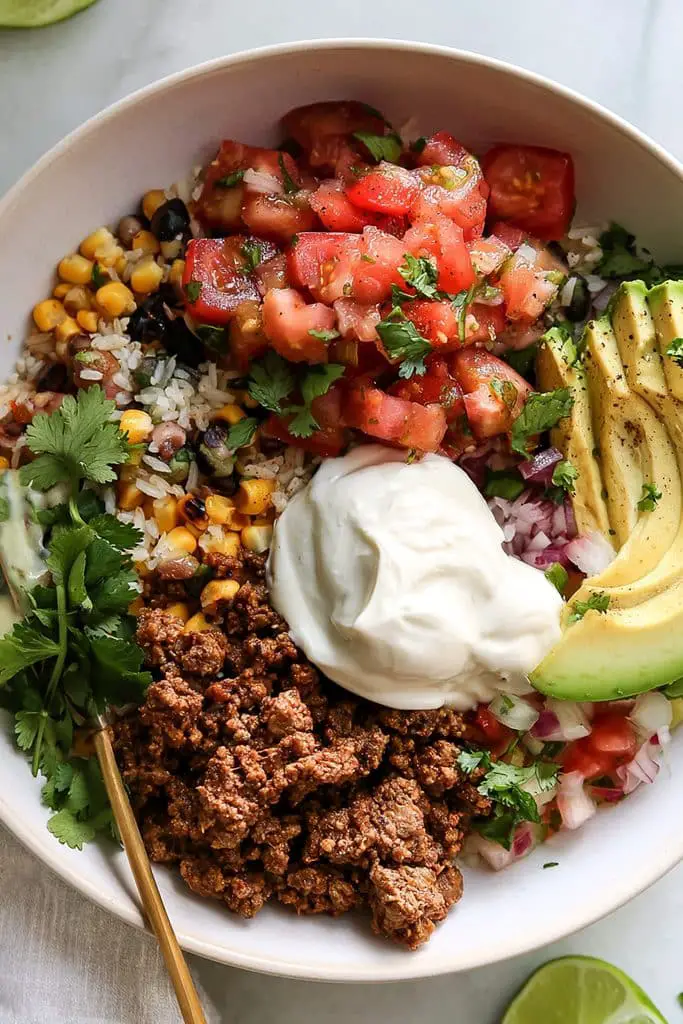
If you love taco night, this ground beef taco bowl is an easy way to enjoy those familiar flavors in one bowl. It combines seasoned ground beef with rice, black beans, corn, lettuce, tomatoes, and avocado. Add a little salsa and Greek yogurt on top, and you have a filling meal that’s simple to make at home.
You can keep the toppings simple or add your favorites, such as jalapeños, shredded cheese, or fresh cilantro. It’s also easy to adjust depending on what you have in your fridge.
For a lower-carb version, swap the rice for cauliflower rice and add extra lettuce and vegetables.
Prep time: 15 minutes · Cook time: 20 minutes · Total time: 35 minutes · Servings: 2 · Difficulty: Easy
Ingredients
For the taco bowls
- 300 g lean ground beef
- 1 cup uncooked rice (about 185 g)
- 1/2 cup canned black beans, drained and rinsed
- 1/2 cup corn kernels, fresh, frozen, or canned
- 2 cups shredded lettuce
- 1 medium tomato, diced
- 1/2 avocado, sliced
- 1/4 cup shredded cheddar cheese (about 25-30 g), optional
- 2 tablespoons salsa
- 1 teaspoon olive oil, if needed
For the taco seasoning
- 1 teaspoon chili powder
- 1 teaspoon ground cumin
- 1/2 teaspoon paprika
- 1/2 teaspoon garlic powder
- 1/4 teaspoon onion powder
- Salt and black pepper, to taste
- 2-3 tablespoons water
For serving
- 2 tablespoons plain Greek yogurt
- Lime wedges
- Fresh cilantro, optional
Instructions
1. Cook the rice. Rinse the rice under cold water and cook it according to the package instructions. Once cooked, fluff it with a fork and set it aside.
2. Prepare the taco seasoning. In a small bowl, mix the chili powder, cumin, paprika, garlic powder, onion powder, salt, and black pepper.
3. Brown the ground beef. Heat a skillet over medium heat. Add the ground beef and cook for about 6-8 minutes, breaking it up with a wooden spoon as it cooks. Continue until it is browned and fully cooked. If you’re using very lean beef and the pan looks dry, add a little olive oil.
4. Season the beef. Stir the seasoning mixture into the cooked beef. Add 2-3 tablespoons of water and cook for another 1-2 minutes, stirring until the spices coat the meat and the liquid has mostly evaporated. Ground beef should reach an internal temperature of 160°F (71°C).
5. Prepare the toppings. Warm the black beans and corn in a small pan or microwave. Shred the lettuce, dice the tomato, and slice the avocado.
6. Assemble the bowls. Divide the cooked rice between two bowls. Add the seasoned ground beef, black beans, corn, lettuce, tomato, and avocado. Sprinkle with cheddar cheese if using.
7. Finish and serve. Add the salsa and a spoonful of Greek yogurt to each bowl. Serve with lime wedges and fresh cilantro for extra flavor.
How to Make Ground Beef Taco Bowls for Meal Prep
This recipe is a good choice when you want to prepare several lunches at once. Cook the ground beef with the seasoning, prepare the rice, and portion both into airtight containers. You can also divide the black beans and corn into the containers.
Keep the lettuce, fresh tomato, avocado, salsa, and Greek yogurt separate until you’re ready to eat. This helps prevent the fresh ingredients from becoming soggy. For the best texture, add the avocado just before serving.
Refrigerate the cooked beef and rice promptly and use them within 3-4 days. Reheat the beef and rice until steaming hot, then add the cold toppings. If you want to freeze portions, freeze the seasoned beef separately for easier thawing and reheating.
Are Ground Beef Taco Bowls Good for a High Protein Lunch?
The ground beef provides protein, while the black beans contribute additional protein and fiber. Rice supplies carbohydrates for energy, and the vegetables add color, texture, and useful nutrients.
The exact protein content depends on the beef’s fat percentage, the portion size, and your toppings. To increase the protein, you can add a little extra lean ground beef or serve the bowl with plain Greek yogurt.
These ground beef taco bowls are also easy to customize, making them a practical addition to your collection of high protein bowls for meal prep. You can prepare the base in advance and change the toppings throughout the week to keep lunch interesting.
4. Low Carb Chicken Fajita Bowl
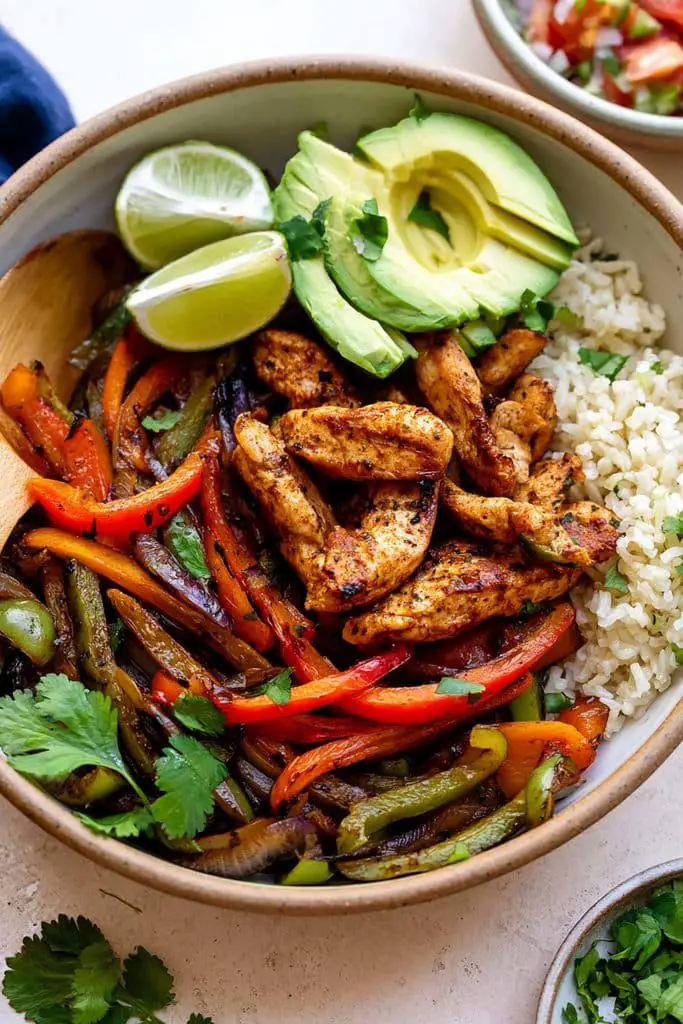
If you want a filling meal without the extra rice or tortillas, this low carb chicken fajita bowl is a great option. It has seasoned chicken, sautéed bell peppers, onions, and cauliflower rice, with fresh avocado and lime to finish everything off.
I like this bowl because it uses simple ingredients but still has plenty of flavor. The chicken is seasoned with fajita spices, while the peppers and onions become tender and slightly sweet as they cook. Cauliflower rice makes a good base because it keeps the bowl light without taking away from the other ingredients.
This recipe is easy enough for a weeknight lunch or dinner, and you can prepare several portions ahead of time. It’s also one of the low carb high protein bowls you can customize with your favorite toppings, such as salsa, fresh cilantro, or a spoonful of plain Greek yogurt.
Prep time: 15 minutes · Cook time: 20 minutes · Total time: 35 minutes · Servings: 2 · Difficulty: Easy
Ingredients
For the chicken
- 2 small boneless, skinless chicken breasts (about 300-350 g total)
- 1 tablespoon olive oil, divided
- 1 teaspoon chili powder
- 1 teaspoon ground cumin
- 1/2 teaspoon paprika
- 1/2 teaspoon garlic powder
- 1/2 teaspoon dried oregano
- Salt and black pepper, to taste
- 1 tablespoon lime juice
For the bowl
- 4 cups cauliflower rice (about 400 g)
- 1 red bell pepper, thinly sliced
- 1 green bell pepper, thinly sliced
- 1 small onion, thinly sliced
- 1 avocado, sliced
- 1 tablespoon chopped fresh cilantro, optional
- Lime wedges, for serving
Optional toppings
- Salsa
- Plain Greek yogurt
- Sliced jalapeños
- Shredded cheddar cheese
Instructions
1. Season the chicken. In a small bowl, mix the chili powder, cumin, paprika, garlic powder, oregano, salt, and black pepper. Rub the seasoning over the chicken breasts.
2. Cook the chicken. Heat half the olive oil in a skillet over medium heat. Add the chicken and cook for about 5-7 minutes per side, depending on thickness, until browned and cooked through. The thickest part should reach 165°F (74°C). Transfer the chicken to a plate and let it rest for a few minutes before slicing.
3. Cook the peppers and onions. Add the remaining olive oil to the same skillet. Add the sliced bell peppers and onion. Cook for about 5-7 minutes, stirring occasionally, until they soften and develop a little color.
4. Prepare the cauliflower rice. Add the cauliflower rice to a separate skillet over medium heat. Cook for about 5-7 minutes, stirring occasionally, until tender and any excess moisture has evaporated. Season lightly with salt and pepper. If you’re using frozen cauliflower rice, cook it according to the package instructions and allow extra time for the water to evaporate.
5. Slice the chicken. Cut the rested chicken into strips. Add a squeeze of lime juice for a fresh, tangy flavor.
6. Assemble the bowls. Divide the cauliflower rice between two bowls. Top with the chicken strips, cooked peppers, and onions. Add the sliced avocado and fresh cilantro.
7. Add your favorite toppings. Serve with lime wedges, salsa, or a spoonful of plain Greek yogurt if you like.
How to Meal Prep Low Carb Chicken Fajita Bowls
These bowls are easy to prepare ahead of time. Cook the chicken, peppers, onions, and cauliflower rice, then divide them between airtight containers. Keep the avocado, lime, and any cold toppings separate until you’re ready to eat.
Store the cooked ingredients in the refrigerator and use within 3-4 days. Reheat the chicken and vegetables until steaming hot. Warm the cauliflower rice separately if possible, and add the fresh toppings just before serving.
For a different flavor each day, change the toppings rather than making a completely new meal. Salsa adds a fresh, tangy taste, while Greek yogurt makes the bowl creamy. You can also add a little shredded cheese if it fits your preferences.
Why Add This Bowl to Your High Protein Meal Plan?
The amount of protein and total carbohydrates will depend on your portions and toppings, but this bowl can be a useful choice if you’re looking for a balanced lunch or dinner with fewer carbohydrates.
If you’re building a weekly collection of high protein bowls for meal prep, this fajita bowl is a good one to include. It’s simple to cook, easy to portion, and flexible enough to suit different tastes.
5. Honey Garlic Chicken Rice Bowl
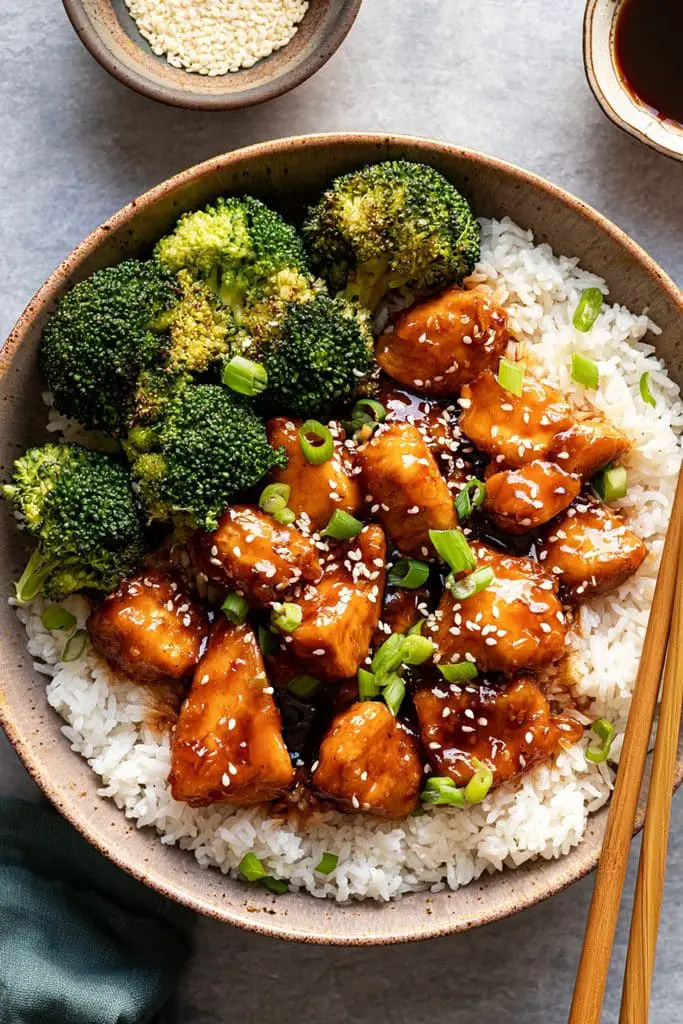
I like this bowl because the sauce uses simple ingredients you may already have at home. You can serve it with broccoli, carrots, or any vegetables you have in the fridge.
This is one of those protein bowl recipes that feels a little special but doesn’t take much effort to make. It is also a useful option for meal prep because you can cook the chicken, rice, and vegetables ahead of time. If you want to change things up, try brown rice or serve the chicken with cauliflower rice for a lower-carb version.
Prep time: 10 minutes · Cook time: 20 minutes · Total time: 30 minutes · Servings: 2 · Difficulty: Easy
Ingredients
For the chicken
- 2 small boneless, skinless chicken breasts (about 300-350 g total), cut into bite-sized pieces
- 1 tablespoon olive oil
- Salt and black pepper, to taste
- 1/2 teaspoon paprika, optional
For the honey garlic sauce
- 2 tablespoons honey
- 2 tablespoons low-sodium soy sauce
- 3 garlic cloves, minced
- 1 tablespoon water
- 1 teaspoon rice vinegar or lemon juice
- 1 teaspoon cornstarch
- 1 tablespoon cold water, to mix with the cornstarch
For the bowls
- 1 cup uncooked rice (about 185 g)
- 1 1/2 cups broccoli florets
- 1 small carrot, thinly sliced
- 1 teaspoon sesame seeds, optional
- 1 spring onion, sliced, optional
Instructions
1. Cook the rice. Rinse the rice under cold water and cook according to the package instructions. Fluff with a fork once it is ready, then set it aside.
2. Prepare the sauce. In a small bowl, mix the honey, soy sauce, minced garlic, water, and rice vinegar or lemon juice. In a separate small cup, stir the cornstarch with 1 tablespoon of cold water until smooth.
3. Cook the chicken. Heat the olive oil in a large skillet over medium heat. Season the chicken pieces with salt, black pepper, and paprika if using. Add them to the skillet in a single layer and cook for about 6-8 minutes, turning occasionally, until golden and cooked through.
4. Add the honey garlic sauce. Lower the heat slightly and pour the sauce into the skillet. Stir gently to coat the chicken. Add the cornstarch mixture and cook for another 1-2 minutes, stirring until the sauce thickens and clings to the chicken. Make sure the chicken reaches an internal temperature of 165°F (74°C).
5. Cook the vegetables. While the chicken cooks, steam the broccoli and carrots for about 4-6 minutes, until tender but still slightly crisp. You can also sauté them in a separate pan with a little oil.
6. Assemble the bowls. Divide the cooked rice between two bowls. Add the honey garlic chicken and vegetables.
7. Add the finishing touches. Sprinkle sesame seeds and sliced spring onion over the top, if using. Spoon any remaining sauce from the pan over the chicken and serve warm.
How to Make Honey Garlic Chicken Bowls for Meal Prep
This bowl is easy to prepare in advance. Cook the rice, chicken, and vegetables, then divide them between two airtight containers. Let the food cool slightly and refrigerate it promptly rather than leaving it at room temperature for an extended period.
Store the sauce-coated chicken with the rice and vegetables, or keep the chicken separate if you prefer. Refrigerate for up to 3-4 days and reheat until steaming hot throughout. If the sauce thickens too much in the fridge, add a small splash of water before reheating.
For the best texture, keep sesame seeds and spring onion separate until serving. You can also change the vegetables each time you make this bowl to keep your lunches from feeling repetitive.
Is a Honey Garlic Chicken Rice Bowl Good for a High Protein Lunch?
If you want to increase the protein, you can add a little more chicken or serve the bowl with an extra portion of vegetables and a protein-rich side. For a lower-carb option, cauliflower rice works well in place of regular rice.
This honey garlic chicken bowl is a simple way to add variety to your high protein bowls for meal prep. The ingredients are easy to find, the sauce comes together quickly, and you can adjust the sweetness, spice, and vegetables to suit your taste.
6. Salmon Rice Bowl with Avocado and Cucumber
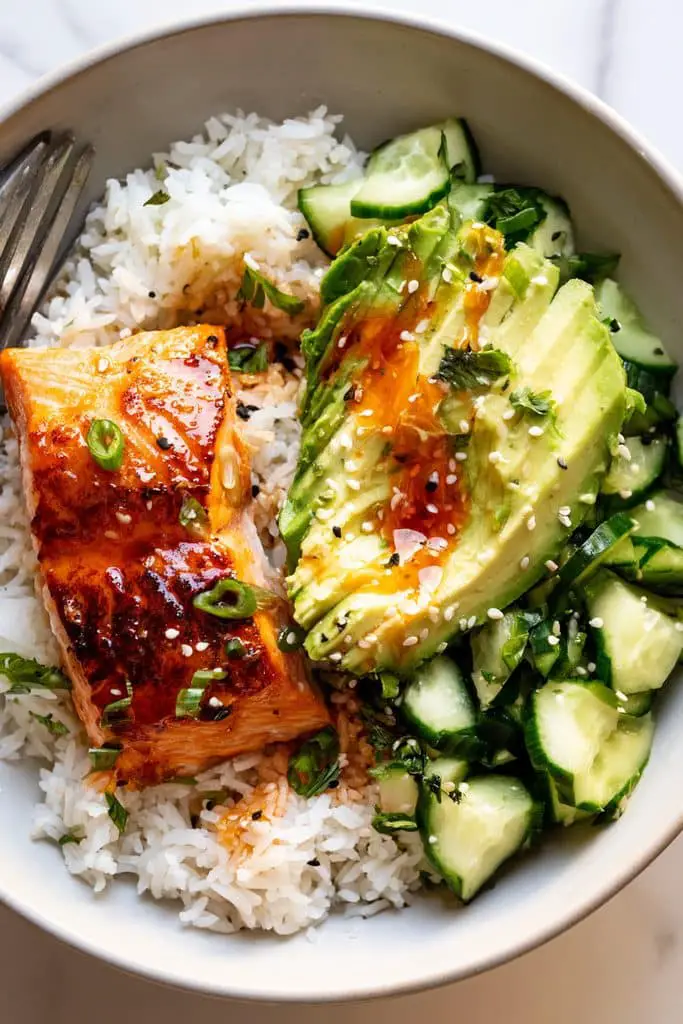
I like this bowl because it has a nice balance of flavors and textures. You can use oven-baked salmon or cook it in a skillet, depending on what is easiest for you.
This is one of those healthy protein bowl recipes that works well for lunch or dinner. You can prepare the rice and dressing ahead of time, then cook the salmon when you’re ready to eat. If you’re planning your meals for the week, it’s also easy to adapt with brown rice, extra vegetables, or edamame for additional protein and fiber.
Prep time: 15 minutes · Cook time: 20 minutes · Total time: 35 minutes · Servings: 2 · Difficulty: Easy
Ingredients
For the salmon
- 2 salmon fillets (about 300-350 g total)
- 1 teaspoon olive oil
- 1 tablespoon low-sodium soy sauce
- 1 teaspoon lemon juice
- 1/2 teaspoon garlic powder
- Black pepper, to taste
For the bowls
- 1 cup uncooked rice (about 185 g)
- 1 small cucumber, diced or thinly sliced
- 1 ripe avocado, sliced
- 1 cup shelled edamame, cooked (optional)
- 1 spring onion, thinly sliced (optional)
- 1 teaspoon sesame seeds
For the dressing
- 1 tablespoon low-sodium soy sauce
- 1 tablespoon lemon juice or rice vinegar
- 1 teaspoon honey, optional
- 1 teaspoon sesame oil, optional
- 1 teaspoon water, or more as needed
Instructions
1. Cook the rice. Rinse the rice under cold water and cook it according to the package instructions. Once it is tender, fluff it with a fork and set it aside.
2. Season the salmon. Pat the salmon dry with a paper towel. Mix the olive oil, 1 tablespoon of soy sauce, lemon juice, garlic powder, and black pepper. Brush the mixture over the salmon fillets.
3. Cook the salmon. Heat a nonstick skillet over medium heat. Add the salmon and cook for about 4-5 minutes per side, depending on thickness, until it flakes easily with a fork and reaches an internal temperature of 145°F (63°C). You can also bake it at 400°F (200°C) for about 12-15 minutes, adjusting the time to the thickness of the fillets.
4. Prepare the dressing. In a small bowl, whisk together the soy sauce, lemon juice or rice vinegar, honey if using, sesame oil if using, and water. Taste and adjust the flavor to your liking.
5. Prepare the toppings. Slice the cucumber, avocado, and spring onion. If you’re using edamame, cook it according to the package instructions and drain well.
6. Assemble the bowls. Divide the cooked rice between two bowls. Add the salmon, cucumber, avocado, and edamame, if using.
7. Finish and serve. Drizzle the dressing over the bowls and sprinkle with sesame seeds and spring onion. Serve while the salmon is warm.
How to Prepare Salmon Rice Bowls for Meal Prep
You can prepare the rice, dressing, and vegetables ahead of time to make lunch easier during the week. Store the cooked salmon and rice in separate airtight containers if you prefer, and keep the dressing in a small jar.
For food safety, refrigerate cooked salmon and rice promptly and use within 3-4 days. Reheat the salmon and rice until steaming hot, or enjoy the salmon cold if it has been safely stored. Add the avocado shortly before serving so it stays fresh and doesn’t brown as quickly.
If you’re making these bowls for several days, you may prefer to cook the salmon in smaller batches for the best texture. Keep sesame seeds and dressing separate until serving to help the ingredients stay fresh.
Is a Salmon Rice Bowl a Healthy High Protein Meal?
The total protein in each bowl depends on the size of the salmon fillet and whether you include edamame. If you’re looking for healthy lunch ideas, this combination gives you a useful mix of protein, carbohydrates, fats, and vegetables.
This salmon rice bowl is also easy to adapt to different meal plans. Serve it with regular rice for a filling meal, or use cauliflower rice if you prefer a lower-carb option. Either way, it’s a simple addition to your collection of high protein bowls for meal prep.
7. Teriyaki Beef and Broccoli Bowl
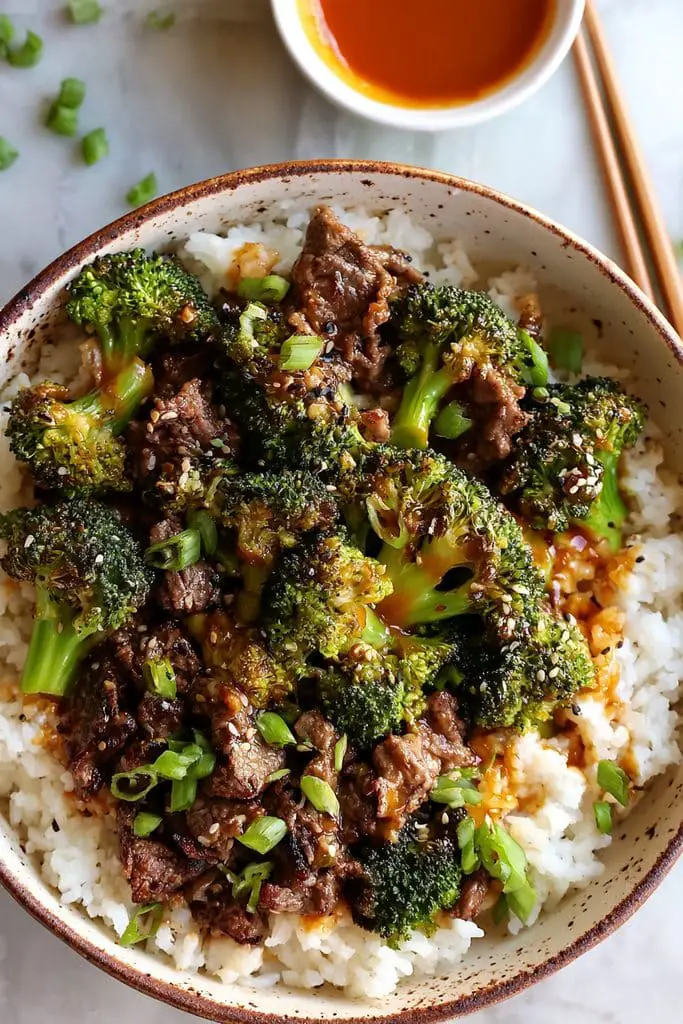
If you enjoy takeout-style meals, this teriyaki beef and broccoli bowl is a simple recipe to make at home.
I like this bowl because it doesn’t need many ingredients to taste good.
This is also a useful recipe if you’re looking for high protein bowls with beef that you can prepare ahead of time. Serve it with regular rice for a filling meal, use brown rice for extra fiber, or swap the rice for cauliflower rice if you want a lower-carb option.
Prep time: 15 minutes · Cook time: 20 minutes · Total time: 35 minutes · Servings: 2 · Difficulty: Easy
Ingredients
For the beef and broccoli
- 300 g lean beef steak, thinly sliced against the grain
- 3 cups broccoli florets (about 250 g)
- 1 cup uncooked rice (about 185 g)
- 1 tablespoon olive oil, divided
- 2 garlic cloves, minced
- 1 teaspoon freshly grated ginger, optional
- 1 spring onion, sliced, optional
- 1 teaspoon sesame seeds, optional
- Black pepper, to taste
For the teriyaki sauce
- 3 tablespoons low-sodium soy sauce
- 1 tablespoon honey
- 2 tablespoons water
- 1 teaspoon rice vinegar or lemon juice
- 1 teaspoon cornstarch
- 1 tablespoon cold water, to mix with the cornstarch
Instructions
1. Cook the rice. Rinse the rice under cold water and cook it according to the package instructions. Once cooked, fluff it with a fork and set aside.
2. Mix the teriyaki sauce. In a small bowl, combine the soy sauce, honey, 2 tablespoons of water, and rice vinegar or lemon juice. In a separate cup, mix the cornstarch with 1 tablespoon of cold water until smooth.
3. Prepare the broccoli. Steam the broccoli for about 4-5 minutes, until bright green and just tender. Drain well and set aside. If you prefer, you can sauté it in a skillet with a small splash of water.
4. Cook the beef. Heat half the olive oil in a large skillet over medium-high heat. Add the sliced beef in a single layer, working in batches if needed, and cook for about 2-4 minutes, turning occasionally, until browned and cooked to your preferred doneness. Transfer the beef to a plate.
5. Add the garlic and ginger. Reduce the heat to medium. Add the remaining oil if needed, then stir in the garlic and ginger. Cook for about 30 seconds until fragrant, taking care not to let the garlic burn.
6. Thicken the sauce. Pour the teriyaki mixture into the skillet. Bring it to a gentle simmer, then stir in the cornstarch mixture. Cook for 1-2 minutes, stirring until the sauce thickens.
7. Combine the ingredients. Return the beef to the skillet and toss it in the sauce. Add the broccoli and gently stir until everything is coated and heated through.
8. Assemble the bowls. Divide the rice between two bowls. Add the teriyaki beef and broccoli, then finish with sesame seeds, sliced spring onion, and a little black pepper.
Tips and Variations
- Slice the beef thinly: Cutting against the grain helps make the beef easier to chew. If the meat is difficult to slice, place it in the freezer for about 15-20 minutes first.
- Avoid overcrowding the pan: Cook the beef in batches if necessary. This helps it brown instead of releasing too much moisture and steaming.
- Adjust the sweetness: Start with 1 teaspoon of honey if you prefer a less sweet sauce, then add more to taste.
- Add more vegetables: Bell peppers, carrots, mushrooms, or snap peas are all good additions.
- Use chicken instead: Thinly sliced chicken breast works well with the same sauce. Cook it thoroughly before adding the sauce.
- Make it lower in carbs: Replace the rice with cauliflower rice and reduce or omit the honey. This creates a lower-carb variation, although the exact carbohydrate content will depend on the ingredients and portions.
How to Make Teriyaki Beef and Broccoli Bowls for Meal Prep
This recipe is convenient for preparing lunch ahead of time. Cook the rice, beef, broccoli, and sauce, then divide them into airtight containers. Let the food cool slightly and refrigerate it promptly.
Store the portions in the refrigerator for up to 3-4 days. Reheat until steaming hot throughout, adding a small splash of water if the sauce has thickened too much. For the best texture, keep the sesame seeds and spring onion separate until serving.
If you’re preparing several high protein bowls for meal prep, you can also cook a larger batch of the sauce and use it with chicken or tofu on another day. Just keep an eye on the amount of sauce you use, as it contributes sodium and added sugar.
Is Teriyaki Beef and Broccoli a Good High Protein Bowl?
Yes, this bowl can be a satisfying source of protein because beef provides protein, iron, and vitamin B12. Broccoli adds fiber and other nutrients, while rice provides carbohydrates for energy.
To keep the meal balanced, choose a lean cut of beef and include a generous serving of broccoli. You can adjust the rice portion to suit your appetite and preferences. If you want a lower-carb meal, cauliflower rice is an easy substitute.
This teriyaki beef and broccoli bowl is a practical way to add variety to your healthy lunch rotation. It’s easy to customize, doesn’t require complicated cooking techniques, and works well for both freshly made meals and planned-ahead lunches.
8. Ground Turkey Taco Bowl
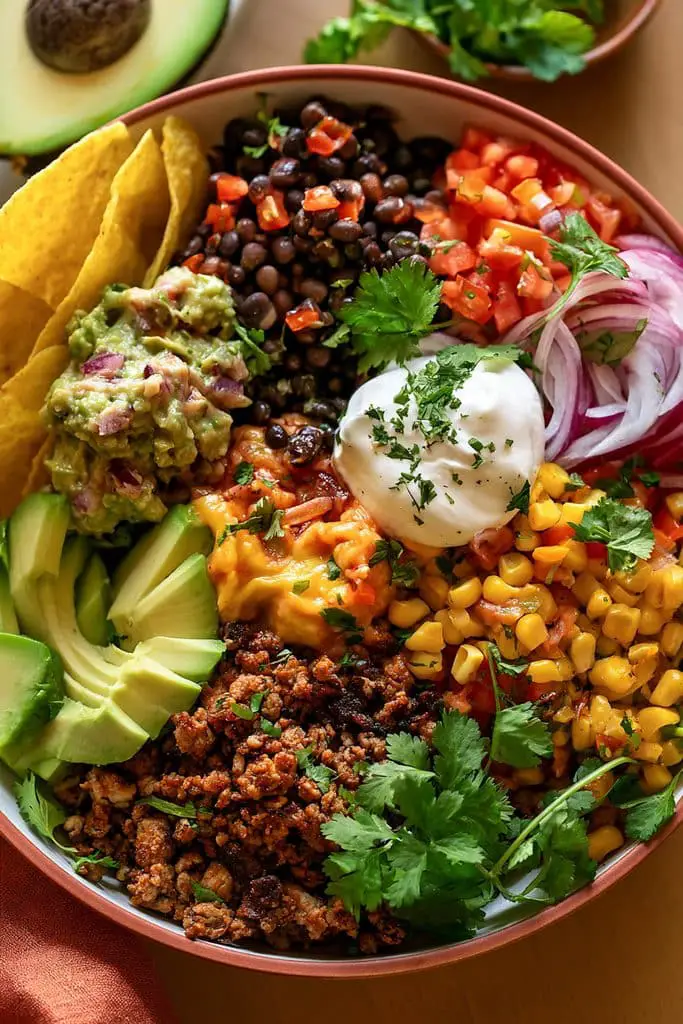
If you want a taco bowl that’s full of flavor but a little different from the usual ground beef version, this ground turkey taco bowl is a great option.
I like this recipe because ground turkey cooks quickly and takes on the flavor of the spices really well. It’s easy to adjust the seasoning, too, so you can make the bowl mild or spicy depending on what you prefer. You can serve it with rice for a filling meal or use cauliflower rice if you’re looking for low carb high protein bowls.
This is also one of the easiest protein bowl recipes to prepare in advance. Cook the turkey and rice in batches, prepare the toppings, and assemble your bowls when you’re ready to eat.
Prep time: 15 minutes · Cook time: 20 minutes · Total time: 35 minutes · Servings: 2 · Difficulty: Easy
Ingredients
For the taco bowls
- 300 g lean ground turkey
- 1 cup uncooked rice (about 185 g)
- 1/2 cup canned black beans, drained and rinsed
- 1/2 cup corn kernels, fresh, frozen, or canned
- 2 cups shredded lettuce
- 1 medium tomato, diced
- 1/2 avocado, sliced
- 2 tablespoons salsa
- 1 teaspoon olive oil
- 1 tablespoon lime juice
For the seasoning
- 1 teaspoon chili powder
- 1 teaspoon ground cumin
- 1/2 teaspoon paprika
- 1/2 teaspoon garlic powder
- 1/2 teaspoon onion powder
- Salt and black pepper, to taste
- 2-3 tablespoons water
Optional toppings
- 2 tablespoons plain Greek yogurt
- 2 tablespoons shredded cheddar cheese
- Fresh cilantro, chopped
- Lime wedges
Instructions
1. Cook the rice. Rinse the rice under cold water and cook according to the package instructions. Once it’s tender, fluff it with a fork and set it aside.
2. Mix the seasoning. In a small bowl, combine the chili powder, cumin, paprika, garlic powder, onion powder, salt, and black pepper.
3. Cook the ground turkey. Heat the olive oil in a skillet over medium heat. Add the ground turkey and break it apart with a wooden spoon. Cook for about 7-10 minutes, stirring occasionally, until no pink remains and the turkey is cooked through.
4. Add the spices. Stir the seasoning into the turkey. Add 2-3 tablespoons of water and cook for another 1-2 minutes, allowing the spices to coat the meat evenly. Ground turkey should reach an internal temperature of 165°F (74°C).
5. Prepare the toppings. Warm the black beans and corn in a small pan or microwave. Dice the tomato, shred the lettuce, and slice the avocado.
6. Assemble the bowls. Divide the rice between two bowls. Add the seasoned turkey, black beans, corn, lettuce, and tomato. Arrange the avocado slices on top.
7. Finish and serve. Add salsa, a squeeze of lime juice, and any optional toppings you like. Plain Greek yogurt makes a creamy alternative to sour cream.
How to Make Ground Turkey Taco Bowls for Meal Prep
These bowls are easy to prepare for several lunches at once. Cook the rice and seasoned turkey, then divide them between airtight containers with the black beans and corn. Keep the lettuce, tomato, avocado, salsa, and other fresh toppings separate until serving.
Refrigerate the cooked turkey and rice promptly and use within 3-4 days. Reheat the turkey and rice until steaming hot throughout, then add the fresh ingredients. For the best texture, slice the avocado just before eating.
You can also freeze the cooked, seasoned ground turkey in individual portions. Thaw it safely in the refrigerator and reheat thoroughly before assembling your bowl. Fresh vegetables and toppings are best added after reheating.
9. Shrimp Burrito Bowl with Cilantro Lime Rice
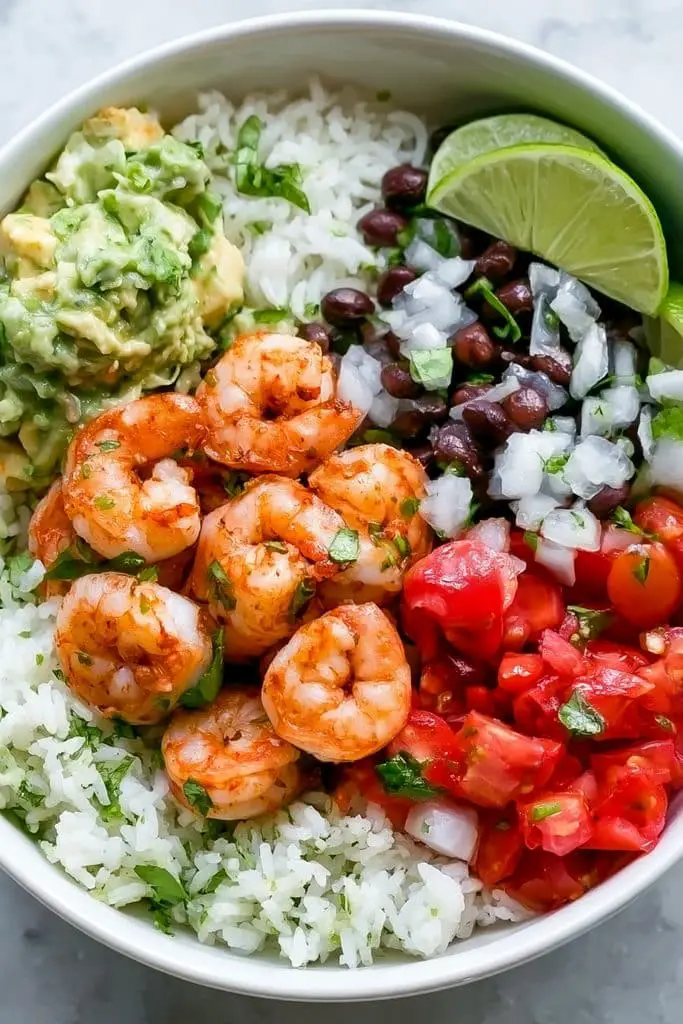
If you love burrito bowls but want something a little different from chicken or beef, this shrimp burrito bowl is a fresh and flavorful option.
I like this bowl because shrimp cooks in just a few minutes, so it’s a good choice when you don’t have much time to spend in the kitchen. You can also adjust the toppings based on what you have at home.
This is one of the easiest high protein bowls to make when you want a quick meal with plenty of flavor. Serve it with regular rice for a more filling bowl, or swap in cauliflower rice if you’re looking for low carb high protein bowls. You can prepare the rice and toppings ahead of time, then cook the shrimp just before serving.
Prep time: 15 minutes · Cook time: 15 minutes · Total time: 30 minutes · Servings: 2 · Difficulty: Easy
Ingredients
For the cilantro lime rice
- 1 cup uncooked rice (about 185 g)
- 1 tablespoon fresh lime juice
- 2 tablespoons chopped fresh cilantro
- 1/4 teaspoon salt, or to taste
For the shrimp
- 300 g raw shrimp, peeled and deveined
- 1 tablespoon olive oil
- 1 teaspoon paprika
- 1/2 teaspoon ground cumin
- 1/2 teaspoon garlic powder
- 1/4 teaspoon chili powder, optional
- Salt and black pepper, to taste
- 1 teaspoon lime juice
For the bowls
- 1/2 cup canned black beans, drained and rinsed
- 1/2 cup corn kernels, fresh, frozen, or canned
- 1/2 avocado, sliced
- 1 medium tomato, diced
- 2 tablespoons salsa
- Lime wedges, for serving
Instructions
1. Cook the rice. Rinse the rice under cold water and cook it according to the package instructions. Once tender, fluff it with a fork.
2. Add the cilantro and lime. While the rice is still warm, stir in the lime juice, chopped cilantro, and salt. Taste and adjust the seasoning if needed. Set aside.
3. Season the shrimp. Pat the shrimp dry with a paper towel. In a bowl, mix the paprika, cumin, garlic powder, chili powder if using, salt, and black pepper. Add the shrimp, olive oil, and lime juice, then toss to coat evenly.
4. Cook the shrimp. Heat a large skillet over medium-high heat. Add the shrimp in a single layer and cook for about 1-2 minutes per side, depending on size, until they turn pink, opaque, and are cooked through. Avoid overcooking, as shrimp can become rubbery. Transfer to a plate.
5. Prepare the toppings. Warm the black beans and corn in a small pan or microwave. Dice the tomato and slice the avocado.
6. Assemble the bowls. Divide the cilantro lime rice between two bowls. Add the cooked shrimp, black beans, corn, tomato, and avocado.
7. Finish and serve. Spoon salsa over the top and serve with lime wedges. Add extra cilantro if you enjoy a fresh, herby flavor.
How to Prepare Shrimp Burrito Bowls for Meal Prep
These bowls are easy to prepare ahead of time, especially if you cook the rice and prepare the toppings in advance. Store the cilantro lime rice, shrimp, beans, and corn in airtight containers, keeping the avocado and fresh toppings separate until serving.
For the best texture, I recommend cooking the shrimp close to the day you plan to eat them. If you do cook them ahead, refrigerate them promptly and use within 3-4 days. Reheat gently until hot throughout, or enjoy them cold if they’ve been handled and stored safely. Keep the salsa and fresh vegetables separate so the rice doesn’t become soggy.
You can also make a larger batch of cilantro lime rice to use in other protein bowl recipes throughout the week. Pair it with chicken one day and shrimp the next for a little variety without preparing a completely different meal.
Is a Shrimp Burrito Bowl a Good High Protein Lunch?
Yes, shrimp is a lean source of protein, making it a useful choice for a filling lunch. Black beans add more protein and fiber, while avocado contributes unsaturated fats. Rice provides carbohydrates for energy, and the vegetables add freshness and variety.
The exact protein content depends on the amount of shrimp and other ingredients in each serving. If you want to increase the protein, add more shrimp or include a spoonful of plain Greek yogurt as a topping.
This shrimp burrito bowl is a simple addition to your list of healthy high protein bowls for meal prep. It’s quick to make, easy to customize, and full of fresh flavors that work just as well for lunch as they do for dinner.
10. Chicken Shawarma Bowl with Garlic Yogurt Sauce
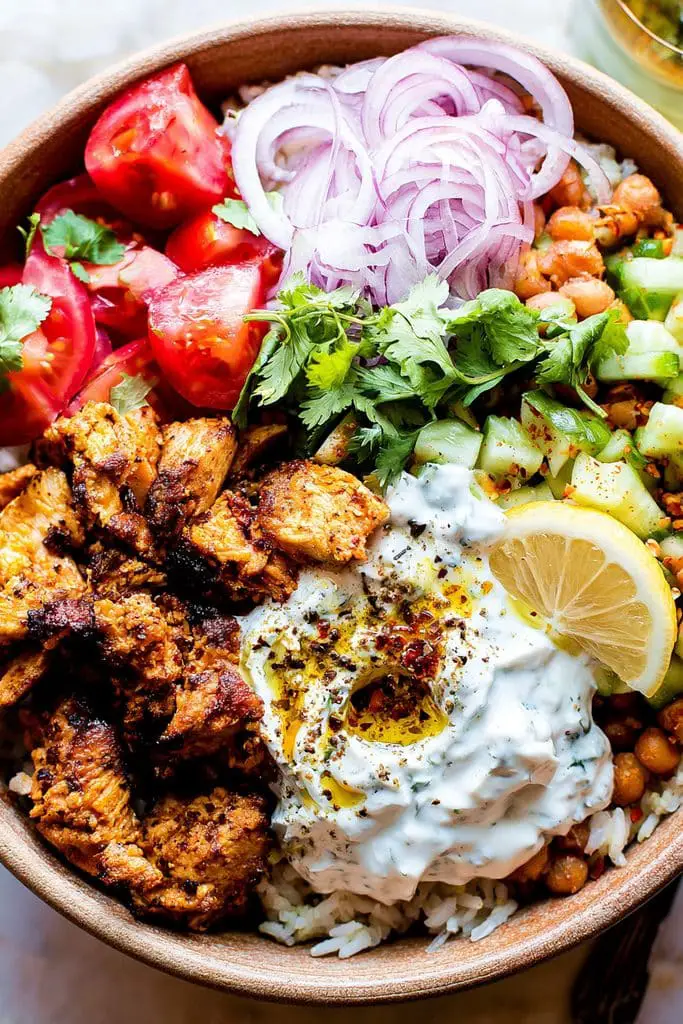
This is one of those high protein bowls that works well for both lunch and dinner. You can cook the chicken ahead of time, prepare the sauce, and chop the vegetables in advance. That makes it a practical choice when you’re planning healthy lunches or putting together high protein bowls for meal prep.
Prep time: 15 minutes · Cook time: 20 minutes · Total time: 35 minutes · Servings: 2 · Difficulty: Easy
Ingredients
For the chicken
- 2 small boneless, skinless chicken breasts (about 300-350 g total), cut into strips
- 1 tablespoon olive oil
- 1 tablespoon lemon juice
- 2 garlic cloves, minced
- 1 teaspoon paprika
- 1 teaspoon ground cumin
- 1/2 teaspoon ground coriander
- 1/2 teaspoon ground turmeric
- 1/2 teaspoon dried oregano
- 1/4 teaspoon ground cinnamon, optional
- Salt and black pepper, to taste
For the bowls
- 1 cup uncooked rice (about 185 g)
- 1 small cucumber, diced
- 1 cup cherry tomatoes, halved
- 1/4 small red onion, thinly sliced
- 2 tablespoons chopped fresh parsley, optional
For the garlic yogurt sauce
- 1/2 cup plain Greek yogurt (about 120 g)
- 1 small garlic clove, finely minced
- 1 tablespoon lemon juice
- 1 tablespoon water, or more as needed
- 1 tablespoon chopped fresh parsley, optional
- Salt and black pepper, to taste
Instructions
1. Cook the rice. Rinse the rice under cold water and cook according to the package instructions. Fluff with a fork and set aside.
2. Season the chicken. In a bowl, combine the olive oil, lemon juice, minced garlic, paprika, cumin, coriander, turmeric, oregano, cinnamon if using, salt, and black pepper. Add the chicken strips and toss until evenly coated.
3. Cook the chicken. Heat a large skillet over medium heat. Add the chicken in a single layer and cook for about 6-8 minutes, stirring occasionally, until browned and cooked through. The thickest pieces should reach an internal temperature of 165°F (74°C). Cook in batches if necessary to help the chicken brown properly.
4. Make the garlic yogurt sauce. In a small bowl, mix the Greek yogurt, minced garlic, lemon juice, parsley if using, salt, and black pepper. Add water a little at a time until the sauce reaches a consistency you like.
5. Prepare the vegetables. Dice the cucumber, halve the cherry tomatoes, and thinly slice the red onion. If the raw onion tastes too strong, soak the slices in cold water for a few minutes, then drain.
6. Assemble the bowls. Divide the rice between two bowls. Add the cooked chicken, cucumber, tomatoes, and red onion.
7. Add the sauce and serve. Spoon the garlic yogurt sauce over the chicken and vegetables. Sprinkle with fresh parsley and serve with an extra squeeze of lemon if you like.
How to Make Chicken Shawarma Bowls for Meal Prep
This recipe is easy to prepare ahead of time. Cook the rice and chicken, mix the garlic yogurt sauce, and chop the vegetables. Divide the rice and chicken between airtight containers, then store the sauce and fresh vegetables separately to keep everything fresh.
Refrigerate the cooked chicken and rice promptly and use within 3-4 days. Keep the yogurt sauce refrigerated, and add it after reheating the chicken and rice. The cucumber and tomatoes are best added cold just before serving.
If you’re preparing lunches for several days, you can also cook a larger batch of the shawarma seasoning and use it with chicken thighs or other proteins. Keeping the sauce and toppings separate makes it easier to change the bowl’s flavor and texture without much extra work.
11. Steak Bowl with Chimichurri Sauce
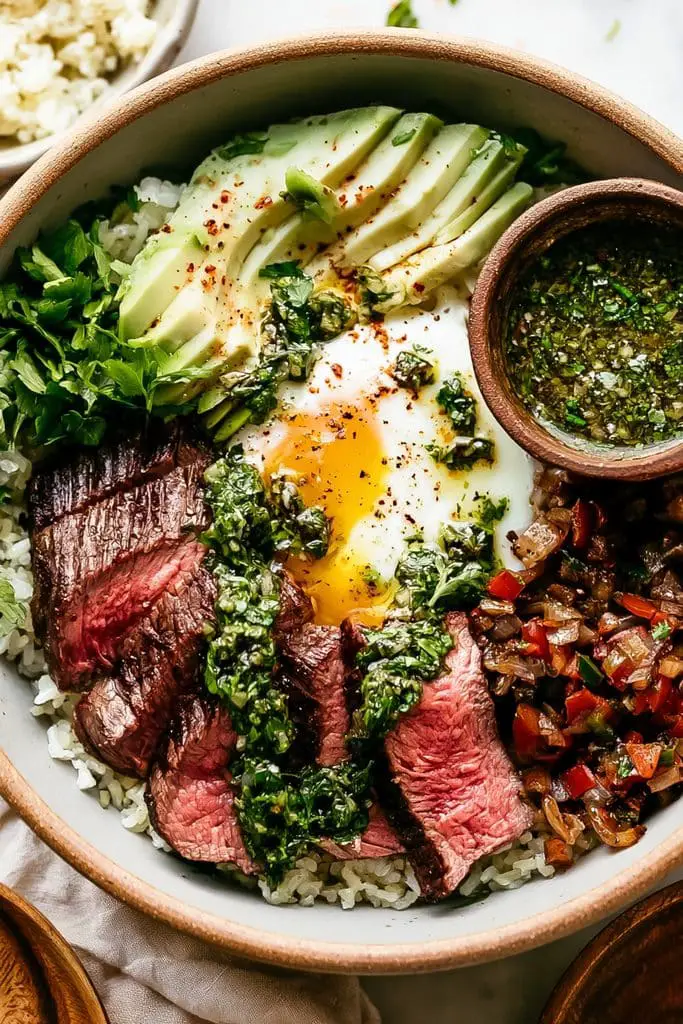
Serve it with rice for a filling lunch or dinner, or use cauliflower rice if you prefer a lower-carb option.
You can add roasted potatoes, grilled peppers, or leafy greens, depending on what you have available. It’s also a good option for meal prep, especially if you store the chimichurri separately and add it just before serving.
Prep time: 15 minutes · Cook time: 20 minutes · Total time: 35 minutes · Servings: 2 · Difficulty: Easy
Ingredients
For the steak bowls
- 300-350 g lean steak, such as sirloin
- 1 cup uncooked rice (about 185 g)
- 1 tablespoon olive oil, divided
- 1 red bell pepper, sliced
- 1 small red onion, sliced
- Salt and black pepper, to taste
- 1/2 teaspoon paprika, optional
For the chimichurri sauce
- 1 cup loosely packed fresh parsley, finely chopped
- 2 garlic cloves, minced
- 2 tablespoons olive oil
- 1 tablespoon red wine vinegar or lemon juice
- 1 tablespoon water, if needed
- 1/4 teaspoon dried oregano
- A pinch of red pepper flakes, optional
- Salt and black pepper, to taste
Optional toppings
- 1 cup baby spinach or mixed greens
- Cherry tomatoes, halved
- Avocado slices
- Lime or lemon wedges
Instructions
1. Cook the rice. Rinse the rice under cold water and cook according to the package instructions. Fluff it with a fork and set aside.
2. Make the chimichurri sauce. In a small bowl, mix the chopped parsley, garlic, olive oil, vinegar or lemon juice, oregano, red pepper flakes if using, salt, and black pepper. Add a little water if you prefer a thinner sauce. Let it sit while you prepare the steak so the flavors have time to come together.
3. Season the steak. Pat the steak dry with a paper towel. Season both sides with salt, black pepper, and paprika if using.
4. Cook the steak. Heat a skillet or grill pan over medium-high heat. Add a little olive oil, then cook the steak for about 3-5 minutes per side, depending on its thickness and your preferred doneness. For food safety, whole cuts of beef should reach 145°F (63°C), followed by a 3-minute rest. Transfer the steak to a cutting board and let it rest before slicing thinly against the grain.
5. Cook the vegetables. Add the remaining olive oil to the skillet. Add the sliced bell pepper and red onion and cook for about 5-7 minutes, stirring occasionally, until softened and lightly browned.
6. Assemble the bowls. Divide the rice between two bowls. Add the sliced steak, cooked peppers and onions, and leafy greens or other optional vegetables.
7. Add the chimichurri. Spoon the sauce over the steak just before serving. Add avocado or cherry tomatoes if you like, and serve with lemon or lime wedges.
How to Make Steak Bowls for Meal Prep
You can prepare the rice, chimichurri, and vegetables ahead of time to make assembly easier. Cook the steak closer to serving time if possible, as it usually has the best texture when freshly cooked. If you prefer to prepare everything in advance, slice the cooked steak and portion it with the rice and vegetables into airtight containers.
Store the chimichurri separately so the fresh herbs retain their flavor and the other ingredients don’t become too oily. Refrigerate the cooked steak and rice promptly and use within 3-4 days. Reheat the steak and rice until hot throughout, then add the sauce and any fresh greens just before eating.
For variety, you can change the base during the week. Serve the steak with rice one day, cauliflower rice the next, or a bed of leafy greens when you want a lighter meal.
12. Buffalo Chicken Bowl with Cauliflower Rice
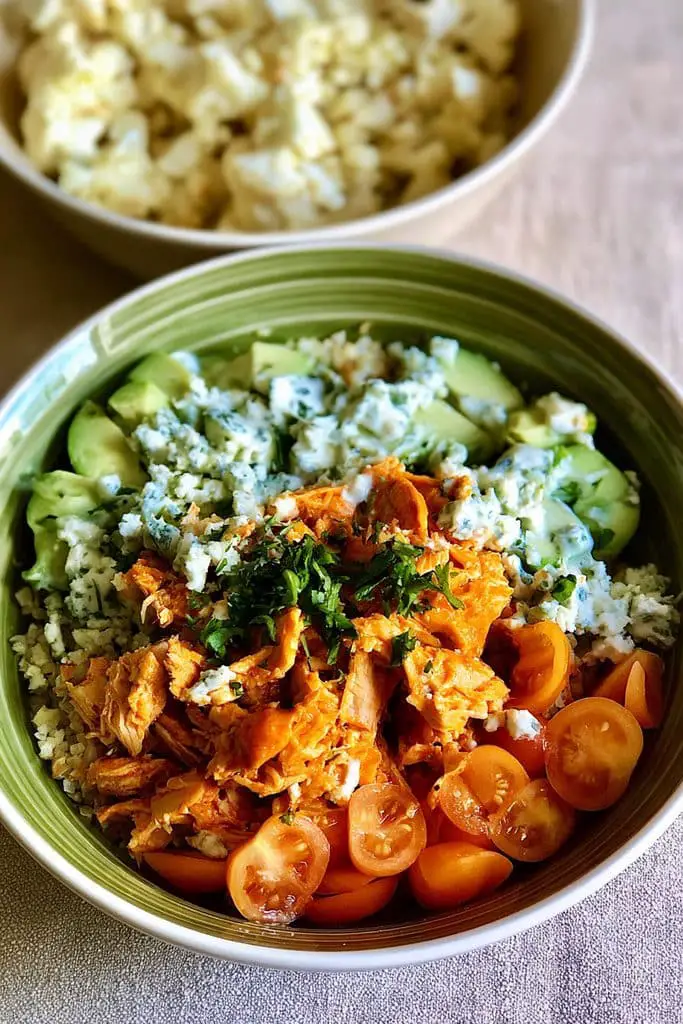
If you enjoy a little heat in your meals, this buffalo chicken bowl is a great one to try.
I like this bowl because it’s easy to put together, and you can adjust the spice level to suit your taste. Cauliflower rice keeps the bowl lower in carbohydrates and makes it a useful option if you’re looking for low carb high protein bowls.
This recipe is also easy to prepare ahead of time. You can cook the chicken and cauliflower rice in advance, then add the fresh vegetables and dressing when you’re ready to eat. It’s a simple way to add variety to your collection of healthy protein bowl recipes.
Prep time: 15 minutes · Cook time: 20 minutes · Total time: 35 minutes · Servings: 2 · Difficulty: Easy
Ingredients
For the buffalo chicken
- 2 small boneless, skinless chicken breasts (about 300-350 g total), cut into bite-sized pieces
- 1 tablespoon olive oil
- 3 tablespoons buffalo sauce
- 1/2 teaspoon garlic powder
- 1/2 teaspoon paprika
- Black pepper, to taste
For the cauliflower rice bowls
- 4 cups cauliflower rice (about 400 g)
- 1 teaspoon olive oil
- 1 cup cherry tomatoes, halved
- 1 small cucumber, diced
- 1/2 avocado, sliced
- 2 cups shredded lettuce
- Salt and black pepper, to taste
For the creamy yogurt dressing
- 1/2 cup plain Greek yogurt (about 120 g)
- 1 teaspoon lemon juice
- 1 tablespoon water, or more as needed
- 1/4 teaspoon garlic powder
- Salt and black pepper, to taste
Instructions
1. Season the chicken. Place the chicken pieces in a bowl. Add the olive oil, garlic powder, paprika, and black pepper, then toss until evenly coated.
2. Cook the chicken. Heat a skillet over medium heat. Add the chicken in a single layer and cook for about 6-8 minutes, stirring occasionally, until browned and cooked through. The thickest pieces should reach 165°F (74°C).
3. Add the buffalo sauce. Reduce the heat to low and stir in the buffalo sauce. Toss the chicken until every piece is coated, then cook for another 1-2 minutes. If the sauce becomes too thick, add a small splash of water.
4. Cook the cauliflower rice. Heat 1 teaspoon of olive oil in a separate skillet over medium heat. Add the cauliflower rice and cook for about 5-7 minutes, stirring occasionally, until tender and most of the moisture has evaporated. Season with a little salt and black pepper.
5. Make the yogurt dressing. In a small bowl, mix the Greek yogurt, lemon juice, garlic powder, salt, and black pepper. Add water a little at a time until the dressing reaches your preferred consistency.
6. Prepare the vegetables. Halve the cherry tomatoes, dice the cucumber, slice the avocado, and shred the lettuce if needed.
7. Assemble the bowls. Divide the cauliflower rice between two bowls. Add the buffalo chicken, lettuce, cucumber, tomatoes, and avocado.
8. Finish and serve. Drizzle the yogurt dressing over the top. Add a little extra buffalo sauce if you like a stronger, spicier flavor.
How to Make Buffalo Chicken Bowls for Meal Prep
These bowls are easy to prepare ahead of time. Cook the chicken and cauliflower rice, then divide them between airtight containers. Keep the lettuce, cucumber, tomatoes, avocado, and yogurt dressing separate until serving so the vegetables stay fresh and crisp.
Refrigerate the cooked chicken and cauliflower rice promptly and use within 3-4 days. Reheat the chicken and cauliflower rice until hot throughout, then add the cold toppings and dressing. For the best texture, slice the avocado just before eating.
You can also prepare the chicken with the seasoning in advance and store it covered in the refrigerator until you’re ready to cook. Keep raw chicken separate from ready-to-eat ingredients, and don’t reuse its marinade unless you cook it thoroughly.
13. High Protein Mediterranean Chickpea Bowl
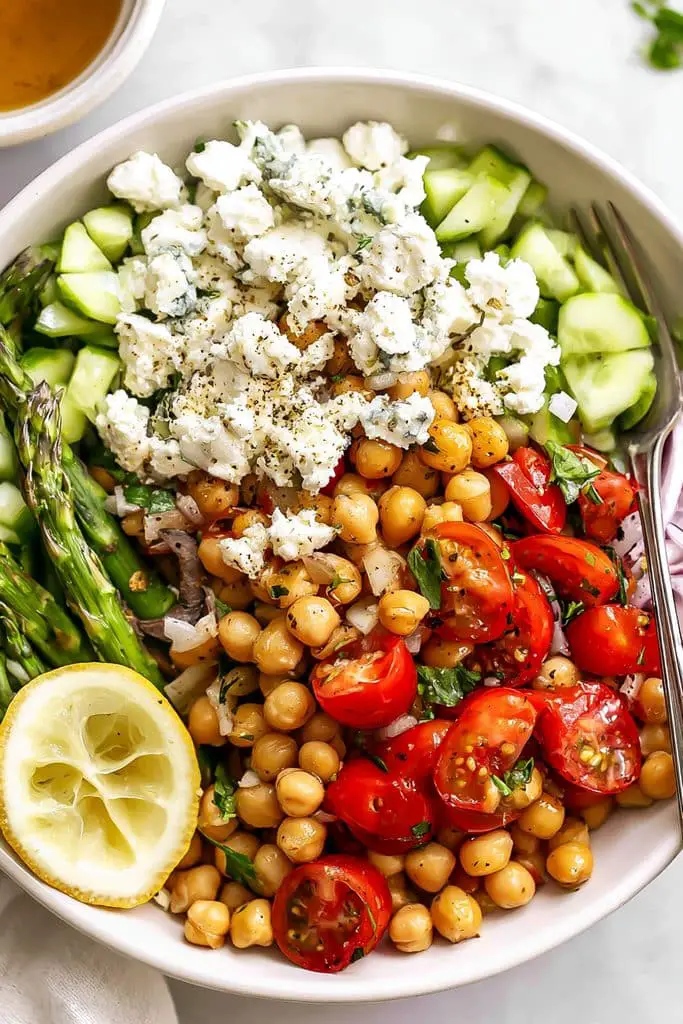
I like this bowl because it’s colorful, easy to make, and doesn’t require much cooking. Chickpeas provide plant-based protein and fiber, while quinoa adds extra protein and makes the bowl more filling. The feta and olives bring a salty, savory flavor that works well with the fresh vegetables.
This is a useful choice if you’re looking for healthy protein bowl recipes without meat. You can prepare most of the ingredients ahead of time, making it a convenient option for busy weekdays. For an extra protein boost, add a spoonful of hummus or serve the bowl with plain Greek yogurt on the side.
Prep time: 15 minutes · Cook time: 15 minutes · Total time: 30 minutes · Servings: 2 · Difficulty: Easy
Ingredients
For the bowls
- 1 can chickpeas (about 240 g drained and rinsed)
- 1/2 cup uncooked quinoa (about 85 g)
- 1 small cucumber, diced
- 1 cup cherry tomatoes, halved
- 1/4 small red onion, thinly sliced
- 1/4 cup crumbled feta cheese (about 30 g)
- 2 tablespoons Kalamata olives, sliced
- 2 tablespoons hummus, optional
- 2 tablespoons chopped fresh parsley
For the lemon dressing
- 1 tablespoon olive oil
- 1 tablespoon lemon juice
- 1 teaspoon red wine vinegar, optional
- 1/2 teaspoon dried oregano
- Salt and black pepper, to taste
Instructions
1. Rinse the quinoa. Place the quinoa in a fine-mesh strainer and rinse it under cold water. This helps remove its natural bitter coating.
2. Cook the quinoa. Add the quinoa to a saucepan with 1 cup of water. Bring to a boil, then reduce the heat, cover, and simmer for about 12-15 minutes, or until the water is absorbed and the quinoa is tender. Remove from the heat and let it sit covered for 5 minutes before fluffing with a fork.
3. Prepare the chickpeas. Drain and rinse the chickpeas well. Pat them dry if you prefer a firmer texture, then place them in a bowl. You can use them straight from the can or warm them in a skillet with a pinch of cumin and paprika for extra flavor.
4. Chop the vegetables. Dice the cucumber, halve the cherry tomatoes, and thinly slice the red onion. Slice the olives and chop the parsley.
5. Mix the dressing. In a small bowl, whisk together the olive oil, lemon juice, red wine vinegar if using, oregano, salt, and black pepper.
6. Assemble the bowls. Divide the cooked quinoa between two bowls. Add the chickpeas, cucumber, tomatoes, red onion, olives, and feta cheese.
7. Finish and serve. Drizzle the lemon dressing over the bowls and sprinkle with fresh parsley. Add hummus on the side or spoon a little over the top.
How to Make Mediterranean Chickpea Bowls for Meal Prep
This bowl is a good choice for meal prep because most of the ingredients can be prepared ahead of time. Cook the quinoa, rinse the chickpeas, chop the vegetables, and mix the dressing. Divide the quinoa and chickpeas between airtight containers, then store the vegetables, feta, and dressing separately if you want the freshest texture.
Refrigerate the prepared ingredients promptly. Cooked quinoa can generally be kept refrigerated for 3-4 days, and the assembled bowls are best enjoyed within that same period. Add the dressing just before serving to keep the vegetables crisp.
If you want to make the bowls more filling, prepare a little extra quinoa or add a serving of hummus. Keep in mind that hummus, feta, olives, and olive oil all contribute to the overall energy content, so adjust the amounts to suit your needs.
Is a Mediterranean Chickpea Bowl High in Protein?
Chickpeas and quinoa both provide plant-based protein, and together they make a satisfying base for a vegetarian meal. Chickpeas also supply fiber, while quinoa contributes additional nutrients. Feta adds some protein, although it also contributes sodium and saturated fat.
This bowl may provide less protein than a similar-sized bowl made with chicken, beef, or fish. If you want to increase the protein while keeping the meal vegetarian, add edamame or serve it with plain Greek yogurt. For a fully plant-based bowl, extra chickpeas or tofu are useful additions.
If you’re building a collection of healthy protein bowl recipes, this Mediterranean chickpea bowl offers a fresh alternative to meat-based meals. It’s simple to prepare, easy to customize, and works especially well for make-ahead lunches.
14. Crispy Tofu Edamame Bowl
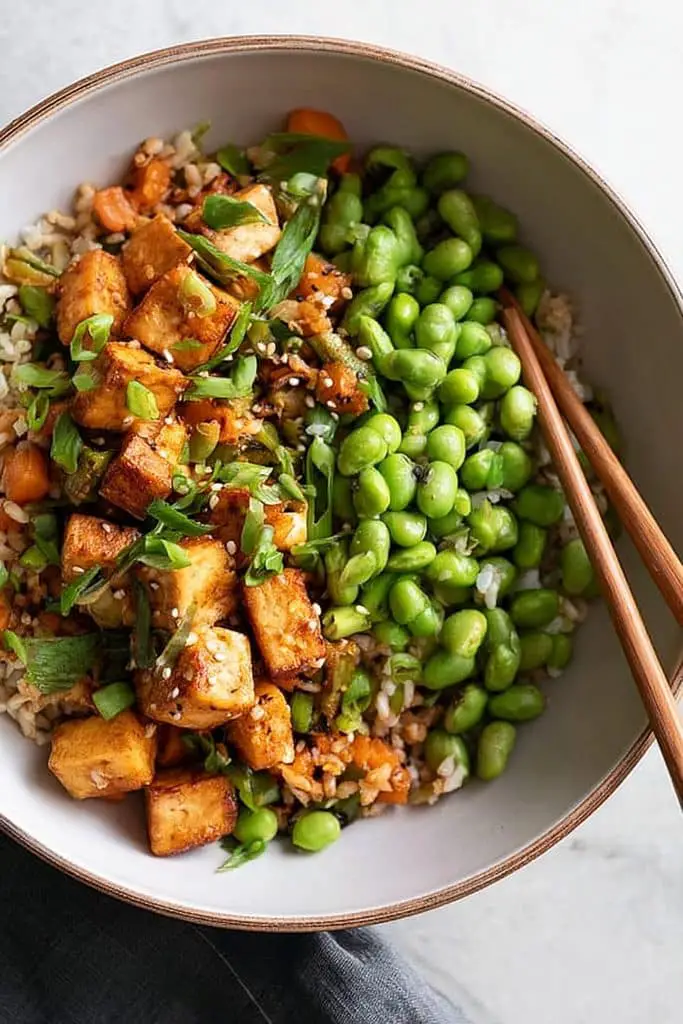
The tofu and edamame provide plant-based protein, while the rice and vegetables help make it a balanced meal. You can cook the tofu in a skillet or use an air fryer if you prefer a hands-off method.
It’s also easy to customize for meal prep. Use brown rice for extra fiber, add your favorite vegetables, or make the dressing a little spicy with sriracha. If you’re collecting high protein bowls for meal prep, this one is a useful addition to your weekly lunch rotation.
Prep time: 15 minutes · Cook time: 20 minutes · Total time: 35 minutes · Servings: 2 · Difficulty: Easy
Ingredients
For the bowls
- 250 g extra-firm tofu, drained
- 1 cup shelled edamame, cooked (about 150 g)
- 1 cup uncooked brown or white rice (about 180-200 g)
- 1 teaspoon olive oil or sesame oil
- 1 tablespoon cornstarch
- 1/2 teaspoon garlic powder
- 1/2 teaspoon paprika, optional
- Salt and black pepper, to taste
- 1 small cucumber, sliced
- 1 medium carrot, grated or cut into thin strips
- 1/2 avocado, sliced, optional
- 1 teaspoon sesame seeds
- 2 tablespoons sliced spring onions
For the soy-ginger dressing
- 2 tablespoons low-sodium soy sauce
- 1 tablespoon rice vinegar or lime juice
- 1 teaspoon sesame oil
- 1 teaspoon honey or maple syrup
- 1 teaspoon freshly grated ginger
- 1 small garlic clove, minced
- 1-2 teaspoons water, as needed
Instructions
1. Prepare the rice. Rinse the rice under cold water. Cook according to the package instructions, then set aside while you prepare the other ingredients.
2. Press the tofu. Drain the tofu and wrap it in a clean kitchen towel or paper towels. Place a plate or another light weight on top for 10-15 minutes to remove excess moisture. Cut it into bite-sized cubes.
3. Season the tofu. Add the tofu cubes to a bowl with the oil, cornstarch, garlic powder, paprika if using, salt, and black pepper. Toss gently until the pieces are evenly coated. The cornstarch helps create a crisp outer layer.
4. Cook until crispy. Heat a nonstick skillet over medium-high heat. Add the tofu in a single layer and cook for 8-12 minutes, turning occasionally, until golden and crisp on several sides. Avoid overcrowding the pan. You can also air-fry the tofu at 400°F (200°C) for about 12-15 minutes, shaking the basket halfway through.
5. Prepare the edamame and vegetables. Cook the edamame according to the package instructions if needed. Slice the cucumber, grate the carrot, and cut the avocado just before assembling the bowls.
6. Mix the dressing. In a small bowl, whisk together the soy sauce, rice vinegar, sesame oil, honey or maple syrup, ginger, garlic, and enough water to reach your preferred consistency.
7. Assemble the bowls. Divide the cooked rice between two bowls. Add the edamame, cucumber, carrot, and avocado. Arrange the crispy tofu on top.
8. Finish and serve. Drizzle with the soy-ginger dressing and sprinkle with sesame seeds and sliced spring onions. Serve while the tofu is still warm and crisp.
Tips and Variations
- Make the tofu extra crispy: Press it well before cooking, coat it lightly with cornstarch, and leave space between the pieces in the pan or air fryer.
- Add more protein: Increase the edamame portion or use a higher-protein grain such as quinoa instead of rice.
- Make it spicy: Add sriracha, chili flakes, or a little chili crisp to the dressing.
- Change the vegetables: Bell peppers, shredded cabbage, steamed broccoli, and snap peas all work well in this bowl.
- Make it gluten-free: Use certified gluten-free tamari instead of regular soy sauce, and check the labels on your other ingredients.
- Try a peanut dressing: For a creamier option, whisk a tablespoon of peanut butter with lime juice, soy sauce, a little warm water, and grated ginger.
How to Meal Prep Crispy Tofu Edamame Bowls
This bowl is easy to prepare ahead of time. Cook the rice, crisp the tofu, and portion the cooked edamame and vegetables into separate airtight containers. Store the dressing in a small jar so you can add it just before eating.
Refrigerate the cooked ingredients promptly and use them within 3-4 days. For the best texture, keep the tofu separate from the dressing and reheat it in an air fryer, oven, or skillet rather than the microwave. This helps it regain some of its crispness.
If you’re preparing these bowls for several lunches, you can make a double batch of tofu and rice. Add fresh cucumber and avocado when you’re ready to eat, since they taste best when freshly prepared.
Is a Crispy Tofu Edamame Bowl High in Protein?
Yes, tofu and edamame are both useful plant-based protein sources. Together, they can make this bowl a filling lunch, while rice provides energy and the vegetables add fiber and variety. The exact protein content will depend on the tofu brand, the amount of edamame, and your portion sizes.
For a higher-protein version, add extra edamame, use a generous serving of tofu, or replace some of the rice with quinoa. You can also adjust the dressing to suit your preferences, keeping in mind that soy sauce can be high in sodium.
This crispy tofu edamame bowl is a flavorful choice for anyone who wants more plant-based meals in their routine. It’s easy to adapt, works well for meal prep, and adds variety to a weekly lineup of healthy high protein bowls.
15. High Protein Egg and Cottage Cheese Breakfast Bowl
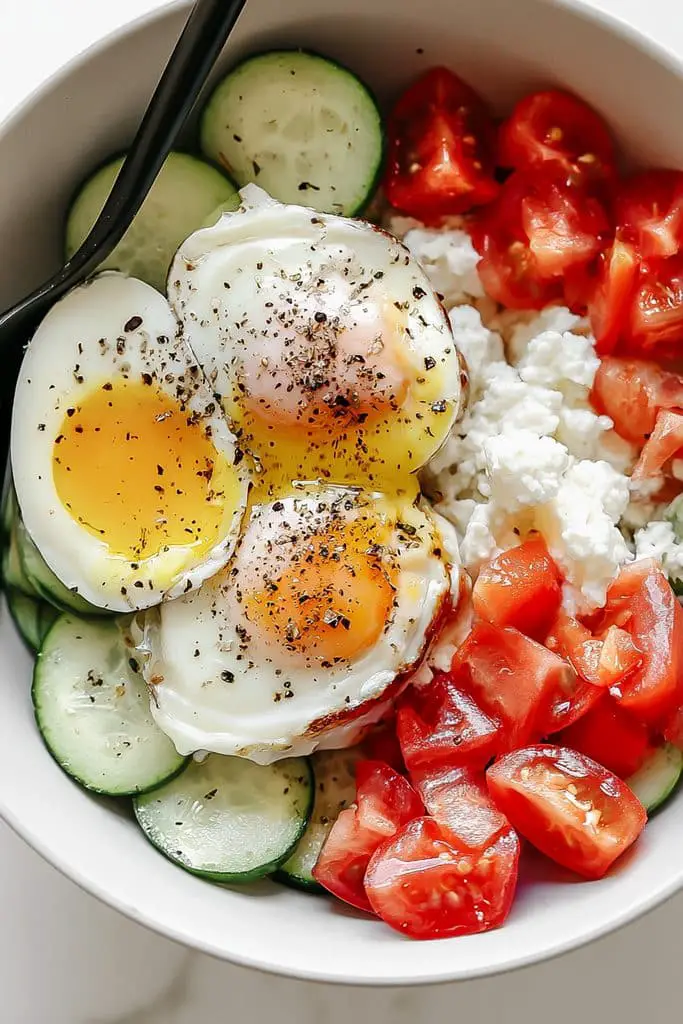
Eggs and cottage cheese provide protein, while spinach and tomatoes add freshness. You can serve it on its own for a lighter meal or add whole-grain toast or roasted potatoes when you want something more substantial.
Although it’s often served as breakfast, this is also one of those high protein bowls that works well for a quick lunch. It takes around 15 minutes to prepare, making it useful for busy mornings or days when you don’t feel like cooking a complicated meal.
Prep time: 5 minutes · Cook time: 10 minutes · Total time: 15 minutes · Servings: 1 · Difficulty: Easy
Ingredients
- 2 large eggs
- 1/2 cup cottage cheese (about 110-115 g)
- 1 teaspoon olive oil or butter
- 1 cup fresh spinach
- 1/2 cup cherry tomatoes, halved
- 1/2 avocado, sliced
- 1 tablespoon chopped green onions or fresh chives
- Salt and black pepper, to taste
- 1/4 teaspoon garlic powder, optional
- Pinch of chili flakes, optional
Optional toppings and sides:
- 1 slice whole-grain toast
- 1 tablespoon crumbled feta cheese
- Fresh parsley or dill
- A few cucumber slices
Instructions
1. Prepare the vegetables. Wash the spinach and tomatoes. Halve the tomatoes, slice the avocado, and chop the green onions.
2. Cook the spinach and tomatoes. Heat the olive oil or butter in a nonstick skillet over medium heat. Add the spinach and cook for 1-2 minutes until wilted. Add the cherry tomatoes and cook for another 2 minutes. Transfer the vegetables to a bowl.
3. Scramble the eggs. Crack the eggs into a small bowl and whisk with a pinch of salt, black pepper, and garlic powder if using. Pour them into the same skillet over medium-low heat. Stir gently for 2-4 minutes, until the eggs are cooked through but still soft.
4. Add the cottage cheese. Spoon the cottage cheese into the serving bowl beside the scrambled eggs. You can leave it cold for a creamy contrast or gently fold a spoonful into the eggs near the end of cooking.
5. Assemble the bowl. Add the cooked spinach and tomatoes, then arrange the sliced avocado on top. Sprinkle with green onions, black pepper, and chili flakes if you like a little heat.
6. Serve immediately. Enjoy the bowl on its own or serve it with whole-grain toast for extra fiber and carbohydrates.
How to Prepare This Breakfast Bowl Ahead of Time
This bowl is best freshly made because scrambled eggs and avocado have the nicest texture when served right away. However, you can save time by washing and chopping the vegetables the night before.
If you want to prepare the cooked ingredients in advance, scramble the eggs and cook the spinach and tomatoes, then refrigerate them promptly in an airtight container. Use within 3-4 days and reheat until steaming hot. Store the cottage cheese separately and add it after reheating. Slice the avocado just before serving to help prevent browning.
For a simple weekday routine, portion the cottage cheese into small containers and keep the vegetables ready in the fridge. In the morning, you only need to cook the eggs and assemble everything.
Is an Egg and Cottage Cheese Bowl High in Protein?
Yes, eggs and cottage cheese are both good sources of protein. Two large eggs provide roughly 12-13 grams of protein, while half a cup of cottage cheese often adds around 12-14 grams, depending on the brand. Together, they can provide approximately 24-27 grams of protein before counting the smaller amounts from vegetables and optional toppings.
The exact nutrition will vary with your ingredients and portion sizes. For even more protein, add another egg or increase the cottage cheese portion. If you’re watching your sodium intake, compare cottage cheese labels because some brands contain more salt than others.
This bowl is a simple way to add more protein to your day without relying on protein powder or complicated recipes. With a short cooking time and plenty of room for variations, it’s a practical choice for breakfast, lunch, or a quick meal whenever you need something satisfying.