These Vegan Meringue Nests are one of those desserts that look fancy and whimsical but are secretly very easy to make. Light, crisp, and cloud-like, they’re the kind of gluten-free vegan Easter dessert that always gets a “wait… this is vegan?!” reaction at the table.
I love making these little nests when spring rolls around because they’re playful, customizable, and perfect for filling with creams, fruit, or tiny chocolate treats. If you’ve been looking for an easy vegan meringue recipe that actually works and doesn’t feel intimidating, this one’s a keeper.
Ingredient Notes & Substitutions
AQUAFABA
This is the magic behind vegan meringue. You’ll need about ¾ cup of liquid from a can of chickpeas, just the liquid, not the beans. Look for a can with a slightly thick, viscous brine rather than watery. If it pours like egg whites, you’re golden. Leftover chickpeas? Toss them into salads, curries, or mash them for sandwiches.
SUGAR
You’ll use about ¾ to 1 cup of fine sugar, depending on how sweet you like your meringue. Superfine or caster sugar dissolves best and gives a smoother texture, but regular white sugar works too if you beat long enough. Avoid brown sugar here, it adds moisture and changes the structure.
ACID (LEMON JUICE OR VINEGAR)
Just 1 teaspoon makes a big difference. It helps stabilize the aquafaba and gives you stiff, glossy peaks. Fresh lemon juice adds a clean flavor, while white or apple cider vinegar works quietly in the background with no taste.
CORNSTARCH (OPTIONAL BUT HELPFUL)
A small amount, about 1 teaspoon, helps the nests stay crisp on the outside while remaining slightly marshmallowy inside. It’s especially helpful in humid kitchens. Arrowroot powder works as a gluten-free substitute.
VANILLA EXTRACT
Use ½ to 1 teaspoon of good-quality vanilla for warmth and depth. It softens the sweetness and gives the meringue that classic dessert aroma.
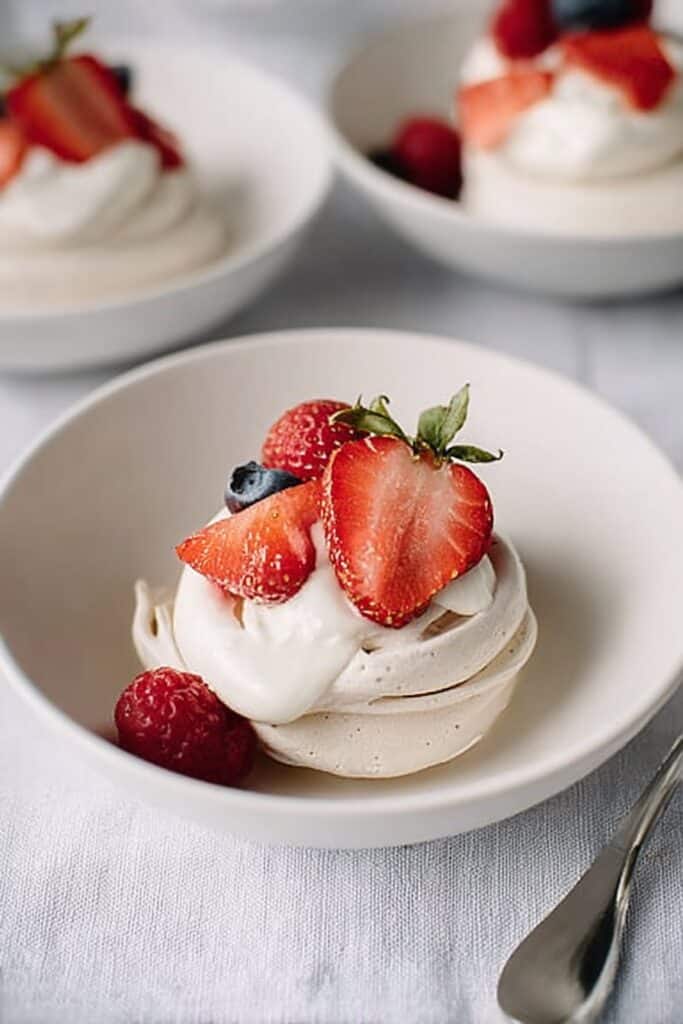
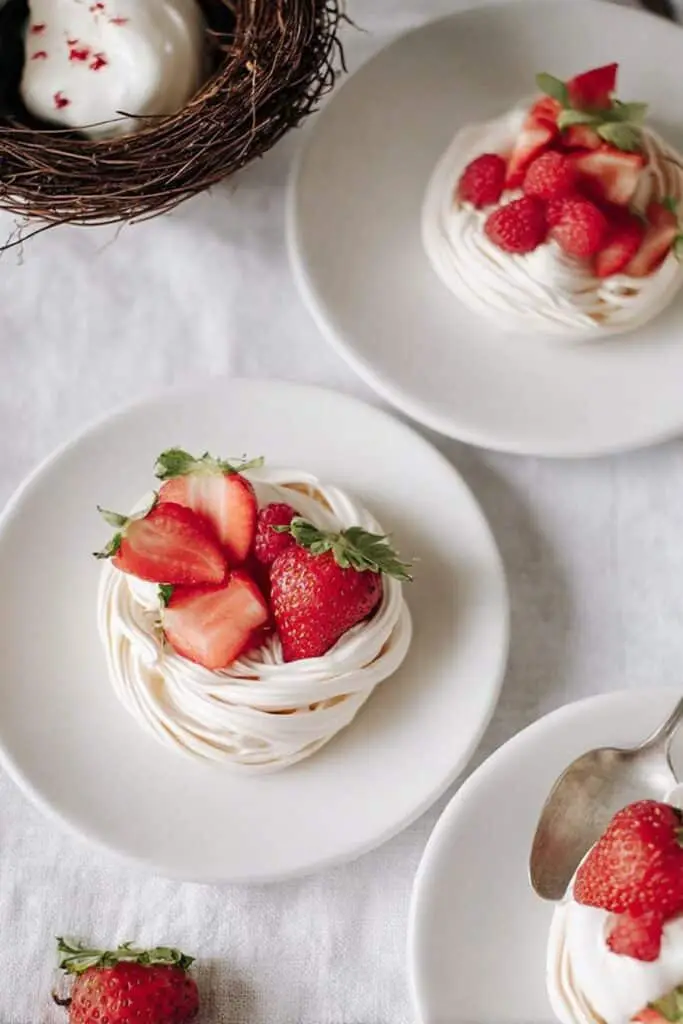
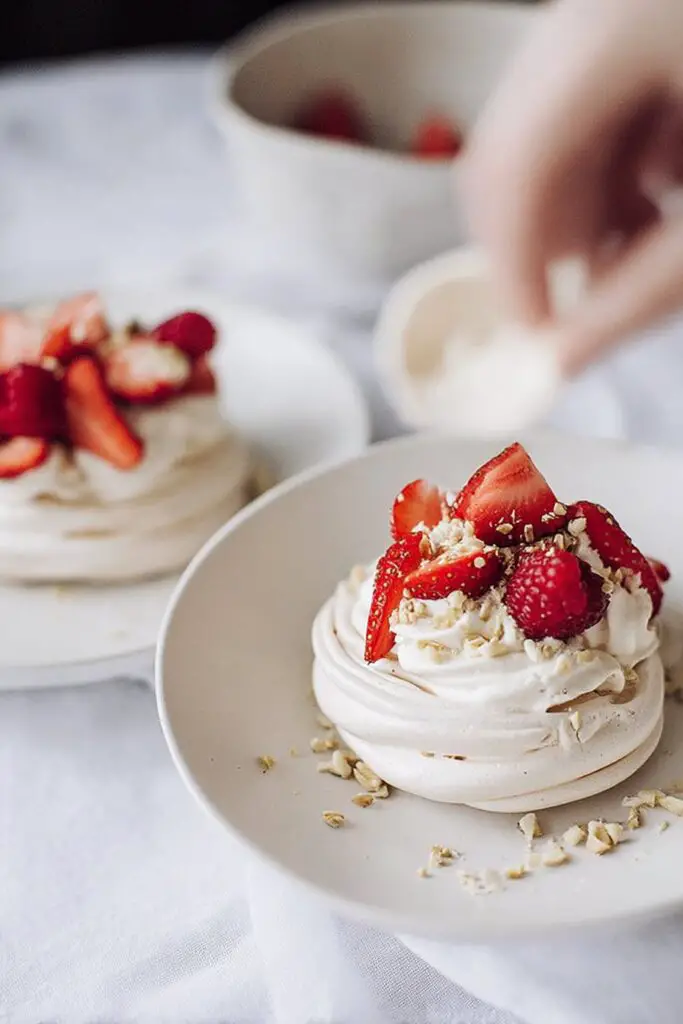
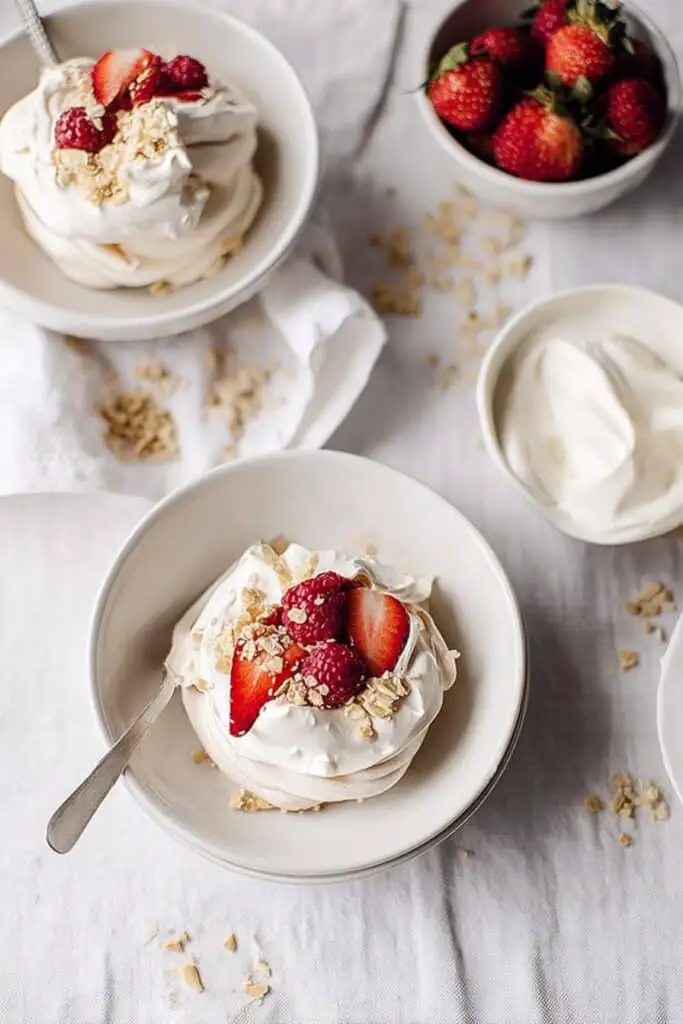
FILLINGS (FOR SERVING)
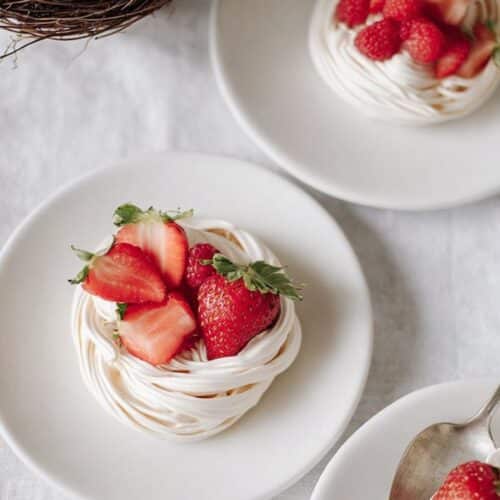
Think coconut whipped cream, dairy-free yogurt, lemon curd, or fresh berries. You can keep it simple or go all out, these nests love being dressed up.
Step-by-Step Instructions
- Preheat your oven to a very low temperature, around 210°F (100°C), and line a baking tray with parchment paper. Low and slow is the secret here, meringue hates rushing.
- Pour the aquafaba into a clean, grease-free bowl. Any oil can stop it from whipping properly. Start beating on medium speed until it turns foamy and pale, like a light sea foam.
- Add the acid and keep beating. You’ll see the mixture thicken and turn glossy. At this stage, it should hold soft peaks that gently flop over.
- Slowly add the sugar, one spoonful at a time. This part takes patience. Let each addition fully dissolve before adding the next. The mixture will become thick, shiny, and dramatically increase in volume.
- Beat until stiff peaks form. When you lift the whisk, the peaks should stand tall without drooping. Rub a bit between your fingers, if it feels grainy, keep mixing.
- Gently fold in the vanilla and cornstarch using a spatula. Keep your movements light to avoid knocking out the air.
- Spoon or pipe the meringue onto the tray, shaping small circles and creating a slight dip in the center to form a nest. Leave a little space between each one, they won’t spread much.
- Bake for 90 minutes, then turn off the oven and let the nests cool inside with the door slightly open. This slow cooling helps prevent cracks.
- Once completely cool, gently lift them off the paper. They should feel crisp, light, and delicate.
Expert Tips
- Use room-temperature aquafaba, it whips faster and holds air better.
- If your kitchen is humid, add the cornstarch for extra structure.
- Beat the sugar in slowly; rushing this step causes grainy meringue.
- Pipe nests slightly taller than you think, they settle a bit as they bake.
- Let the nests cool fully before filling to keep them crisp.
- Fill just before serving for the best texture and appearance.
Storage & Make-Ahead
Unfilled vegan meringue nests store beautifully in an airtight container at room temperature for up to 4–5 days. Keep them away from heat and moisture, as humidity will soften them quickly.
Once filled with creams or fruit, they’re best enjoyed the same day. If you need to prep ahead, make the nests in advance and store the filling separately. Avoid refrigerating plain meringues, they absorb moisture and lose their crunch.
What to Serve With
These meringue nests pair perfectly with coconut whipped cream and fresh berries for a light dessert, or a spoon of tangy lemon curd if you want something brighter. They’re lovely alongside a spring brunch spread, especially with fresh fruit and dairy-free yogurt.
They also shine on an Easter dessert table, baby showers, or anytime you want a gluten-free treat that feels festive without being heavy.
FAQs
Can I make vegan meringue without sugar?
Sugar is essential for structure, but you can reduce it slightly. Liquid sweeteners won’t work here.
Why is my meringue soft or sticky?
Humidity or under-baking is usually the cause. Bake longer and cool slowly in the oven.
Can I color vegan meringue?
Yes! Use gel or powdered food coloring to avoid adding extra moisture.
Do vegan meringues taste like chickpeas?
Not at all. Once baked, the flavor is neutral and lightly sweet.
Vegan Meringue Nests (Gluten-Free Vegan Easter Dessert)
Ingredients
- ¾ cup aquafaba chickpea liquid
- ¾ –1 cup white sugar
- 1 teaspoon lemon juice or vinegar
- 1 teaspoon cornstarch optional
- ½ teaspoon vanilla extract
Instructions
- Preheat oven to 210°F (100°C) and line a baking tray.
- Whip aquafaba until foamy, then add acid and beat to soft peaks.
- Gradually add sugar, beating until stiff, glossy peaks form.
- Fold in vanilla and cornstarch gently.
- Pipe or spoon nests onto tray, shaping a center dip.
- Bake for 90 minutes, then cool completely in the oven.