
Valentine’s Day is the perfect time to make something sweet for the people we love. And honestly, I don’t think desserts need to be complicated to look beautiful and taste amazing. Sometimes, a simple chocolate treat or a few fresh strawberries dipped in chocolate can make the day feel extra special.
That’s why I love collecting cute and easy Valentine’s Day desserts that anyone can make at home. From chocolate-covered strawberries and heart-shaped cookies to creamy cheesecakes and no-bake treats, there are so many delicious options to try.
In this list, I’m sharing some of my favorite Valentine’s Day dessert ideas that are easy to prepare, look lovely on the table, and are perfect for sharing with family, friends, or someone special. Whether you’re looking for fun Valentine’s desserts to make with kids or unique Valentine’s Day desserts for a romantic evening, you’ll find something to love here.
1. Chocolate-Covered Strawberries

Chocolate-covered strawberries are one of those desserts that always look beautiful without requiring much effort.
What makes these treats even better is how easy they are to customize. I can use dark, milk, or white chocolate, then add pink chocolate drizzle or Valentine’s sprinkles for a festive finish.
Prep time: 15 minutes
Setting time: 20-30 minutes
Total time: 35-45 minutes
Difficulty: Easy
Servings: 12 strawberries
Ingredients
- 12 fresh strawberries with their stems
- 200 g (7 oz) milk or dark chocolate, chopped
- 50 g (1.75 oz) white chocolate, optional for decoration
- 1 tablespoon Valentine’s Day sprinkles, optional
Instructions
1. Prepare the Strawberries
Wash the strawberries gently under cool water and pat them completely dry with paper towels. I always make sure there is no water left on the strawberries because even a little moisture can make melted chocolate difficult to work with.
Leave the green stems attached. They make the strawberries easier to hold while dipping.
2. Melt the Chocolate
Place the chopped chocolate in a microwave-safe bowl. Microwave in 20-second intervals, stirring after each interval, until the chocolate is smooth and fully melted.
You can also melt the chocolate in a heatproof bowl over a pan of gently simmering water. Just make sure the bottom of the bowl doesn’t touch the water.
3. Dip the Strawberries
Hold each strawberry by its stem and dip it into the melted chocolate. Turn it gently to coat most of the surface, then lift it and allow the extra chocolate to drip back into the bowl.
Place each strawberry on a baking tray lined with parchment paper.
4. Decorate the Strawberries
If you want to make these treats look more festive, melt the white chocolate in a separate bowl. Drizzle it over the chocolate-coated strawberries using a spoon.
Add Valentine’s sprinkles before the chocolate sets. You can also use pink candy melts for a pretty pink finish.
5. Let the Chocolate Set
Leave the strawberries at room temperature in a cool place until the coating firms up, or refrigerate them briefly to speed up the process.
My Tips for the Best Chocolate-Covered Strawberries
- Dry the strawberries well: This is the most important step for getting a smooth chocolate coating.
- Choose good-quality chocolate: It makes a noticeable difference in flavor and texture.
- Try different toppings: Crushed nuts, coconut flakes, and colorful sprinkles all work beautifully.
- Serve them fresh: Strawberries release moisture over time, so these desserts are best enjoyed on the day you make them.
I love how something this simple can look so special. Arrange the strawberries in a small gift box or on a pretty serving plate, and you have one of the cutest and easiest Valentine’s Day desserts to share with someone you love.
2. Easy Valentine’s Day Sugar Cookies

These Easy Valentine’s Day Sugar Cookies are one of my favorite cute and easy Valentine’s Day desserts. They’re soft in the middle, lightly golden around the edges, and so much fun to decorate with pink frosting, red sprinkles, and little heart shapes. I love making these cookies when I want a homemade Valentine’s Day treat that looks special without being too complicated.
Prep Time: 20 minutes
Chill Time: 30 minutes
Cook Time: 8-10 minutes
Total Time: About 1 hour
Difficulty: Easy
Servings: 18-24 cookies, depending on the cutter size
Ingredients
- 2 ¼ cups all-purpose flour
- ½ teaspoon baking powder
- ¼ teaspoon salt
- ¾ cup unsalted butter, softened
- ¾ cup granulated sugar
- 1 large egg
- 2 teaspoons vanilla extract
- Pink or red frosting, for decorating (optional)
- Valentine’s Day sprinkles, for decorating (optional)
Instructions
- Mix the dry ingredients. In a medium bowl, whisk together the flour, baking powder, and salt. Set aside.
- Cream the butter and sugar. In a separate large bowl, beat the softened butter and sugar until light and fluffy. Add the egg and vanilla extract, then mix until everything is combined.
- Make the dough. Gradually add the dry ingredients to the butter mixture. Mix just until a soft dough forms. If the dough feels sticky, that’s okay; chilling will make it easier to handle.
- Chill the dough. Shape the dough into a flat disk, wrap it, and refrigerate for about 30 minutes. This helps the cookies keep their heart shapes while baking.
- Cut out the cookies. Preheat your oven to 350°F (175°C) and line a baking sheet with parchment paper. Roll the dough on a lightly floured surface to about ¼ inch thick. Use heart-shaped cookie cutters to cut out the cookies.
- Bake. Place the cookies on the prepared baking sheet, leaving a little space between them. Bake for 8-10 minutes, or until the edges are just beginning to turn golden. Let them cool on the baking sheet for a few minutes before transferring them to a wire rack.
- Decorate and enjoy. Once the cookies are completely cool, add pink or red frosting and Valentine’s Day sprinkles. I love mixing different shades of pink and red to make each cookie look a little different!
Tips for the Best Valentine’s Day Sugar Cookies
- Don’t skip chilling: Cold dough is easier to roll and helps the cookies hold their shape.
- Avoid overbaking: Take the cookies out when the edges are just set. They will firm up as they cool.
- Make them your own: Use heart-shaped cutters, edible glitter, icing, or colorful sprinkles to create your favorite designs.
- Make them ahead: You can prepare the dough a day in advance and keep it covered in the refrigerator until you’re ready to bake.
These cute Valentine’s Day sugar cookies are perfect for sharing with friends, packing into treat bags, or enjoying with a cup of coffee. They’re simple, festive, and a fun Valentine’s Day dessert to make with kids, too!
3. Valentine’s Day Chocolate-Covered Pretzels

If you love sweet and salty treats, these Valentine’s Day Chocolate-Covered Pretzels are a must-try! They’re one of my favorite easy Valentine desserts with few ingredients, especially when I need something cute to share with friends or family.
Prep Time: 15 minutes
Setting Time: 20-30 minutes
Total Time: 35-45 minutes
Difficulty: Easy
Servings: About 24 pretzels
Ingredients
- 24 mini pretzel twists
- 1 cup (170 g) milk or white chocolate chips
- ¼ cup pink or red candy melts (optional)
- 2 tablespoons Valentine’s Day sprinkles
- 1 teaspoon coconut oil, if needed to thin the chocolate
Instructions
- Prepare the pretzels. Line a baking sheet or tray with parchment paper. Make sure your pretzels are dry and ready for dipping.
- Melt the chocolate. Place the chocolate chips in a microwave-safe bowl. Microwave in 20-second intervals, stirring between each one, until smooth. If the chocolate seems too thick, stir in a little coconut oil.
- Dip the pretzels. Dip each pretzel halfway into the melted chocolate, or use a spoon to drizzle chocolate over the top. Let the extra chocolate drip back into the bowl before placing each pretzel on the lined tray.
- Add the decorations. While the chocolate is still wet, sprinkle the pretzels with pink, red, and white Valentine’s Day sprinkles. For an extra cute look, melt the candy melts and drizzle them over the pretzels once the first chocolate layer has set.
- Let them set. Leave the pretzels at room temperature until the chocolate hardens, or place the tray in the refrigerator for about 15-20 minutes.
- Serve and enjoy. Once the chocolate is firm, arrange your pretzels on a pretty plate or pack them into small treat bags. They’re ready to share!
Tips for the Best Chocolate-Covered Pretzels
- Choose your favorite chocolate: Milk chocolate gives you a sweeter treat, while dark chocolate adds a richer flavor. White chocolate looks especially pretty with pink and red decorations.
- Decorate quickly: Add sprinkles before the chocolate sets so they stick properly.
- Try different shapes: Pretzel rods, mini twists, and pretzel snaps all work well for this recipe.
- Make them ahead: These treats are easy to prepare a day or two before Valentine’s Day. Store them in an airtight container in a cool, dry place.
These Valentine’s Day chocolate-covered pretzels are crunchy, colorful, and so simple to make. I love that you can change the chocolate and toppings to match your theme, making them a fun Valentine’s Day dessert for parties, gift boxes, or a cozy night at home.
4. Mini Valentine’s Day Cheesecakes
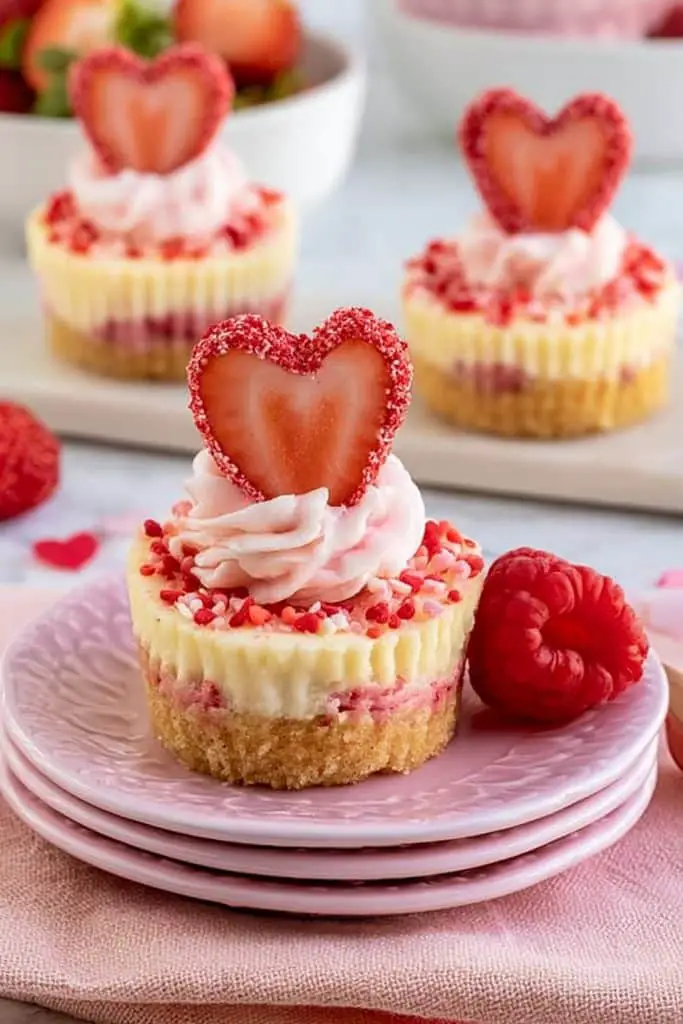
I love making mini cheesecakes because everyone gets their own adorable dessert, and they’re easy to decorate with fresh strawberries, whipped cream, or pink sprinkles. If you’re looking for cute and easy Valentine’s Day desserts that feel a little more special, these are a lovely choice.
Prep Time: 20 minutes
Cook Time: 18-22 minutes
Chill Time: 2 hours
Total Time: About 2 hours 45 minutes
Difficulty: Easy
Servings: 12 mini cheesecakes
Ingredients
For the crust:
- 1 cup (100 g) graham cracker crumbs or digestive biscuit crumbs
- 3 tablespoons unsalted butter, melted
- 1 tablespoon granulated sugar
For the cheesecake filling:
- 12 oz (340 g) cream cheese, softened
- ½ cup (100 g) granulated sugar
- 1 large egg, at room temperature
- ¼ cup (60 g) sour cream
- 1 teaspoon vanilla extract
- 1 teaspoon lemon juice (optional)
For decorating:
- Whipped cream (optional)
- Fresh strawberry slices or raspberries
- Pink or red sprinkles (optional)
Instructions
- Prepare the muffin pan. Preheat your oven to 325°F (165°C). Line a 12-cup muffin pan with paper liners so the mini cheesecakes are easy to remove.
- Make the crust. Mix the biscuit crumbs, melted butter, and sugar in a bowl until the mixture resembles wet sand. Divide it evenly among the muffin cups and press firmly into the bottom of each liner.
- Prepare the filling. In a large bowl, beat the softened cream cheese and sugar until smooth and creamy. Add the egg, sour cream, vanilla extract, and lemon juice, if using. Mix on low speed just until combined. Avoid overmixing, as too much air can cause the cheesecakes to crack.
- Fill the muffin cups. Spoon the cheesecake mixture over the crusts, filling each cup about three-quarters full. Gently tap the pan on the counter to release any large air bubbles.
- Bake the cheesecakes. Bake for 18-22 minutes, until the edges look set and the centers still have a slight wobble. Let them cool in the pan for about 20 minutes.
- Chill until firm. Transfer the cooled cheesecakes to the refrigerator and chill for at least 2 hours. This step helps them set properly and gives them that lovely creamy texture.
- Decorate and serve. Just before serving, add a swirl of whipped cream, a strawberry slice, or a few Valentine’s Day sprinkles. I love topping each mini cheesecake with a little heart-shaped strawberry for an extra festive touch!
Tips for the Best Mini Valentine’s Day Cheesecakes
- Use softened cream cheese: Room-temperature cream cheese blends more smoothly and helps prevent lumps in the filling.
- Don’t overbake: The centers should still wobble slightly when you take the cheesecakes out of the oven. They’ll firm up as they cool.
- Make them ahead: You can bake these mini cheesecakes the day before Valentine’s Day and decorate them just before serving.
- Try a chocolate twist: Add a few mini chocolate chips to the filling or drizzle melted chocolate over the chilled cheesecakes.
- Store them properly: Keep the cheesecakes in an airtight container in the refrigerator for up to 4 days.
These mini Valentine’s Day cheesecakes are creamy, pretty, and easy to personalize. Whether you’re making dessert for a date night, a family dinner, or a Valentine’s Day party, these little treats are sure to look adorable on the dessert table!
5. Valentine’s Day Chocolate Brownies
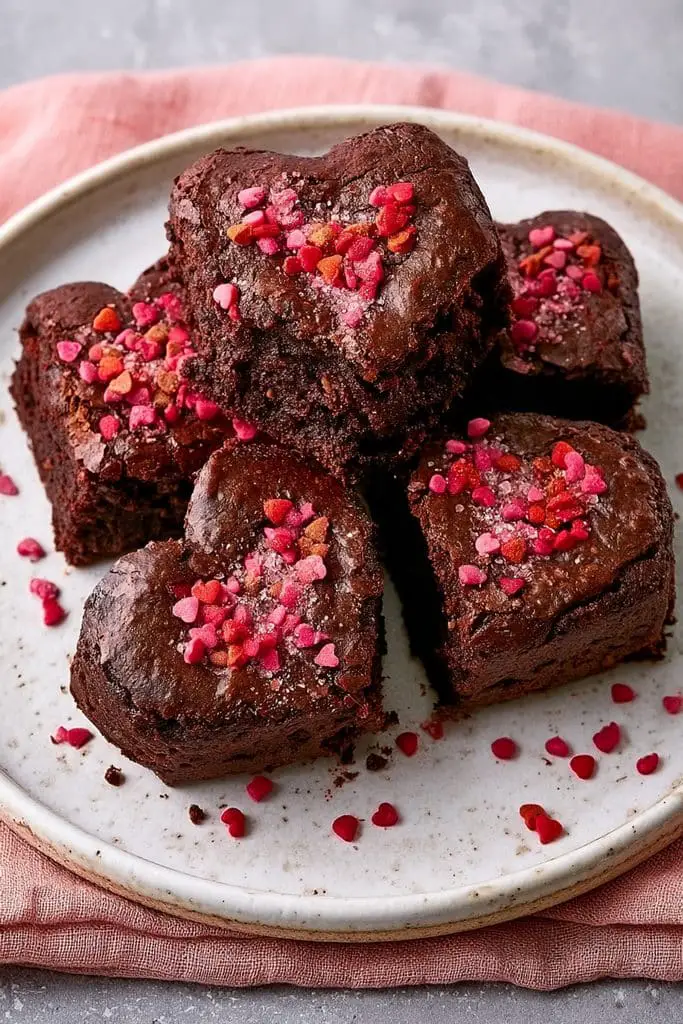
If you’re a chocolate lover like me, these Valentine’s Day Chocolate Brownies are hard to resist! They’re rich, fudgy, and full of chocolate flavor, with a soft center and slightly crackly top. I love making brownies for Valentine’s Day because they’re simple to prepare, easy to decorate, and look extra cute when cut into little hearts. They’re one of those fun Valentine’s Day desserts to make when you want something delicious without spending hours in the kitchen.
Prep Time: 15 minutes
Cook Time: 22-28 minutes
Cooling Time: 30 minutes
Total Time: About 1 hour 15 minutes
Difficulty: Easy
Servings: 9-12 brownies
Ingredients
- ½ cup (113 g) unsalted butter
- 1 cup (200 g) granulated sugar
- 2 large eggs
- 1 teaspoon vanilla extract
- ⅓ cup (35 g) unsweetened cocoa powder
- ½ cup (65 g) all-purpose flour
- ¼ teaspoon salt
- ¼ teaspoon baking powder
- ½ cup (85 g) chocolate chips (optional)
- Valentine’s Day sprinkles or powdered sugar, for decorating (optional)
Instructions
- Prepare the pan. Preheat your oven to 350°F (175°C). Grease an 8-inch square baking pan or line it with parchment paper, leaving a little overhang so the brownies are easy to lift out.
- Melt the butter. Melt the butter in a microwave-safe bowl or in a small saucepan over low heat. Let it cool slightly before mixing in the sugar.
- Add the eggs and vanilla. Whisk the eggs and vanilla extract into the butter mixture until smooth and glossy.
- Mix the dry ingredients. In a separate bowl, combine the cocoa powder, flour, salt, and baking powder. Add the dry mixture to the wet ingredients and stir just until combined. Fold in the chocolate chips if you’re using them.
- Bake the brownies. Spread the batter evenly into the prepared pan. Bake for 22-28 minutes, or until a toothpick inserted near the center comes out with a few moist crumbs. Try not to overbake them if you want a fudgy texture.
- Let them cool. Leave the brownies in the pan for about 30 minutes, or until they’re cool enough to cut neatly. For cleaner slices, let them cool completely.
- Make them Valentine’s Day-ready. Cut the brownies into squares or use a small heart-shaped cookie cutter to make heart-shaped brownies. Finish with a dusting of powdered sugar, a drizzle of melted chocolate, or a few pink and red sprinkles.
Tips for the Best Valentine’s Day Chocolate Brownies
- Don’t overmix the batter: Stir only until the flour disappears to help keep the brownies tender.
- Keep an eye on the baking time: Every oven is a little different, so start checking near the 22-minute mark.
- Make cute heart shapes: Let the brownies cool completely before using a cookie cutter. You can save the leftover brownie pieces for a sundae topping or a quick snack.
- Add extra chocolate: Chocolate chips or chunks make these brownies even richer.
- Store them properly: Keep leftover brownies in an airtight container at room temperature for up to 3 days.
These Valentine’s Day chocolate brownies are a simple way to make your dessert table feel extra special. I love serving them with fresh strawberries or a scoop of vanilla ice cream. They’re rich, chocolatey, and perfect for sharing with someone you love!
6. Strawberry Chocolate Chip Cookies
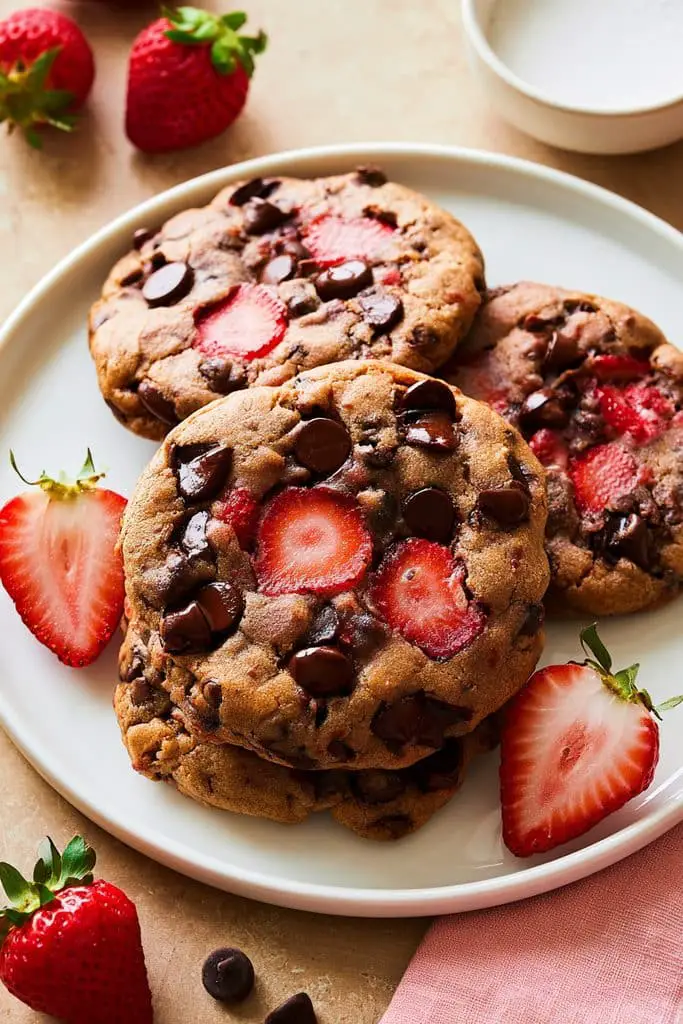
These Strawberry Chocolate Chip Cookies are sweet, soft, and full of Valentine’s Day charm. The pretty pink color and little chocolate chips make them look adorable. I love making these when I want something a little different from regular cookies without using a complicated recipe. They’re cute, delicious, and perfect for sharing with friends, family, or someone special.
Prep Time: 15 minutes
Chill Time: 30 minutes
Cook Time: 10-12 minutes
Total Time: About 1 hour
Difficulty: Easy
Servings: 18 cookies
Ingredients
- ½ cup (113 g) unsalted butter, softened
- ¾ cup (150 g) granulated sugar
- 1 large egg
- 1 teaspoon vanilla extract
- 1 ½ cups (190 g) all-purpose flour
- ½ teaspoon baking soda
- ¼ teaspoon salt
- 1 packet (about 3.4 oz or 96 g) strawberry-flavored gelatin dessert mix
- ¾ cup (130 g) semi-sweet chocolate chips
- A few drops of pink food coloring (optional)
Instructions
- Prepare the dough. In a large bowl, beat the softened butter and sugar until light and creamy. Add the egg and vanilla extract, then mix until well combined.
- Mix the dry ingredients. In a separate bowl, whisk together the flour, baking soda, salt, and strawberry gelatin dessert mix.
- Combine everything. Gradually add the dry ingredients to the butter mixture, mixing just until a soft dough forms. If you’d like a brighter pink color, add a drop or two of pink food coloring.
- Add the chocolate chips. Fold the chocolate chips into the dough, saving a few to press onto the tops of the cookies before baking.
- Chill the dough. Cover the bowl and refrigerate the dough for 30 minutes. Chilling helps the cookies spread less and keeps them thicker.
- Shape and bake. Preheat your oven to 350°F (175°C) and line a baking sheet with parchment paper. Scoop the dough into roughly 1 ½-tablespoon portions and place them about 2 inches apart. Press a few extra chocolate chips onto each cookie. Bake for 10-12 minutes, until the edges are set but the centers still look slightly soft.
- Cool and enjoy. Let the cookies rest on the baking sheet for about 5 minutes before transferring them to a wire rack. They’ll continue to set as they cool.
Tips for the Best Strawberry Chocolate Chip Cookies
- Measure the flour carefully: Too much flour can make the cookies dry. Spoon it into your measuring cup and level it off.
- Don’t overbake: The centers may look a little soft when you remove the cookies from the oven. That’s what helps keep them tender.
- Customize the chocolate: White chocolate chips are especially delicious with strawberry flavor and give the cookies a pretty pink-and-white look.
- Make them extra festive: Add Valentine’s Day sprinkles before baking or drizzle cooled cookies with melted white chocolate.
- Store them properly: Keep the cooled cookies in an airtight container at room temperature for up to 3 days.
These Strawberry Chocolate Chip Cookies are such a fun Valentine’s Day dessert. I love the combination of sweet strawberry flavor and rich chocolate chips, especially when they’re served with a cold glass of milk. Pack a few into a cute gift box, and you’ve got a homemade Valentine’s Day treat that’s as lovely to give as it is to eat!
7. Easy Valentine’s Day Chocolate Fudge
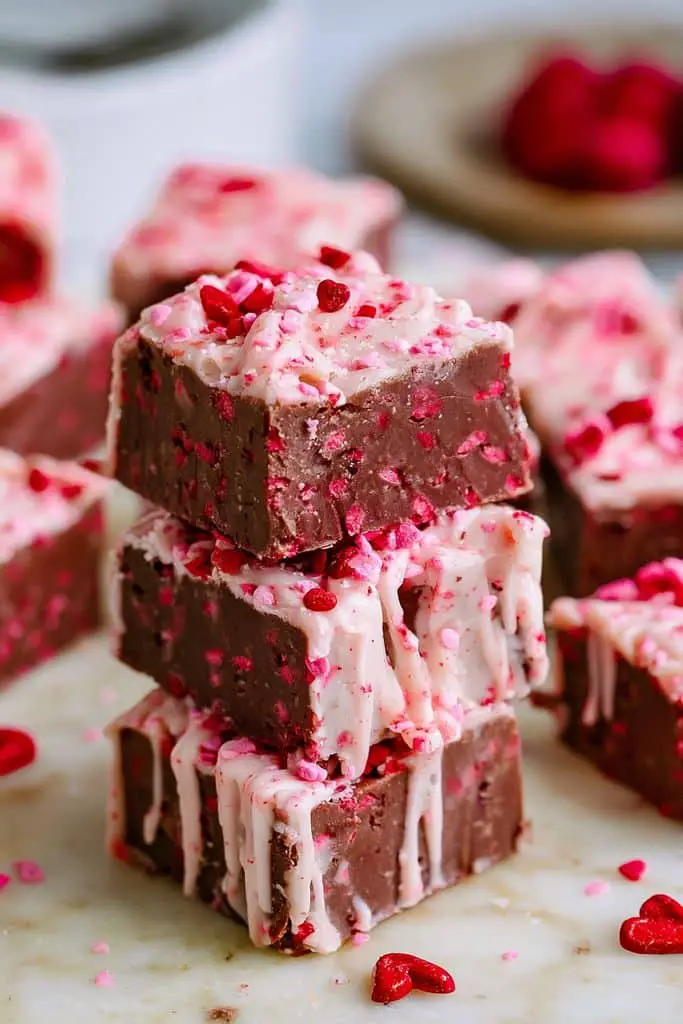
If you need a chocolate treat that’s easy to make and looks adorable on a dessert platter, this Easy Valentine’s Day Chocolate Fudge is a great choice. It’s rich, creamy, and melts in your mouth, and you only need a few simple ingredients to make it. I love decorating fudge with pink and red sprinkles because it instantly gives this classic chocolate treat a Valentine’s Day look.
This is one of my favorite easy Valentine desserts with few ingredients, especially when I want to prepare something ahead of time without turning on the oven.
Prep Time: 10 minutes
Chill Time: 2-3 hours
Total Time: About 2 hours 10 minutes to 3 hours 10 minutes
Difficulty: Easy
Servings: 24 small pieces
Ingredients
- 3 cups (510 g) semi-sweet chocolate chips
- 1 can (14 oz or 397 g) sweetened condensed milk
- 2 tablespoons unsalted butter
- 1 teaspoon vanilla extract
- 2 tablespoons Valentine’s Day sprinkles
- ¼ cup white chocolate chips (optional, for drizzling)
- Pink or red food coloring (optional, for the white chocolate drizzle)
Instructions
- Prepare the pan. Line an 8-inch square baking pan with parchment paper, leaving a little extra paper hanging over the sides. This makes it easier to lift out the fudge once it’s firm.
- Melt the chocolate. Add the chocolate chips, sweetened condensed milk, and butter to a microwave-safe bowl. Microwave in 20-30-second intervals, stirring each time, until the mixture is melted and smooth. You can also melt everything in a saucepan over low heat, stirring constantly.
- Add the vanilla. Stir in the vanilla extract until evenly combined. The mixture should be thick, glossy, and creamy.
- Spread the fudge. Pour the mixture into the prepared pan and spread it into an even layer using a spatula.
- Decorate. Sprinkle the top with pink, red, and white Valentine’s Day sprinkles while the fudge is still soft. For an extra pretty finish, melt the white chocolate chips separately and drizzle them over the top. Add a tiny drop of pink food coloring to the white chocolate if desired.
- Chill until firm. Refrigerate the fudge for 2-3 hours, or until completely set.
- Cut and serve. Lift the fudge out of the pan using the parchment paper. Cut it into small squares with a sharp knife. For a festive touch, you can even use a small heart-shaped cutter if the fudge is thick enough.
Tips for the Best Valentine’s Day Chocolate Fudge
- Use sweetened condensed milk: Make sure you don’t accidentally use evaporated milk. They are different products, and evaporated milk won’t give you the same creamy result.
- Melt the chocolate gently: Chocolate can burn easily, so use short microwave intervals and stir often.
- Try different flavors: Add a little peppermint extract or use a mixture of milk and dark chocolate for a different taste.
- Make it extra cute: Top the fudge with heart-shaped sprinkles, crushed freeze-dried strawberries, or a white chocolate drizzle.
- Store it properly: Keep the fudge in an airtight container in the refrigerator for up to 2 weeks. Let it sit at room temperature for a few minutes before serving for a softer bite.
This Easy Valentine’s Day Chocolate Fudge is creamy, chocolatey, and perfect for gifting. I love cutting it into small squares and arranging the pieces in a pretty box with a ribbon. It’s a simple homemade treat that looks thoughtful and festive without requiring much time or effort!
8. Heart-Shaped Chocolate Chip Cookies

These Heart-Shaped Chocolate Chip Cookies are a cute twist on a classic favorite! They’re buttery, soft in the middle, filled with melty chocolate chips, and shaped like little hearts for Valentine’s Day. I love this recipe because you get all the deliciousness of traditional chocolate chip cookies with an extra-special look. They’re perfect for sharing with someone you love or packing into a homemade Valentine’s Day gift box.
If you’re looking for fun Valentine’s Day desserts to make at home, these cookies are a sweet choice that doesn’t require fancy decorating skills.
Prep Time: 20 minutes
Chill Time: 30 minutes
Cook Time: 10-12 minutes
Total Time: About 1 hour
Difficulty: Easy
Servings: 12-16 cookies
Ingredients
- ½ cup (113 g) unsalted butter, softened
- ½ cup (100 g) packed light brown sugar
- ¼ cup (50 g) granulated sugar
- 1 large egg
- 1 teaspoon vanilla extract
- 1 ½ cups (190 g) all-purpose flour
- ½ teaspoon baking soda
- ¼ teaspoon salt
- 1 cup (170 g) semi-sweet chocolate chips
- 2 tablespoons extra chocolate chips, for decorating (optional)
Instructions
- Cream the butter and sugars. In a large bowl, beat the softened butter, brown sugar, and granulated sugar until creamy. Add the egg and vanilla extract, then mix until smooth.
- Combine the dry ingredients. In another bowl, whisk together the flour, baking soda, and salt. Gradually stir the dry mixture into the wet ingredients until a soft dough forms.
- Add the chocolate chips. Fold the chocolate chips into the dough, making sure they’re evenly distributed. If the dough feels very soft, don’t worry; chilling will make it easier to shape.
- Chill the dough. Cover the bowl and refrigerate for 30 minutes. This helps reduce spreading and makes the cookies easier to handle.
- Shape the hearts. Preheat your oven to 350°F (175°C) and line a baking sheet with parchment paper. Roll the dough to about ¼ inch thick on a lightly floured surface. Use a heart-shaped cookie cutter to cut out the cookies. If the chocolate chips make cutting difficult, press any large chips gently into the dough or remove them from the cutting edges.
- Bake the cookies. Place the hearts on the prepared baking sheet, leaving about 2 inches between them. Bake for 10-12 minutes, until the edges are lightly golden and the centers look just set.
- Cool and decorate. Let the cookies cool on the baking sheet for 5 minutes before transferring them to a wire rack. While they’re still slightly warm, you can press a few extra chocolate chips onto the tops for a bakery-style finish.
Tips for the Best Heart-Shaped Chocolate Chip Cookies
- Chill the dough well: Cold dough is easier to roll and cut, and the cookies are more likely to hold their shape.
- Don’t add too much flour: Too much can make the cookies dry and crumbly. Measure carefully and use just enough flour to prevent sticking.
- Make shaping easier: If the dough gets too soft while cutting, pop it back into the refrigerator for a few minutes.
- Try different chocolate: Milk chocolate, dark chocolate, or white chocolate chips all work well in this recipe.
- Store leftovers properly: Keep the cooled cookies in an airtight container at room temperature for up to 4 days.
These Heart-Shaped Chocolate Chip Cookies are simple, sweet, and perfect for Valentine’s Day. I love serving them on a pretty plate with strawberries or wrapping a few in clear bags tied with red ribbon. They’re a lovely homemade treat that shows a little extra love in every bite!
9. Valentine’s Day Oreo Truffles

These Valentine’s Day Oreo Truffles are one of the easiest chocolate treats you can make at home. They’re rich, creamy, and made with just a few simple ingredients. I love how the crushed Oreo cookies mix with cream cheese to create a soft, fudgy center covered in a smooth chocolate shell. Add some pink drizzle and heart-shaped sprinkles, and you’ve got an adorable Valentine’s Day dessert that looks like it came from a candy shop!
The best part? There’s no baking involved, so these truffles are perfect when you want cute and easy Valentine’s Day desserts without spending much time in the kitchen.
Prep Time: 20 minutes
Chill Time: 1 hour
Total Time: About 1 hour 20 minutes
Difficulty: Easy
Servings: 20-24 truffles
Ingredients
- 36 Oreo cookies (one standard package, approximately 400 g)
- 8 oz (225 g) cream cheese, softened
- 12 oz (340 g) semi-sweet or milk chocolate, chopped or in melting wafers
- ½ cup (85 g) white chocolate chips (optional, for decorating)
- Pink or red food coloring, if desired
- Valentine’s Day sprinkles, for decorating
Instructions
- Crush the Oreos. Place the Oreo cookies, including the cream filling, in a food processor and pulse until they become fine crumbs. If you don’t have a food processor, put the cookies in a sealed bag and crush them with a rolling pin.
- Mix with cream cheese. Add the softened cream cheese to the Oreo crumbs. Mix until everything is combined and the mixture holds together like a soft dough.
- Shape the truffles. Scoop out about 1 tablespoon of the mixture at a time and roll it between your palms to make small balls. Place them on a parchment-lined baking sheet.
- Chill the balls. Refrigerate the truffles for about 30-45 minutes, or until firm enough to dip. This helps them keep their shape when coated in chocolate.
- Melt the chocolate. Place the semi-sweet or milk chocolate in a microwave-safe bowl. Heat in 20-second intervals, stirring between each one, until smooth. Avoid overheating the chocolate.
- Dip the truffles. Use a fork or dipping tool to lower each chilled truffle into the melted chocolate. Lift it out, let the excess chocolate drip off, and place it back on the parchment-lined tray.
- Decorate and set. While the chocolate coating is still wet, add Valentine’s Day sprinkles. For a pretty finishing touch, melt the white chocolate separately and drizzle it over the truffles. You can tint the white chocolate pink with a little oil-based food coloring made for chocolate.
- Chill and serve. Refrigerate the truffles for another 15-20 minutes, or until the chocolate coating has completely set. Arrange them on a serving plate or pack them into small gift boxes.
Tips for the Best Valentine’s Day Oreo Truffles
- Use the whole Oreo: Don’t remove the cream filling. It helps give the truffles their rich flavor and soft texture.
- Chill before dipping: Firm truffles are much easier to coat and less likely to fall apart in the melted chocolate.
- Choose the right chocolate: Melting wafers are convenient, while good-quality baking chocolate gives a lovely finish.
- Make them extra festive: Add crushed freeze-dried strawberries, pink sprinkles, or tiny candy hearts before the coating sets.
- Store them safely: Because these truffles contain cream cheese, keep them in an airtight container in the refrigerator for up to 5 days.
These Valentine’s Day Oreo Truffles are sweet, chocolatey, and almost too cute to eat! I love making a batch ahead of time because they’re easy to share, travel well when kept chilled, and look beautiful in a Valentine’s Day dessert box. They’re a simple no-bake treat that both kids and adults will enjoy.
10. Valentine’s Day Strawberry Cupcakes

These Valentine’s Day Strawberry Cupcakes are soft, fluffy, and full of sweet strawberry flavor. With their pretty pink color and creamy frosting, they’re almost too cute to eat! I love making these cupcakes for Valentine’s Day because they’re easy to decorate and look beautiful on a dessert table. Top them with fresh strawberries, heart-shaped sprinkles, or a swirl of pink frosting for a lovely homemade treat.
If you’re searching for cute and easy Valentine’s Day desserts that feel special but are simple enough to make at home, these strawberry cupcakes are a wonderful choice.
Prep Time: 20 minutes
Cook Time: 18-22 minutes
Cooling Time: 30 minutes
Total Time: About 1 hour 15 minutes
Difficulty: Easy
Servings: 12 cupcakes
Ingredients
For the cupcakes:
- 1 ½ cups (190 g) all-purpose flour
- 1 ½ teaspoons baking powder
- ¼ teaspoon salt
- ½ cup (113 g) unsalted butter, softened
- ¾ cup (150 g) granulated sugar
- 2 large eggs, at room temperature
- 1 teaspoon vanilla extract
- ½ cup (120 ml) milk
- ½ cup (75 g) finely chopped fresh strawberries, patted dry
- A few drops of pink food coloring (optional)
For the frosting:
- ½ cup (113 g) unsalted butter, softened
- 2 cups (240 g) powdered sugar
- 1-2 tablespoons strawberry puree or milk
- ½ teaspoon vanilla extract
- Pink food coloring, if desired
- Fresh strawberry slices or Valentine’s Day sprinkles, for decorating
Instructions
- Prepare the oven and pan. Preheat your oven to 350°F (175°C). Line a 12-cup muffin pan with cupcake liners.
- Mix the dry ingredients. In a medium bowl, whisk together the flour, baking powder, and salt. Set aside while you prepare the batter.
- Cream the butter and sugar. In a large bowl, beat the softened butter and sugar until light and fluffy, about 2-3 minutes. Add the eggs one at a time, mixing well after each addition. Stir in the vanilla extract.
- Make the batter. Add the dry ingredients in two portions, alternating with the milk. Mix gently after each addition, stopping as soon as everything is combined. Fold in the chopped strawberries and add a little pink food coloring if you want a brighter color.
- Fill the cupcake liners. Divide the batter evenly among the 12 liners, filling each about two-thirds full.
- Bake the cupcakes. Bake for 18-22 minutes, or until a toothpick inserted into the center comes out clean. Let the cupcakes cool in the pan for about 5 minutes, then transfer them to a wire rack to cool completely.
- Make the frosting. Beat the softened butter until creamy. Gradually add the powdered sugar, then mix in the vanilla and 1 tablespoon of strawberry puree or milk. Add a little more liquid if needed until the frosting is smooth and easy to pipe. For a pink finish, add a drop or two of food coloring.
- Decorate and serve. Once the cupcakes are completely cool, pipe or spread the frosting on top. Finish with a fresh strawberry slice or Valentine’s Day sprinkles. I love adding tiny heart sprinkles because they make the cupcakes look extra festive!
Tips for the Best Valentine’s Day Strawberry Cupcakes
- Dry the strawberries well: Fresh strawberries contain a lot of moisture, so pat them dry after chopping to help prevent soggy cupcakes.
- Don’t overmix the batter: Stir just until the ingredients come together for soft, fluffy cupcakes.
- Cool completely before frosting: Warm cupcakes can melt the buttercream, so give them enough time to cool.
- Try a shortcut: If you’re short on time, use a boxed vanilla cake mix and add a little strawberry flavoring or finely chopped strawberries.
- Store them properly: Keep frosted cupcakes in an airtight container in the refrigerator for up to 3 days. Let them sit at room temperature briefly before serving for the best texture.
These Valentine’s Day Strawberry Cupcakes are sweet, pretty, and perfect for sharing. I love how the strawberry flavor pairs with creamy frosting, especially when each cupcake has its own little decoration. Serve them at a Valentine’s Day party, pack them into a treat box, or enjoy one after dinner for a lovely homemade dessert!
11. Easy Valentine’s Day Rice Krispie Treats
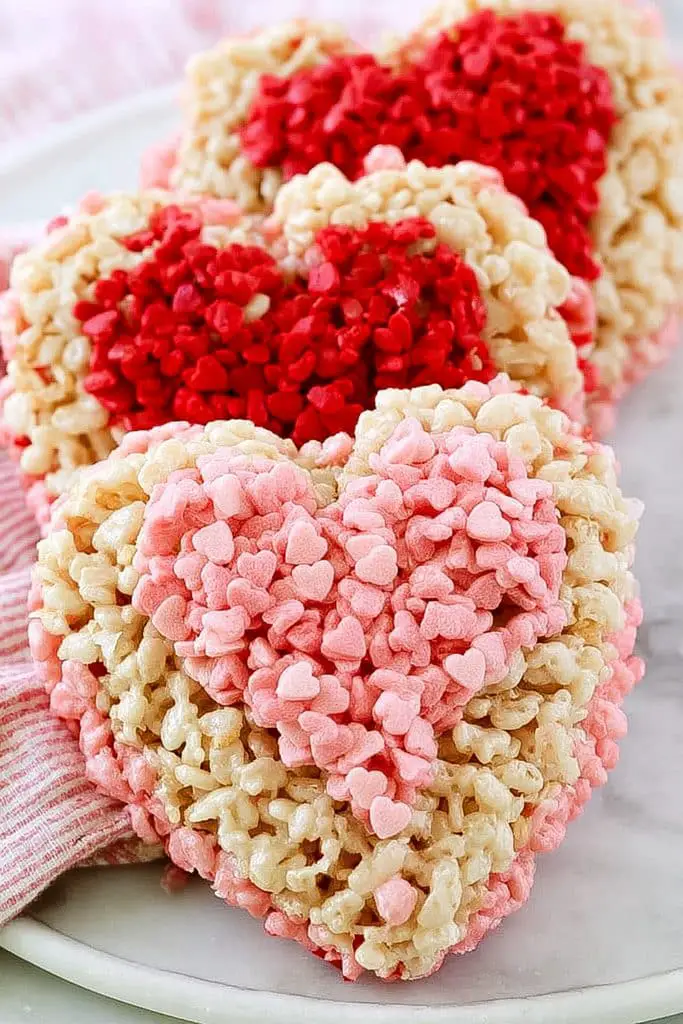
These Easy Valentine’s Day Rice Krispie Treats are sweet, crispy, chewy, and so much fun to make! I love this recipe because it uses just a handful of ingredients and doesn’t require an oven. With pink marshmallows, colorful sprinkles, and cute heart shapes, you can turn a simple childhood favorite into a festive Valentine’s Day dessert in no time.
They’re perfect when you need fun Valentine’s Day desserts to make with kids, prepare for a school party, or pack into little homemade gift bags.
Prep Time: 15 minutes
Setting Time: 30 minutes
Total Time: 45 minutes
Difficulty: Easy
Servings: 12-16 treats
Ingredients
- 6 cups (about 180 g) crispy rice cereal
- 4 tablespoons (57 g) unsalted butter
- 1 package (10 oz or 283 g) mini marshmallows
- ½ teaspoon vanilla extract (optional)
- A few drops of pink or red food coloring (optional)
- ¼ cup Valentine’s Day sprinkles
- ½ cup white chocolate chips or pink candy melts (optional, for drizzling)
Instructions
- Prepare your pan. Lightly grease a 9-by-13-inch baking pan with butter or nonstick spray. You can also line it with parchment paper to make removing the treats easier.
- Melt the butter. Add the butter to a large saucepan and melt it over low heat. Keep the heat gentle so the butter doesn’t brown or burn.
- Add the marshmallows. Stir in the mini marshmallows and continue stirring over low heat until they’re completely melted and smooth. Remove the pan from the heat and mix in the vanilla extract and a drop or two of food coloring, if using.
- Mix in the cereal. Add the crispy rice cereal to the melted marshmallow mixture. Stir gently until all the cereal is coated. Work fairly quickly because the mixture starts to set as it cools.
- Press into the pan. Transfer the mixture to your prepared pan. Using a lightly buttered spatula or clean, greased hands, gently press it into an even layer. Don’t press too firmly, or the treats may turn out hard instead of soft and chewy.
- Add the decorations. Sprinkle the top with Valentine’s Day sprinkles while the mixture is still slightly warm. If you’d like a chocolate drizzle, melt the white chocolate chips or pink candy melts according to the package directions.
- Let them set. Allow the treats to cool at room temperature for about 30 minutes, or until firm enough to cut.
- Cut and serve. Slice into squares or use a heart-shaped cookie cutter to make festive heart treats. If you’re using a cookie cutter, press firmly and carefully through the set mixture.
Tips for the Best Valentine’s Day Rice Krispie Treats
- Use fresh marshmallows: Fresh marshmallows melt more smoothly and help create soft, chewy treats.
- Keep the heat low: High heat can make the marshmallow mixture too firm, resulting in hard treats.
- Don’t pack them too tightly: Gently pressing the mixture into the pan helps keep the treats light and crispy.
- Make them colorful: Add pink food coloring, heart-shaped sprinkles, or a drizzle of red and white candy melts.
- Store them properly: Keep the treats in an airtight container at room temperature for up to 3 days. Separate layers with parchment paper to prevent sticking.
These Easy Valentine’s Day Rice Krispie Treats are a simple, budget-friendly way to add something cute to your Valentine’s Day dessert table. I love making them in heart shapes and wrapping them individually for gifts. They’re crunchy, gooey, colorful, and perfect for sharing a little sweetness with the people you love!
12. Chocolate-Dipped Shortbread Cookies
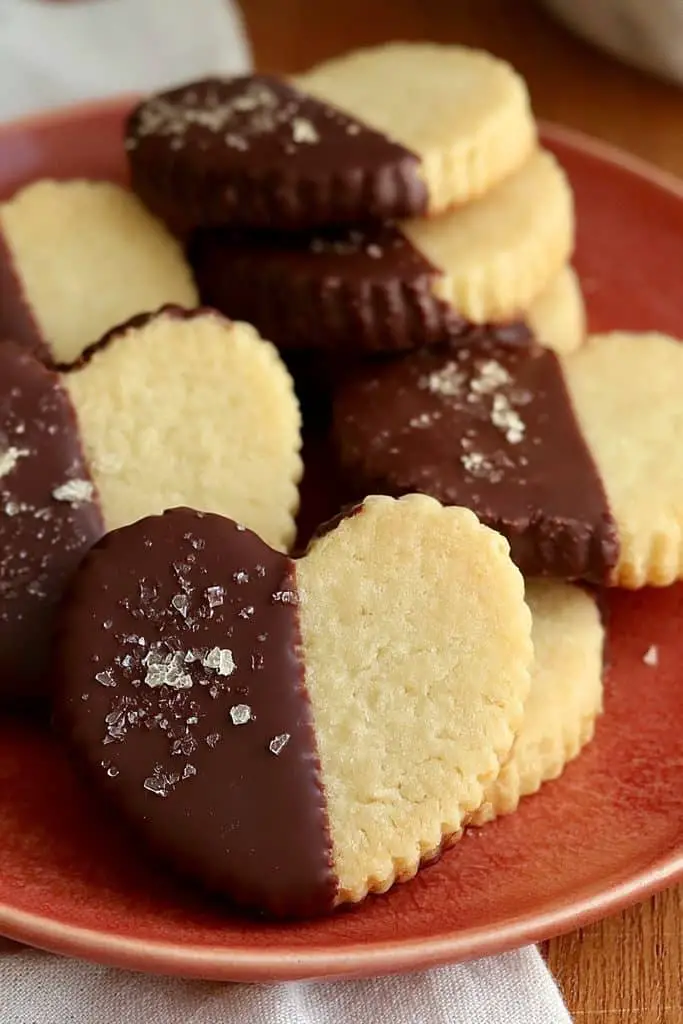
They’re easy to make with everyday ingredients, and you can decorate them with pink sprinkles or a white chocolate drizzle to make them extra festive.
If you’re looking for unique Valentine’s Day desserts that don’t require complicated decorating, these cookies are a lovely option. They’re also perfect for homemade gift boxes because they look beautiful and hold their shape well.
Prep Time: 20 minutes
Chill Time: 20 minutes
Cook Time: 12-15 minutes
Setting Time: 20 minutes
Total Time: About 1 hour 15 minutes
Difficulty: Easy
Servings: 18-20 cookies
Ingredients
For the shortbread cookies:
- 1 cup (227 g) unsalted butter, softened
- ½ cup (60 g) powdered sugar
- 1 teaspoon vanilla extract
- 2 cups (250 g) all-purpose flour
- ¼ teaspoon salt
For the chocolate coating:
- 6 oz (170 g) semi-sweet or milk chocolate, chopped
- 1 teaspoon coconut oil (optional, for a smoother coating)
- 2 tablespoons Valentine’s Day sprinkles
- ¼ cup (45 g) white chocolate chips (optional, for drizzling)
Instructions
- Prepare the dough. In a large bowl, beat the softened butter and powdered sugar until smooth and creamy. Add the vanilla extract and mix again.
- Add the dry ingredients. Gradually mix in the flour and salt until a soft dough forms. Avoid overmixing; the dough should come together without feeling too sticky.
- Chill the dough. Shape the dough into a flat disk, wrap it, and refrigerate for about 20 minutes. This makes it easier to roll and cut.
- Cut out the cookies. Preheat your oven to 325°F (165°C) and line a baking sheet with parchment paper. Roll the dough on a lightly floured surface to about ¼ inch thick. Use a heart-shaped cookie cutter or your favorite small cutter to make the cookies.
- Bake until lightly golden. Place the cookies on the baking sheet and bake for 12-15 minutes, or until the edges are just beginning to turn golden. Let them cool on the baking sheet for 5 minutes, then transfer them to a wire rack to cool completely.
- Melt the chocolate. Place the chopped chocolate in a microwave-safe bowl and heat in 20-second intervals, stirring between each interval until smooth. Stir in the coconut oil if needed to thin the chocolate.
- Dip the cookies. Dip half of each cooled cookie into the melted chocolate. Let the excess chocolate drip off before placing the cookie on a parchment-lined tray.
- Decorate and set. Add Valentine’s Day sprinkles while the chocolate is still wet. For another pretty finish, melt the white chocolate and drizzle it over the cookies. Let them sit at room temperature until the chocolate sets, or refrigerate for about 10-15 minutes to speed things up.
Tips for the Best Chocolate-Dipped Shortbread Cookies
- Use softened butter: It blends easily with the sugar and helps create a tender, buttery cookie.
- Don’t skip chilling: Chilled dough is easier to cut, and the cookies are more likely to keep their shape.
- Let the cookies cool completely: Warm cookies can cause the chocolate coating to slide off or melt unevenly.
- Try different coatings: Dark, milk, and white chocolate all work beautifully. You can even dip one corner in white chocolate and another in dark chocolate.
- Store them properly: Keep the cookies in an airtight container in a cool, dry place for up to 5 days. Separate layers with parchment paper to protect the chocolate decorations.
These Chocolate-Dipped Shortbread Cookies are simple, pretty, and full of buttery goodness. I love arranging them in a small gift box with a few chocolate-covered strawberries for a homemade Valentine’s Day surprise. They’re proof that a dessert doesn’t need to be complicated to feel thoughtful and special!
13. Valentine’s Day Cake Pops

They’re sweet, colorful, and so much fun to serve at a Valentine’s Day party! I love how you can make them look fancy with just a few simple decorations, even if you’re not an expert baker.
The best part is that you can use a boxed cake mix to save time, so these treats are easier to make than they look. If you’re searching for cute and easy Valentine’s Day desserts, these cake pops are perfect for sharing, gifting, or enjoying with your favorite people.
Prep Time: 30 minutes
Bake Time: 25-30 minutes
Chill Time: 45 minutes
Setting Time: 20 minutes
Total Time: About 2 hours
Difficulty: Easy
Servings: 20-24 cake pops
Ingredients
For the cake pops:
- 1 baked 9-by-13-inch vanilla or chocolate cake, cooled completely (homemade or boxed mix)
- ⅓ cup (75 g) vanilla frosting, plus more if needed
- 12 oz (340 g) pink candy melts or white chocolate melting wafers
- 20-24 cake pop sticks
- 2 tablespoons Valentine’s Day sprinkles
- ¼ cup (45 g) white chocolate chips, optional for drizzling
Instructions
- Bake and cool the cake. Prepare your cake according to the recipe or package directions. Let it cool completely before starting. You can bake it a day ahead to save time.
- Crumble the cake. Break the cooled cake into a large bowl and crumble it with clean hands until there are no large pieces left.
- Add the frosting. Mix in about ⅓ cup of frosting a little at a time. The mixture should hold together when pressed without feeling overly wet or sticky. Add a little more frosting only if needed.
- Shape the cake balls. Scoop out about 1 tablespoon of the mixture and roll it between your palms to form a smooth ball. Place each ball on a parchment-lined tray. Repeat until all the mixture is used.
- Chill the cake balls. Refrigerate them for about 30-45 minutes, until firm. This helps them stay on the sticks when you dip them.
- Attach the sticks. Melt a small amount of candy melts according to the package directions. Dip the tip of each cake pop stick into the melted coating, then insert it about halfway into a cake ball. Return the tray to the refrigerator for about 10 minutes to help the coating set.
- Dip the cake pops. Melt the remaining candy coating in a deep, narrow microwave-safe cup. Dip each cake pop straight down until covered, then gently lift it out and tap the stick against the cup to remove excess coating. Avoid swirling the cake pop too much, as this can loosen it from the stick.
- Decorate and set. Add Valentine’s Day sprinkles while the coating is still wet. If you like, drizzle the set cake pops with melted white chocolate for an extra pretty finish. Stand them upright in a cake pop stand or a piece of Styrofoam until completely set.
Tips for the Best Valentine’s Day Cake Pops
- Don’t add too much frosting: Too much can make the cake mixture soft and heavy, causing the balls to slide off the sticks.
- Keep the temperature balanced: The cake balls should be chilled but not frozen solid. Extremely cold cake balls dipped into warm coating can sometimes crack as they adjust to the temperature.
- Use candy melts for convenience: They generally make dipping easier than regular chocolate because they’re designed to set into a firm coating.
- Choose a festive look: Use pink coating, white chocolate drizzle, tiny heart sprinkles, or red candy melts to match your Valentine’s Day theme.
- Make them ahead: You can prepare the cake balls a day in advance and keep them covered in the refrigerator. Once coated, store the finished cake pops in an airtight container in the refrigerator for up to 4 days.
These Valentine’s Day Cake Pops are adorable, delicious, and easy to customize with your favorite cake and frosting flavors. I love arranging them in a bouquet-style stand or wrapping them individually with clear treat bags and ribbons. They make such a sweet homemade gift and look beautiful on any Valentine’s Day dessert table!
14. Chocolate-Dipped Marshmallow Pops
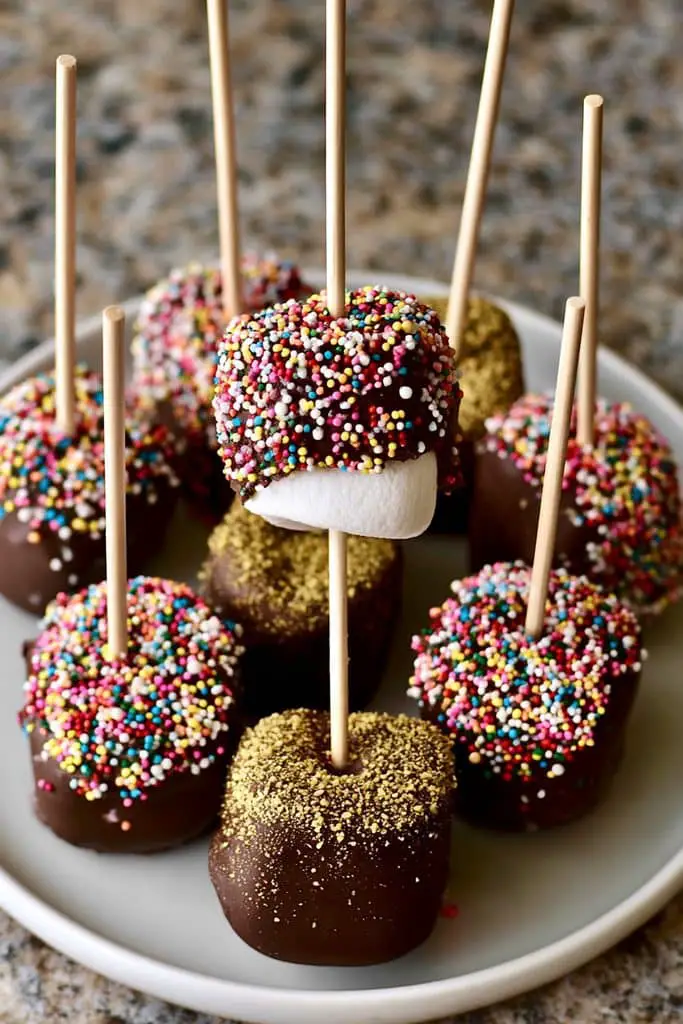
These Chocolate-Dipped Marshmallow Pops are soft, fluffy, chocolatey, and incredibly easy to make. They’re one of my favorite cute and easy Valentine’s Day desserts because you don’t need to bake anything, and the decorating possibilities are endless! A little melted chocolate, some colorful sprinkles, and a few marshmallows are all you need to create a sweet treat that looks adorable on a dessert table.
I especially love making these with kids because everyone can decorate their own marshmallow pops. They’re perfect for Valentine’s Day parties, homemade gifts, or a fun afternoon in the kitchen.
Prep Time: 15 minutes
Setting Time: 20-30 minutes
Total Time: 35-45 minutes
Difficulty: Easy
Servings: 12 marshmallow pops
Ingredients
- 12 large marshmallows
- 8 oz (225 g) milk or semi-sweet chocolate, chopped or in melting wafers
- 12 lollipop sticks or sturdy paper straws
- 2 tablespoons Valentine’s Day sprinkles
- ¼ cup (45 g) white chocolate chips (optional, for drizzling)
- Pink or red candy melts (optional, for extra decoration)
Instructions
- Prepare the marshmallows. Line a baking sheet or tray with parchment paper. Gently insert a lollipop stick into the center of each marshmallow, pushing it in about halfway without going all the way through.
- Melt the chocolate. Place the chocolate in a microwave-safe bowl. Heat in 20-second intervals, stirring between each one until the chocolate is smooth. If you’re using candy melts, follow the package directions.
- Dip the marshmallows. Hold each marshmallow by its stick and dip it into the melted chocolate, turning gently to coat it. You can cover the whole marshmallow or dip only half for a two-tone look.
- Add the sprinkles. Let the extra chocolate drip off, then sprinkle the marshmallow with pink, red, and white Valentine’s Day decorations while the coating is still wet.
- Make them extra pretty. Place the dipped marshmallows on the parchment-lined tray. If you’d like, melt the white chocolate or pink candy melts separately and drizzle them over the pops for a cute finishing touch.
- Let them set. Leave the pops at room temperature until the chocolate hardens, or refrigerate them for about 15-20 minutes to speed things up.
- Serve or wrap as gifts. Once the chocolate is firm, arrange the pops in a glass or treat stand. You can also wrap each one in a clear treat bag and tie it with a pink or red ribbon.
Tips for the Best Chocolate-Dipped Marshmallow Pops
- Use fresh marshmallows: Fresh ones are soft, fluffy, and easier to work with. Older marshmallows may be firmer and less enjoyable to bite into.
- Choose a deep bowl: A narrow, deep container makes it easier to dip the marshmallows without using too much chocolate.
- Decorate before the chocolate sets: Sprinkles stick best while the coating is still wet, so keep them close by.
- Try different flavors: Use dark, milk, or white chocolate, or add a little crushed freeze-dried strawberry for a fruity touch.
- Store them properly: Keep the finished pops in an airtight container in a cool, dry place for up to 3 days. Avoid storing them somewhere warm, as the chocolate may soften.
These Chocolate-Dipped Marshmallow Pops are sweet, colorful, and so simple to make. I love how easy it is to match them to any Valentine’s Day theme with different chocolates and sprinkles. Whether you’re making them for a party, giving them as little gifts, or enjoying them at home, these marshmallow pops are a fun way to add something extra cute to your Valentine’s Day dessert spread!
15. Valentine’s Day Red Velvet Cupcakes

These Valentine’s Day Red Velvet Cupcakes are soft, moist, and beautifully red, making them perfect for a romantic dessert or a festive Valentine’s Day party. I love how the rich cocoa flavor pairs with tangy cream cheese frosting. They look fancy enough for a special occasion but are surprisingly easy to make at home!
If you’re looking for unique Valentine’s Day desserts that are both pretty and delicious, these red velvet cupcakes are a wonderful choice. Add a swirl of creamy frosting and a few heart-shaped sprinkles, and you’ve got a treat everyone will want to try.
Prep Time: 20 minutes
Cook Time: 18-22 minutes
Cooling Time: 30 minutes
Total Time: About 1 hour 15 minutes
Difficulty: Easy
Servings: 12 cupcakes
Ingredients
For the cupcakes:
- 1 ¼ cups (160 g) all-purpose flour
- 1 tablespoon unsweetened cocoa powder
- ½ teaspoon baking soda
- ¼ teaspoon salt
- ½ cup (100 g) granulated sugar
- ½ cup (120 ml) buttermilk, at room temperature
- ⅓ cup (80 ml) vegetable oil
- 1 large egg, at room temperature
- 1 teaspoon vanilla extract
- 1 teaspoon white vinegar
- 1-2 teaspoons red gel food coloring, or as needed
For the cream cheese frosting:
- 4 oz (113 g) cream cheese, softened
- ¼ cup (57 g) unsalted butter, softened
- 1 ½ cups (180 g) powdered sugar
- ½ teaspoon vanilla extract
- Valentine’s Day sprinkles or red velvet cake crumbs, for decorating
Instructions
- Prepare the oven and pan. Preheat your oven to 350°F (175°C). Line a 12-cup muffin pan with cupcake liners.
- Mix the dry ingredients. In a medium bowl, whisk together the flour, cocoa powder, baking soda, and salt until evenly combined.
- Combine the wet ingredients. In a separate large bowl, whisk the sugar, buttermilk, vegetable oil, egg, vanilla extract, vinegar, and red food coloring until smooth.
- Make the batter. Add the dry ingredients to the wet mixture and stir gently until just combined. Avoid overmixing, as this can make the cupcakes dense.
- Fill the liners. Divide the batter evenly among the cupcake liners, filling each about two-thirds full.
- Bake the cupcakes. Bake for 18-22 minutes, or until a toothpick inserted into the center comes out clean. Let the cupcakes cool in the pan for about 5 minutes before transferring them to a wire rack to cool completely.
- Prepare the frosting. Beat the softened cream cheese and butter together until smooth and creamy. Gradually add the powdered sugar, then mix in the vanilla extract. Beat just until fluffy. If the frosting feels too soft to pipe, refrigerate it for 15-20 minutes.
- Decorate and serve. Pipe or spread the cream cheese frosting onto the completely cooled cupcakes. Finish with red velvet crumbs, pink sprinkles, or tiny candy hearts. I love adding a little sprinkle of cake crumbs because it gives the cupcakes a beautiful, classic red velvet look.
Tips for the Best Valentine’s Day Red Velvet Cupcakes
- Use gel food coloring: Gel coloring usually gives a richer red shade without adding too much liquid to the batter.
- Don’t overmix: Stir just until the flour disappears to help keep the cupcakes soft and tender.
- Let them cool completely: Cream cheese frosting can melt if you spread it on warm cupcakes.
- Make them ahead: Bake the cupcakes a day in advance and store them in an airtight container. Frost them closer to serving time for the freshest look.
- Store them in the refrigerator: Because the frosting contains cream cheese, refrigerate the cupcakes in an airtight container for up to 3 days. Let them sit at room temperature for about 15-20 minutes before serving.
These Valentine’s Day Red Velvet Cupcakes are soft, rich, and full of festive charm. I love serving them after a special dinner or arranging them on a pretty cake stand for a Valentine’s Day celebration. The bright red cake and creamy frosting make every bite feel a little extra special!
16. No-Bake Chocolate Peanut Butter Hearts

If you love the combination of chocolate and peanut butter, these No-Bake Chocolate Peanut Butter Hearts are going to be a favorite! They’re creamy, slightly salty, sweet, and coated in a smooth layer of chocolate. I love this recipe because it requires only a few ingredients and no oven, making it perfect when you want a homemade Valentine’s Day treat without much effort.
These little heart-shaped candies look adorable in gift boxes, on dessert platters, or alongside fresh strawberries. They’re also a great option if you’re looking for easy Valentine’s Day desserts with few ingredients.
Prep Time: 20 minutes
Chill Time: 45 minutes
Total Time: About 1 hour 5 minutes
Difficulty: Easy
Servings: 16-20 hearts
Ingredients
For the peanut butter filling:
- 1 cup (250 g) creamy peanut butter
- ¼ cup (57 g) unsalted butter, softened
- 1 ½ cups (180 g) powdered sugar
- 1 teaspoon vanilla extract
- 1-2 tablespoons milk, only if needed
For the chocolate coating:
- 10 oz (285 g) milk or semi-sweet chocolate, chopped or in melting wafers
- 1 teaspoon coconut oil (optional, for a smoother coating)
- Valentine’s Day sprinkles, for decorating (optional)
Instructions
- Make the peanut butter mixture. Add the peanut butter and softened butter to a mixing bowl. Beat until smooth, then mix in the vanilla extract.
- Add the powdered sugar. Gradually stir in the powdered sugar until a thick, workable dough forms. If the mixture seems too dry or crumbly, add milk a teaspoon at a time. It should be firm enough to roll without sticking heavily to your hands.
- Roll and cut the hearts. Place the mixture between two sheets of parchment paper and roll it to about ½ inch thick. Use a small heart-shaped cookie cutter to cut out the hearts. Gather the scraps, roll them again, and continue cutting until you’ve used up the mixture.
- Chill the hearts. Arrange the peanut butter hearts on a parchment-lined tray and refrigerate for about 30 minutes, or until firm. This makes them easier to dip in chocolate.
- Melt the chocolate. Place the chocolate in a microwave-safe bowl and heat in 20-second intervals, stirring between each one until smooth. Stir in the coconut oil if needed to make the coating a little thinner.
- Dip the hearts. Use a fork to dip each chilled peanut butter heart into the melted chocolate. Let the excess chocolate drip back into the bowl, then place the heart on the lined tray.
- Decorate and set. Add Valentine’s Day sprinkles while the chocolate is still wet. Refrigerate the hearts for about 15 minutes, or until the chocolate coating is firm.
- Serve and enjoy. Arrange the finished hearts on a plate or place them in small treat boxes. I love adding a little drizzle of white chocolate to make them look extra pretty!
Tips for the Best Chocolate Peanut Butter Hearts
- Use creamy peanut butter: Regular creamy peanut butter works best for a smooth, firm filling. Natural peanut butter that separates easily may make the mixture too oily or soft.
- Adjust the texture slowly: Add milk only if the mixture is too crumbly. Too much liquid can make the hearts difficult to shape.
- Chill before dipping: Firm hearts are easier to handle and less likely to break in the melted chocolate.
- Try different coatings: Dark chocolate gives a richer flavor, while milk chocolate makes the treats sweeter. You can also drizzle white chocolate over the top.
- Store them properly: Keep the hearts in an airtight container in the refrigerator for up to 1 week. You can also freeze them in a freezer-safe container for up to 2 months and thaw them in the refrigerator before serving.
These No-Bake Chocolate Peanut Butter Hearts are sweet, creamy, and full of chocolatey goodness. I love how simple they are to make, especially when I want something homemade that still feels thoughtful and special. Package a few in a cute Valentine’s Day box, and you’ve got a delicious little gift made with love!
17. Valentine’s Day Chocolate Mousse
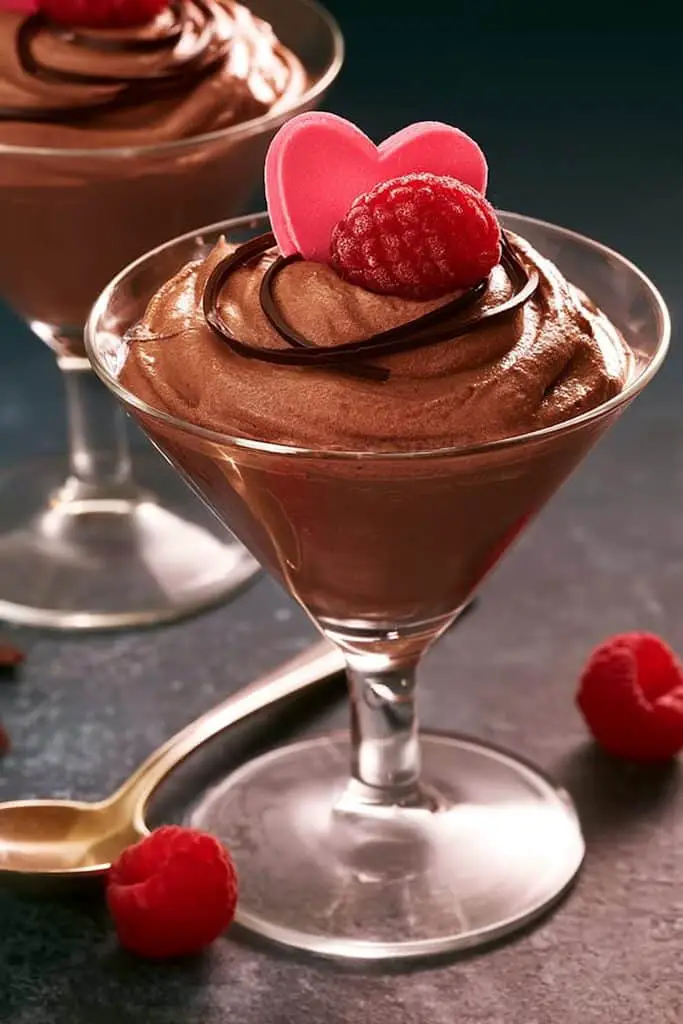
This Valentine’s Day Chocolate Mousse is rich, silky, and wonderfully chocolatey. It’s one of those desserts that looks elegant enough for a romantic dinner but is surprisingly easy to make at home. I love serving mousse in little glass cups because you can see the creamy layers, and a swirl of whipped cream with a few chocolate shavings makes it look extra special.
If you’re searching for unique Valentine’s Day desserts that don’t require complicated decorating, this chocolate mousse is a lovely choice. You can prepare it ahead of time, chill it in the refrigerator, and enjoy a delicious dessert without any last-minute fuss.
Prep Time: 20 minutes
Chill Time: 2 hours
Total Time: About 2 hours 20 minutes
Difficulty: Easy
Servings: 4 small dessert cups
Ingredients
- 6 oz (170 g) semi-sweet chocolate, finely chopped
- 1 cup (240 ml) heavy whipping cream, divided
- 1 teaspoon vanilla extract
- 1 tablespoon powdered sugar (optional)
- A pinch of salt (optional)
For decorating:
- Extra whipped cream
- Chocolate shavings or cocoa powder
- Fresh strawberries or raspberries
- Valentine’s Day sprinkles (optional)
Instructions
- Melt the chocolate. Place the chopped chocolate in a heatproof bowl. Warm ¼ cup of the heavy cream in a small saucepan until hot but not boiling. Pour it over the chocolate and let it sit for 2 minutes, then stir until smooth. Let the mixture cool until just slightly warm.
- Whip the remaining cream. Pour the remaining ¾ cup of cold heavy cream into a mixing bowl. Add the vanilla extract and powdered sugar, if using. Beat with a hand mixer until medium peaks form. The cream should hold its shape but still look smooth and soft.
- Fold the chocolate and cream together. Add about one-third of the whipped cream to the cooled chocolate mixture and gently stir to lighten it. Fold in the remaining whipped cream in two additions using a spatula. Use gentle movements to keep the mousse airy.
- Divide into serving cups. Spoon or pipe the mousse into four small dessert glasses or ramekins. Smooth the tops if needed.
- Chill until set. Refrigerate the mousse for at least 2 hours, or until it’s chilled and softly set. You can also prepare it the night before if you’re planning a special Valentine’s Day dinner.
- Decorate before serving. Add a swirl of whipped cream, chocolate shavings, or a light dusting of cocoa powder. I love adding a fresh strawberry on top because the red color looks beautiful against the chocolate.
Tips for the Best Valentine’s Day Chocolate Mousse
- Choose good-quality chocolate: Since chocolate is the main flavor, use a brand you enjoy eating on its own.
- Let the chocolate cool slightly: If it’s too hot when you fold in the whipped cream, the cream can melt and the mousse may lose its fluffy texture.
- Fold gently: Stirring too vigorously can knock the air out of the whipped cream. Gentle folding helps keep the mousse light.
- Make it your own: Try a little espresso powder for a deeper chocolate flavor or a small pinch of cinnamon for warmth.
- Prepare ahead: You can make the mousse up to a day in advance. Keep it covered in the refrigerator and add the toppings just before serving.
- Store leftovers safely: Keep the mousse refrigerated in covered containers and enjoy it within 2-3 days.
18. Valentine’s Day Jam Thumbprint Cookies

They’re simple, pretty, and have that lovely homemade look I always enjoy in Valentine’s Day treats. The little jam centers add a pop of red or pink, making these cookies perfect for sharing with someone special.
I love this recipe because it uses basic baking ingredients and doesn’t need any fancy decorations. If you’re looking for cute and easy Valentine’s Day desserts that look beautiful on a cookie platter, these jam-filled cookies are a wonderful choice.
Prep Time: 20 minutes
Chill Time: 20 minutes
Cook Time: 12-15 minutes
Total Time: About 55 minutes
Difficulty: Easy
Servings: 20 cookies
Ingredients
- 1 cup (227 g) unsalted butter, softened
- ⅔ cup (80 g) powdered sugar
- 1 large egg yolk
- 1 teaspoon vanilla extract
- 2 cups (250 g) all-purpose flour
- ¼ teaspoon salt
- ½ cup (160 g) strawberry or raspberry jam
Instructions
- Cream the butter and sugar. In a large bowl, beat the softened butter and powdered sugar until light and creamy. Add the egg yolk and vanilla extract, then mix until smooth.
- Add the dry ingredients. Gradually stir in the flour and salt until a soft dough forms. The dough should hold together when pressed without feeling overly sticky.
- Chill the dough. Cover the bowl and refrigerate the dough for about 20 minutes. This makes it easier to roll and helps the cookies hold their shape while baking.
- Shape the cookies. Preheat your oven to 350°F (175°C) and line a baking sheet with parchment paper. Roll the dough into small balls, about 1 tablespoon each, and place them on the baking sheet, leaving about 2 inches between them.
- Make the thumbprints. Gently press your thumb or the back of a small measuring spoon into the center of each dough ball to create a little well. If the edges crack, gently press them back together.
- Fill with jam. Spoon about ½ teaspoon of strawberry or raspberry jam into each indentation. Avoid overfilling, as the jam can bubble over during baking.
- Bake the cookies. Bake for 12-15 minutes, until the edges are lightly golden and the cookies look set. Let them cool on the baking sheet for 5 minutes before transferring them to a wire rack.
- Cool and serve. Allow the cookies to cool completely so the jam can settle. Arrange them on a pretty plate or place them in a gift box for a sweet Valentine’s Day surprise.
Tips for the Best Valentine’s Day Jam Thumbprint Cookies
- Use a thick jam: A thicker strawberry or raspberry jam is less likely to run out of the cookie centers while baking.
- Keep the dough cool: If the dough becomes too soft to shape, refrigerate it for another 10 minutes.
- Don’t make the wells too deep: Press gently so the cookies don’t crack or break apart.
- Try different fillings: Raspberry, strawberry, cherry, or apricot jam all work well. For Valentine’s Day, I especially love the color of strawberry jam.
- Store them properly: Once completely cool, keep the cookies in an airtight container at room temperature for up to 4 days. Place parchment paper between layers to protect the jam centers.
Serve them with tea or coffee, share them with friends, or wrap a few in a little box for a thoughtful Valentine’s Day treat!
19. Mini Chocolate Lava Cakes
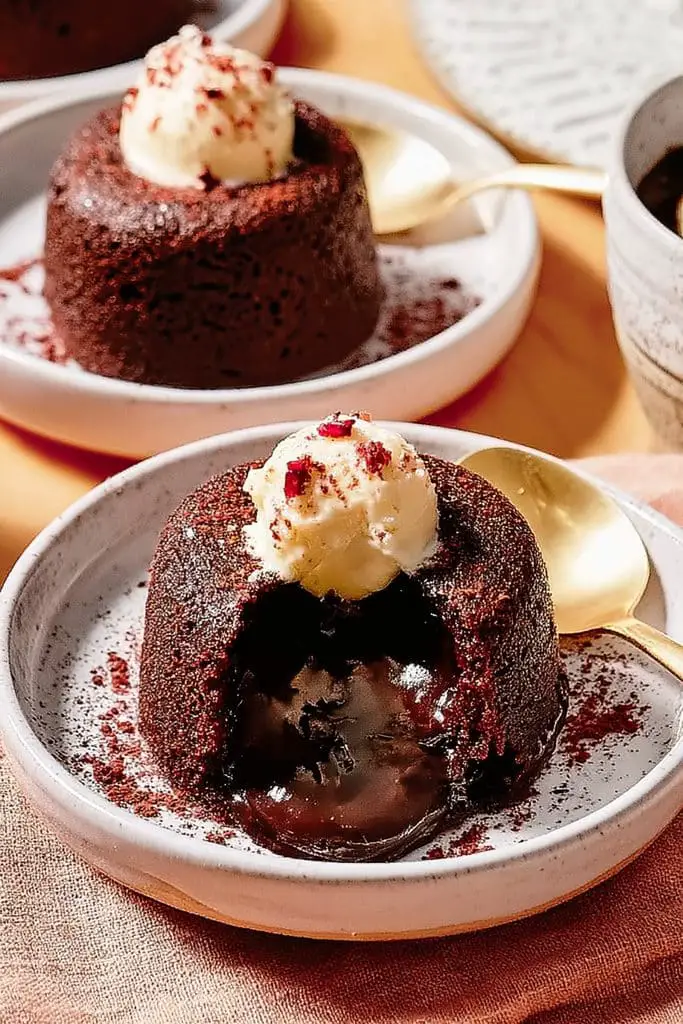
They’re perfect for Valentine’s Day when you want to serve something that feels a little fancy without spending hours in the kitchen. I love how these little cakes look when dusted with powdered sugar and served with fresh strawberries or a scoop of vanilla ice cream.
If you’re looking for unique Valentine’s Day desserts for a romantic dinner at home, these mini lava cakes are a delicious choice. They use simple ingredients, bake quickly, and taste like something you’d order at a restaurant.
Prep Time: 15 minutes
Cook Time: 10-12 minutes
Total Time: About 30 minutes
Difficulty: Easy
Servings: 4 mini cakes
Ingredients
- ½ cup (115 g) unsalted butter, plus extra for greasing
- 4 oz (115 g) semi-sweet or dark chocolate, chopped
- 2 large eggs
- 2 large egg yolks
- ¼ cup (50 g) granulated sugar
- 2 tablespoons all-purpose flour
- 1 teaspoon vanilla extract
- A pinch of salt
- Powdered sugar, for dusting (optional)
- Fresh strawberries or raspberries, for serving (optional)
Instructions
- Prepare the ramekins. Preheat your oven to 425°F (220°C). Grease four small oven-safe ramekins with butter, making sure to coat the bottoms and sides well. Dust lightly with cocoa powder if desired, then tap out any excess.
- Melt the chocolate and butter. Place the butter and chopped chocolate in a heatproof bowl. Microwave in 20-second intervals, stirring each time, until melted and smooth. Let the mixture cool for a couple of minutes.
- Whisk the eggs and sugar. In a separate bowl, whisk the eggs, egg yolks, and granulated sugar until the mixture looks slightly lighter and well combined. Stir in the vanilla extract and salt.
- Combine the mixtures. Slowly pour the melted chocolate mixture into the egg mixture, whisking gently as you go. Add the flour and fold it in just until no dry streaks remain.
- Fill the ramekins. Divide the batter evenly among the four prepared ramekins, filling each about three-quarters full. Place the ramekins on a baking tray to make them easier to handle.
- Bake the cakes. Bake for 10-12 minutes. The edges should look set, while the centers remain soft and slightly jiggly. Keep a close eye on them because even an extra minute or two can make the centers more cake-like.
- Rest and release. Let the cakes rest for about 1 minute after removing them from the oven. Carefully run a thin knife around the edges, place a serving plate over each ramekin, and invert it. Use oven mitts because the ramekins will be very hot.
- Serve immediately. Dust with powdered sugar and add fresh strawberries or raspberries. I love serving these while they’re still warm so the chocolate center flows out beautifully when you cut into the cake.
Tips for the Best Mini Chocolate Lava Cakes
- Use good-quality chocolate: Chocolate is the main flavor here, so choose one you enjoy eating on its own.
- Don’t overbake: The secret to the gooey center is taking the cakes out when the edges are set but the middle is still soft.
- Prepare ahead: You can make the batter a few hours ahead, divide it among the greased ramekins, cover, and refrigerate. Let the ramekins sit out briefly while the oven preheats, then bake and check for doneness; chilled batter may need an extra minute or two.
- Grease the ramekins well: This helps the cakes release cleanly and keeps their shape when turned out.
- Serve right away: Lava cakes are best enjoyed fresh from the oven, when the centers are warm and flowing.
If you’re planning a cozy Valentine’s Day dinner, these warm chocolate cakes are a lovely way to finish the meal!
20. Strawberry Cheesecake Parfaits
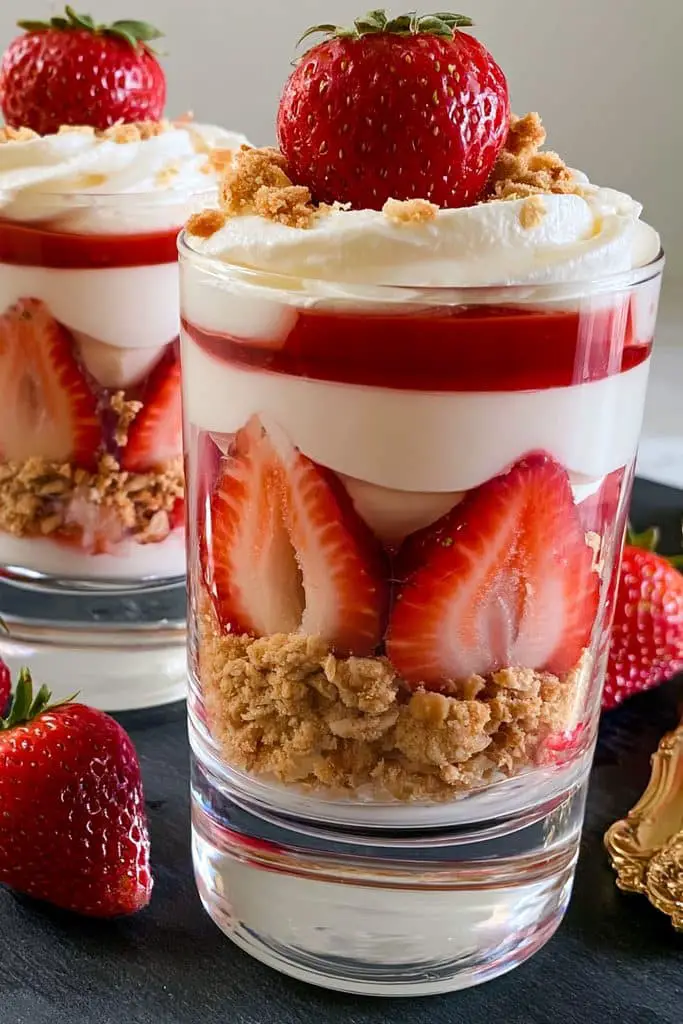
These Strawberry Cheesecake Parfaits are creamy, fruity, and so easy to put together. They have layers of buttery graham cracker crumbs, smooth cheesecake filling, and sweet fresh strawberries. I love making these because they look beautiful in little glasses, and you don’t need to turn on the oven!
If you’re searching for cute and easy Valentine’s Day desserts, these parfaits are a lovely choice. The pretty red strawberries and creamy white filling make them perfect for Valentine’s Day parties, date nights, or a sweet treat to share with someone special.
Prep Time: 20 minutes
Cook Time: None
Chill Time: 30 minutes
Total Time: 50 minutes
Difficulty: Easy
Servings: 4 parfaits
Ingredients
For the cheesecake filling:
- 8 oz (225 g) cream cheese, softened
- ½ cup (120 ml) heavy whipping cream, cold
- ¼ cup (30 g) powdered sugar
- 1 teaspoon vanilla extract
For the strawberry layer:
- 1½ cups fresh strawberries, chopped
- 1 tablespoon granulated sugar (optional)
- 1 teaspoon lemon juice (optional)
For the crumb layer:
- 1 cup graham cracker crumbs or digestive biscuit crumbs
- 3 tablespoons unsalted butter, melted
For topping:
- Fresh strawberry slices
- Whipped cream (optional)
- Valentine’s Day sprinkles (optional)
Instructions
- Prepare the strawberries. Wash, dry, and chop the strawberries into small pieces. If you’d like them a little sweeter, toss them with the granulated sugar and lemon juice. Set aside while you prepare the other layers.
- Make the crumb mixture. In a small bowl, combine the graham cracker crumbs with the melted butter. Stir until the crumbs are evenly coated and resemble damp sand.
- Beat the cream cheese. In a mixing bowl, beat the softened cream cheese, powdered sugar, and vanilla extract until smooth and creamy. Make sure there are no lumps.
- Whip the cream. In a separate bowl, whip the cold heavy cream until stiff peaks form. Gently fold it into the cream cheese mixture until everything is smooth and fluffy.
- Start layering. Spoon a layer of buttery crumbs into the bottom of four small glasses or dessert jars. Add a layer of cheesecake filling, followed by a layer of chopped strawberries.
- Repeat the layers. Add another layer of crumbs, cheesecake filling, and strawberries. You can use a piping bag or a zip-top bag with the corner snipped off to make the cheesecake layers look neat.
- Chill the parfaits. Refrigerate for at least 30 minutes so the layers can set and the flavors have time to come together.
- Decorate and serve. Top with fresh strawberry slices, a little whipped cream, or Valentine’s Day sprinkles. Serve chilled and enjoy!
Tips for the Best Strawberry Cheesecake Parfaits
- Use softened cream cheese: This makes the filling smooth and helps prevent lumps.
- Dry the strawberries well: Too much water can make the parfaits runny, so pat the berries dry after washing.
- Make them look extra cute: Use clear glasses or small jars so the pretty layers show through. Pink sprinkles or a little heart-shaped chocolate make a sweet finishing touch.
- Try different berries: Raspberries or a mix of strawberries and blueberries work well, too.
- Prepare ahead: You can assemble the parfaits a few hours before serving and keep them covered in the refrigerator. For the crunchiest crumb layer, add some extra crumbs just before serving.
These Strawberry Cheesecake Parfaits are one of those easy Valentine’s Day desserts with few ingredients that still look special enough for a celebration. I love the combination of fresh strawberries and creamy cheesecake filling, especially when served in individual glasses. They’re simple, pretty, and perfect for sharing a little Valentine’s Day sweetness!
21. Pink Chocolate Bark with Valentine’s Sprinkles
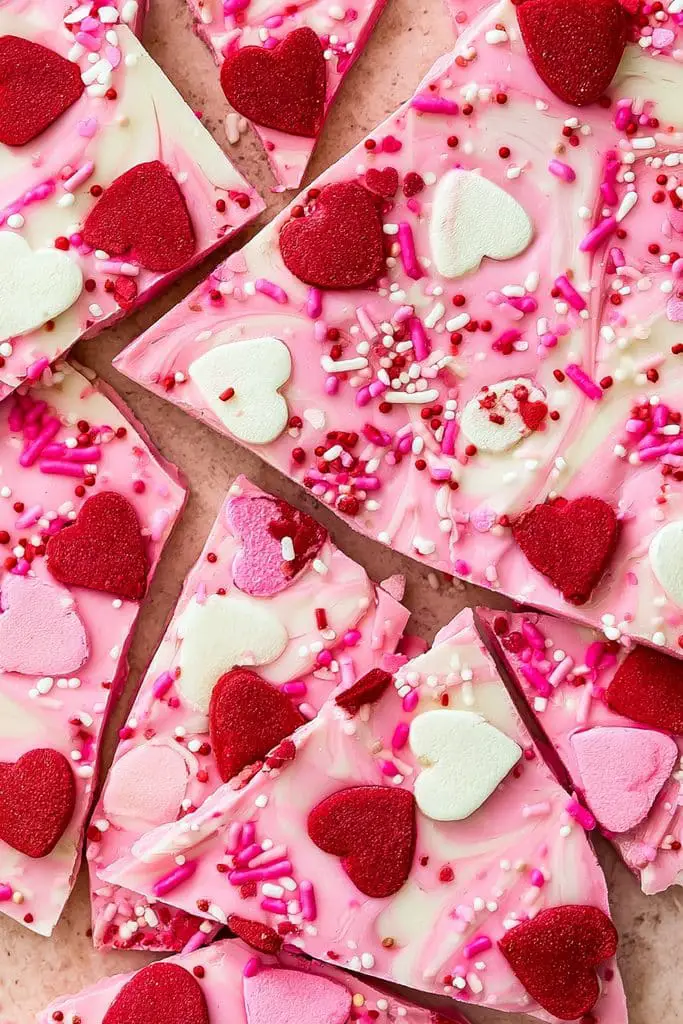
It has creamy pink chocolate, colorful heart-shaped sprinkles, and a sweet crunch in every bite. The best part? You don’t need an oven or any special baking skills to make it!
I love this recipe because you can decorate the bark however you like. Use pink and white chocolate, add red candy hearts, or sprinkle on mini chocolate chips for extra sweetness. It’s perfect for Valentine’s Day parties, homemade gift bags, or a fun afternoon treat with the kids.
Prep Time: 10 minutes
Cook Time: None
Chill Time: 30-45 minutes
Total Time: About 45-55 minutes
Difficulty: Very Easy
Servings: 8-10
Ingredients
- 12 oz (340 g) white chocolate or white chocolate melting wafers
- Pink oil-based food coloring, if needed
- 2 tablespoons Valentine’s Day sprinkles
- 2 tablespoons mini chocolate chips or candy hearts (optional)
- 2 tablespoons crushed freeze-dried strawberries (optional)
Instructions
- Prepare your tray. Line a baking sheet or flat tray with parchment paper. Make sure the tray can fit comfortably in your refrigerator.
- Melt the chocolate. Place the white chocolate in a microwave-safe bowl. Heat in 20-second intervals, stirring between each one, until smooth and fully melted. Be careful not to overheat it.
- Add the pink color. If your chocolate isn’t already pink, stir in a small amount of pink oil-based food coloring until you reach your desired shade. Avoid regular water-based food coloring, which can cause melted chocolate to seize and become grainy.
- Spread the chocolate. Pour the melted pink chocolate onto the prepared tray. Use a spatula to spread it into an even layer about ¼ inch thick. It doesn’t need to be perfectly shaped; the uneven edges make the bark look homemade and cute.
- Add the decorations. While the chocolate is still melted, scatter Valentine’s Day sprinkles, candy hearts, mini chocolate chips, or crushed freeze-dried strawberries over the top. Gently press any larger decorations into the chocolate so they stick.
- Chill until firm. Place the tray in the refrigerator for 30-45 minutes, or until the chocolate is completely set.
- Break into pieces. Once firm, lift the chocolate bark off the parchment paper and break it into small, uneven pieces. You can also cut it into squares with a sharp knife if you prefer a neater look.
- Serve or package. Arrange the bark on a plate for a Valentine’s Day dessert platter, or place the pieces in small treat bags or a pretty gift box.
Tips for the Best Pink Chocolate Bark
- Choose the right chocolate: White chocolate melting wafers are easy to work with. If you’re using real white chocolate, melt it gently to keep it smooth.
- Use oil-based coloring: Pink oil-based food coloring is made for chocolate and gives you a bright, even shade without ruining the texture.
- Decorate quickly: Add the sprinkles before the chocolate starts to set so they stay in place.
- Make it your own: Try red and pink candies, heart-shaped sprinkles, crushed cookies, or freeze-dried raspberries for different flavors and textures.
- Package it as a gift: Put a few pieces in a clear bag tied with a pink ribbon for a simple homemade Valentine’s Day gift.
- Store it properly: Keep the bark in an airtight container in a cool, dry place, or refrigerate it if your kitchen is warm.
This Pink Chocolate Bark with Valentine’s Sprinkles is such a fun option when you want cute and easy Valentine’s Day desserts without spending hours in the kitchen. I love how easy it is to customize, and the pink color makes every piece feel festive. Make a batch to share with friends, add it to a dessert table, or keep a few pieces for a sweet little treat!
22. Heart-Shaped Brownie Bites
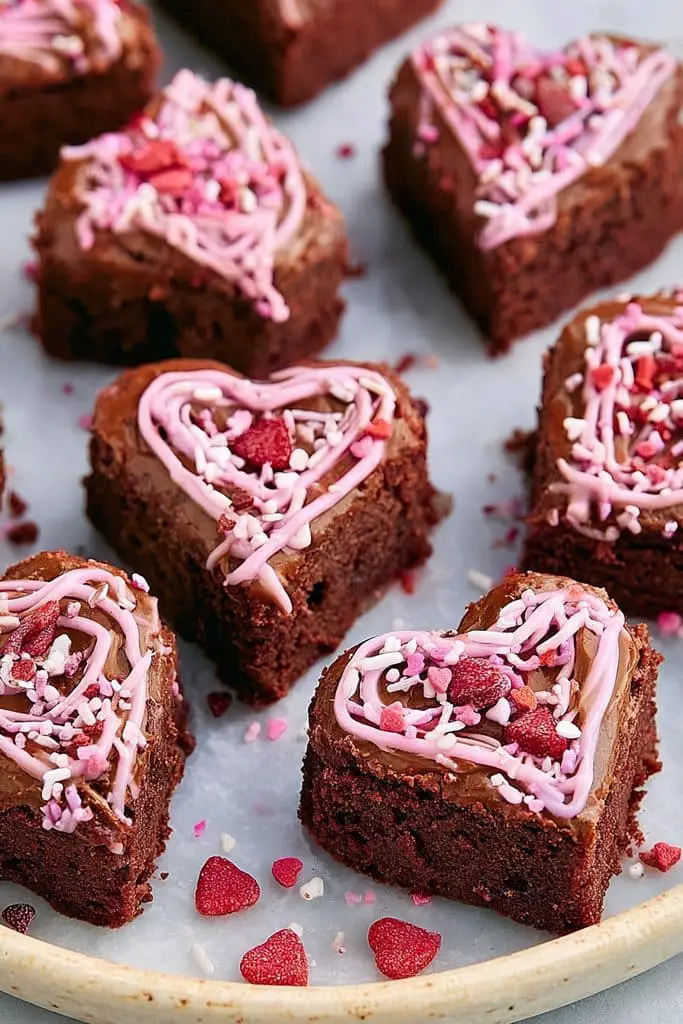
If you’re looking for fun Valentine’s Day desserts to make at home, these brownie bites are a great choice. They’re easy to prepare, simple to decorate, and perfect for sharing with your favorite people. You can drizzle them with pink or white chocolate, add heart-shaped sprinkles, or leave them plain for a classic chocolate treat.
Prep Time: 15 minutes
Cook Time: 20-25 minutes
Cooling Time: 30-45 minutes
Total Time: About 1 hour 25 minutes
Difficulty: Easy
Servings: 12-16 brownie bites
Ingredients
For the brownies:
- ½ cup (115 g) unsalted butter
- 1 cup (200 g) granulated sugar
- 2 large eggs
- 1 teaspoon vanilla extract
- ⅓ cup (30 g) unsweetened cocoa powder
- ½ cup (65 g) all-purpose flour
- ¼ teaspoon salt
- ¼ cup (45 g) chocolate chips (optional)
For decorating:
- ¼ cup (45 g) white chocolate or pink candy melts
- Valentine’s Day sprinkles (optional)
Instructions
- Preheat the oven. Preheat your oven to 350°F (175°C). Line an 8-inch square baking pan with parchment paper, leaving a little overhang so you can lift the brownies out easily later.
- Melt the butter. Melt the butter in a microwave-safe bowl or in a small saucepan over low heat. Let it cool slightly before mixing it with the other ingredients.
- Mix the wet ingredients. Whisk the melted butter and sugar together in a large bowl. Add the eggs and vanilla extract, then whisk until everything is smooth and well combined.
- Add the dry ingredients. Sift in the cocoa powder, flour, and salt. Fold everything together until just combined. If you’re using chocolate chips, gently stir them into the batter. Avoid overmixing so the brownies stay tender.
- Bake the brownies. Spread the batter evenly in the prepared pan. Bake for 20-25 minutes, or until the edges are set and a toothpick inserted near the center comes out with a few moist crumbs. Let the brownies cool completely in the pan.
- Cut out heart shapes. Use the parchment paper to lift the cooled brownies onto a cutting board. Press a small heart-shaped cookie cutter into the brownie slab to make individual bites. For cleaner cuts, wipe the cutter between uses.
- Melt the decorating chocolate. Melt the white chocolate or pink candy melts according to the package instructions, stirring until smooth. If using white chocolate, you can leave it white or color it with a little oil-based pink food coloring.
- Decorate the brownie bites. Drizzle the melted chocolate over the hearts or dip the tops into it. Add Valentine’s Day sprinkles while the chocolate is still wet, then allow the decorations to set before serving.
Tips for the Best Heart-Shaped Brownie Bites
- Let the brownies cool completely: Warm brownies are soft and can crumble when you cut them. Cooling makes it much easier to get neat heart shapes.
- Use a metal cookie cutter: A small metal heart cutter usually cuts through brownies more cleanly than a plastic one.
- Keep the scraps: Don’t throw away the leftover brownie pieces! Crumble them over ice cream, mix them into a milkshake, or enjoy them as little bites.
- Try different toppings: Use pink icing, white chocolate drizzle, crushed freeze-dried strawberries, or colorful candy hearts.
- Make them ahead: Bake the brownies a day ahead, then cut and decorate them when you’re ready to serve.
These Heart-Shaped Brownie Bites are one of my favorite cute and easy Valentine’s Day desserts because they’re simple, chocolatey, and easy to customize. I love arranging them on a pretty plate with strawberries and a few extra sprinkles for a festive look. They’re perfect for Valentine’s Day parties, classroom treats, or a sweet homemade surprise for someone special!
23. Easy Valentine’s Day Chocolate-Dipped Oreos
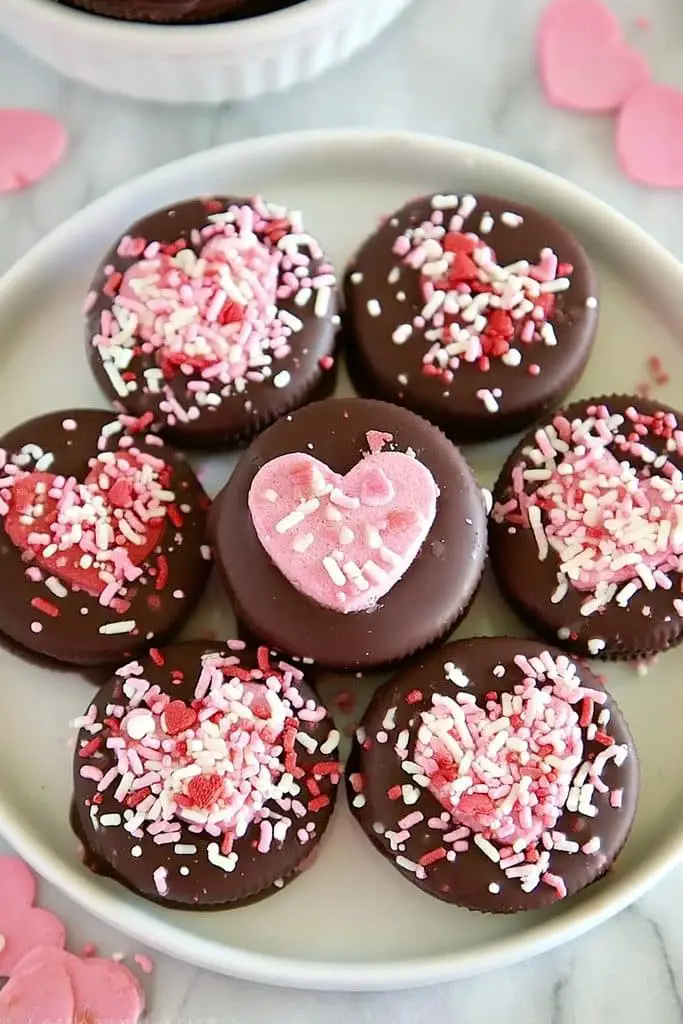
These Easy Valentine’s Day Chocolate-Dipped Oreos are crunchy, chocolatey, and almost too cute to eat! They’re made with classic Oreo cookies dipped in melted chocolate and decorated with pink sprinkles, candy hearts, or a pretty white chocolate drizzle. Best of all, you only need a few ingredients and no baking is required.
I love making these when I want a quick Valentine’s Day treat without spending much time in the kitchen. They’re perfect for parties, homemade gift boxes, or a fun activity to do with kids. You can use pink, red, white, or milk chocolate to create your own festive designs.
Prep Time: 15 minutes
Cook Time: None
Chill Time: 20-30 minutes
Total Time: About 45 minutes
Difficulty: Very Easy
Servings: 12 cookies
Ingredients
- 12 Oreo cookies
- 8 oz (225 g) white chocolate or white candy melts
- 4 oz (115 g) pink or red candy melts (optional)
- Valentine’s Day sprinkles or candy hearts
- 1 teaspoon coconut oil, if needed to thin the melted chocolate (optional)
Instructions
- Prepare your workspace. Line a baking sheet or flat tray with parchment paper. Make sure there’s enough room in your refrigerator to chill the cookies on the tray.
- Melt the chocolate. Place the white chocolate or candy melts in a microwave-safe bowl. Heat in 20-second intervals, stirring each time, until smooth. If the chocolate seems too thick, stir in a small amount of coconut oil.
- Dip the Oreos. Hold an Oreo with a fork and dip it into the melted chocolate, turning it gently to coat both sides. Lift it out and tap the fork lightly against the bowl to let the extra chocolate drip off.
- Place on the tray. Carefully transfer each coated Oreo to the parchment-lined baking sheet. Use a toothpick or another fork to help slide the cookie off if needed.
- Add Valentine’s decorations. While the chocolate coating is still wet, sprinkle on heart-shaped sprinkles, tiny candy hearts, or pink sugar. Work one cookie at a time so the decorations stick before the coating sets.
- Add a chocolate drizzle. If you’d like extra decoration, melt the pink or red candy melts in a separate bowl. Use a spoon or a small piping bag to drizzle the colored chocolate over the cookies.
- Chill until set. Place the tray in the refrigerator for 20-30 minutes, or until the chocolate coating is firm.
- Serve or package. Arrange the finished Oreos on a dessert plate or place them in small treat bags tied with ribbon. They’re ready to share!
Tips for the Best Chocolate-Dipped Oreos
- Use candy melts for easy decorating: They usually melt smoothly and set firmly, making them a convenient choice for homemade treats.
- Keep the cookies dry: Even a little water can make melted chocolate seize, so use completely dry bowls and utensils.
- Try different chocolate combinations: Dip Oreos in white chocolate and drizzle with pink, or use milk chocolate with red and white sprinkles.
- Make them extra special: Add heart-shaped candies or use a small piping bag to draw little hearts on the coating.
- Let the coating set fully: This helps prevent fingerprints and makes the cookies easier to package.
- Store them properly: Keep the finished cookies in an airtight container in a cool place, or refrigerate them if your kitchen is warm. Separate layers with parchment paper.
These Easy Valentine’s Day Chocolate-Dipped Oreos are such a lovely choice when you need cute and easy Valentine’s Day desserts with just a few ingredients. I love how you can make them look different every time with simple decorations. Whether you’re sharing them with friends or wrapping them up as a sweet homemade gift, these little chocolate treats are always a fun addition to Valentine’s Day!
24. Valentine’s Day Mini Fruit Pizzas
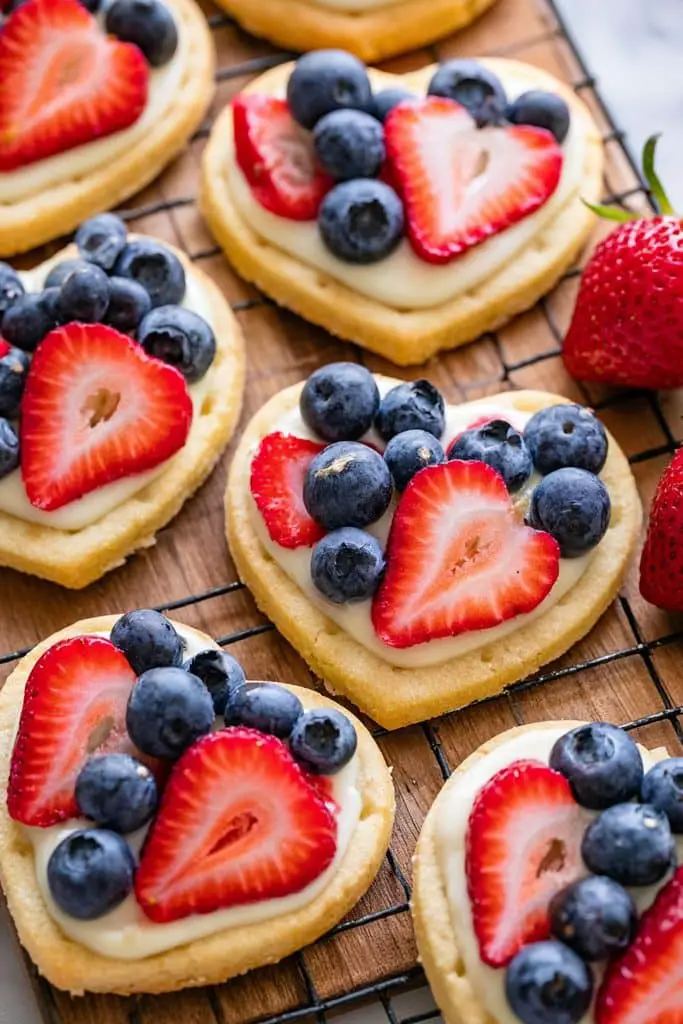
These Valentine’s Day Mini Fruit Pizzas are colorful, sweet, and so much fun to make! They have soft sugar cookie bases, a creamy frosting layer, and fresh fruit arranged on top. I love how easy it is to decorate each little pizza with strawberries, raspberries, and other colorful fruits to create a cute Valentine’s Day treat.
If you’re looking for cute and easy Valentine’s Day desserts that feel a little lighter than chocolate treats, these mini fruit pizzas are a wonderful option. They’re perfect for Valentine’s Day parties, family gatherings, or an afternoon baking activity with kids. You can even arrange the fruit into little hearts for an extra festive touch!
Prep Time: 20 minutes
Cook Time: 10-12 minutes
Cooling Time: 20 minutes
Total Time: About 50 minutes
Difficulty: Easy
Servings: 12 mini fruit pizzas
Ingredients
For the cookie bases:
- 1 cup (125 g) all-purpose flour
- ¼ cup (50 g) granulated sugar
- ¼ cup (57 g) unsalted butter, softened
- 1 small egg or 2 tablespoons beaten egg
- ½ teaspoon vanilla extract
- ¼ teaspoon baking powder
- A pinch of salt
Shortcut option: Use store-bought sugar cookie dough if you want to save time.
For the creamy topping:
- 4 oz (115 g) cream cheese, softened
- ¼ cup (30 g) powdered sugar
- ½ teaspoon vanilla extract
For the fruit topping:
- ½ cup chopped strawberries
- ¼ cup raspberries or blueberries
- 1 kiwi, peeled and sliced (optional)
- Extra fruit of your choice
Instructions
- Preheat the oven. Preheat your oven to 350°F (175°C). Line a baking sheet with parchment paper.
- Make the cookie dough. In a bowl, cream the softened butter and granulated sugar until smooth. Mix in the egg and vanilla extract. Add the flour, baking powder, and salt, then stir until a soft dough forms.
- Shape the mini bases. Divide the dough into 12 small portions. Roll each portion into a ball and flatten it into a small circle, about 2-3 inches wide. You can also shape them into hearts for a Valentine’s Day look.
- Bake the cookies. Place the cookie bases on the prepared baking sheet, leaving a little space between them. Bake for 10-12 minutes, or until the edges are just lightly golden. Let them cool completely before adding the topping.
- Prepare the cream cheese frosting. In a small bowl, beat the softened cream cheese, powdered sugar, and vanilla extract until smooth and creamy.
- Wash and prepare the fruit. Wash the fruit and pat it dry with a paper towel. Slice the strawberries and kiwi into small pieces so they’re easy to arrange on the mini pizzas.
- Add the creamy layer. Spread a thin layer of cream cheese frosting over each cooled cookie base, leaving a small border around the edges.
- Decorate with fruit. Arrange the strawberries, raspberries, blueberries, or kiwi on top. Try making little heart shapes with strawberry slices, or use different colors to create a pretty pattern.
- Chill and serve. Refrigerate the mini fruit pizzas for about 15-20 minutes if you’d like the topping to firm up a little. Serve chilled or slightly cool for the best texture.
Tips for the Best Valentine’s Day Mini Fruit Pizzas
- Don’t frost warm cookies: Let the cookie bases cool completely so the cream cheese topping doesn’t melt.
- Dry the fruit well: Excess moisture can make the frosting watery, so pat the fruit dry before decorating.
- Use seasonal fruit: Strawberries and raspberries are perfect for Valentine’s Day, but blueberries, kiwi, and mandarin segments also work well.
- Make heart-shaped pizzas: Use a heart-shaped cookie cutter before baking for an extra-cute presentation.
- Save time with store-bought dough: Refrigerated sugar cookie dough works well when you’re making these for a party.
- Prepare ahead: Bake the cookie bases a day in advance and store them in an airtight container. Add the frosting and fruit closer to serving time for the freshest result.
These Valentine’s Day Mini Fruit Pizzas are such a fun way to add a little color to your dessert table. I love the combination of buttery cookies, creamy frosting, and fresh fruit because every bite feels sweet and refreshing. They’re cute, easy to customize, and perfect for anyone who wants a festive Valentine’s Day dessert beyond the usual chocolate treats!
25. No-Bake Valentine’s Day Chocolate Cheesecake Cups
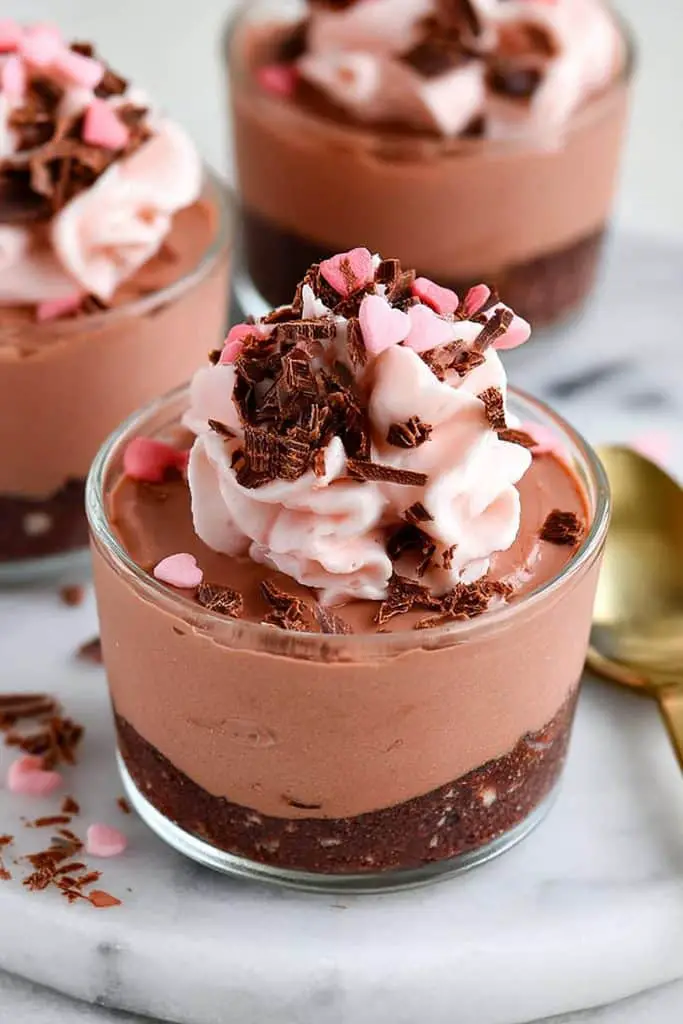
These No-Bake Valentine’s Day Chocolate Cheesecake Cups are rich, creamy, and full of chocolate flavor. They have a buttery cookie crumb base, a smooth chocolate cheesecake filling, and a pretty topping that makes them perfect for Valentine’s Day. The best part is that you don’t need an oven to make them!
I love this recipe because it looks elegant when served in little dessert cups, but it’s surprisingly easy to prepare. If you’re searching for cute and easy Valentine’s Day desserts, these chocolate cheesecake cups are a wonderful choice for date nights, parties, or a sweet homemade surprise.
Prep Time: 20 minutes
Cook Time: None
Chill Time: 2-3 hours
Total Time: About 3 hours 20 minutes
Difficulty: Easy
Servings: 4-6 cups
Ingredients
For the cookie crust:
- 1 cup (100 g) chocolate cookie crumbs or crushed Oreos
- 3 tablespoons unsalted butter, melted
For the chocolate cheesecake filling:
- 8 oz (225 g) cream cheese, softened
- ½ cup (60 g) powdered sugar
- ¼ cup (25 g) unsweetened cocoa powder
- 1 teaspoon vanilla extract
- ½ cup (120 ml) heavy whipping cream, cold
- 3 oz (85 g) semi-sweet chocolate, melted and slightly cooled
For decorating:
- Whipped cream
- Chocolate shavings or mini chocolate chips
- Pink or red heart-shaped sprinkles
- Fresh strawberries (optional)
Instructions
- Prepare the cookie crust. Place the chocolate cookies in a food processor and crush them into fine crumbs. If you don’t have a food processor, put the cookies in a sealed bag and crush them with a rolling pin. Mix the crumbs with the melted butter until evenly combined.
- Fill the dessert cups. Divide the crumb mixture among four to six small glasses or dessert cups. Press it down gently with the back of a spoon to create an even base. Place the cups in the refrigerator while you prepare the filling.
- Melt the chocolate. Melt the semi-sweet chocolate in the microwave in 20-second intervals, stirring between each interval. Let it cool slightly so it’s no longer hot but still pourable.
- Make the cheesecake mixture. In a mixing bowl, beat the softened cream cheese and powdered sugar until smooth. Add the cocoa powder and vanilla extract, then mix again until everything is well combined.
- Add the melted chocolate. Pour the slightly cooled melted chocolate into the cream cheese mixture. Beat on low speed until the filling looks smooth and evenly chocolatey.
- Whip the cream. In a separate bowl, whip the cold heavy cream until stiff peaks form. Gently fold the whipped cream into the chocolate cheesecake mixture until light and fluffy.
- Assemble the cups. Spoon or pipe the chocolate cheesecake filling over the chilled cookie crusts. Smooth the tops with a spoon or use a piping bag to make pretty swirls.
- Chill until set. Cover the cups and refrigerate for at least 2-3 hours, or until the filling is firm enough to hold its shape.
- Decorate and serve. Add whipped cream, chocolate shavings, heart-shaped sprinkles, or a fresh strawberry just before serving. Enjoy them chilled for the creamiest texture.
Tips for the Best No-Bake Chocolate Cheesecake Cups
- Use softened cream cheese: Let it sit at room temperature before mixing. This helps create a smooth filling without lumps.
- Cool the melted chocolate: If the chocolate is too hot, it can soften the cream cheese mixture and affect the texture.
- Whip the cream properly: Stiff peaks help the cheesecake filling stay light and hold its shape without gelatin.
- Make individual portions: Clear glasses or small jars show off the chocolate layers and make these desserts look extra special.
- Add a strawberry topping: Fresh strawberries bring a fruity contrast to the rich chocolate filling.
- Prepare ahead: These cups can be made the day before and kept covered in the refrigerator. Add the final decorations shortly before serving.
These No-Bake Valentine’s Day Chocolate Cheesecake Cups are one of my favorite easy Valentine’s Day desserts with a rich, chocolatey flavor. I love that you can prepare them ahead of time, leaving you more time to enjoy the celebration. With their creamy filling, crunchy cookie base, and cute toppings, they’re a lovely way to finish this list of sweet Valentine’s Day treats!