
Sometimes, you just feel like doing something fun at home, and baking is one of my favorite ways to spend that time. Whether you’re craving something sweet, looking for a little kitchen project, or trying to find things to bake when you’re bored at home, there are plenty of easy recipes to try.
The best part is that you don’t need to be an expert baker to make something delicious. You can start with simple chocolate chip cookies, bake a batch of fudgy brownies, or try something a little different, like cinnamon roll twists or mini pizzas. There are also plenty of things to bake when you’re bored for kids, so the whole family can join in.
In this list, I’ve gathered 32 baking ideas for different moods, skill levels, and cravings. Some recipes are quick enough to make in under 30 minutes, while others are perfect for a slow afternoon when you want to enjoy the process. So, if you’re looking for good things to bake when you’re bored, there’s something here for you!
1. Chocolate Chip Cookies

Chocolate chip cookies are one of the first things I think of when I want something sweet and homemade. They’re simple, comforting, and filled with little pockets of melted chocolate. The edges turn lightly crisp while the centers stay soft and chewy, especially when you take them out of the oven at just the right time.
They’re also a great choice if you’re new to baking. You don’t need special equipment, and you can easily change the recipe to suit your taste. Add chopped nuts, use dark chocolate instead of milk chocolate, or sprinkle a little sea salt on top for extra flavor.
Prep time: 15 minutes
Cook time: 10-12 minutes per batch
Chilling time: 20-30 minutes, optional
Total time: About 45-60 minutes
Difficulty: Easy
Yield: About 18 cookies
Ingredients
- ½ cup (113 g) unsalted butter, softened
- ½ cup (100 g) packed brown sugar
- ¼ cup (50 g) granulated sugar
- 1 large egg, at room temperature
- 1 teaspoon vanilla extract
- 1¼ cups (155 g) all-purpose flour
- ½ teaspoon baking soda
- ¼ teaspoon salt
- ¾ cup (130 g) chocolate chips
Instructions
- Preheat the oven. Heat your oven to 350°F (175°C). Line a baking sheet with parchment paper so the cookies don’t stick.
- Cream the butter and sugars. In a large bowl, beat the softened butter, brown sugar, and granulated sugar until the mixture looks creamy and well combined.
- Add the egg and vanilla. Mix in the egg and vanilla extract until everything is smooth.
- Combine the dry ingredients. In a separate bowl, stir together the flour, baking soda, and salt. Add the dry mixture to the butter mixture and mix just until a dough forms. Try not to overmix it, as this can make the cookies tougher.
- Fold in the chocolate chips. Add the chocolate chips and gently stir them through the dough so you get chocolate in every bite.
- Shape the cookies. Scoop the dough into balls, using about 1½ tablespoons per cookie. Place them on the prepared baking sheet, leaving around 2 inches between each one because they will spread as they bake.
- Bake until lightly golden. Bake for 10-12 minutes, or until the edges are lightly golden and the centers still look a little soft. They will continue to set as they cool.
- Let them cool. Leave the cookies on the baking sheet for about 5 minutes before transferring them to a wire rack.
Tips and Variations
- For thicker cookies: Chill the dough for 20-30 minutes before baking.
- For extra chocolate flavor: Use a mix of milk chocolate and dark chocolate chips.
- For a nutty crunch: Add ½ cup of chopped walnuts or pecans.
- For kids: Let them help stir in the chocolate chips or gently press a few extra chips onto the tops of the dough balls.
- For soft centers: Avoid baking the cookies until they look completely firm in the middle. They’ll finish setting as they cool.
If you’re searching for fun things to bake when you’re bored at home, these chocolate chip cookies are a lovely place to start. The recipe is easy, the ingredients are simple, and you get a warm batch of homemade cookies at the end. Serve them with a glass of milk, a cup of tea, or a scoop of vanilla ice cream for an extra treat.
2. Fudgy Chocolate Brownies
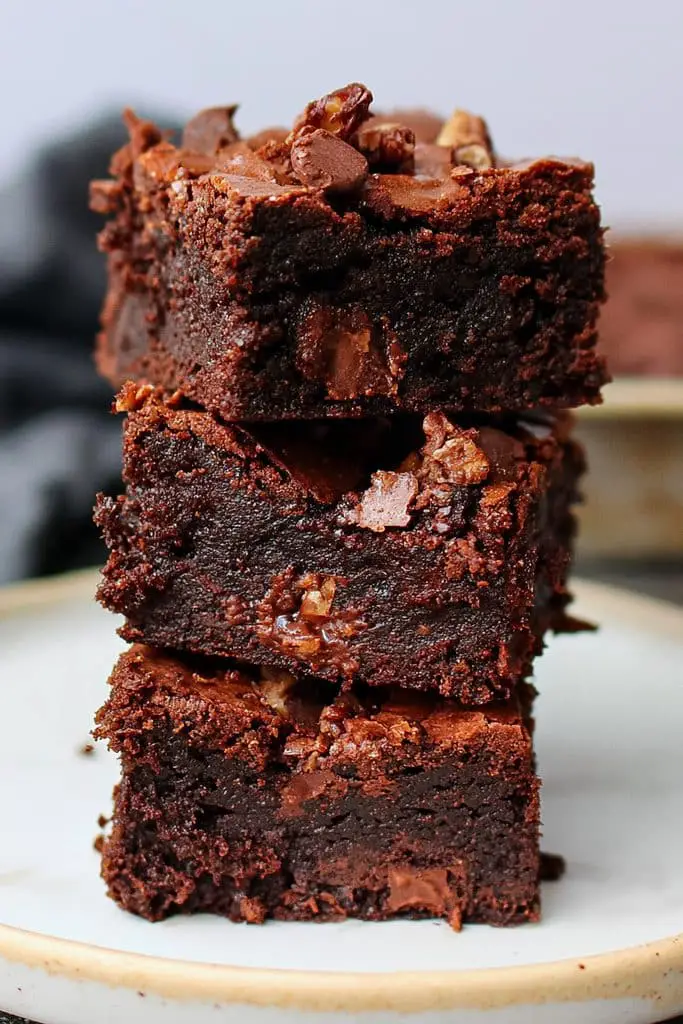
If you’re craving something sweet and chocolatey, fudgy chocolate brownies are always a good idea. They’re rich, soft in the middle, and have that lovely thin, crackly top that makes homemade brownies so hard to resist. I love that you can make them with simple pantry ingredients without needing a mixer or any complicated baking techniques.
These brownies are a great choice when you’re looking for things to bake when you’re bored at home. The batter comes together quickly, and most of the work happens in the oven. You can enjoy them plain, add chopped walnuts for a little crunch, or stir in chocolate chips for an even richer chocolate flavor.
Prep time: 15 minutes
Cook time: 25-30 minutes
Total time: 40-45 minutes, plus cooling time
Difficulty: Easy
Yield: 9-12 brownies
Ingredients
- ½ cup (113 g) unsalted butter
- 1 cup (200 g) granulated sugar
- 2 large eggs, at room temperature
- 1 teaspoon vanilla extract
- ⅓ cup (35 g) unsweetened cocoa powder
- ½ cup (65 g) all-purpose flour
- ¼ teaspoon salt
- ½ cup (85 g) chocolate chips or chopped chocolate, optional
Instructions
- Preheat the oven. Preheat your oven to 350°F (175°C). Line an 8-inch square baking pan with parchment paper, leaving a little extra hanging over the sides so you can lift the brownies out easily.
- Melt the butter. Place the butter in a microwave-safe bowl and heat it in short intervals until melted. You can also melt it in a small saucepan over low heat. Let it cool slightly before moving on to the next step.
- Mix the butter and sugar. Add the sugar to the melted butter and whisk until well combined. The mixture may look a little grainy, which is perfectly fine.
- Add the eggs and vanilla. Whisk in the eggs one at a time, followed by the vanilla extract. Mix until the batter looks glossy and smooth. This step helps create that lovely crackly top.
- Add the dry ingredients. Sift in the cocoa powder, flour, and salt. Use a spatula to fold everything together until you no longer see dry patches. Try not to overmix, as too much mixing can make the brownies less tender.
- Stir in the chocolate. If you’re using chocolate chips or chopped chocolate, gently fold them into the batter. They’ll add little pockets of melted chocolate throughout the brownies.
- Transfer to the pan. Spread the batter evenly into your prepared baking pan. Smooth the top with a spatula so the brownies bake evenly.
- Bake the brownies. Bake for 25-30 minutes. The edges should look set, while the center should still be slightly soft. A toothpick inserted into the middle should come out with a few moist crumbs, but not wet batter.
- Cool before slicing. Let the brownies cool completely in the pan before cutting them into squares. This helps them set properly and gives you cleaner slices. If you prefer extra-neat pieces, chill them briefly before cutting.
Tips and Variations
- For extra-fudgy brownies: Take them out of the oven as soon as the center is set but still moist. Baking them for too long can make them dry and cakey.
- For more chocolate flavor: Replace some of the chocolate chips with chopped dark chocolate.
- For a crunchy texture: Add ½ cup of chopped walnuts or pecans to the batter.
- For a little contrast: Sprinkle a small pinch of flaky sea salt over the top before baking.
- For a peanut butter twist: Drop a few spoonfuls of peanut butter over the batter and gently swirl it with a knife.
- For easy serving: Warm a brownie slightly and serve it with vanilla ice cream.
How to Store Chocolate Brownies
Once the brownies have cooled completely, store them in an airtight container at room temperature for up to 3-4 days. If your kitchen is particularly warm, you can refrigerate them instead. They also freeze well for up to 3 months when wrapped tightly and stored in a freezer-safe container.
If you want a quick chocolate fix, these fudgy brownies are one of the good things to bake when you’re bored. They’re simple enough for beginner bakers, easy to customize, and perfect for sharing with family or friends. Just remember to let them cool before cutting, even though the smell of freshly baked chocolate brownies might make that the hardest part!
3. Vanilla Cupcakes

Vanilla cupcakes are one of those classic treats that never go out of style. They’re soft, fluffy, and have a lovely vanilla flavor that goes well with almost any frosting. If you’re looking for things to bake when you’re bored, these cupcakes are a great choice because they’re simple to make and don’t require any fancy ingredients.
What I especially like about vanilla cupcakes is how easy they are to customize. You can keep them plain, add chocolate chips to the batter, or decorate them with colorful sprinkles and buttercream frosting. They’re also one of the best things to bake when you’re bored for kids because everyone can have fun choosing their own toppings.
This recipe makes light, tender cupcakes with a soft crumb. You can enjoy them as they are or dress them up for a birthday, family gathering, or an ordinary afternoon when you’re craving something sweet.
Prep time: 15 minutes
Cook time: 18-22 minutes
Total time: About 35-40 minutes, plus cooling time
Difficulty: Easy
Yield: 12 cupcakes
Ingredients
For the cupcakes
- 1¼ cups (155 g) all-purpose flour
- 1¼ teaspoons baking powder
- ¼ teaspoon salt
- ½ cup (113 g) unsalted butter, softened
- ¾ cup (150 g) granulated sugar
- 2 large eggs, at room temperature
- 2 teaspoons vanilla extract
- ½ cup (120 ml) whole milk, at room temperature
For the optional vanilla buttercream
- ½ cup (113 g) unsalted butter, softened
- 1½ cups (180 g) powdered sugar, sifted
- 1 teaspoon vanilla extract
- 1-2 tablespoons milk or cream, as needed
Instructions
- Preheat the oven. Preheat your oven to 350°F (175°C). Line a 12-cup muffin pan with paper cupcake liners so the cupcakes are easy to remove after baking.
- Mix the dry ingredients. In a medium bowl, whisk together the flour, baking powder, and salt. Set the bowl aside while you prepare the wet ingredients.
- Cream the butter and sugar. In a large bowl, beat the softened butter and granulated sugar for about 2-3 minutes, until the mixture looks pale and fluffy. This helps give the cupcakes a lighter texture.
- Add the eggs and vanilla. Beat in the eggs one at a time, mixing well after each addition. Stir in the vanilla extract. If the mixture looks slightly curdled, don’t worry too much; it should come together as you add the remaining ingredients.
- Combine the wet and dry ingredients. Add about one-third of the flour mixture to the butter mixture and mix gently. Add half the milk, then another third of the flour mixture, followed by the remaining milk and flour. Mix just until everything is combined. Avoid overmixing, as this can make the cupcakes dense.
- Fill the cupcake liners. Divide the batter evenly between the 12 liners, filling each about two-thirds full. This leaves enough room for the cupcakes to rise without spilling over.
- Bake until done. Bake for 18-22 minutes, or until the tops spring back lightly when touched and a toothpick inserted into the center comes out clean or with a few crumbs.
- Cool the cupcakes. Let them rest in the pan for about 5 minutes, then transfer them to a wire rack. Allow them to cool completely before adding frosting.
- Make the buttercream. If you’d like to frost the cupcakes, beat the softened butter until creamy. Gradually add the powdered sugar, then mix in the vanilla extract. Add milk or cream a little at a time until the frosting reaches a smooth, spreadable consistency.
- Decorate and serve. Spread or pipe the buttercream onto the cooled cupcakes. Finish with sprinkles, chocolate shavings, or any toppings you like.
Tips and Variations
- Use room-temperature ingredients: Softened butter, room-temperature eggs, and milk help the batter mix more evenly.
- Don’t overmix the batter: Once the flour disappears, stop mixing. This helps keep the cupcakes soft and tender.
- Try chocolate chip cupcakes: Gently fold ½ cup of chocolate chips into the finished batter before filling the liners.
- Make them colorful: Add sprinkles to the batter or let everyone decorate their own cupcake with different toppings.
- Add a citrus twist: Mix in a little lemon zest for a fresh flavor that pairs nicely with vanilla.
- Try a filled center: Once the cupcakes have cooled, remove a small piece from the middle and fill it with jam, chocolate spread, or caramel.
How to Store Vanilla Cupcakes
Unfrosted vanilla cupcakes can be stored in an airtight container at room temperature for up to 2 days. Frosted cupcakes are best kept in a covered container, following the storage guidance for your frosting; buttercream cupcakes can usually stay at room temperature for a day or two in a cool kitchen. If your kitchen is hot, refrigerate them and let them sit at room temperature briefly before serving for a softer texture.
You can also freeze unfrosted cupcakes for up to 2-3 months. Let them cool completely, wrap them well, and thaw them before decorating.
Final Thoughts
These vanilla cupcakes are a lovely option when you want something homemade without spending the whole afternoon in the kitchen. They’re easy enough for beginner bakers, and the simple vanilla flavor gives you plenty of room to experiment with different frostings and toppings.
If you’re collecting fun things to bake when you’re bored at home, keep this recipe handy. Whether you make them for yourself, bake with the kids, or share them with friends, a batch of soft vanilla cupcakes is always a sweet little treat.
4. Peanut Butter Cookies

If you love the rich, nutty taste of peanut butter, these cookies are definitely worth trying. They’re soft in the middle, lightly crisp around the edges, and have that classic peanut butter flavor that makes every bite delicious. The best part is that you can make them with a handful of everyday ingredients, so there’s no need for a complicated baking project.
Peanut butter cookies are one of my favorite baking ideas for a relaxed afternoon at home. The dough comes together quickly, and you can make the traditional crisscross pattern on top with a fork. If you’re looking for things to bake when you’re bored at home, this recipe is easy enough for beginners and fun to make with kids, too.
You can keep these cookies simple or add chocolate chips for a little extra sweetness. Either way, they’re perfect with a glass of milk, a cup of tea, or whenever you’re craving something sweet.
Prep time: 15 minutes
Chilling time: 20 minutes, optional
Cook time: 10-12 minutes per batch
Total time: About 30-45 minutes
Difficulty: Easy
Yield: About 18 cookies
Ingredients
- ½ cup (113 g) unsalted butter, softened
- ½ cup (100 g) packed brown sugar
- ¼ cup (50 g) granulated sugar
- ½ cup (125 g) creamy peanut butter
- 1 large egg
- 1 teaspoon vanilla extract
- 1¼ cups (155 g) all-purpose flour
- ½ teaspoon baking soda
- ¼ teaspoon salt
Optional additions:
- ½ cup (85 g) chocolate chips
- 2 tablespoons granulated sugar, for rolling the dough balls
Instructions
- Preheat the oven. Preheat your oven to 350°F (175°C). Line a baking sheet with parchment paper to keep the cookies from sticking.
- Cream the butter and sugars. In a large bowl, beat the softened butter, brown sugar, and granulated sugar until the mixture looks creamy and well combined.
- Mix in the peanut butter. Add the peanut butter and beat until smooth. Creamy peanut butter works especially well for this recipe because it gives the cookies a consistent texture.
- Add the egg and vanilla. Beat in the egg and vanilla extract until everything is fully combined.
- Combine the dry ingredients. In a separate bowl, whisk together the flour, baking soda, and salt. Add the dry ingredients to the peanut butter mixture and stir until a soft dough forms. If you’re using chocolate chips, fold them in at this stage.
- Chill the dough if needed. If the dough feels very soft or sticky, refrigerate it for about 20 minutes. This makes it easier to shape and can help prevent the cookies from spreading too much.
- Shape the cookies. Scoop the dough into balls, using about 1 tablespoon for each cookie. If you like a slightly sweet outer coating, roll each ball in granulated sugar before placing it on the baking sheet. Leave around 2 inches between the cookies.
- Make the crisscross pattern. Gently press each dough ball with the back of a fork, then press again from the opposite direction to create the traditional crisscross design. Don’t flatten them too much.
- Bake the cookies. Bake for 10-12 minutes, until the edges look set and lightly golden. The centers may still look a little soft, but that’s fine. They’ll firm up as they cool.
- Let them cool. Leave the cookies on the baking sheet for about 5 minutes before transferring them to a wire rack. This gives them time to set without breaking.
Tips and Variations
- Choose the right peanut butter: Regular creamy peanut butter usually gives the most reliable results. Natural peanut butter can vary in texture and oil content, which may affect how the cookies spread.
- For softer cookies: Avoid overbaking them. Take them out when the edges are set but the centers are still slightly soft.
- For extra crunch: Use crunchy peanut butter or add ¼ cup of chopped roasted peanuts.
- For chocolate lovers: Stir chocolate chips into the dough, or dip half of each cooled cookie into melted chocolate.
- For a sweet-and-salty flavor: Sprinkle a tiny pinch of flaky salt over the cookies before baking.
- For baking with kids: Let them roll the dough into balls and make the fork patterns. It’s a simple way to make baking more interactive.
How to Store Peanut Butter Cookies
Once the cookies have cooled completely, place them in an airtight container and store them at room temperature for up to 5 days. To keep them soft, avoid leaving them uncovered for long periods.
You can also freeze the unbaked dough balls for up to 3 months. Place them on a tray until firm, then transfer them to a freezer-safe bag or container. When you’re ready to bake, arrange them on a baking sheet and bake from frozen, adding a couple of extra minutes as needed.
Final Thoughts
These peanut butter cookies are a great reminder that baking doesn’t have to be complicated to be enjoyable. With simple ingredients, a few easy steps, and very little preparation, you can make a batch of homemade cookies that taste delicious.
If you’re searching for good things to bake when you’re bored, add these to your list. They’re beginner-friendly, easy to customize, and a fun choice for an afternoon baking session with family or friends.
5. Cinnamon Sugar Muffins
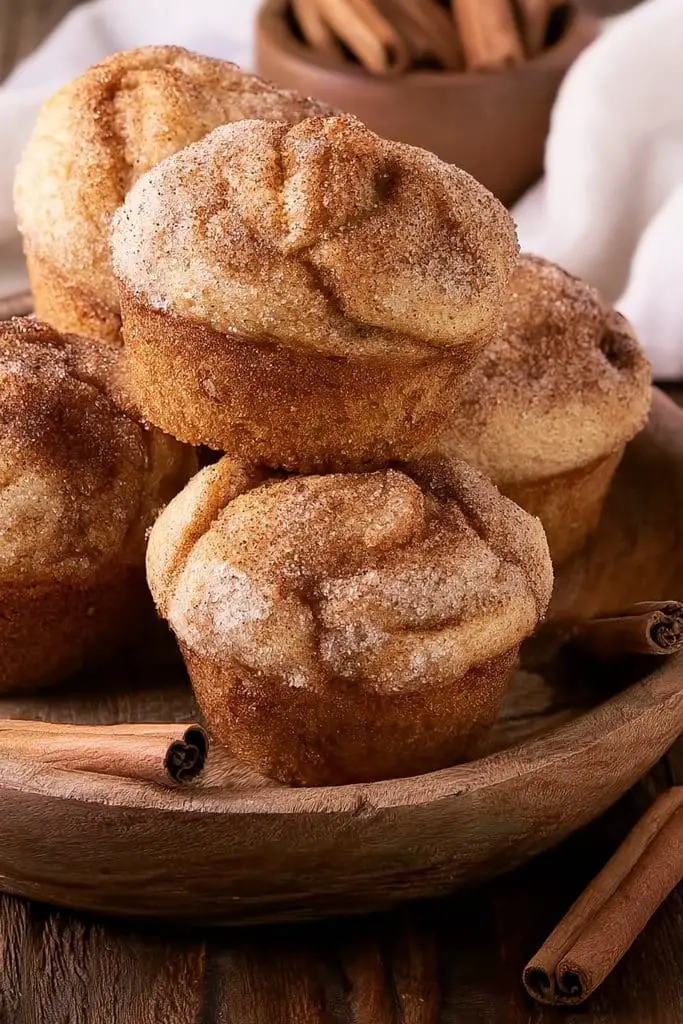
There’s something so comforting about cinnamon sugar muffins fresh from the oven. They’re soft and fluffy inside, with a lightly golden top coated in buttery cinnamon sugar. They taste a little like cinnamon sugar doughnuts, but they’re much easier to make at home because you don’t need to prepare dough or deal with hot oil.
These muffins are a lovely option when you’re looking for things to bake when you’re bored at home. The batter comes together in one bowl with a few simple ingredients, and the warm cinnamon smell that fills your kitchen makes the whole baking process even better. They’re also a fun recipe to make with kids, especially when it’s time to brush the muffins with melted butter and dip them in cinnamon sugar.
I like these muffins best when they’re still slightly warm. You can enjoy them for breakfast, serve them with a cup of tea, or make them whenever you’re craving something sweet in the afternoon. If you want to change things up, try adding chopped apples or a little vanilla to make them even more flavorful.
Prep time: 15 minutes
Cook time: 18-22 minutes
Total time: About 35-40 minutes
Difficulty: Easy
Yield: 12 muffins
Ingredients
For the muffins
- 1¾ cups (220 g) all-purpose flour
- ¾ cup (150 g) granulated sugar
- 2 teaspoons baking powder
- ½ teaspoon ground cinnamon
- ¼ teaspoon salt
- 1 large egg
- ¾ cup (180 ml) whole milk
- ⅓ cup (80 ml) neutral oil, such as vegetable oil
- 1 teaspoon vanilla extract
For the cinnamon sugar coating
- ¼ cup (50 g) granulated sugar
- 1 teaspoon ground cinnamon
- 3 tablespoons (42 g) unsalted butter, melted
Instructions
- Preheat the oven. Preheat your oven to 375°F (190°C). Line a 12-cup muffin pan with paper liners or lightly grease each cup with butter or oil.
- Mix the dry ingredients. In a large bowl, whisk together the flour, sugar, baking powder, ground cinnamon, and salt. Make sure the baking powder is evenly distributed so the muffins rise properly.
- Mix the wet ingredients. In a separate bowl, whisk the egg, milk, oil, and vanilla extract until combined.
- Combine the mixtures. Pour the wet ingredients into the dry ingredients. Stir gently with a spatula until everything is just combined. The batter may look slightly lumpy, which is perfectly fine. Avoid overmixing because it can make the muffins dense.
- Fill the muffin pan. Divide the batter evenly between the 12 muffin cups, filling each about two-thirds to three-quarters full.
- Bake the muffins. Place the pan in the preheated oven and bake for 18-22 minutes. The muffins are ready when the tops are lightly golden and a toothpick inserted into the center comes out clean or with a few crumbs.
- Prepare the coating. While the muffins bake, mix the granulated sugar and ground cinnamon in a small bowl. Melt the butter in another bowl and set it aside.
- Brush with butter. Let the muffins cool in the pan for about 5 minutes. While they’re still warm, brush the tops with melted butter. You can also dip the tops directly into the butter if you prefer.
- Add the cinnamon sugar. Dip each buttered muffin top into the cinnamon sugar mixture, turning gently to coat it evenly. If you want extra cinnamon flavor, sprinkle a little more mixture over the tops.
- Serve and enjoy. Let the coating settle for a minute or two, then enjoy the muffins while they’re still warm. The outside will have a lovely sweet coating, while the inside stays soft and tender.
Tips and Variations
- Don’t overmix the batter: A few small lumps are fine. Mixing just until the flour disappears helps keep the muffins light and fluffy.
- Measure the flour carefully: Too much flour can make muffins dry. For the most accurate results, weigh it or spoon it into your measuring cup and level the top.
- Add chopped apples: Fold ½ cup of finely chopped apple into the batter for a fruity twist. Apple and cinnamon are a classic combination.
- Make them extra cozy: Add a pinch of nutmeg along with the cinnamon for a warmer, spiced flavor.
- Try a brown sugar topping: Replace some of the coating sugar with brown sugar for a deeper caramel-like taste.
- Get the kids involved: Let them mix the cinnamon sugar and help coat the cooled-enough muffin tops. Just be careful, as the melted butter and freshly baked muffins can be hot.
How to Store Cinnamon Sugar Muffins
Store the cooled muffins in an airtight container at room temperature for up to 2-3 days. The cinnamon sugar coating is at its best on the day they’re made, but the muffins will still taste lovely the next day.
If you want to keep them longer, freeze the muffins without the coating for up to 3 months. Once thawed, warm them briefly in the oven, brush the tops with a little melted butter, and add fresh cinnamon sugar before serving.
Final Thoughts
Cinnamon sugar muffins are one of those easy baking ideas that make an ordinary afternoon feel a little more special. You don’t need fancy equipment or much baking experience, and the simple cinnamon coating makes them taste like a homemade treat from your favorite bakery.
If you’re making a list of fun things to bake when you’re bored at home, these muffins deserve a spot. They’re quick, beginner-friendly, and easy to adapt with your favorite spices or fruit. Make a batch, put the kettle on, and enjoy a warm muffin straight from your own kitchen.
6. Chocolate Mug Cake
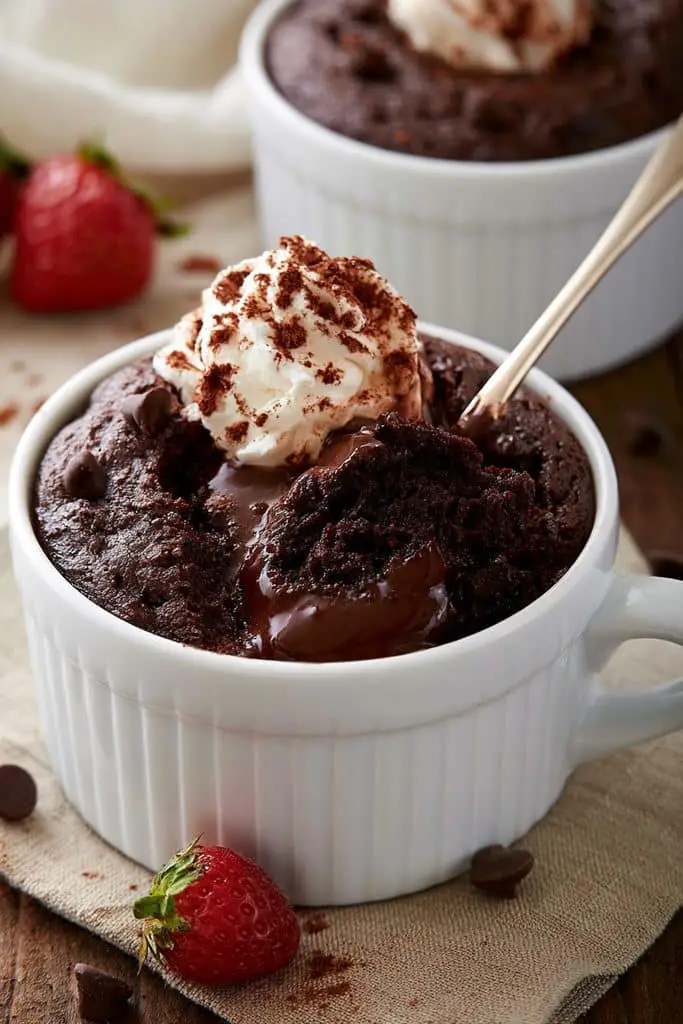
Sometimes, you want something chocolatey but don’t feel like making a whole batch of brownies or cookies. That’s where a chocolate mug cake comes in handy. It’s soft, rich, and ready in just a few minutes, making it one of the easiest things to bake when you’re bored and craving something sweet.
The best part about this recipe is that you don’t need an oven, a mixer, or a pile of dishes. You simply mix the ingredients in a microwave-safe mug and cook the cake in the microwave. It’s perfect for a quick dessert when you’re home alone, watching a movie, or looking for easy fun baking ideas that don’t take much effort.
This mug cake has a tender chocolate crumb and tastes especially good when served warm. You can add chocolate chips for a gooey center, swirl in a spoonful of peanut butter, or top it with ice cream. Just remember that microwave cooking times vary, so it’s best to start with less time and add a few extra seconds if needed.
Prep time: 5 minutes
Cook time: 60-90 seconds
Total time: About 6-7 minutes
Difficulty: Very easy
Yield: 1 serving
Ingredients
- 4 tablespoons (32 g) all-purpose flour
- 2 tablespoons (25 g) granulated sugar
- 1 tablespoon (5 g) unsweetened cocoa powder
- ¼ teaspoon baking powder
- A small pinch of salt
- 3 tablespoons (45 ml) milk
- 1 tablespoon (15 ml) neutral oil or melted butter
- ¼ teaspoon vanilla extract
- 1 tablespoon chocolate chips, optional
Instructions
- Choose a suitable mug. Use a microwave-safe mug that holds at least 10-12 ounces (300-350 ml). The cake will rise as it cooks, so leave enough room at the top to prevent it from overflowing.
- Mix the dry ingredients. Add the flour, sugar, cocoa powder, baking powder, and salt directly to the mug. Stir well with a fork or small whisk, making sure there are no large lumps of cocoa powder.
- Add the wet ingredients. Pour in the milk, oil or melted butter, and vanilla extract. Mix until you have a smooth batter and no dry flour remains at the bottom of the mug.
- Add the chocolate chips. If you want an extra chocolatey cake, stir in the chocolate chips. You can also save a few to sprinkle over the top before cooking.
- Microwave the cake. Place the mug in the microwave and cook on high for about 60 seconds. Check the center, then continue cooking in 10-15-second intervals if needed. Depending on your microwave and mug, the cake may need around 60-90 seconds or slightly longer.
- Check that it’s cooked. The cake should look risen and mostly set on top. The center can remain moist, but the batter should not be completely liquid. Avoid cooking it for too long, as this can make the cake rubbery and dry.
- Let it rest. Allow the mug cake to stand for about 1-2 minutes before eating. The mug will be hot, and the cake will continue to set slightly as it rests.
- Add your favorite toppings. Finish with a scoop of vanilla ice cream, a drizzle of chocolate sauce, powdered sugar, or a spoonful of whipped cream. Enjoy it straight from the mug while it’s warm.
Tips and Variations
- For a gooey chocolate center: Press a teaspoon of chocolate spread or a few chocolate chips into the middle of the batter before microwaving.
- For a peanut butter mug cake: Swirl a teaspoon of peanut butter into the batter before cooking.
- For a mocha flavor: Add a small pinch of instant coffee to bring out the chocolate flavor.
- For a richer cake: Use whole milk and melted butter instead of oil.
- For a dairy-free version: Use your favorite plant-based milk and a suitable dairy-free chocolate.
- Avoid overcooking: This is the most important tip for a soft mug cake. Microwaves vary in power, so short cooking intervals work better than guessing one long cooking time.
- Mix thoroughly: Make sure the flour and cocoa powder are fully combined with the liquid, especially at the bottom of the mug.
How to Store Chocolate Mug Cake
Chocolate mug cake tastes best when it’s freshly made because it can become dry as it cools. Since this recipe makes just one serving and takes only a few minutes, I recommend making it when you’re ready to eat it rather than preparing it in advance.
If you don’t finish it, cover the mug and refrigerate the leftovers, then eat them within a day. Reheat briefly in the microwave, checking every few seconds, but keep in mind that the texture won’t be quite as soft as when freshly made.
Final Thoughts
This chocolate mug cake is proof that you don’t need a lot of time or ingredients to make a delicious homemade dessert. It’s quick, simple, and perfect for those moments when a chocolate craving strikes unexpectedly.
If you’re collecting things to bake when you’re bored at home, this recipe is worth keeping nearby. It’s especially handy when you want a personal-sized treat without turning your kitchen upside down. Grab your favorite mug, mix everything together, and you’ll have a warm chocolate dessert ready in minutes.
7. Red Velvet Cupcakes

Red velvet cupcakes are a lovely choice when you want to bake something that looks a little special without making a complicated dessert. They have a beautiful deep red color, a soft and tender crumb, and a mild cocoa flavor that makes them different from ordinary chocolate cupcakes. Topped with creamy cream cheese frosting, they’re sweet, slightly tangy, and hard to resist.
What I like about red velvet cupcakes is how well the flavors work together. The cocoa gives them a gentle chocolate taste, while the buttermilk adds moisture and a slight tang. The cream cheese frosting brings everything together, making these cupcakes perfect for birthdays, celebrations, or simply an afternoon when you’re craving something sweet.
Although they look impressive, these cupcakes are quite easy to make at home. You don’t need any special baking skills, just a few basic ingredients and a little care when mixing the batter. If you’re searching for fun things to bake when you’re bored at home, this recipe is a great way to try something colorful and delicious.
Prep time: 20 minutes
Cook time: 18-22 minutes
Cooling time: 30-45 minutes
Total time: About 1 hour 15 minutes
Difficulty: Easy to moderate
Yield: 12 cupcakes
Ingredients
For the red velvet cupcakes
- 1¼ cups (155 g) all-purpose flour
- 1 tablespoon (7 g) unsweetened cocoa powder
- ¾ cup (150 g) granulated sugar
- ½ teaspoon baking soda
- ¼ teaspoon salt
- 1 large egg, at room temperature
- ½ cup (120 ml) buttermilk, at room temperature
- ⅓ cup (80 ml) neutral oil, such as vegetable oil
- 1 teaspoon vanilla extract
- 1 teaspoon white vinegar
- 1-2 teaspoons red gel food coloring, or as needed
For the cream cheese frosting
- 4 oz (113 g) cream cheese, softened but still slightly cool
- ¼ cup (57 g) unsalted butter, softened
- 1½ cups (180 g) powdered sugar, sifted
- ½ teaspoon vanilla extract
Instructions
- Preheat the oven. Preheat your oven to 350°F (175°C). Line a 12-cup muffin pan with paper cupcake liners. This makes the cupcakes easier to remove and helps keep their sides neat.
- Combine the dry ingredients. In a medium bowl, whisk together the flour, cocoa powder, sugar, baking soda, and salt. Break up any lumps in the cocoa powder so the batter has an even color and texture.
- Mix the wet ingredients. In another bowl, whisk together the egg, buttermilk, oil, vanilla extract, and white vinegar until smooth. Add the red food coloring and mix until the liquid has an even red color.
- Make the batter. Pour the wet ingredients into the dry ingredients. Gently whisk or fold everything together until no dry flour remains. Don’t overmix the batter, as this can make the cupcakes less tender.
- Fill the cupcake liners. Divide the batter evenly among the 12 liners, filling each about two-thirds full. This leaves enough room for the cupcakes to rise without overflowing.
- Bake the cupcakes. Bake for 18-22 minutes. To check if they’re ready, insert a toothpick into the center of a cupcake. It should come out clean or with a few moist crumbs attached.
- Cool completely. Let the cupcakes rest in the pan for about 5 minutes, then transfer them to a wire rack. Allow them to cool completely before frosting. If they’re still warm, the frosting may melt and slide off.
- Prepare the frosting. In a bowl, beat the softened butter and cream cheese until smooth and creamy. Add the powdered sugar gradually, mixing on low speed at first to prevent it from flying everywhere. Add the vanilla extract and beat just until the frosting is smooth and spreadable.
- Frost the cupcakes. Once the cupcakes have cooled, spread the frosting over each one with a knife or pipe it on using a piping bag. If you like, crumble a little piece of one cupcake over the frosting for a simple decoration.
- Serve and enjoy. The cupcakes are ready to serve once decorated. If you’re not serving them immediately, refrigerate them because the cream cheese frosting needs to stay chilled.
Tips and Variations
- Use gel food coloring: Gel coloring usually gives a deeper red shade without adding too much liquid to the batter. Start with a small amount and add more if needed.
- Don’t add too much cocoa: Red velvet has a mild cocoa flavor rather than the strong chocolate taste of a chocolate cupcake. Too much cocoa can also make the red color less noticeable.
- Make your own buttermilk: If you don’t have buttermilk, mix ½ cup (120 ml) milk with 1½ teaspoons lemon juice or white vinegar. Let it stand for 5-10 minutes before using.
- Avoid overbaking: Take the cupcakes out as soon as a toothpick comes out clean or with a few crumbs. Overbaking can make them dry.
- Decorate with sprinkles: Add red, white, or pink sprinkles for birthdays and special occasions.
- Try a chocolate variation: If you prefer a stronger chocolate taste, add a few mini chocolate chips to the batter, keeping in mind that this will make the cupcakes a little less traditional.
- Bake with kids: Let them help mix the batter or decorate the cooled cupcakes. Food coloring can stain hands and clothes, so it’s best to handle that step carefully.
How to Store Red Velvet Cupcakes
Because these cupcakes have cream cheese frosting, store them in an airtight container in the refrigerator. They’ll generally keep well for about 3-4 days. For the best texture and flavor, let them sit at room temperature for around 15-20 minutes before serving.
You can also freeze the unfrosted cupcakes for up to 2-3 months. Let them cool completely, wrap them well, and place them in a freezer-safe container. Thaw them in the refrigerator or at room temperature before adding freshly made frosting.
Final Thoughts
Red velvet cupcakes are a fun way to make an ordinary baking afternoon feel a little more special. They look beautiful, taste delicious, and are easier to prepare than you might expect. The soft cake and creamy frosting make a lovely combination, whether you’re baking for guests or treating yourself.
If you’re looking for good things to bake when you’re bored, add these cupcakes to your list. You can keep the decoration simple or get creative with frosting and sprinkles. Either way, you’ll have a homemade treat that’s just as enjoyable to make as it is to eat.
8. Double Chocolate Cookies
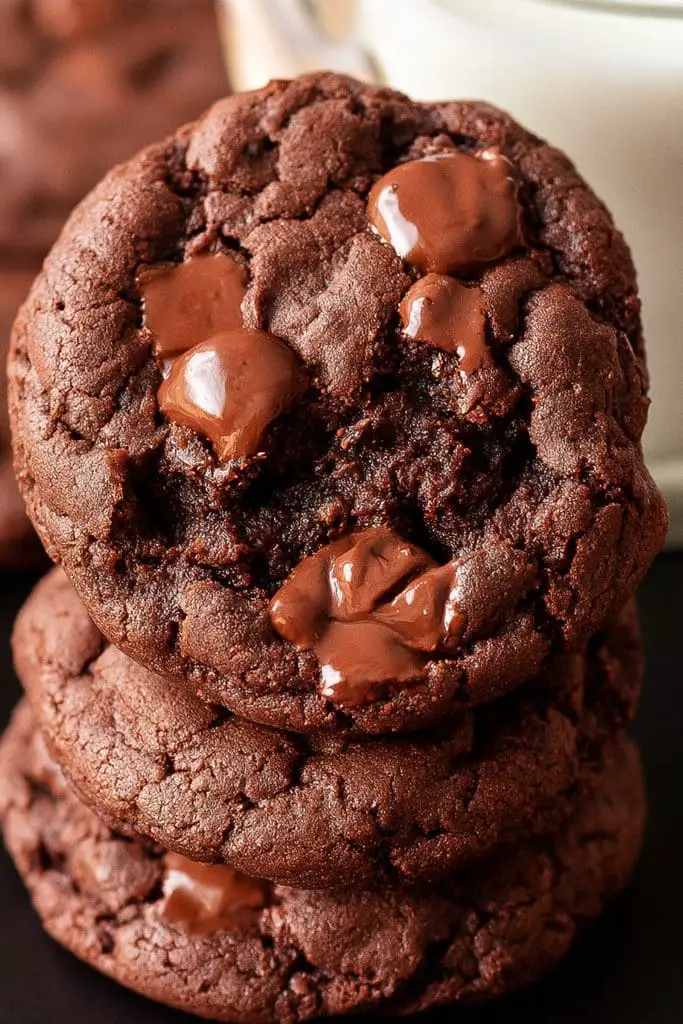
If one kind of chocolate isn’t enough, these double chocolate cookies are just what you need. They’re rich, soft, and packed with chocolate flavor, with a slightly crisp edge and a chewy center. Cocoa powder gives the dough its deep chocolate taste, while chocolate chips melt into little pockets of goodness as the cookies bake.
These cookies are a great choice when you’re craving something sweet and want to try a baking recipe that’s a little different from classic chocolate chip cookies. The dough is easy to prepare, and you don’t need any special equipment. I also like how flexible this recipe is: you can use milk chocolate for a sweeter cookie, dark chocolate for a richer flavor, or a mixture of both.
If you’re collecting things to bake when you’re bored at home, keep these cookies in mind. They’re perfect for an afternoon baking session, a movie-night treat, or whenever you want something chocolatey without making a whole cake.
Prep time: 15 minutes
Chilling time: 20-30 minutes
Cook time: 10-12 minutes per batch
Total time: About 45-60 minutes
Difficulty: Easy
Yield: About 16 cookies
Ingredients
- ½ cup (113 g) unsalted butter, softened
- ½ cup (100 g) packed brown sugar
- ¼ cup (50 g) granulated sugar
- 1 large egg, at room temperature
- 1 teaspoon vanilla extract
- 1 cup (125 g) all-purpose flour
- ⅓ cup (30 g) unsweetened cocoa powder
- ½ teaspoon baking soda
- ¼ teaspoon salt
- ¾ cup (130 g) chocolate chips or chopped chocolate
Instructions
- Prepare the oven and baking sheet. Preheat your oven to 350°F (175°C). Line a baking sheet with parchment paper and set it aside.
- Cream the butter and sugars. In a large bowl, beat the softened butter, brown sugar, and granulated sugar until the mixture looks creamy and well combined. This usually takes about 2 minutes.
- Add the egg and vanilla. Beat in the egg and vanilla extract until the mixture is smooth. Scrape down the sides of the bowl if needed so everything is evenly mixed.
- Mix the dry ingredients. In a separate bowl, whisk together the flour, cocoa powder, baking soda, and salt. Breaking up any cocoa lumps now will help give the cookies a more even texture.
- Make the cookie dough. Add the dry ingredients to the butter mixture and stir until a soft dough forms. Stop mixing as soon as the flour is incorporated. The dough will be thick, which is exactly what you want.
- Fold in the chocolate chips. Add the chocolate chips or chopped chocolate and gently mix them through the dough. Save a few pieces to press onto the tops of the cookies before baking if you’d like them to look extra chocolatey.
- Chill the dough. Cover the bowl and refrigerate the dough for 20-30 minutes. This helps firm it up and makes it easier to shape. It can also reduce excessive spreading in the oven.
- Shape the cookies. Scoop the dough into balls using about 1½ tablespoons per cookie. Place them on the prepared baking sheet, leaving around 2 inches between each one. Press a few reserved chocolate chips onto the tops.
- Bake the cookies. Bake for 10-12 minutes. The edges should look set, while the centers may still appear slightly soft. Don’t wait for the cookies to become completely firm in the oven, as they will continue to set while cooling.
- Let them cool. Leave the cookies on the baking sheet for about 5 minutes before transferring them to a wire rack. This helps them hold their shape while keeping the centers soft and chewy.
Tips and Variations
- Use good-quality cocoa powder: Cocoa is one of the main flavors in these cookies, so using a cocoa powder you enjoy makes a noticeable difference.
- Mix your chocolate: Combine milk chocolate chips with dark chocolate chunks for a balance of sweetness and rich cocoa flavor.
- Don’t overbake them: The cookies may look a little underdone in the center when you first take them out. That’s normal, and it helps keep them chewy.
- Add a little crunch: Fold in ¼ cup of chopped walnuts or pecans for extra texture.
- Make them extra indulgent: Add a handful of white chocolate chips for a sweet contrast against the dark dough.
- Sprinkle with sea salt: A tiny pinch of flaky salt on each cookie before baking can balance the sweetness.
- Chill longer if needed: If your kitchen is warm or the dough feels very soft, leave it in the refrigerator for another 15-20 minutes before shaping.
How to Store Double Chocolate Cookies
Once the cookies have cooled completely, store them in an airtight container at room temperature for up to 4-5 days. Keep them away from direct sunlight or heat so they maintain their texture.
You can also freeze the unbaked cookie dough. Shape it into balls, freeze them on a tray until firm, then transfer them to a freezer-safe bag or container for up to 3 months. Bake from frozen, adding a couple of extra minutes to the baking time and checking that the edges are set.
Final Thoughts
Double chocolate cookies are a lovely option when you want a homemade treat that feels a little more indulgent than an everyday cookie. They’re simple to prepare, easy to customize, and full of rich chocolate flavor in every bite.
If you’re looking for fun things to bake when you’re bored at home, this recipe is worth trying. Put on your favorite music, mix up the dough, and enjoy the smell of chocolate cookies baking in the oven. And if you like your cookies warm, let them cool just enough to handle before enjoying one with a glass of milk.
9. Brookies (Brownie Cookies)
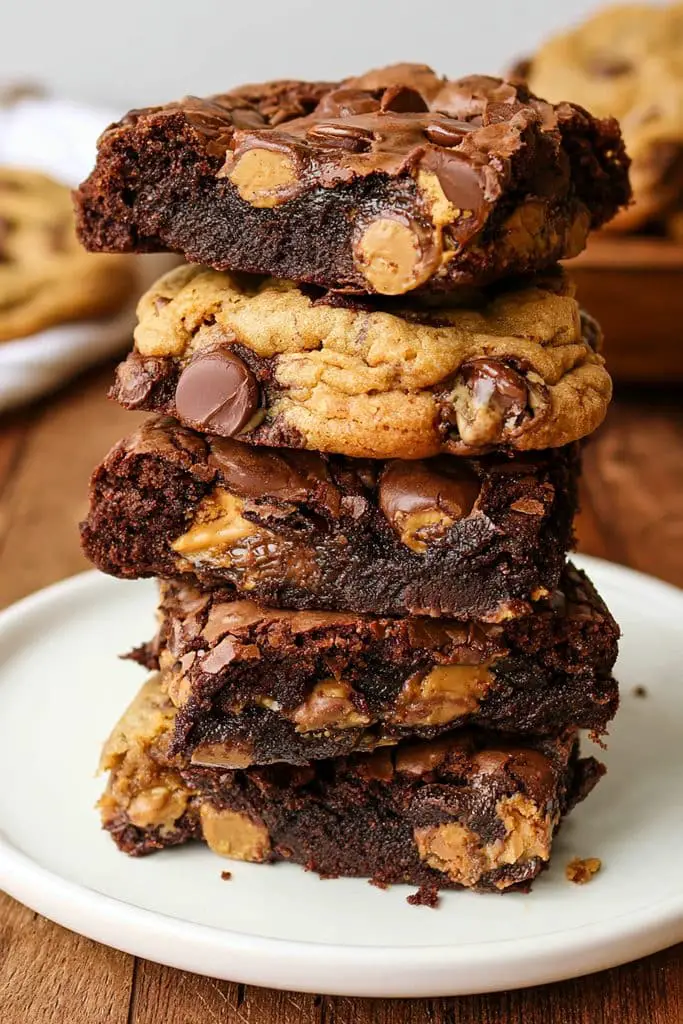
Can’t decide between brownies and cookies? You don’t have to! Brookies bring the best of both desserts together in one delicious treat. They have the rich chocolate flavor and soft, fudgy center of a brownie, with the convenient shape and slightly crisp edges of a cookie. If you’re a chocolate lover, this recipe is definitely worth adding to your baking list.
Brookies are a fun choice when you’re looking for things to bake when you’re bored at home. They look impressive, but the ingredients are fairly simple, and you don’t need to make two separate batches of dough. The secret is to create a thick, brownie-like batter that bakes into cookies with shiny, crackly tops and soft centers.
I like these best when the edges are set but the middle is still a little fudgy. You can add chocolate chips for extra richness or sprinkle a little flaky salt on top to balance the sweetness. Serve them with a glass of cold milk or a scoop of vanilla ice cream for an extra-special treat.
Prep time: 15 minutes
Cook time: 10-12 minutes per batch
Cooling time: 10 minutes
Total time: About 35-45 minutes
Difficulty: Easy to moderate
Yield: About 12-14 brookies
Ingredients
- ½ cup (85 g) semi-sweet chocolate chips or chopped chocolate
- 2 tablespoons (28 g) unsalted butter
- 1 large egg, at room temperature
- ½ cup (100 g) granulated sugar
- ½ teaspoon vanilla extract
- ¼ cup (30 g) all-purpose flour
- 2 tablespoons (10 g) unsweetened cocoa powder
- ¼ teaspoon baking powder
- ⅛ teaspoon salt
- ¼ cup (45 g) chocolate chips, optional
Instructions
- Prepare the baking sheet. Preheat your oven to 350°F (175°C). Line a baking sheet with parchment paper and set it aside.
- Melt the chocolate and butter. Place the ½ cup of chocolate chips and the butter in a microwave-safe bowl. Heat in short 15-20-second intervals, stirring between each one, until the mixture is smooth. Let it cool for a few minutes so it doesn’t scramble the egg later.
- Whip the egg and sugar. In a separate bowl, beat the egg and granulated sugar for about 3-4 minutes, until the mixture becomes pale, thick, and slightly fluffy. This step helps create the shiny, crackly tops that make brookies look so tempting.
- Add the chocolate mixture. Pour the slightly cooled melted chocolate into the egg mixture. Add the vanilla extract and gently mix until combined.
- Combine the dry ingredients. In another bowl, whisk together the flour, cocoa powder, baking powder, and salt. Add these ingredients to the chocolate mixture and fold gently until no dry patches remain.
- Add extra chocolate. If you want even more chocolate in every bite, fold in the optional chocolate chips. The finished batter should be thick and glossy, but softer and stickier than regular cookie dough.
- Scoop the batter. Use a tablespoon or small cookie scoop to place portions of batter onto the prepared baking sheet. Leave about 2 inches between each one because the brookies will spread as they bake.
- Bake until the tops crack. Bake for 10-12 minutes, until the cookies have spread, the tops look shiny and crackled, and the edges appear set. The centers should still be slightly soft.
- Let them set. Remove the baking sheet from the oven and leave the brookies on it for about 10 minutes. They’ll be delicate while hot, so allow them to firm up before moving them to a wire rack.
- Serve and enjoy. Once they’ve cooled enough to handle, enjoy them as they are or serve them slightly warm with ice cream. The combination of crisp edges and a fudgy center is what makes these cookies so good.
Tips and Variations
- Beat the egg and sugar properly: Don’t skip this step. Beating them until pale and thick helps create the classic shiny brownie-cookie tops.
- Don’t overheat the chocolate: Melt it slowly and let it cool slightly before mixing it with the egg. Chocolate that’s too hot can cook the egg.
- Work quickly once the batter is ready: Brookie batter can thicken as it sits. Scoop it onto the baking sheet soon after mixing for more even spreading.
- Avoid adding too much flour: Measure carefully, as excess flour can make the cookies cakey instead of fudgy.
- Try different chocolate: Semi-sweet chocolate gives a balanced flavor, while dark chocolate makes the brookies richer and less sweet.
- Add a little crunch: Mix in ¼ cup of chopped walnuts or pecans if you enjoy nuts in brownies.
- Finish with sea salt: A light sprinkle of flaky salt before baking makes the chocolate flavor stand out.
- Bake one test cookie: If you’re unsure about your oven, bake one cookie first. If it spreads too much, let the batter rest briefly while you check your measurements and oven temperature.
How to Store Brookies
Once the brookies have cooled completely, store them in an airtight container at room temperature for up to 3 days. Keep them away from heat and direct sunlight to help maintain their texture.
You can also freeze the baked cookies for up to 2 months. Let them thaw at room temperature before serving. For that freshly baked taste, warm one in the microwave for a few seconds, taking care not to overheat it.
Final Thoughts
Brookies are one of those baking ideas that make it hard to choose a favorite dessert. You get the deep chocolate flavor of a brownie and the easy-to-eat shape of a cookie, all in one treat. They’re fun to make, don’t require complicated decorating, and are perfect for sharing.
If you’re collecting good things to bake when you’re bored, give these brownie cookies a try. They’re a little different from your usual chocolate chip cookies, but the simple method makes them manageable even if you’re not an experienced baker. Make a batch for a cozy afternoon at home, and don’t be surprised if they disappear quickly!
10. Chocolate Lava Cakes
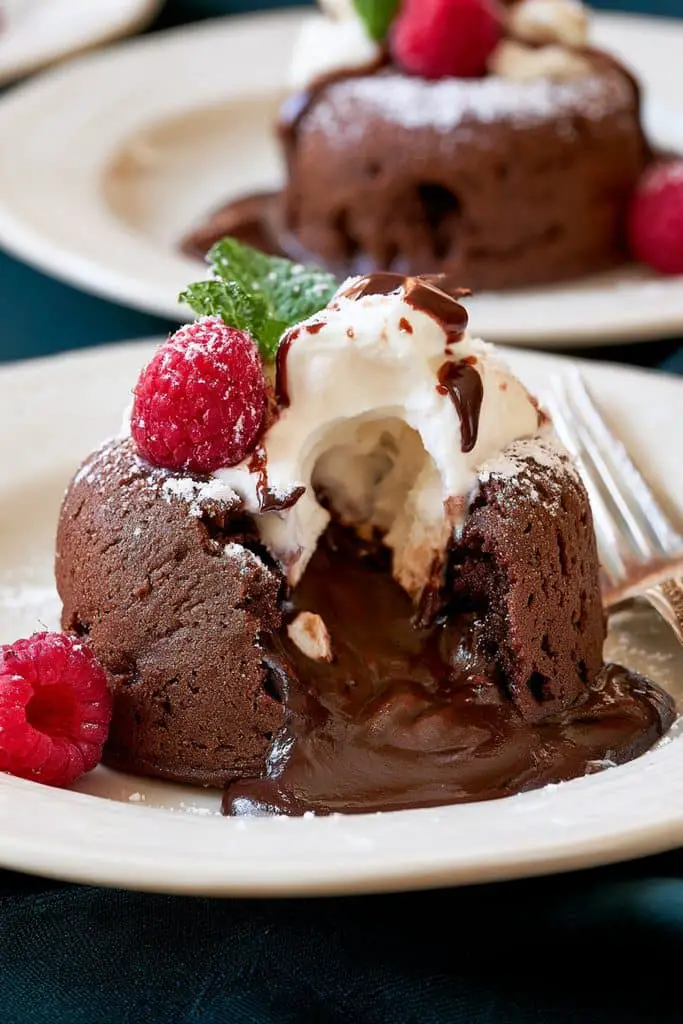
If you’re in the mood for a dessert that feels a little fancy but is surprisingly easy to make, chocolate lava cakes are a great choice. These small chocolate cakes have a soft, delicate outside and a warm, gooey chocolate center that flows out when you cut into them. They’re rich, indulgent, and perfect for anyone who loves a good chocolate dessert.
What makes lava cakes so special is their texture. Unlike regular chocolate cakes, they’re baked just long enough for the edges to set while the middle stays molten. You might think they’re difficult to make, but the ingredients are simple, and once you get the baking time right for your oven, they’re quite manageable.
These cakes are lovely for a date night, a special family dessert, or simply an afternoon when you’re craving something sweet. You can serve them with vanilla ice cream, fresh strawberries, or a light dusting of powdered sugar. If you’re looking for fun things to bake when you’re bored at home, this recipe is a delicious way to try something that looks impressive without too much effort.
Prep time: 15 minutes
Cook time: 10-12 minutes
Total time: About 25-30 minutes
Difficulty: Easy to moderate
Yield: 4 individual lava cakes
Ingredients
- ½ cup (85 g) semi-sweet or dark chocolate, chopped
- ½ cup (113 g) unsalted butter, cut into pieces
- 2 large eggs
- 2 large egg yolks
- ¼ cup (50 g) granulated sugar
- 2 tablespoons (16 g) all-purpose flour
- 1 teaspoon vanilla extract
- A small pinch of salt
- Butter and cocoa powder, for preparing the ramekins
- Powdered sugar, for serving, optional
Instructions
- Preheat the oven. Preheat your oven to 425°F (220°C). Place four small oven-safe ramekins, each holding about 6 ounces (180 ml), on a baking sheet so they’re easy to move in and out of the oven.
- Prepare the ramekins. Grease the inside of each ramekin generously with butter. Dust with a little cocoa powder, turning each ramekin to coat the bottom and sides. Tap out any excess. This helps the cakes release more easily after baking.
- Melt the chocolate and butter. Add the chopped chocolate and butter to a heatproof bowl. Melt them together in the microwave in short 15-20-second intervals, stirring between each interval. You can also place the bowl over a saucepan of gently simmering water. Stir until smooth, then let the mixture cool slightly.
- Whisk the eggs and sugar. In a separate bowl, whisk the eggs, egg yolks, and granulated sugar until the mixture looks slightly thicker and lighter in color. This usually takes about 1-2 minutes by hand.
- Add the chocolate mixture. Slowly pour the melted chocolate and butter into the egg mixture while whisking gently. Add the vanilla extract and salt, then mix until everything is combined.
- Fold in the flour. Sift the flour over the chocolate mixture and gently fold it in with a spatula. Stop as soon as you no longer see dry flour. The batter should be smooth and thick.
- Fill the ramekins. Divide the batter evenly between the four prepared ramekins. Place them on the baking sheet, making sure they’re stable and not touching one another.
- Bake the cakes. Bake for 10-12 minutes. The edges should look firm and set, while the centers should still have a slight wobble. Since ovens and ramekins vary, start checking at around 10 minutes. Baking them for too long can cook the center completely.
- Rest briefly. Remove the cakes from the oven and let them stand for about 1 minute. Run a thin knife carefully around the inside edge of each ramekin to loosen the cake.
- Turn out and serve. Place a small serving plate over each ramekin, then carefully invert it. Let the ramekin sit upside down for a few seconds before lifting it away. Dust the cakes with powdered sugar and serve immediately.
Tips and Variations
- Choose good-quality chocolate: Since chocolate is the main flavor, use chocolate you enjoy eating on its own. Semi-sweet or dark chocolate gives the cakes a rich flavor without making them overly sweet.
- Watch the baking time: The secret to a molten center is taking the cakes out while the edges are set but the middle remains soft. If this is your first attempt, test one cake before baking the rest.
- Prepare the ramekins well: Grease and dust them thoroughly so the cakes release without breaking.
- Make them ahead: You can prepare the batter, divide it between the prepared ramekins, cover, and refrigerate for a few hours. Bake straight from the refrigerator, allowing a little extra time and checking the centers carefully.
- Try a chocolate-hazelnut center: Add a small spoonful of chilled chocolate-hazelnut spread to the center of each filled ramekin before baking. The result will be extra rich.
- Add a coffee flavor: Stir a small pinch of instant espresso powder into the melted chocolate to deepen its flavor.
- Serve with something fresh: Strawberries, raspberries, or orange segments help balance the richness of the chocolate.
- Be careful when unmolding: The cakes and ramekins will be very hot. Use oven mitts and sturdy plates, and handle them carefully.
How to Store Chocolate Lava Cakes
Chocolate lava cakes are best served immediately because their centers are meant to be warm and molten. Once baked and cooled, the centers will continue to set, so they won’t have quite the same flowing texture when reheated.
If you want to prepare ahead, the better option is to refrigerate the unbaked batter in the prepared ramekins for a few hours. Cover them and keep them chilled until you’re ready to bake. Don’t leave the batter at room temperature for an extended period.
Final Thoughts
Chocolate lava cakes are a lovely example of how a few simple ingredients can turn into something special. They look like a restaurant-style dessert, but you can make them in your own kitchen with very little preparation. Once you get the timing right, they’re a wonderful recipe to keep on hand.
If you’re searching for things to bake when you’re bored at home, these little cakes are worth trying. They’re rich, chocolatey, and especially satisfying when you break through the soft outer layer and reach the warm center. Serve one with a scoop of ice cream, and you’ve got a dessert that feels like a real treat.
11. Oreo Brownies
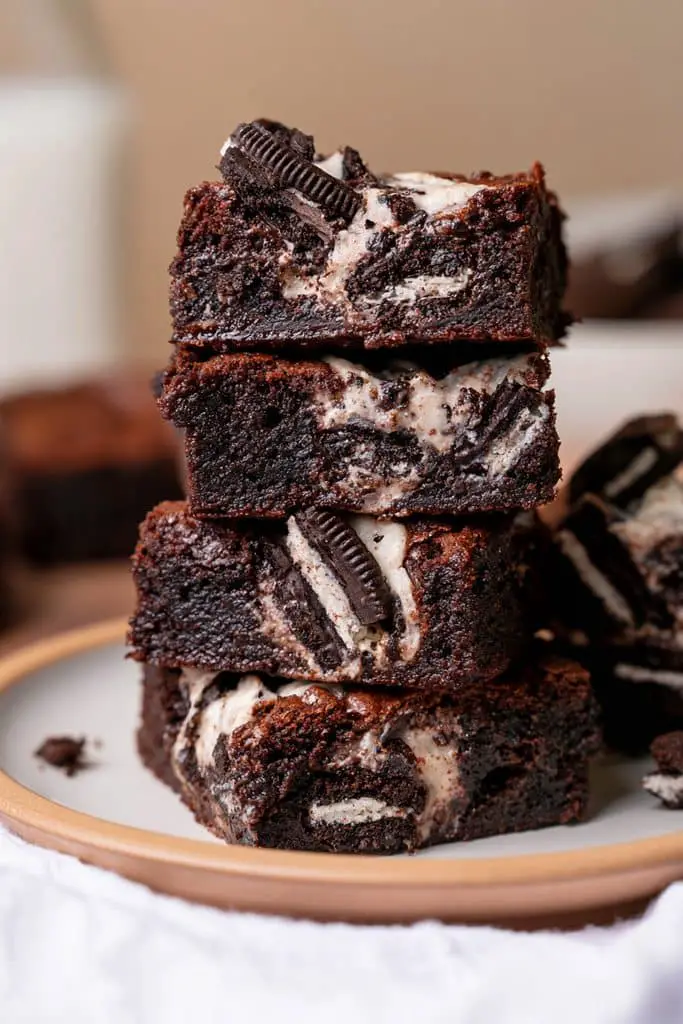
If you love brownies and Oreo cookies, this recipe brings the two together in the best way. Oreo brownies have a rich, fudgy chocolate base with crunchy chocolate sandwich cookies tucked inside and scattered over the top. You get a little crunch from the cookies, a creamy hint from the filling, and plenty of chocolate flavor in every bite.
These brownies are a great option when you’re craving something sweet and want to make a dessert that feels a little different from the usual chocolate brownies. The recipe is simple, doesn’t require a mixer, and uses ingredients you can easily find at home. You can even let kids help break up the Oreos and arrange them over the batter, making this one of those fun things to bake when you’re bored at home.
I like keeping the brownie base fudgy rather than cakey because it pairs so well with the crunchy cookies. You can use classic Oreos, try a different flavor, or add a handful of chocolate chips if you want an even richer dessert.
Prep time: 15 minutes
Cook time: 25-30 minutes
Cooling time: 45-60 minutes
Total time: About 1 hour 30 minutes
Difficulty: Easy
Yield: 9-12 brownies
Ingredients
- ½ cup (113 g) unsalted butter
- 1 cup (200 g) granulated sugar
- 2 large eggs, at room temperature
- 1 teaspoon vanilla extract
- ⅓ cup (35 g) unsweetened cocoa powder
- ½ cup (65 g) all-purpose flour
- ¼ teaspoon salt
- 10-12 Oreo cookies, roughly broken into pieces
- ¼ cup (45 g) chocolate chips, optional
Instructions
- Preheat the oven. Preheat your oven to 350°F (175°C). Line an 8-inch square baking pan with parchment paper, leaving a little overhang on the sides. This will make it easier to lift the brownies out later.
- Melt the butter. Place the butter in a microwave-safe bowl and heat it in short intervals until melted. You can also melt it gently in a small saucepan. Let it cool for a minute or two before adding the other ingredients.
- Mix the butter and sugar. Add the granulated sugar to the melted butter and whisk until well combined. The mixture may look slightly grainy, which is normal.
- Add the eggs and vanilla. Whisk in the eggs one at a time, followed by the vanilla extract. Continue mixing until the batter looks smooth and glossy. This helps give the brownies a lovely texture.
- Add the dry ingredients. Sift in the cocoa powder and flour, then add the salt. Fold everything together with a spatula until no dry patches remain. Avoid overmixing, as this can make the brownies less tender.
- Fold in some Oreos. Break about 6-8 Oreo cookies into medium-sized pieces and gently fold them into the brownie batter. If you’re using chocolate chips, add them at this stage as well.
- Spread the batter. Pour the batter into the prepared pan and spread it evenly into the corners. Break the remaining Oreo cookies into pieces and press them lightly over the top.
- Bake the brownies. Bake for 25-30 minutes. The edges should look set, while the center should remain slightly soft. A toothpick inserted into the middle should come out with a few moist crumbs rather than wet batter.
- Let them cool. Remove the pan from the oven and place it on a cooling rack. Let the brownies cool completely before lifting them out and slicing. Cutting them while they’re still hot can make the pieces fall apart.
- Slice and serve. Use a sharp knife to cut the brownies into 9 or 12 squares. For cleaner slices, wipe the knife between cuts. Serve them as they are or warm a piece slightly before adding a scoop of vanilla ice cream.
Tips and Variations
- Don’t overbake the brownies: The center should still be slightly soft when you take the pan out of the oven. It will continue to set as the brownies cool.
- Keep some larger cookie pieces: Smaller pieces mix nicely into the batter, while larger pieces on top add crunch and make the brownies look more appealing.
- Try different Oreo flavors: Golden Oreos or other flavored varieties can give the brownies a fun twist. Keep in mind that the final flavor will change depending on the cookies you choose.
- Add extra chocolate: Fold in a handful of chocolate chips or chunks for a richer brownie.
- Make them less sweet: Use semi-sweet or dark chocolate chips if you want to balance the sweetness of the cookies.
- For neat slices: Let the brownies cool completely, then chill them briefly before cutting. This is especially helpful if you want clean squares for serving.
- Get kids involved: Let them break the cookies into pieces and decorate the top before baking. An adult should handle the hot pan and oven.
How to Store Oreo Brownies
Once the brownies have cooled completely, store them in an airtight container at room temperature for up to 3-4 days. Keep them in a cool place, away from direct sunlight, to help maintain their texture.
You can also freeze the brownies for up to 2-3 months. Cut them into individual squares, wrap them well, and place them in a freezer-safe container. Thaw them at room temperature before serving. If you like your brownies warm, heat a piece briefly in the microwave.
Final Thoughts
Oreo brownies are one of those desserts that make a simple baking afternoon more enjoyable. They’re easy to prepare, full of chocolate flavor, and have a lovely mix of fudgy brownie and crunchy cookie in every bite. You don’t need complicated decorating or special equipment to make them feel special.
If you’re looking for good things to bake when you’re bored, these brownies are a great addition to your list. They’re perfect for sharing, easy to customize, and especially delicious with a glass of milk. Make a batch, let it cool, and enjoy a homemade treat that combines two classic favorites.
12. Chocolate Crinkle Cookies
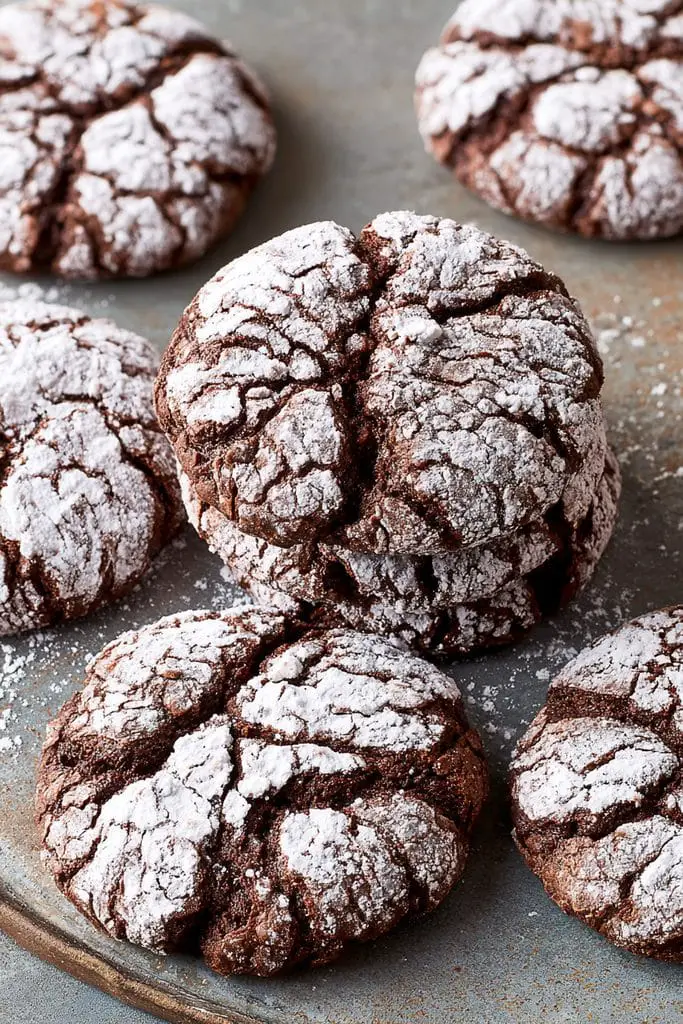
Chocolate crinkle cookies are one of those treats that look beautiful without needing any fancy decorating. They have a soft, brownie-like center, slightly crisp edges, and a lovely coating of powdered sugar that cracks as the cookies spread in the oven. The contrast between the dark chocolate dough and the white sugar gives them their classic crinkled appearance.
If you’re craving something sweet and chocolatey, these cookies are a great recipe to try. They taste a little like brownies but have the shape and convenience of cookies. The ingredients are simple, and the dough is easy to prepare, although it does need some chilling time before baking. That extra step helps the dough firm up and makes the cookies easier to roll.
These cookies are also a fun choice when you’re looking for things to bake when you’re bored at home. You can make them for a family gathering, serve them with tea or coffee, or keep a batch ready for whenever you want a little chocolate treat. Just don’t skip the powdered sugar coating, because that’s what gives chocolate crinkle cookies their signature look.
Prep time: 15 minutes
Chilling time: 2 hours
Cook time: 10-12 minutes per batch
Total time: About 2 hours 30 minutes
Difficulty: Easy
Yield: About 18-20 cookies
Ingredients
- 1 cup (125 g) all-purpose flour
- ½ cup (45 g) unsweetened cocoa powder
- 1 teaspoon baking powder
- ¼ teaspoon salt
- ¾ cup (150 g) granulated sugar
- ¼ cup (60 ml) neutral oil, such as vegetable oil
- 2 large eggs
- 1 teaspoon vanilla extract
- ½ cup (60 g) powdered sugar, for coating
Instructions
- Mix the dry ingredients. In a medium bowl, whisk together the flour, cocoa powder, baking powder, and salt. Break up any lumps in the cocoa powder so the mixture is evenly combined.
- Combine the sugar and oil. In a separate large bowl, whisk together the granulated sugar and oil until well mixed.
- Add the eggs and vanilla. Add the eggs one at a time, whisking after each addition. Stir in the vanilla extract until the mixture looks smooth.
- Make the dough. Add the dry ingredients to the wet mixture and stir with a spatula until a thick, sticky chocolate dough forms. Don’t worry if the dough seems softer than ordinary cookie dough; it will firm up in the refrigerator.
- Chill the dough. Cover the bowl and refrigerate for at least 2 hours. If the dough is still too sticky to handle after chilling, leave it in the refrigerator a little longer.
- Preheat the oven. When you’re ready to bake, preheat your oven to 350°F (175°C). Line a baking sheet with parchment paper.
- Prepare the powdered sugar. Place the powdered sugar in a small bowl. Scoop the chilled dough into portions of about 1 tablespoon each and roll them into balls with your hands. If the dough becomes too soft, return it to the refrigerator for a few minutes.
- Coat the cookie dough balls. Roll each ball generously in powdered sugar until it’s completely covered. A good coating helps create the white, crackled pattern as the cookies spread.
- Arrange the cookies. Place the coated dough balls on the prepared baking sheet, leaving about 2 inches between them. They’ll spread slightly as they bake.
- Bake the cookies. Bake for 10-12 minutes. The cookies should spread and develop visible cracks, while the centers remain soft. Avoid baking them until they’re completely firm, as they’ll continue to set as they cool.
- Cool before serving. Leave the cookies on the baking sheet for about 5 minutes, then transfer them to a wire rack to cool completely. Their centers will become more stable as they cool.
Tips and Variations
- Don’t skip the chilling time: Cold dough is easier to roll and helps the cookies keep their shape. It also gives the cocoa time to hydrate, improving the texture.
- Use plenty of powdered sugar: A generous coating helps the cracks stand out against the dark chocolate dough.
- Roll the dough evenly: Try to make the balls similar in size so the cookies bake at roughly the same rate.
- For a richer flavor: Add ½ teaspoon of instant espresso powder to the dry ingredients. It enhances the chocolate flavor without making the cookies taste strongly of coffee.
- Add a hint of mint: A small amount of peppermint extract can give the cookies a chocolate-mint flavor. Use it sparingly because it can be quite strong.
- Make them extra chocolatey: Fold ¼ cup of mini chocolate chips into the dough before chilling.
- Keep an eye on the baking time: The cookies should look crackled on top but still feel soft in the middle when they come out of the oven.
How to Store Chocolate Crinkle Cookies
Once the cookies have cooled completely, store them in an airtight container at room temperature for about 3-4 days. The powdered sugar coating may absorb a little moisture over time, but the cookies will still taste delicious.
You can also freeze the unbaked dough balls for up to 2-3 months. Freeze them before coating, then thaw them in the refrigerator until they’re easy to handle. Roll them generously in powdered sugar just before baking and follow the recipe instructions.
Final Thoughts
Chocolate crinkle cookies are a lovely option when you want something chocolatey that looks just as good as it tastes. Their brownie-like centers, delicate cracks, and snowy powdered sugar coating make them feel a little special, even though the recipe uses simple ingredients.
If you’re collecting fun things to bake when you’re bored at home, add these cookies to your list. The dough takes only a few minutes to prepare, and rolling each cookie in powdered sugar is an easy step that even beginner bakers can manage. Make a batch, let them cool, and enjoy them with your favorite hot drink or a cold glass of milk.
13. Classic Banana Bread
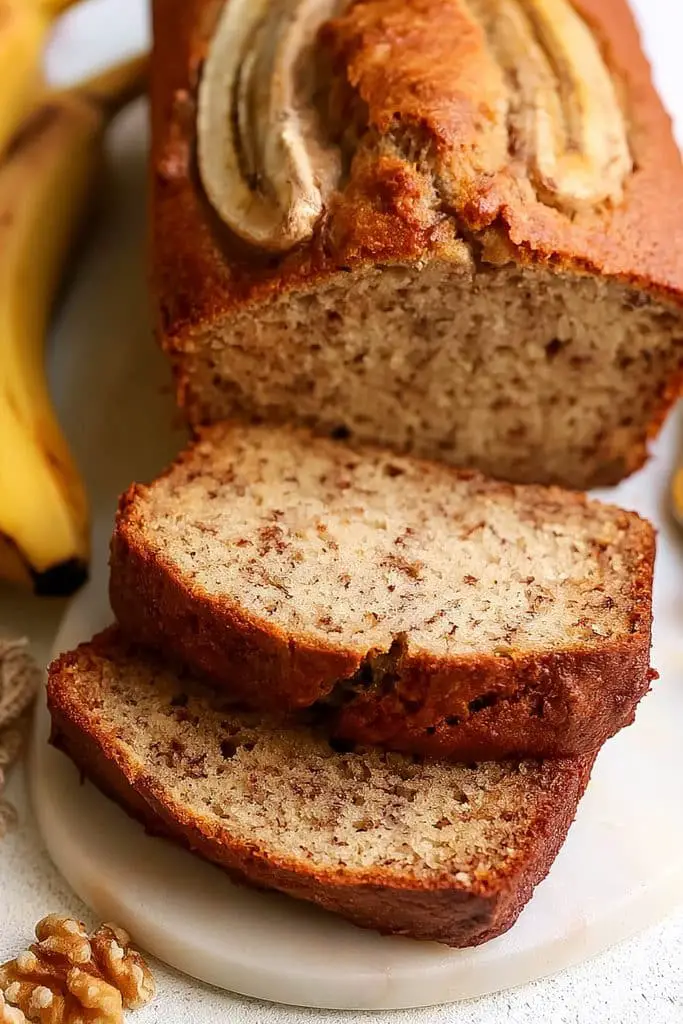
If you have a few overripe bananas sitting on your kitchen counter, this classic banana bread is a great way to use them. It’s soft, moist, and naturally sweet, with a lovely banana flavor that makes every slice comforting. The best part is that you don’t need a mixer or any complicated techniques to make it. A bowl, a fork, and a loaf pan are pretty much all you need.
Banana bread is one of my favorite things to bake when I want something homemade without spending too much time in the kitchen. The riper the bananas, the sweeter and more flavorful the loaf will be. It’s perfect for breakfast, an afternoon snack, or those moments when you’re craving something sweet but don’t feel like making cookies or cake.
This recipe keeps things simple with basic pantry ingredients, but there are plenty of ways to make it your own. Add chopped walnuts for a little crunch, stir in chocolate chips for a sweeter version, or sprinkle cinnamon into the batter for extra warmth. If you’re looking for easy baking ideas, classic banana bread is always worth trying.
Prep time: 10-15 minutes
Cook time: 50-60 minutes
Total time: About 1 hour 10 minutes
Difficulty: Easy
Yield: 1 loaf, about 8-10 slices
Ingredients
- 3 medium very ripe bananas, mashed (about 1¼ cups or 280-300 g without peels)
- ⅓ cup (75 g) unsalted butter, melted
- ¾ cup (150 g) granulated sugar
- 1 large egg, at room temperature
- 1 teaspoon vanilla extract
- 1½ cups (190 g) all-purpose flour
- 1 teaspoon baking soda
- ¼ teaspoon salt
- ½ teaspoon ground cinnamon, optional
- ½ cup (60 g) chopped walnuts or chocolate chips, optional
Instructions
- Preheat the oven. Preheat your oven to 350°F (175°C). Grease a 9 × 5-inch loaf pan with butter or oil, then line it with parchment paper if you want to remove the loaf more easily.
- Mash the bananas. Peel the ripe bananas and place them in a large mixing bowl. Mash them with a fork until mostly smooth. A few small lumps are fine and add a little texture to the finished bread.
- Add the melted butter. Pour the melted butter into the mashed bananas and stir until combined. Let the butter cool slightly before adding it so the mixture isn’t too hot.
- Mix in the sugar, egg, and vanilla. Add the sugar, egg, and vanilla extract. Stir everything together until the mixture looks smooth and evenly combined.
- Combine the dry ingredients. In a separate bowl, whisk together the flour, baking soda, salt, and optional cinnamon. This helps distribute the baking soda evenly throughout the batter.
- Make the batter. Add the dry ingredients to the banana mixture. Use a spatula or wooden spoon to fold everything together just until no dry flour remains. Avoid overmixing, as this can make the banana bread dense.
- Add any extras. If you’re using walnuts or chocolate chips, gently fold them into the batter. You can also save a few pieces to sprinkle over the top before baking.
- Fill the loaf pan. Pour the batter into the prepared pan and spread it evenly. If you like, slice a banana lengthwise and place it on top for a simple bakery-style finish.
- Bake until golden. Bake for 50-60 minutes, or until the top is golden brown and a toothpick inserted into the center comes out clean or with a few moist crumbs. If the top browns too quickly, loosely cover it with foil for the final part of baking.
- Cool the loaf. Remove the pan from the oven and let the bread rest for about 10-15 minutes. Carefully lift it out and transfer it to a wire rack to cool further before slicing.
- Slice and serve. Cut the banana bread into slices and serve it plain, with a little butter, or with your favorite spread. It’s especially delicious when slightly warm.
Tips and Variations
- Use very ripe bananas: Bananas with plenty of brown spots are ideal because they’re softer, sweeter, and easier to mash. Green or barely ripe bananas won’t give the same flavor.
- Measure the banana carefully: Too much mashed banana can make the middle overly wet. Aim for about 1¼ cups rather than adding extra just because you have it.
- Don’t overmix the batter: Stir only until the flour disappears. A few small lumps are fine, and gentle mixing helps keep the loaf tender.
- Make it chocolatey: Fold in ½ cup of chocolate chips or chunks for a sweeter, dessert-style banana bread.
- Add some crunch: Chopped walnuts or pecans work beautifully with the soft banana texture.
- Try a cinnamon version: Add ½ teaspoon of cinnamon to the batter, or sprinkle a little cinnamon sugar over the top before baking.
- Check the center: Banana bread can look done on the outside while still being underbaked in the middle. Test the thickest part with a toothpick before removing it from the oven.
- Let it cool before slicing: It’s tempting to cut into the loaf while it’s hot, but cooling helps the crumb set and makes cleaner slices.
How to Store Classic Banana Bread
Once the banana bread has cooled completely, store it in an airtight container at room temperature for up to 2-3 days. If your kitchen is very warm or humid, refrigerate it to help it keep longer. Refrigerated banana bread generally lasts around a week, although it may become a little firmer.
You can also freeze banana bread for up to 3 months. Slice the cooled loaf first and place parchment paper between the slices, then store them in a freezer-safe bag or container. This way, you can take out one slice at a time whenever you want a quick snack. Let a slice thaw at room temperature or warm it briefly before serving.
Final Thoughts
Classic banana bread is one of those recipes that makes baking feel simple and rewarding. It uses everyday ingredients, helps you make use of overripe bananas, and fills the kitchen with a warm, sweet smell while it bakes.
If you’re searching for good things to bake when you’re bored, this loaf is a wonderful place to start. You can keep it classic or add your favorite mix-ins, and it works just as well for breakfast as it does for an afternoon treat. So, the next time you spot a few overripe bananas on the counter, turn them into a homemade loaf and enjoy a slice with your tea or coffee.
14. Apple Crumble
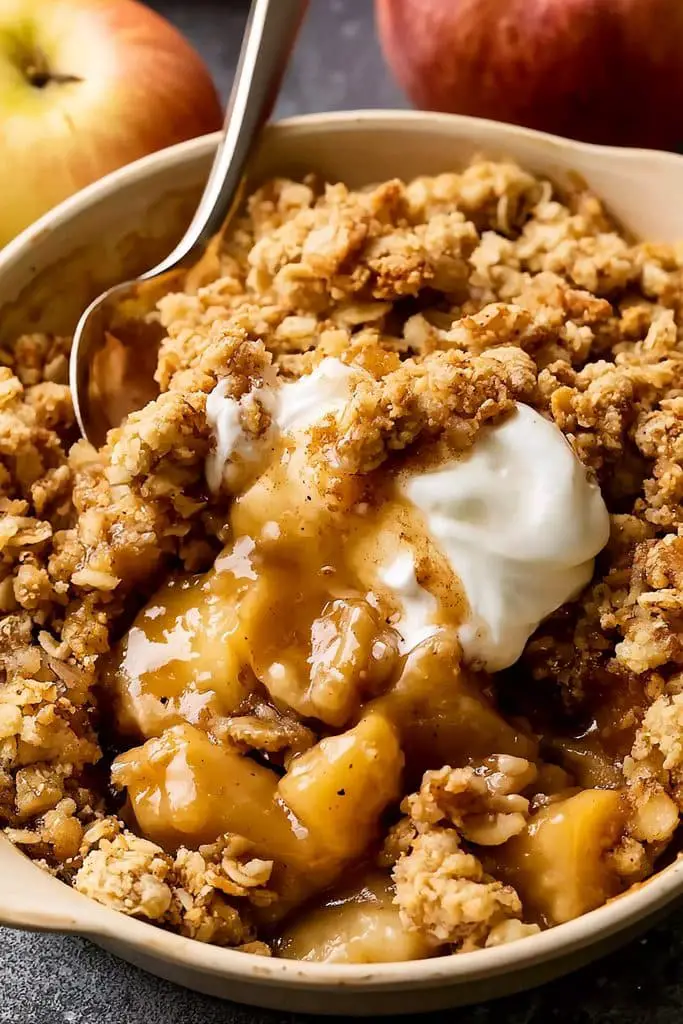
There’s something so comforting about warm apple crumble fresh from the oven. The apples turn soft and juicy as they bake, while the topping becomes golden, buttery, and crisp. Add a little cinnamon to the mix, and your kitchen will smell amazing before you even take the first bite.
Apple crumble is one of those easy baking ideas I love because it feels like a proper homemade dessert without requiring much effort. You don’t need to roll out pastry or worry about making a perfect pie crust. Just slice the apples, mix a few simple ingredients, sprinkle the crumble topping over them, and let the oven do most of the work.
If you’re looking for things to bake when you’re bored at home, this is a lovely recipe to try, especially when you’re craving something sweet and cozy. Serve it warm on its own or with a scoop of vanilla ice cream for an extra-special treat.
Prep time: 15 minutes
Cook time: 35-45 minutes
Total time: About 1 hour
Difficulty: Easy
Yield: 6 servings
Ingredients
For the apple filling:
- 5 medium apples, peeled, cored, and thinly sliced
- ¼ cup (50 g) granulated sugar
- 1 tablespoon lemon juice
- 1 tablespoon all-purpose flour
- 1 teaspoon ground cinnamon
- ¼ teaspoon ground nutmeg, optional
- 1 teaspoon vanilla extract, optional
For the crumble topping:
- 1 cup (125 g) all-purpose flour
- ½ cup (100 g) light brown sugar
- ½ teaspoon ground cinnamon
- ¼ teaspoon salt
- ½ cup (113 g) cold unsalted butter, cut into small cubes
- ½ cup (45 g) rolled oats, optional
Instructions
- Preheat the oven. Preheat your oven to 350°F (175°C). Lightly grease an 8-inch square baking dish or a similar-sized oven-safe dish with butter.
- Prepare the apples. Peel, core, and slice the apples into thin, even pieces. Try to keep the slices roughly the same thickness so they soften at about the same rate.
- Make the filling. Place the sliced apples in a large bowl. Add the granulated sugar, lemon juice, flour, cinnamon, nutmeg if using, and vanilla extract. Toss everything together until the apples are evenly coated.
- Transfer the apples to the dish. Spread the apple mixture evenly in the prepared baking dish. Make sure the slices are distributed across the dish rather than piled into one spot.
- Mix the dry topping ingredients. In another bowl, combine the flour, brown sugar, cinnamon, salt, and rolled oats if you’re using them. Stir until everything is evenly mixed.
- Add the butter. Add the cold butter cubes to the flour mixture. Rub the butter into the dry ingredients with your fingertips until you have a mixture of coarse crumbs, with some larger buttery pieces remaining. You can also use a pastry cutter or fork.
- Cover the apples. Sprinkle the crumble mixture evenly over the apple filling. Don’t press it down too firmly because the loose topping helps create those lovely crisp, golden crumbs.
- Bake until golden. Bake for 35-45 minutes, or until the topping is golden brown and the apples are tender. You should see the fruit bubbling around the edges. If the topping browns before the apples are soft, loosely cover the dish with foil and continue baking.
- Let it rest. Remove the crumble from the oven and let it stand for about 10-15 minutes. This gives the juices a little time to settle and helps prevent the filling from being too runny when you serve it.
- Serve warm. Spoon the apple crumble into bowls and serve it as it is, or add a scoop of vanilla ice cream, a little whipped cream, or a drizzle of caramel sauce.
Tips and Variations
- Choose the right apples: Firm apples that hold their shape during baking work best. Granny Smith apples give the crumble a pleasantly tart flavor, while Honeycrisp, Braeburn, or similar sweet-tart varieties are also good options.
- Slice the apples evenly: Thin, even slices cook more consistently. If your slices are very thick, the topping may be ready before the fruit softens.
- Keep the butter cold: Cold butter helps create a crumbly topping rather than a soft, dough-like layer. If your kitchen is warm and the topping starts to feel greasy, chill it for a few minutes before adding it to the apples.
- Make it extra crunchy: Rolled oats add a lovely texture. You can also mix in a small handful of chopped pecans or walnuts.
- Adjust the sweetness: If your apples are naturally sweet, reduce the sugar in the filling slightly. If they’re very tart, add another tablespoon or two.
- Add more spice: A pinch of ginger or allspice works well with the cinnamon and gives the filling a warmer flavor.
- Try a berry version: Add a handful of blackberries or raspberries to the apple filling for a fruity twist. Keep in mind that extra juicy fruit may make the filling a little softer.
- Make it ahead: Prepare the filling and topping separately, then store them covered in the refrigerator. Assemble just before baking for the best texture.
How to Store Apple Crumble
Let the apple crumble cool before covering it. Store leftovers in an airtight container in the refrigerator for up to 4 days.
To reheat, place a portion in an oven-safe dish and warm it at 325°F (165°C) until heated through. The oven helps bring back some of the crispness in the topping. You can use a microwave if you’re short on time, although the crumble topping will be softer.
Apple crumble can also be frozen. Once cooled, place it in a freezer-safe container and freeze for up to 3 months. Thaw it overnight in the refrigerator before reheating. For the best texture, warm it in the oven rather than serving it straight from the fridge.
Final Thoughts
Apple crumble is proof that you don’t need complicated ingredients or fancy baking skills to make a dessert everyone will enjoy. The soft cinnamon apples and buttery topping are simple, comforting, and easy to customize with whatever you have in your kitchen.
When you’re making a list of things to bake when you’re bored, keep this recipe in mind. It’s easy enough for a relaxed afternoon at home but delicious enough to serve after dinner, especially with vanilla ice cream melting over the warm crumble. And if you have a few apples that need using up, this is a sweet way to put them to good use.
15. Homemade Shortbread Cookies
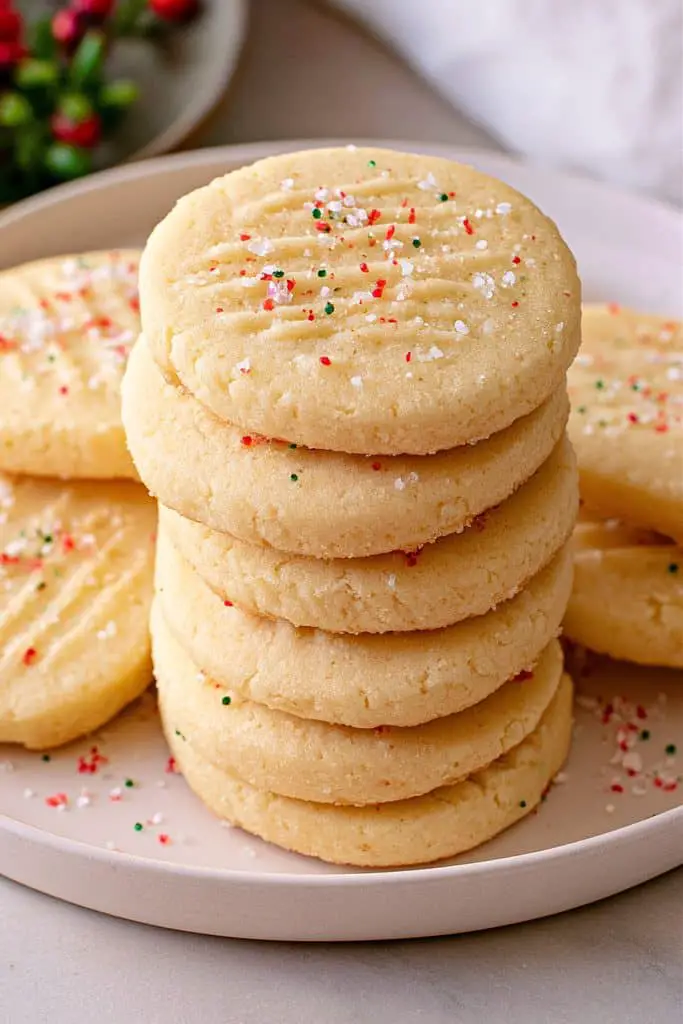
Sometimes, the simplest recipes are the ones I enjoy baking the most, and homemade shortbread cookies are a perfect example. They’re buttery, lightly sweet, and have that lovely crumbly texture that practically melts in your mouth. You only need a handful of basic ingredients, so there’s no need for a special trip to the grocery store if you already have butter, sugar, and flour in your kitchen.
Shortbread cookies are also a great choice when you’re looking for things to bake when you’re bored but don’t want a recipe that takes all afternoon. There’s no complicated dough to prepare, no frosting to make, and no fancy decorating required. Just mix the ingredients, chill the dough, shape the cookies, and bake until the edges are lightly golden.
I love how easy these cookies are to customize, too. You can keep them classic, dip them in melted chocolate, or add a little lemon zest for a fresh twist. They’re delicious with a cup of tea or coffee and make a lovely homemade treat to share with family and friends.
Prep time: 15 minutes
Chilling time: 30 minutes
Cook time: 12-16 minutes
Total time: About 1 hour
Difficulty: Easy
Yield: About 20-24 cookies
Ingredients
- 1 cup (227 g) unsalted butter, softened
- ½ cup (60 g) powdered sugar
- 1 teaspoon vanilla extract
- 2 cups (250 g) all-purpose flour
- ¼ teaspoon salt
- 1-2 tablespoons granulated sugar, optional, for sprinkling
Instructions
- Prepare the oven and baking sheet. Preheat your oven to 325°F (165°C). Line a baking sheet with parchment paper to keep the cookies from sticking and make cleanup easier.
- Cream the butter and sugar. Place the softened butter and powdered sugar in a large mixing bowl. Beat with a hand mixer or stir firmly with a wooden spoon until the mixture looks smooth and creamy. You don’t need to whip it until it’s very fluffy.
- Add the vanilla. Mix in the vanilla extract until evenly combined. It adds a little extra flavor without taking away from the classic buttery taste.
- Add the flour and salt. In a separate bowl, whisk together the flour and salt. Add them gradually to the butter mixture, stirring until a soft dough begins to form. The dough may look crumbly at first, but it should come together when pressed between your fingers.
- Bring the dough together. Use your hands to gently press the dough into a ball. Avoid kneading it too much, as overworking the dough can make the cookies less tender.
- Chill the dough. Flatten the dough into a disc, wrap it, and refrigerate for about 30 minutes. Chilling makes it easier to roll and helps the cookies hold their shape in the oven.
- Roll and cut the cookies. Lightly flour your work surface and roll the dough to about ¼ inch (6 mm) thick. Use a round cookie cutter, a small glass, or your favorite cookie cutters to cut out shapes. Gather the scraps gently and reroll them as needed.
- Arrange on the baking sheet. Place the cookies on the prepared baking sheet, leaving a little space between each one. If you like, prick the tops gently with a fork for a traditional shortbread look. Sprinkle a little granulated sugar over them if you want a slightly sparkly finish.
- Bake until lightly golden. Bake for 12-16 minutes, depending on the size and thickness of your cookies. The centers should look set, and the edges should be just beginning to turn golden. Shortbread is meant to stay pale, so don’t wait for the whole cookie to brown.
- Cool before serving. Let the cookies rest on the baking sheet for about 5 minutes before transferring them to a wire rack. They’ll be delicate while hot but will firm up as they cool.
- Enjoy your cookies. Serve them once completely cooled with tea, coffee, or a glass of milk. They’re also lovely on a dessert platter or wrapped in a small box as a homemade gift.
Tips and Variations
- Use good-quality butter: Butter is the main flavor in shortbread, so using one you enjoy makes a noticeable difference.
- Measure the flour carefully: Too much flour can make the cookies dry and crumbly. For the most accurate results, weigh it if you have a kitchen scale.
- Don’t skip chilling: Chilling firms up the butter and makes the dough easier to handle. It also helps prevent the cookies from spreading too much.
- Avoid overmixing: Once the flour is incorporated, stop mixing. Gentle handling helps keep the cookies tender and delicate.
- Keep the dough cool: If it becomes too soft while you’re cutting out shapes, place it back in the refrigerator for a few minutes.
- Add a citrus twist: Mix in 1 teaspoon of finely grated lemon or orange zest for a fresh flavor.
- Make chocolate shortbread: Replace ¼ cup (30 g) of the flour with unsweetened cocoa powder for a chocolate version. If the dough seems too dry, add a teaspoon of milk at a time until it comes together.
- Dip them in chocolate: Once the cookies have cooled, dip half of each one in melted dark or milk chocolate. Let the chocolate set on parchment paper before serving.
- Try a simple slice-and-bake version: Instead of rolling and cutting the dough, shape it into a log, chill until firm, and slice into rounds before baking.
How to Store Homemade Shortbread Cookies
Once the cookies have cooled completely, place them in an airtight container and store them at room temperature for up to a week. Keep them somewhere cool and dry so they maintain their crisp, delicate texture.
You can also freeze the baked cookies for up to 3 months. Place parchment paper between the layers to prevent them from breaking, then thaw them at room temperature before serving.
If you’d rather prepare the dough ahead of time, wrap it tightly and refrigerate it for up to 3 days. You can also freeze the dough for up to 2 months. Thaw frozen dough in the refrigerator before rolling, cutting, and baking.
Final Thoughts
Homemade shortbread cookies are one of those easy baking ideas that prove you don’t need a long ingredient list to make something delicious. They’re buttery, crisp, and wonderfully simple, which makes them perfect for a quiet afternoon in the kitchen.
If you’re collecting things to bake when you’re bored at home, give these cookies a try. You can keep them plain for a classic treat or dress them up with chocolate, citrus zest, or your favorite cookie shapes. Either way, they’re an easy homemade snack that pairs beautifully with your favorite hot drink.
16. Lemon Drizzle Cake
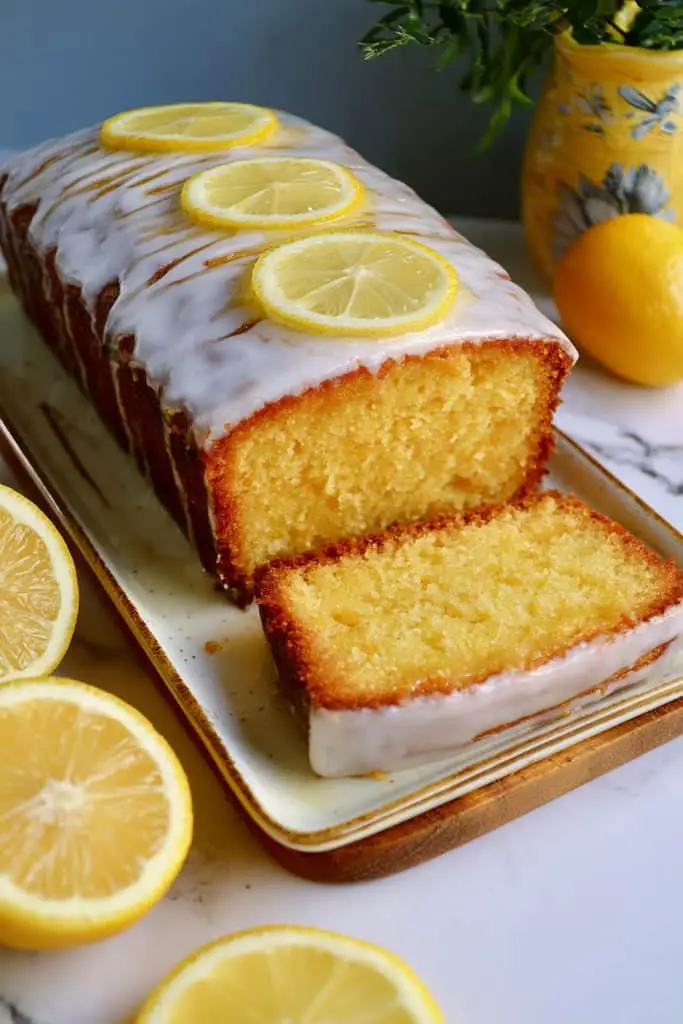
If you love desserts that are sweet but have a little tangy flavor, lemon drizzle cake is definitely worth baking. It’s soft, buttery, and full of fresh lemon flavor, with a sweet lemon syrup that soaks into the cake and keeps every slice moist. A simple lemon icing on top adds an extra burst of citrus flavor and gives the cake that classic finish.
This is one of those fun things to bake when you’re bored at home because it looks lovely without requiring complicated decorating skills. You don’t need layers of frosting or special equipment to make it feel like a bakery-style treat. Just mix a simple cake batter, bake it until golden, and finish it with a drizzle of lemon syrup.
I especially like this cake with a cup of tea in the afternoon. The lemon keeps it from feeling too heavy, and the combination of sweet cake and tangy citrus makes it hard to stop at just one slice. If you’re craving something sweet but want a change from chocolate desserts, this easy lemon drizzle cake is a lovely choice.
Prep time: 15 minutes
Cook time: 40-50 minutes
Total time: About 1 hour 5 minutes
Difficulty: Easy
Yield: 8-10 slices
Ingredients
For the cake:
- 1 cup (225 g) unsalted butter, softened
- 1 cup (200 g) granulated sugar
- 4 large eggs, at room temperature
- 1¾ cups (220 g) all-purpose flour
- 2 teaspoons baking powder
- ¼ teaspoon salt
- Finely grated zest of 2 lemons
- 2 tablespoons fresh lemon juice
- 2 tablespoons milk, if needed
For the lemon drizzle syrup:
- ¼ cup (50 g) granulated sugar
- 3 tablespoons fresh lemon juice
For the optional lemon icing:
- ¾ cup (90 g) powdered sugar
- 1-2 tablespoons fresh lemon juice
Instructions
- Preheat the oven. Preheat your oven to 350°F (175°C). Grease a 9 × 5-inch loaf pan and line it with parchment paper, leaving a little overhang to help lift the cake out later.
- Prepare the dry ingredients. In a medium bowl, whisk together the flour, baking powder, and salt. Set aside while you prepare the butter mixture.
- Cream the butter and sugar. In a large bowl, beat the softened butter and granulated sugar until pale and fluffy, about 3-4 minutes with a hand mixer. This step helps give the cake a light texture, so take your time.
- Add the eggs. Beat in the eggs one at a time, mixing well after each addition. If the mixture looks slightly curdled, don’t worry too much. It should come together when you add the flour.
- Add the lemon flavor. Stir in the lemon zest and fresh lemon juice. The zest is especially important because it gives the cake a strong, fresh lemon aroma.
- Combine the wet and dry mixtures. Add the flour mixture to the butter mixture in two or three additions, folding gently until just combined. If the batter seems unusually thick, stir in up to 2 tablespoons of milk.
- Fill the pan. Spoon the batter into the prepared loaf pan and smooth the top with a spatula. Give the pan a gentle tap on the counter to release any large air pockets.
- Bake the cake. Bake for 40-50 minutes, or until the top is golden and a toothpick inserted into the center comes out clean or with a few moist crumbs. If the top starts browning too quickly, loosely cover it with foil for the last part of baking.
- Make the lemon drizzle. While the cake bakes, stir together the sugar and lemon juice for the syrup. The sugar doesn’t need to dissolve completely; it will melt further when poured over the warm cake.
- Pour over the syrup. Once the cake is baked, leave it in the pan. Use a skewer to poke small holes across the top, then slowly spoon the lemon syrup over it while the cake is still warm. This allows the sweet, tangy syrup to soak into the crumb.
- Let the cake cool. Leave the cake in the pan for about 15 minutes, then carefully lift it onto a wire rack. Let it cool completely before adding the optional icing.
- Make the icing. Mix the powdered sugar with 1 tablespoon of lemon juice, adding a little more if needed until you have a thick but pourable icing. Drizzle it over the cooled cake and allow it to set before slicing.
- Slice and serve. Cut the cake into slices and serve with tea, coffee, or a cold glass of milk. The lemon flavor often becomes even more noticeable after the cake has rested for a few hours.
Tips and Variations
- Use fresh lemons: Freshly squeezed juice gives the cake a brighter flavor than bottled juice. Don’t skip the zest, as it adds plenty of lemon aroma.
- Bring ingredients to room temperature: Softened butter and room-temperature eggs mix more easily, helping create a smoother batter.
- Don’t overmix: Once the flour goes in, fold just until combined. Too much mixing can make the cake dense.
- Poke holes while the cake is warm: The warm crumb absorbs the drizzle more easily, giving you that lovely moist texture throughout.
- Adjust the tanginess: If you prefer a sharper lemon flavor, add a little extra zest. For a sweeter cake, use less lemon juice in the icing.
- Try a simple glaze: If you don’t want to make the syrup and icing separately, skip the syrup and finish the cooled cake with the lemon icing alone. The cake will still taste delicious, though it won’t have quite the same moist, lemon-soaked texture.
- Add poppy seeds: Stir 1 tablespoon of poppy seeds into the batter for a little crunch and a classic lemon-poppy seed variation.
- Make it berry-filled: Gently fold in ½ cup of fresh blueberries before baking. Pat them dry first to avoid adding too much moisture.
- Use a different pan carefully: A round cake pan can work, but the baking time will vary. Start checking for doneness earlier and use a toothpick to test the center.
How to Store Lemon Drizzle Cake
Once the cake and icing have fully set, store it in an airtight container at room temperature for up to 3 days, provided your kitchen is cool. If the weather is particularly hot or humid, refrigerate it to help it stay fresh. Bring refrigerated slices to room temperature before serving for the best texture and flavor.
You can also freeze the cake for up to 3 months. For the easiest serving, slice it first and wrap each piece tightly before placing the slices in a freezer-safe container. Thaw at room temperature, and add fresh icing after thawing if you want it to look freshly made.
Final Thoughts
Lemon drizzle cake is a wonderful reminder that homemade baking doesn’t have to be complicated to taste special. With its soft crumb, fresh citrus flavor, and sweet lemon topping, it’s an easy dessert that works for afternoon tea, family gatherings, or simply treating yourself at home.
If you’re looking for things to bake when you’re bored, add this recipe to your list. It’s simple enough for a relaxed baking afternoon, and you can easily adjust the lemon flavor to suit your taste. Make it once, and you might find yourself reaching for this recipe whenever you have a few lemons to use up.
17. Jam Thumbprint Cookies
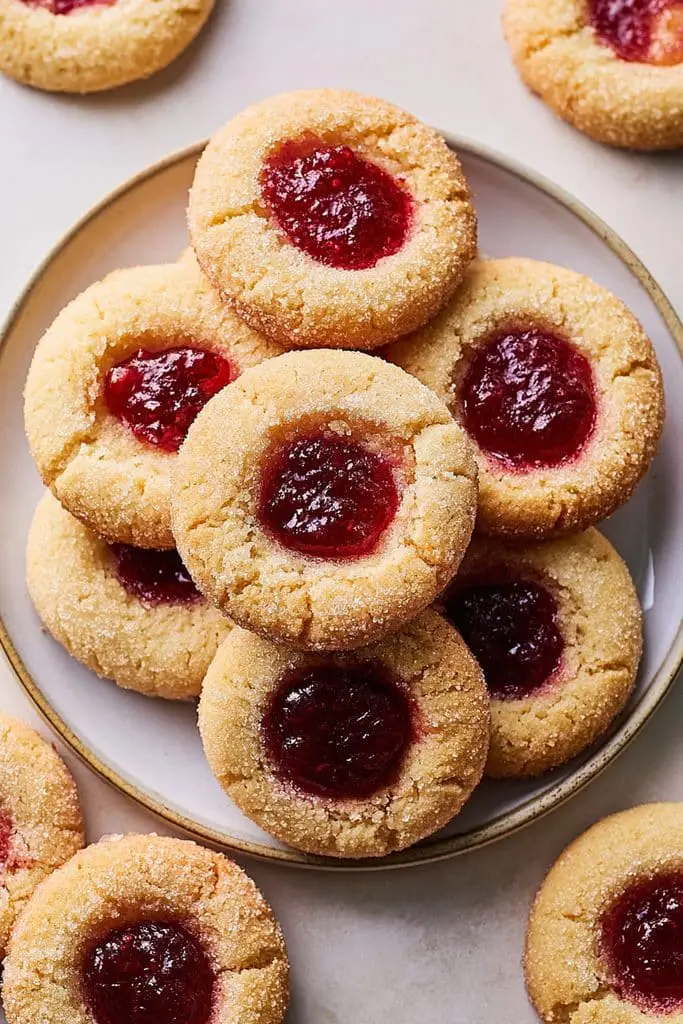
Jam thumbprint cookies are one of those little treats that look adorable but are surprisingly easy to make. They’re buttery, tender, and slightly crumbly, with a sweet fruity jam filling right in the middle. You can use strawberry, raspberry, apricot, or whatever jam you already have in the fridge, so it’s easy to make a batch with your favorite flavor.
These cookies are a lovely choice when you’re looking for things to bake when you’re bored but don’t want to spend hours in the kitchen. The dough comes together with simple ingredients, and making the little indentations is actually one of the most fun parts. If you’re baking with kids, they can help roll the dough into balls and add the jam filling, making this a fun baking activity for everyone.
I love how these cookies feel a little special without needing frosting or complicated decorations. The colorful jam centers make them look pretty on a cookie plate, and they’re perfect for afternoon tea, holiday treats, or a simple homemade snack.
Prep time: 15 minutes
Chilling time: 20-30 minutes
Cook time: 12-15 minutes
Total time: About 1 hour
Difficulty: Easy
Yield: About 20-24 cookies
Ingredients
- ½ cup (113 g) unsalted butter, softened
- ⅓ cup (65 g) granulated sugar
- 1 large egg yolk
- 1 teaspoon vanilla extract
- 1¼ cups (155 g) all-purpose flour
- ¼ teaspoon salt
- ⅓ cup (about 100 g) thick jam, such as strawberry, raspberry, or apricot
Instructions
- Prepare the baking sheet. Preheat your oven to 350°F (175°C). Line a baking sheet with parchment paper and set it aside.
- Cream the butter and sugar. In a large mixing bowl, beat the softened butter and granulated sugar until smooth and creamy. You can use a hand mixer or mix by hand with a sturdy wooden spoon.
- Add the egg yolk and vanilla. Mix in the egg yolk and vanilla extract until everything is well combined. The egg yolk helps give the cookies a tender, rich texture.
- Mix in the flour and salt. Add the flour and salt to the bowl. Stir gently until a soft dough forms. If the mixture looks a little crumbly at first, keep pressing it together gently; it should hold when squeezed between your fingers.
- Chill the dough. Cover the dough and refrigerate it for 20-30 minutes. This makes it easier to roll and helps the cookies keep their shape while baking.
- Roll into balls. Scoop out small portions of dough, about 1 tablespoon each, and roll them into smooth balls. Place them on the prepared baking sheet, leaving about 2 inches between each cookie.
- Make the thumbprints. Press your thumb gently into the center of each ball to create a small indentation. You can also use the rounded end of a wooden spoon. If the edges crack, simply smooth them back together with your fingers.
- Fill with jam. Spoon a small amount of jam into each indentation, around ½ teaspoon per cookie. Avoid overfilling, as the jam can bubble over the edges during baking.
- Bake the cookies. Bake for 12-15 minutes, or until the edges look set and are just beginning to turn light golden. The centers may still look soft, but they’ll firm up as the cookies cool.
- Cool before moving. Let the cookies rest on the baking sheet for about 5 minutes, then carefully transfer them to a wire rack. The jam will be very hot straight from the oven, so allow the cookies to cool before tasting.
- Serve and enjoy. Once completely cooled, arrange the cookies on a plate and serve them with tea, coffee, or a glass of milk. They’re also lovely packed into a small box for gifting.
Tips and Variations
- Use thick jam: A thicker jam tends to stay in place better than a runny one. If yours is very thin, simmer a little in a small saucepan until it thickens, then let it cool before using.
- Don’t make the indentations too deep: A small well is enough to hold the filling. Press gently so the dough doesn’t split or become too thin at the bottom.
- Fix cracks before baking: Small cracks around the edges are normal. Smooth them with your fingertips so the cookies bake into neat little rounds.
- Chill if the dough feels sticky: If the dough is difficult to handle, return it to the refrigerator for another 10 minutes.
- Choose your favorite jam: Raspberry gives a slightly tart flavor, strawberry makes the cookies sweet and familiar, and apricot adds a lovely fruity taste. Seedless jam is a good option if you prefer a smooth filling.
- Add a little citrus: Mix ½ teaspoon of finely grated lemon zest into the dough for a fresh flavor that pairs especially well with raspberry or apricot jam.
- Try a nutty version: Roll the dough balls in finely chopped almonds before making the indentations, then fill them with jam.
- Make them chocolatey: Use chocolate-hazelnut spread instead of jam for a different treat. Add it after baking, once the cookies have cooled, so the filling stays smooth.
- Make them with kids: Let children roll the dough and make the indentations, then help them spoon in the jam. An adult should handle the hot baking sheet and oven.
How to Store Jam Thumbprint Cookies
Once the cookies have cooled completely, place them in an airtight container and store them at room temperature for up to 4-5 days. If you stack them, separate the layers with parchment paper to prevent the jam from sticking to the bottoms of the cookies above.
For longer storage, freeze the baked cookies in a freezer-safe container for up to 2 months. Arrange them in a single layer until frozen, then stack them with parchment paper between the layers. Let them thaw at room temperature before serving.
You can also prepare the dough ahead of time and keep it covered in the refrigerator for up to 2 days. When you’re ready to bake, shape the dough, make the indentations, add the jam, and bake as directed.
Final Thoughts
Jam thumbprint cookies are proof that easy baking can still be beautiful and delicious. The buttery cookies, fruity centers, and simple preparation make them a lovely recipe for beginners and experienced bakers alike.
If you’re collecting fun things to bake when you’re bored at home, these cookies are definitely worth adding to your list. Pick a jam flavor you love, put on some music, and enjoy making a batch. They’re simple enough for an ordinary afternoon but pretty enough to share with guests or give as a homemade gift.
18. Oatmeal Raisin Cookies
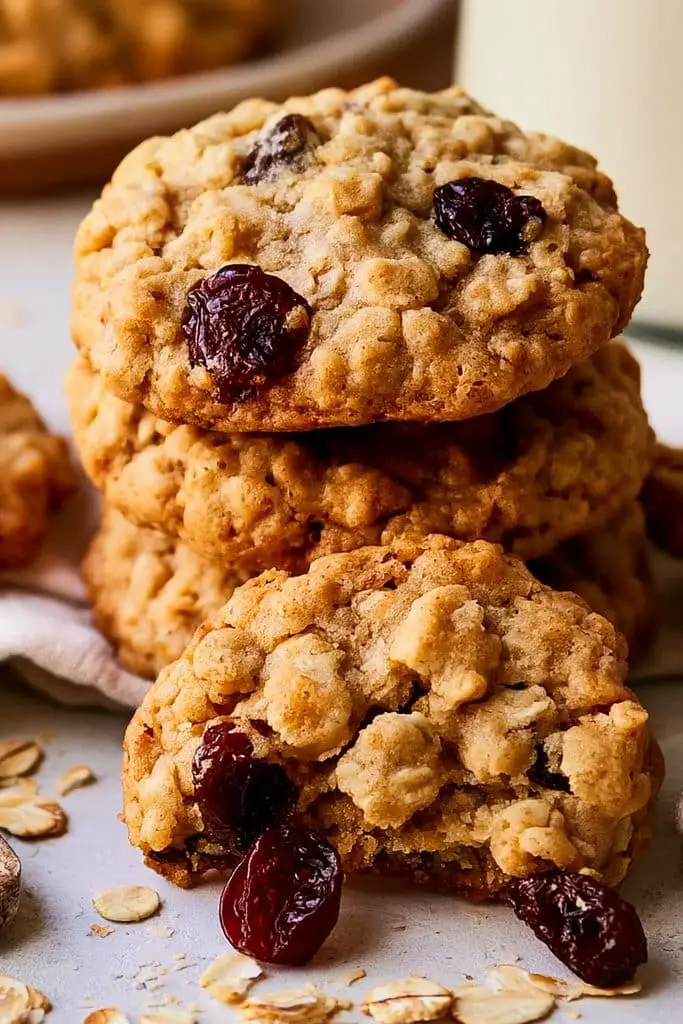
If you’re in the mood for something sweet but want a cookie with a little extra texture, oatmeal raisin cookies are a great choice. They’re soft in the middle, lightly crisp around the edges, and filled with chewy oats and sweet raisins. A touch of cinnamon gives them a warm flavor that makes the whole kitchen smell wonderful while they bake.
These cookies are also one of my favorite things to bake when you’re bored because they’re made with simple pantry ingredients and don’t require any fancy equipment. You can mix everything in one bowl, scoop the dough onto a baking sheet, and have a fresh batch ready in about half an hour. They’re perfect for an afternoon snack, lunchboxes, or enjoying with a cup of tea or coffee.
The best part is how easy they are to customize. Add chopped walnuts for crunch, a handful of chocolate chips for extra sweetness, or a little more cinnamon if you love that warm, cozy flavor. Whether you’re baking for yourself or sharing with family, these homemade oatmeal raisin cookies are a classic worth keeping in your recipe collection.
Prep time: 10-15 minutes
Chilling time: 20 minutes, optional
Cook time: 10-12 minutes per batch
Total time: About 35-45 minutes
Difficulty: Easy
Yield: About 18-20 cookies
Ingredients
- ½ cup (113 g) unsalted butter, softened
- ½ cup (100 g) packed light brown sugar
- ¼ cup (50 g) granulated sugar
- 1 large egg, at room temperature
- 1 teaspoon vanilla extract
- ¾ cup (95 g) all-purpose flour
- ½ teaspoon baking soda
- ½ teaspoon ground cinnamon
- ¼ teaspoon salt
- 1½ cups (120 g) old-fashioned rolled oats
- ¾ cup (110 g) raisins
- ¼ cup (30 g) chopped walnuts, optional
Instructions
- Preheat the oven. Preheat your oven to 350°F (175°C). Line a baking sheet with parchment paper so the cookies release easily after baking.
- Cream the butter and sugars. In a large bowl, beat the softened butter, brown sugar, and granulated sugar until the mixture looks creamy and well combined. You can use a hand mixer or mix by hand with a wooden spoon.
- Add the egg and vanilla. Beat in the egg and vanilla extract until smooth. Scrape down the sides of the bowl if needed so everything mixes evenly.
- Mix the dry ingredients. In a separate bowl, whisk together the flour, baking soda, cinnamon, and salt. This helps distribute the baking soda and spices throughout the dough.
- Combine the mixtures. Add the dry ingredients to the butter mixture and stir until just combined. Don’t worry if the dough looks a little thick; the oats will make it even heartier.
- Add the oats and raisins. Fold in the rolled oats and raisins. If you’re using walnuts, add them now as well. Stir just enough to distribute everything evenly.
- Chill the dough if needed. For thicker cookies with a little less spreading, cover the bowl and refrigerate the dough for about 20 minutes. You can skip this step if you’re short on time, especially if your kitchen is cool and the dough isn’t too soft.
- Shape the cookies. Scoop about 1½ tablespoons of dough for each cookie and roll it into a rough ball. Place the dough balls on the baking sheet, leaving around 2 inches between them to allow for spreading.
- Bake until lightly golden. Bake for 10-12 minutes, or until the edges are set and lightly golden while the centers still look a little soft. If your cookies are larger, they may need an extra minute or two.
- Let them cool. Leave the cookies on the baking sheet for about 5 minutes before transferring them to a wire rack. They’ll continue to set as they cool, so don’t worry if the centers seem soft when they first come out.
- Serve and enjoy. Once the cookies have cooled enough to handle, enjoy them with a glass of milk, tea, or coffee. They’re especially good when the centers are still slightly chewy.
Tips and Variations
- Use old-fashioned rolled oats: These give the cookies a satisfying chewy texture. Quick oats can work in a pinch, but the finished cookies may be softer and less textured.
- Measure the flour carefully: Too much flour can make oatmeal raisin cookies dry or cakey. Weigh it if you have a kitchen scale, or spoon it into your measuring cup and level it off.
- Don’t overbake: The cookies may look slightly underdone in the middle when you remove them from the oven. That’s exactly what helps them stay soft and chewy after cooling.
- Make the raisins softer: If your raisins are very dry, soak them in warm water for 5-10 minutes, then drain and pat them dry before adding them to the dough.
- Use brown sugar for chewiness: Brown sugar adds moisture and a deeper flavor. You can replace some of the granulated sugar with brown sugar if you prefer a softer cookie.
- Add extra spice: A small pinch of nutmeg or a little extra cinnamon works beautifully with the oats and raisins.
- Make them nutty: Chopped walnuts or pecans add a lovely crunch and pair well with the chewy raisins.
- Add chocolate chips: Replace a few tablespoons of raisins with chocolate chips, or use a mixture of both for a sweeter version.
- Make smaller cookies: Use a smaller scoop and reduce the baking time slightly, checking them early so they don’t become too crisp.
How to Store Oatmeal Raisin Cookies
Once the cookies have cooled completely, store them in an airtight container at room temperature for up to 5 days. To help keep them soft, make sure the container is sealed well and avoid leaving the cookies exposed to air for long periods.
You can also freeze the baked cookies for up to 3 months. Let them cool completely, place them in a freezer-safe container with parchment paper between the layers, and thaw them at room temperature whenever you want a quick treat.
If you’d like to prepare ahead, you can freeze portions of the unbaked dough on a tray, then transfer the firm dough balls to a freezer-safe bag. Bake them from frozen, adding a couple of extra minutes to the usual baking time and checking for doneness.
Final Thoughts
Oatmeal raisin cookies are a simple homemade treat with just the right balance of sweetness, chewiness, and warm cinnamon flavor. They’re easy to prepare, use everyday ingredients, and are a lovely option when you want something different from classic chocolate chip cookies.
If you’re looking for good things to bake when you’re bored, give this recipe a try. You can stick with the traditional oats-and-raisins combination or add nuts and chocolate chips to make the cookies your own. Make a batch, pour yourself a cup of tea, and enjoy a little homemade comfort.
19. Sprinkle Sugar Cookies
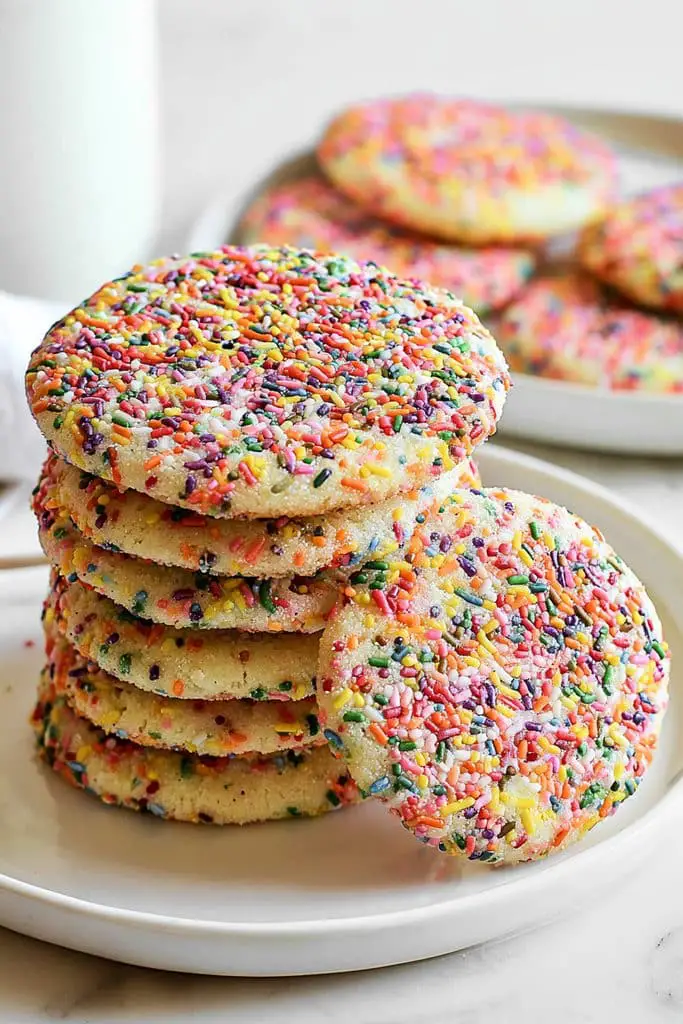
If you’re looking for something cheerful and easy to bake, sprinkle sugar cookies are always a fun choice. They’re soft in the middle, lightly crisp around the edges, and filled with colorful sprinkles that make every cookie look a little more special. You don’t need a holiday or birthday to make them, either. Sometimes, a batch of colorful cookies is all you need to make an ordinary afternoon feel more fun.
These are one of my favorite things to bake when you’re bored because the recipe is simple, the ingredients are easy to find, and decorating is practically built into the process. You can mix the dough, stir in your favorite sprinkles, and have fresh cookies ready in less than an hour. If you’re baking with kids, letting them choose the sprinkle colors makes the whole activity even more enjoyable.
The cookies are delicious on their own, but you can also serve them with a glass of milk, pack them into lunchboxes, or arrange them on a dessert platter. Use rainbow sprinkles for a classic look or choose colors that match a birthday party or special occasion.
Prep time: 15 minutes
Chilling time: 20 minutes
Cook time: 9-12 minutes per batch
Total time: About 45 minutes
Difficulty: Easy
Yield: About 18-22 cookies
Ingredients
- ½ cup (113 g) unsalted butter, softened
- ¾ cup (150 g) granulated sugar
- 1 large egg, at room temperature
- 2 teaspoons vanilla extract
- 1½ cups (190 g) all-purpose flour
- ½ teaspoon baking soda
- ¼ teaspoon baking powder
- ¼ teaspoon salt
- ½ cup (80 g) rainbow jimmies sprinkles, plus extra for rolling, if desired
Instructions
- Preheat the oven. Preheat your oven to 350°F (175°C). Line a baking sheet with parchment paper and set it aside.
- Cream the butter and sugar. In a large mixing bowl, beat the softened butter and granulated sugar until the mixture looks light and creamy. This usually takes about 2-3 minutes with a hand mixer, though you can also mix by hand.
- Add the egg and vanilla. Mix in the egg and vanilla extract until smooth. Scrape down the sides of the bowl so everything is evenly combined.
- Mix the dry ingredients. In a separate bowl, whisk together the flour, baking soda, baking powder, and salt. This helps distribute the raising agents evenly throughout the dough.
- Make the dough. Gradually add the dry ingredients to the butter mixture, mixing on low speed or stirring with a spatula until a soft dough forms. Stop as soon as the flour is incorporated to keep the cookies tender.
- Fold in the sprinkles. Gently stir in the rainbow sprinkles until they’re spread throughout the dough. Try not to overmix, especially if you’re using sprinkles that release color easily.
- Chill the dough. Cover the bowl and refrigerate the dough for about 20 minutes. This helps make it easier to shape and reduces spreading during baking.
- Shape the cookies. Scoop about 1 tablespoon of dough for each cookie and roll it into a ball. If you want extra color on the outside, gently roll each ball in a few additional sprinkles.
- Arrange on the baking sheet. Place the dough balls on the prepared baking sheet, leaving about 2 inches between them. If you prefer slightly flatter cookies, gently press each ball down a little with your fingertips.
- Bake until just set. Bake for 9-12 minutes, or until the edges look set and the bottoms are lightly golden. The centers may still look soft, which is fine because the cookies will continue to firm up as they cool.
- Cool the cookies. Leave them on the baking sheet for about 5 minutes before transferring them to a wire rack. If you want a neater round shape, gently nudge the edges into place with a round cookie cutter while the cookies are still warm.
- Serve and enjoy. Let the cookies cool enough to handle, then enjoy them with milk, tea, or coffee. They’re also perfect for sharing or adding to a homemade cookie box.
Tips and Variations
- Choose the right sprinkles: Rainbow jimmies usually hold their shape well in cookie dough. Very small nonpareils can sometimes bleed color, so use them sparingly if you want clearly defined sprinkles.
- Don’t skip chilling: A short chill helps the dough hold its shape. If your kitchen is warm or the butter has become very soft, refrigerate the dough a little longer.
- Avoid overbaking: These cookies taste best when the centers remain soft. Take them out when the edges are set rather than waiting for the entire cookie to turn golden.
- Use room-temperature ingredients: Softened butter and a room-temperature egg are easier to mix into a smooth dough.
- Try different colors: Pastel sprinkles work beautifully for spring celebrations, while red and green sprinkles make a festive holiday version.
- Add almond flavor: Replace ½ teaspoon of the vanilla extract with ½ teaspoon of almond extract for a bakery-style flavor. Almond extract is strong, so a little goes a long way.
- Make them extra soft: Slightly underbake the cookies and allow them to finish setting on the baking sheet. Store them in an airtight container once completely cool.
- Add a citrus twist: Stir in 1 teaspoon of finely grated lemon or orange zest for a fresh flavor that pairs nicely with the sweetness.
- Turn them into sandwich cookies: Once cooled, spread a little vanilla buttercream between two cookies for a fun dessert.
- Make baking a family activity: Set out a few small bowls of different sprinkles and let everyone decorate their own dough balls before baking. Keep the dough chilled between batches if the kitchen is warm.
How to Store Sprinkle Sugar Cookies
Once the cookies have cooled completely, store them in an airtight container at room temperature for up to 5 days. Keep them away from direct sunlight and heat so the sprinkles retain their color and the cookies stay soft.
You can freeze the baked cookies for up to 2-3 months in a freezer-safe container. Separate the layers with parchment paper to keep them from sticking together, then thaw them at room temperature before serving.
The unbaked dough can also be prepared ahead. Shape it into balls, freeze them on a tray until firm, and transfer them to a freezer-safe bag. When you’re ready for fresh cookies, bake the dough balls from frozen, adding a couple of extra minutes to the baking time and checking that the edges are set.
Final Thoughts
Sprinkle sugar cookies are an easy way to bring a little color and sweetness into your kitchen. They’re made with simple ingredients, don’t need frosting or complicated decorations, and are easy enough for beginner bakers to make successfully.
If you’re collecting fun things to bake when you’re bored at home, these cookies deserve a spot on your list. Choose your favorite sprinkles, make a batch, and enjoy them fresh from the oven. They’re a lovely treat for a regular afternoon, a family baking day, or any occasion that could use a little extra color.
20. Mini Pizzas

If you’re bored of baking sweet treats and feel like making something savory instead, mini pizzas are a fun recipe to try. They’re soft, cheesy, and topped with your favorite pizza sauce and toppings, all in a cute little individual size. You get the same delicious flavors as a regular pizza, but they’re easier to make, quicker to bake, and perfect for customizing.
Mini pizzas are one of those easy baking ideas that work for almost any occasion. You can make them for an afternoon snack, a casual lunch, a movie night, or even a fun weekend activity with kids. Everyone can choose their own toppings, so there’s no need to agree on just one kind of pizza.
For this recipe, we’re making a simple homemade dough with basic ingredients. You can prepare it while you get the toppings ready, then shape the dough into small rounds and add everything you love. If you’re looking for things to bake when you’re bored at home, these little pizzas are a delicious change from cookies and cakes.
Prep time: 20 minutes
Rising time: 45-60 minutes
Cook time: 12-15 minutes
Total time: About 1 hour 20 minutes
Difficulty: Easy
Yield: 8 mini pizzas
Ingredients
For the pizza dough:
- 2 cups (250 g) all-purpose flour, plus extra for dusting
- ¾ teaspoon instant yeast
- 1 teaspoon granulated sugar
- ¾ teaspoon salt
- ¾ cup (180 ml) warm water, added gradually
- 1 tablespoon olive oil
For the toppings:
- ½ cup (120 g) pizza sauce or thick tomato sauce
- 1½ cups (150-170 g) shredded mozzarella cheese
- ½ cup (60 g) chopped bell peppers
- ½ cup (50 g) sliced mushrooms, optional
- ¼ cup (30 g) sliced black olives, optional
- ¼ cup (40 g) chopped onion, optional
- ½ teaspoon dried oregano
- ½ teaspoon dried basil, optional
- Red pepper flakes, optional
You can replace the vegetables with cooked chicken, sweetcorn, pepperoni, or any pizza toppings you enjoy.
Instructions
- Prepare the dough ingredients. In a large bowl, combine the flour, instant yeast, sugar, and salt. Add the warm water gradually along with the olive oil, mixing until a rough dough begins to form. The water should feel warm, not hot, as very hot water can damage the yeast.
- Knead the dough. Transfer the dough to a lightly floured surface and knead for about 8-10 minutes, until smooth and elastic. If you’re using a stand mixer with a dough hook, knead for around 5-7 minutes. The dough should feel soft and slightly tacky without sticking excessively to your hands.
- Let the dough rise. Place the dough in a lightly oiled bowl and turn it once to coat the surface. Cover with a clean kitchen towel or plastic wrap and leave it in a warm spot for 45-60 minutes, or until roughly doubled in size.
- Preheat the oven. Preheat your oven to 425°F (220°C). Line a large baking sheet with parchment paper. If you’re using a pizza stone or steel, preheat it according to the manufacturer’s instructions.
- Divide the dough. Once the dough has risen, gently press it down to release some of the air. Divide it into 8 equal pieces and roll each piece into a ball.
- Shape the mini pizzas. On a lightly floured surface, flatten each ball into a small round about 4-5 inches wide. You can make the edges slightly thicker if you like a soft, puffy crust. Transfer the rounds to the prepared baking sheet.
- Add the sauce. Spread a thin layer of pizza sauce over each dough round, leaving a small border around the edges. Avoid adding too much sauce, as excess moisture can make the centers soggy.
- Add the cheese and toppings. Sprinkle the mozzarella over the sauce, then add your chopped bell peppers, mushrooms, olives, onion, or other favorite toppings. Finish with dried oregano and basil if using.
- Bake the mini pizzas. Place the baking sheet in the preheated oven and bake for 12-15 minutes, or until the crusts are lightly golden and the cheese is melted and bubbling. Depending on your oven and the thickness of the dough, they may need a little more or less time.
- Check that they’re cooked through. Lift one pizza slightly to check the underside. It should look lightly browned rather than pale and doughy. If the toppings are ready but the bases need more time, bake for another 2-3 minutes.
- Cool briefly and serve. Let the mini pizzas rest for a couple of minutes before serving. Sprinkle with a little extra oregano or red pepper flakes if you like, then enjoy while the cheese is still warm and stretchy.
Tips and Variations
- Don’t overheat the water: Warm water helps activate the yeast, but water that’s too hot can stop it from working properly. If you’re unsure, it should feel comfortably warm to the touch.
- Give the dough enough time to rise: A good rise helps create a softer, lighter crust. If your kitchen is cool, the dough may need a little extra time.
- Keep the sauce layer thin: Too much sauce can make the dough soggy in the middle. A few spoonfuls spread evenly over each base are usually enough.
- Use low-moisture mozzarella: This melts well without releasing as much water as some fresh mozzarella varieties. If using fresh mozzarella, drain it well and pat it dry first.
- Pre-cook watery toppings: Mushrooms and some vegetables release moisture while baking. Sautéing mushrooms briefly or patting vegetables dry can help keep the crust crisp.
- Make cheesy mini pizzas: Add a little cheddar or Parmesan along with the mozzarella for a richer cheese flavor.
- Try a chicken version: Add small pieces of cooked, seasoned chicken with bell peppers and onion for a more filling mini pizza.
- Make a spicy version: Add sliced jalapeños, chili flakes, or a drizzle of hot sauce after baking.
- Use whole-wheat flour: Replace up to half the all-purpose flour with whole-wheat flour. You may need a little extra water because whole-wheat flour absorbs more moisture.
- Save time with ready-made dough: Store-bought pizza dough works well when you want a quicker recipe. Divide it into small portions, shape, top, and bake according to the dough’s instructions.
- Let kids build their own: Set out small bowls of sauce, cheese, and toppings so everyone can make a personal pizza. It’s an easy way to turn baking into a fun family activity.
How to Store Mini Pizzas
Let any leftover mini pizzas cool completely before storing them in an airtight container in the refrigerator. They’ll keep for about 3-4 days. If you’re stacking them, place parchment paper between the layers to prevent the cheese from sticking.
To reheat, place the pizzas in an oven or air fryer at 350°F (175°C) for a few minutes, until the cheese is hot and the crust is warmed through. This helps bring back some of the crispness. A microwave works too, although the crust will be softer.
You can also freeze baked mini pizzas for up to 2 months. Let them cool completely, arrange them on a tray until frozen, and then transfer them to a freezer-safe bag or container. Reheat from frozen in the oven until hot throughout.
For a make-ahead option, prepare the dough and let it rise, then refrigerate it in a covered, lightly oiled container for up to 24 hours. Bring it closer to room temperature before shaping and topping.
Final Thoughts
Mini pizzas are a great reminder that baking doesn’t always have to mean cakes, cookies, and other sweet treats. They’re simple to make, easy to customize, and a delicious way to use up leftover vegetables, cheese, or cooked chicken.
If you’re searching for things to bake when you’re bored, give these mini pizzas a try. Make a classic cheese version, load them with vegetables, or experiment with different toppings until you find your favorite combination. They’re especially fun to prepare with family or friends, and the best part is getting to enjoy your own little pizza straight from the oven.
21. Cinnamon Roll Twists
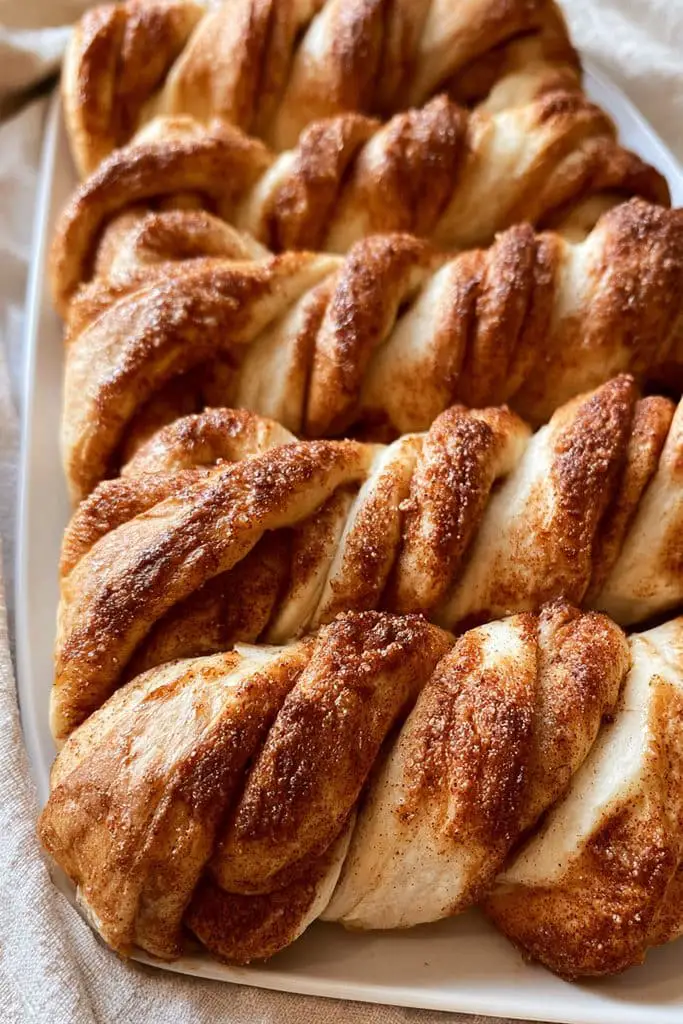
If you love the warm, sweet flavor of cinnamon rolls but want something a little different, these cinnamon roll twists are worth trying. They’re soft and flaky, with buttery layers, a generous cinnamon-sugar filling, and a lightly crisp outside. The twisted shape makes them look fancy, but they’re surprisingly easy to put together at home.
These are one of those fun things to bake when you’re bored because shaping the twists is almost as enjoyable as eating them. You don’t need to make a complicated frosting or worry about getting perfectly round rolls. A simple vanilla glaze is all you need to finish them, although they’re just as delicious without it.
For this recipe, we’re using ready-made puff pastry to keep things simple and save time. That means you can enjoy the cinnamon-roll flavor without waiting for yeast dough to rise. If you’re craving something sweet with your afternoon tea or want an easy homemade treat for the weekend, these cinnamon roll twists are a lovely option.
Prep time: 15 minutes
Chilling time: 10 minutes
Cook time: 15-20 minutes
Total time: About 45 minutes
Difficulty: Easy
Yield: 10-12 twists
Ingredients
For the twists:
- 1 sheet (about 250-300 g) ready-made puff pastry, thawed if frozen
- 2 tablespoons (28 g) unsalted butter, melted
- ⅓ cup (65 g) packed light brown sugar
- 1½ teaspoons ground cinnamon
- 1 teaspoon all-purpose flour, optional, to help absorb excess moisture
- 1 tablespoon milk or 1 beaten egg, for brushing
For the optional vanilla glaze:
- ½ cup (60 g) powdered sugar
- 1-2 teaspoons milk
- ¼ teaspoon vanilla extract
Instructions
- Prepare the oven. Preheat your oven to 400°F (200°C). Line a baking sheet with parchment paper so the pastry doesn’t stick and the sugar is easier to clean up afterward.
- Mix the cinnamon filling. In a small bowl, combine the brown sugar, cinnamon, and optional flour. Stir until evenly mixed. The flour helps absorb a little moisture from the butter, but you can leave it out if you prefer.
- Prepare the pastry. Place the thawed puff pastry on a lightly floured surface or a sheet of parchment paper. If needed, gently roll it into a rectangle about 10 × 12 inches, keeping the thickness fairly even.
- Add the butter. Brush the melted butter over the pastry, leaving a small border around the edges. Make sure the butter is spread evenly so the cinnamon sugar sticks to the surface.
- Sprinkle on the filling. Scatter the cinnamon-sugar mixture over the buttered pastry. Press it down gently with your fingertips so it stays in place when you cut and twist the strips.
- Fold the pastry. Fold the pastry in half lengthwise, bringing one long side over the other. Gently press the layers together without crushing them too much. This creates a neat filling layer inside each twist.
- Cut into strips. Use a sharp knife or pizza cutter to slice the folded pastry crosswise into 10-12 strips, each roughly ¾-1 inch wide.
- Twist the strips. Hold each strip at both ends and twist it a few times in opposite directions. Don’t worry if a little cinnamon sugar falls out; just tuck the ends underneath slightly to help the twists keep their shape.
- Chill briefly. Arrange the twists on the prepared baking sheet, leaving space between them. Refrigerate for about 10 minutes if the pastry has become soft. Cold pastry is easier to handle and tends to puff up better in the oven.
- Brush and bake. Lightly brush the twists with milk or beaten egg. Bake for 15-20 minutes, or until they’re puffed, golden brown, and crisp around the edges. Check them toward the end of baking because the sugar can brown quickly.
- Make the glaze. While the twists cool slightly, mix the powdered sugar, vanilla, and 1 teaspoon of milk in a small bowl. Add a few more drops of milk if needed until the glaze is thick enough to drizzle.
- Finish and serve. Let the twists cool for about 5-10 minutes, then drizzle the glaze over the top. Serve them warm for the best buttery texture and cinnamon flavor.
Tips and Variations
- Keep the pastry cold: Puff pastry works best when the butter inside it stays cold. If it becomes soft or sticky while you’re shaping the twists, pop it in the refrigerator for a few minutes.
- Don’t add too much butter: A thin, even layer is enough to help the cinnamon sugar stick. Too much butter can leak out and make the bottoms greasy.
- Use a sharp knife: Clean cuts help the pastry layers puff up properly. A pizza cutter is especially handy for making even strips.
- Twist gently: You don’t need to twist each strip many times. Two or three turns are usually enough to create a pretty shape without tearing the pastry.
- Watch the oven closely: The sugar can caramelize quickly near the end of baking. If the twists are browning too fast, lower the temperature slightly and check them again.
- Add chopped nuts: Sprinkle a little finely chopped pecan or walnut over the cinnamon sugar before folding the pastry for extra crunch.
- Make them chocolatey: Add a small handful of mini chocolate chips to the filling for a cinnamon-and-chocolate combination.
- Try a maple glaze: Replace the milk in the glaze with a little maple syrup for a deeper, sweeter flavor. Add it gradually so the glaze doesn’t become too thin.
- Use a little orange zest: A small amount of finely grated orange zest in the cinnamon filling adds a fresh citrus note.
- Make them without glaze: The twists are sweet and flavorful on their own, so you can skip the icing if you prefer a less-sweet treat.
How to Store Cinnamon Roll Twists
These twists are best eaten on the day they’re baked, while the pastry is still crisp and flaky. If you have leftovers, let them cool completely and store them in an airtight container at room temperature for up to 2 days. Keep in mind that the pastry will soften over time, especially if you’ve added glaze.
To bring back some of the crispness, reheat the twists in an oven at 325°F (165°C) for about 5-8 minutes. An air fryer also works well; warm them briefly and check frequently so the sugar doesn’t burn. Avoid microwaving if you want to keep the pastry flaky.
You can also prepare the twists ahead of time. Shape them, arrange them on a lined tray, and refrigerate for a few hours before baking. For longer storage, freeze the unbaked twists on a tray until firm, then transfer them to a freezer-safe container. Bake from frozen, adding a few extra minutes and checking that the pastry is fully puffed and golden.
Final Thoughts
Cinnamon roll twists are a simple way to enjoy those classic cinnamon-roll flavors without spending hours making dough from scratch. They’re buttery, sweet, and wonderfully flaky, with a fun shape that makes them look much more complicated than they really are.
If you’re looking for things to bake when you’re bored at home, this recipe is a great place to start. Keep a sheet of puff pastry in the freezer, and you’ll have an easy treat ready whenever the craving strikes. Serve them warm with tea or coffee, and don’t be surprised if everyone reaches for a second twist.
22. Jam-Filled Puff Pastry Pinwheels
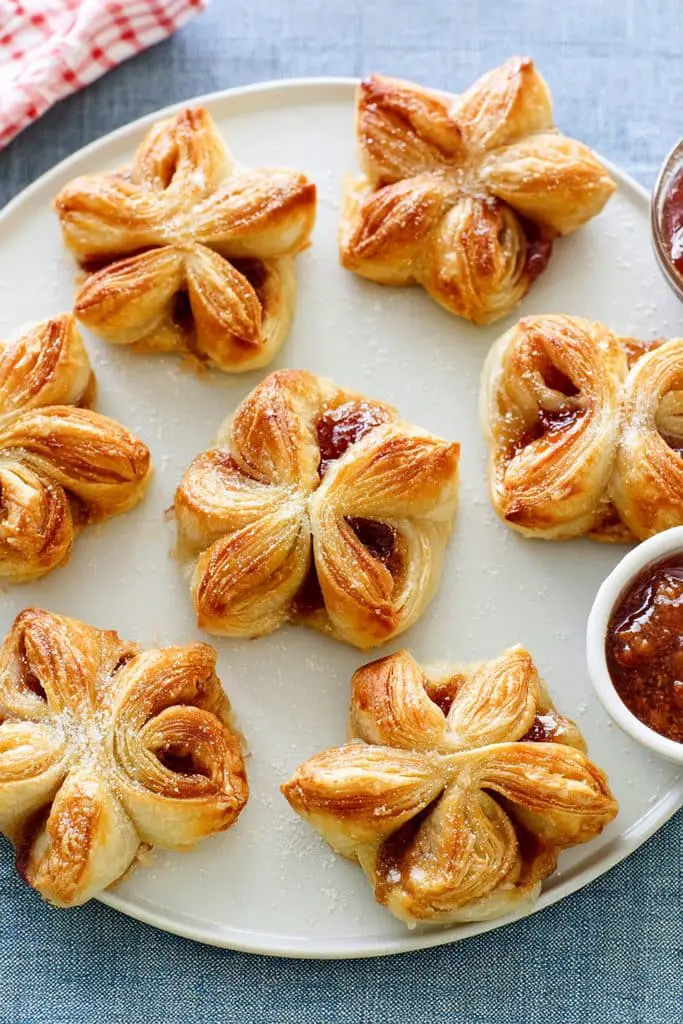
If you’re looking for something sweet to bake without making a mess in the kitchen, these jam-filled puff pastry pinwheels are a lovely choice. They’re golden, flaky, and filled with sweet fruit jam that gets warm and sticky as the pastry bakes. They look like little bakery treats, but you only need a few ingredients to make them at home.
This is one of my favorite kinds of easy baking ideas because ready-made puff pastry does most of the work for you. There’s no dough to knead, no waiting for anything to rise, and no complicated shaping techniques to learn. Just cut the pastry, add your favorite jam, fold the corners, and let the oven turn everything into a delicious sweet snack.
You can use strawberry, raspberry, apricot, or any thick jam you have on hand. These pinwheels are perfect for afternoon tea, a quick dessert, or a fun baking activity with kids. If you’re collecting things to bake when you’re bored at home, keep this recipe handy for those days when you want something homemade without much effort.
Prep time: 10-15 minutes
Chilling time: 10 minutes, optional
Cook time: 12-18 minutes
Total time: About 35 minutes
Difficulty: Easy
Yield: 8-10 pinwheels
Ingredients
- 1 sheet (about 250-300 g) ready-made puff pastry, thawed if frozen
- ⅓ cup (about 100 g) thick fruit jam, such as strawberry, raspberry, or apricot
- 1 tablespoon all-purpose flour, for dusting
- 1 large egg, beaten, or 1 tablespoon milk, for brushing
- 1 tablespoon granulated sugar, optional, for sprinkling
- 2 tablespoons powdered sugar, optional, for dusting after baking
Instructions
- Preheat the oven. Preheat your oven to 400°F (200°C). Line a baking sheet with parchment paper so the pastry doesn’t stick and the jam is easier to clean up if any spills.
- Prepare the pastry. Lightly dust your work surface with flour and unfold the thawed puff pastry. If needed, gently roll it into an even rectangle, keeping it thick enough to puff up nicely in the oven.
- Cut the pastry into squares. Use a sharp knife or pizza cutter to divide the pastry into 8-10 equal squares, depending on the size of your sheet. Aim for squares around 3-4 inches wide.
- Make the pinwheel cuts. Starting at each corner of a square, cut diagonally toward the center, stopping about ¾ inch before you reach it. You’ll have four triangular flaps connected by an uncut center. Repeat with the remaining squares.
- Add the jam. Place about 1 teaspoon of jam in the center of each square. Try not to add too much, as the jam can bubble over during baking and make the pastry sticky.
- Fold the corners. Take one corner of each square and fold it toward the center, over the jam. Repeat with every other corner to create a pinwheel shape. Press the tips gently into the center so they stay in place.
- Chill the pinwheels. Transfer the shaped pastries to the prepared baking sheet, leaving a little space between each one. If the pastry feels soft or warm, refrigerate the tray for about 10 minutes to help the pinwheels hold their shape.
- Brush with egg or milk. Lightly brush the exposed pastry with beaten egg for a shiny, golden finish, or use milk for a softer, less glossy appearance. If you like a little extra sweetness and crunch, sprinkle a pinch of granulated sugar over the pastry.
- Bake until golden. Bake for 12-18 minutes, or until the pastry has puffed up and turned golden brown. Keep an eye on the jam near the end of baking because it can bubble and darken quickly.
- Cool before serving. Remove the baking sheet from the oven and let the pinwheels cool for at least 10 minutes. The jam will be extremely hot straight from the oven, so give it time to settle before taking a bite.
- Add the finishing touch. Once the pinwheels have cooled, dust them lightly with powdered sugar if desired. Arrange them on a serving plate and enjoy with tea, coffee, or a glass of milk.
Tips and Variations
- Choose thick jam: Thick jam is less likely to run out of the pastry while baking. If your jam is very loose, warm it gently in a saucepan to reduce some of the moisture, then let it cool completely before using.
- Keep the pastry cold: Puff pastry is easier to cut and shape when it’s cool. If it starts getting sticky or floppy, place it in the refrigerator for a few minutes.
- Don’t overfill the centers: A small spoonful of jam is enough. Too much filling can spill out and prevent the pinwheels from keeping their shape.
- Press the corners firmly: Gently pressing the folded tips into the center helps them stay attached as the pastry expands in the oven.
- Try different flavors: Strawberry and raspberry are classic choices, but apricot, cherry, and blueberry jam all work well. You can even make a mixed batch with different flavors.
- Add a little spice: Mix a pinch of cinnamon into apple or apricot jam for a warm, cozy flavor.
- Make chocolate pinwheels: Replace the jam with a small amount of chocolate-hazelnut spread. Use it sparingly because it softens as it heats.
- Add cream cheese: For a cheesecake-inspired version, place a small dollop of sweetened cream cheese under the jam. Keep the filling modest so the pastry can still puff up.
- Use a simple glaze: Stir a little milk into powdered sugar and drizzle it over the cooled pinwheels for a sweeter finish.
- Bake with kids: Let children choose the jam flavors and help fold the pastry corners. An adult should handle the knife and hot baking tray.
How to Store Jam-Filled Puff Pastry Pinwheels
These pinwheels taste best on the day they’re baked, when the pastry is crisp and flaky. If you have leftovers, let them cool completely and store them in an airtight container at room temperature for up to 1-2 days, provided your kitchen is cool. The pastry will soften as it sits, especially around the jam.
To refresh them, warm the pinwheels in an oven at 325°F (165°C) for about 5-8 minutes. An air fryer works well too, but check them frequently so the jam doesn’t burn. Avoid the microwave if you want to bring back some of the flaky texture.
For a make-ahead option, shape the pinwheels and arrange them on a baking sheet, then refrigerate for a few hours before baking. You can also freeze the unbaked pinwheels until firm and transfer them to a freezer-safe container. Bake from frozen, adding a few extra minutes and checking that the pastry is fully puffed and golden.
Final Thoughts
Jam-filled puff pastry pinwheels are proof that a delicious homemade treat doesn’t need a long ingredient list or hours of preparation. With flaky pastry and a sweet fruit filling, they’re simple, pretty, and easy to customize with whatever jam you love.
If you’re searching for fun things to bake when you’re bored at home, these little pinwheels are definitely worth trying. Keep some puff pastry in the freezer, choose a jam flavor, and you’ll have a batch of sweet treats ready in no time. Serve them with your favorite hot drink, share them with family, or save a few for a little afternoon pick-me-up.
23. Chocolate-Dipped Biscuit Sticks
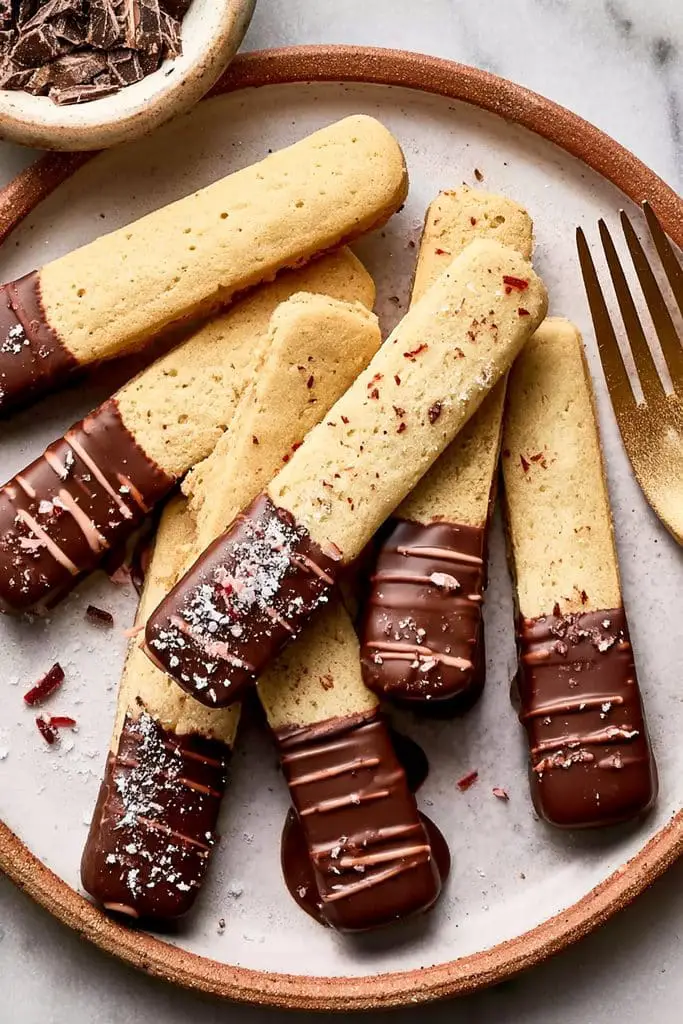
If you’re craving something sweet but don’t feel like making a complicated dessert, chocolate-dipped biscuit sticks are a fun little treat to try. They’re crunchy, chocolatey, and easy to decorate with sprinkles, chopped nuts, or a drizzle of white chocolate. They also look lovely arranged on a plate, even though they take very little effort to make.
What makes this recipe especially handy is that you can use store-bought biscuit sticks or plain crunchy breadsticks, so there’s no need to prepare dough from scratch. If you enjoy a little hands-on time in the kitchen, you can even make your own biscuit sticks and then dip them in melted chocolate. Either way, it’s a simple way to turn an everyday snack into something that feels special.
These chocolate-dipped treats are perfect when you’re looking for things to bake when you’re bored at home, especially if you want to get creative with toppings. Make them for a movie night, a party platter, or a homemade edible gift. You can keep them simple with dark chocolate or add colorful decorations for a playful finish.
Prep time: 15 minutes
Chilling time: 20-30 minutes
Cook time: None if using ready-made sticks
Total time: About 45 minutes
Difficulty: Very easy
Yield: About 20-24 sticks
Ingredients
- 20-24 plain biscuit sticks or crunchy breadsticks
- 200 g (about 7 oz) milk, dark, or semi-sweet chocolate
- 1 teaspoon coconut oil or neutral vegetable oil, optional
- 2 tablespoons rainbow sprinkles, optional
- 2 tablespoons finely chopped nuts, optional
- 2 tablespoons shredded coconut, optional
- 30 g (about 1 oz) white chocolate, optional, for drizzling
Instructions
- Prepare your workspace. Line a baking sheet or large plate with parchment paper. Make sure it’s large enough to hold the biscuit sticks without them overlapping. If you’re using homemade biscuit sticks, let them cool completely before dipping.
- Break the chocolate into pieces. Chop the chocolate into small, even pieces and place it in a dry, microwave-safe bowl. Smaller pieces melt more evenly and are less likely to scorch.
- Melt the chocolate. Microwave the chocolate in 20-second intervals, stirring after each one, until it’s smooth. Alternatively, place the bowl over a saucepan of gently simmering water, making sure the bottom of the bowl doesn’t touch the water. Stir until melted, then remove from the heat.
- Adjust the consistency if needed. If the chocolate seems too thick for dipping, stir in 1 teaspoon of coconut oil or neutral vegetable oil. This is optional, but it can make the coating smoother and easier to work with.
- Dip the biscuit sticks. Hold one biscuit stick at one end and dip about half to two-thirds of it into the melted chocolate. Rotate it gently to coat the sides, then lift it out and let the excess chocolate drip back into the bowl.
- Add the toppings. While the chocolate is still wet, sprinkle the coated portion with rainbow sprinkles, chopped nuts, or shredded coconut. You can also leave some sticks plain for a simple chocolate finish.
- Arrange on the tray. Place each dipped stick on the parchment-lined tray, leaving a little space between them so the chocolate doesn’t stick together. If you’re coating only one end, keep the plain ends outside the chocolate puddles.
- Make a white chocolate drizzle. If you’d like an extra decorative touch, melt the white chocolate in a separate bowl using short microwave intervals. Transfer it to a small spoon or piping bag and drizzle thin lines over the dipped sticks.
- Let the chocolate set. Place the tray in the refrigerator for about 20-30 minutes, or until the chocolate coating is firm. If your kitchen is cool, the chocolate may also set at room temperature, although it can take longer.
- Serve and enjoy. Once the coating has hardened, carefully lift the sticks from the parchment paper and arrange them in a glass, jar, or serving plate. They’re ready to enjoy with tea, coffee, or a cold glass of milk.
Tips and Variations
- Choose crunchy biscuit sticks: Plain, firm sticks work best because they won’t bend or break easily during dipping. Avoid soft biscuits that may crumble when handled.
- Keep water away from the chocolate: Even a small amount of water can cause melted chocolate to become grainy and thick. Make sure your bowl and utensils are completely dry.
- Melt slowly: Chocolate can burn quickly, especially in the microwave. Use short intervals and stir regularly rather than heating it for a long time at once.
- Use different chocolates: Dark chocolate gives a richer, less-sweet coating, while milk chocolate makes the sticks sweeter and creamier. You can even dip some in each type for variety.
- Try a peanut butter version: Spread a very thin layer of peanut butter on the biscuit sticks before dipping them in chocolate. Keep the layer light so the sticks remain easy to handle.
- Add crushed cookies: Sprinkle crushed chocolate sandwich cookies or graham crackers over the wet chocolate for extra crunch.
- Make them colorful: Use different sprinkles for birthdays, celebrations, or holidays. You can also drizzle contrasting chocolate over the top for a bakery-style finish.
- Create a coconut version: Dip the sticks in dark chocolate and roll them lightly in shredded coconut for a simple chocolate-coconut combination.
- Make them less sweet: Choose dark chocolate and skip the sugary toppings. A small sprinkle of chopped roasted nuts adds texture without much extra sweetness.
- Let excess chocolate drip off: Before placing each stick on the tray, gently tap it against the side of the bowl. This helps create a neater coating without thick puddles at the bottom.
- Make them with kids: Set out small bowls of toppings and let everyone decorate their own sticks. An adult should handle the hot melted chocolate.
How to Store Chocolate-Dipped Biscuit Sticks
Once the chocolate has completely set, store the biscuit sticks in an airtight container in a cool, dry place. If your kitchen isn’t too warm, they’ll generally stay crisp for around 5-7 days, depending on the freshness of the biscuits you used.
If the weather is hot, keep them in the refrigerator so the chocolate doesn’t soften or melt. Separate the layers with parchment paper to prevent the coatings from sticking together. Let them sit for a few minutes before serving if you prefer not to eat them straight from the fridge.
You can also prepare these treats a day ahead for a party or gathering. Store them in a sealed container away from moisture and strong-smelling foods, as chocolate can absorb odors. For the best crunch, avoid leaving them uncovered for long periods.
Final Thoughts
Chocolate-dipped biscuit sticks are one of the easiest sweet treats to make when you want something homemade without much work. You don’t need an oven, complicated ingredients, or special decorating skills, and you can change the toppings to suit whatever you have in your kitchen.
If you’re collecting things to bake when you’re bored, this no-bake recipe is a fun addition to your list. Choose your favorite chocolate, get creative with the toppings, and turn simple biscuit sticks into a treat that looks just as good as it tastes. They’re also easy to package as little homemade gifts, which makes them useful for more than just afternoon snacking.
24. Homemade Cinnamon Sugar Donut Holes
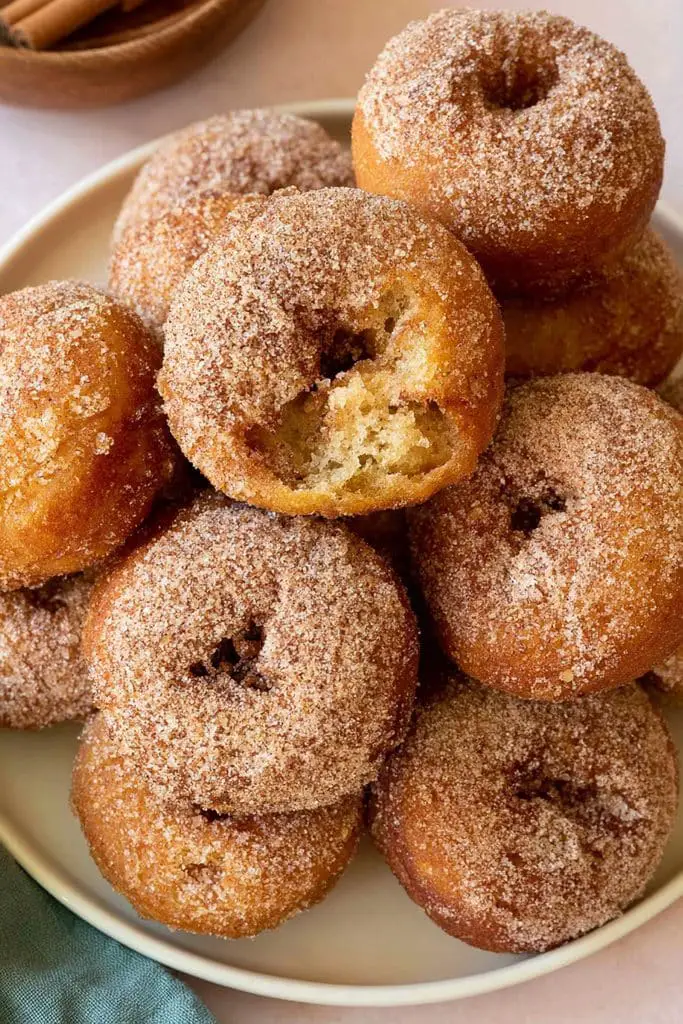
There’s something about warm, freshly made donut holes coated in cinnamon sugar that makes them hard to resist. They’re soft on the inside, lightly crisp on the outside, and covered in that sweet, cinnamon-spiced coating that makes your kitchen smell amazing. If you’re looking for fun things to bake when you’re bored at home, these little treats are worth adding to your list.
I love that donut holes feel like a special bakery treat, but you don’t need to make full-sized donuts or spend hours working with yeast dough to enjoy them. This version uses a simple dough that comes together with everyday ingredients. Once the little dough balls are fried and rolled in cinnamon sugar, they’re ready to eat while still warm.
They’re perfect for a cozy afternoon, a weekend baking project, or a sweet snack to share with family. You can serve them as they are, dip them in chocolate sauce, or add a little vanilla glaze if you want something extra.
Prep time: 15 minutes
Cook time: 15-20 minutes
Total time: About 35 minutes
Difficulty: Easy
Yield: About 20-24 donut holes
Ingredients
For the donut holes:
- 250 g (2 cups) all-purpose flour
- 50 g (¼ cup) granulated sugar
- 2 teaspoons baking powder
- ¼ teaspoon salt
- ½ teaspoon ground cinnamon, optional
- 1 large egg
- 120 ml (½ cup) milk
- 2 tablespoons unsalted butter, melted and slightly cooled
- 1 teaspoon vanilla extract
- Vegetable oil, for frying
For the cinnamon sugar coating:
- 100 g (½ cup) granulated sugar
- 1½ teaspoons ground cinnamon
- 2 tablespoons melted butter, optional, to help the coating stick
Instructions
- Mix the dry ingredients. In a large bowl, whisk together the flour, sugar, baking powder, salt, and optional cinnamon. Mixing these ingredients first helps distribute the baking powder evenly, so the donut holes rise more consistently.
- Combine the wet ingredients. In a separate bowl, whisk the egg, milk, melted butter, and vanilla extract until combined. Let the butter cool slightly before adding it so it doesn’t scramble the egg.
- Make the dough. Pour the wet ingredients into the dry ingredients and stir until a soft dough forms. It should be slightly sticky but manageable. Avoid mixing for too long, as overworking the dough can make the donut holes tough.
- Shape the donut holes. Lightly flour your hands and gently roll the dough into small balls, about 2-3 cm (¾-1¼ inches) wide. Try to keep them roughly the same size so they cook evenly. If the dough is very sticky, lightly flour your hands rather than adding too much extra flour to the dough.
- Prepare the cinnamon sugar. In a shallow bowl, mix the granulated sugar and cinnamon until evenly combined. Set it beside your cooking area so it’s ready when the donut holes come out of the oil.
- Heat the oil. Pour vegetable oil into a deep, heavy-bottomed saucepan to a depth of about 5-7 cm (2-3 inches). Heat it to approximately 170-175°C (340-350°F). If you have a kitchen thermometer, use it to check the temperature, as oil that’s too hot can brown the outside before the centers cook.
- Fry in small batches. Carefully lower a few dough balls into the hot oil, leaving enough room for them to move around. Fry for about 3-4 minutes, turning them as needed, until they’re evenly golden brown and cooked through. The exact time will depend on their size.
- Drain the donut holes. Use a slotted spoon to lift them out of the oil and place them on a wire rack or a plate lined with paper towels. Let the excess oil drain away, but don’t leave them sitting for too long before coating.
- Coat with cinnamon sugar. While the donut holes are still warm, roll them in the cinnamon sugar mixture until they’re covered all over. If the sugar doesn’t stick well, brush them lightly with melted butter before rolling.
- Check that they’re cooked through. Break open one donut hole from the first batch to check the center. It should be soft and fully cooked, not wet or doughy. If it’s undercooked, make the next batch slightly smaller or reduce the oil temperature a little so the centers have more time to cook.
- Serve warm. Transfer the finished donut holes to a serving plate and enjoy them while they’re fresh. They’re delicious on their own, but you can also serve them with chocolate sauce, caramel sauce, or a simple vanilla dip.
Tips and Variations
- Keep the dough soft: A slightly sticky dough helps create tender donut holes. Add extra flour only if you genuinely need it to shape the balls.
- Use a thermometer if possible: Keeping the oil around 170-175°C (340-350°F) helps the donut holes cook evenly. If the oil is too cool, they’ll absorb more oil; if it’s too hot, the outside may brown too quickly.
- Don’t overcrowd the pan: Frying too many at once can lower the oil temperature and make the results greasy. Work in small batches instead.
- Make the balls similar in size: This helps everything cook at the same rate. Smaller balls are also easier to cook through without over-browning the outside.
- Try a vanilla version: Leave out the cinnamon in the dough and add a little extra vanilla for a simple, sweet flavor.
- Add a chocolate center: Once the donut holes have cooled slightly, use a piping bag to fill them with chocolate hazelnut spread or thick chocolate pastry cream.
- Make them extra cozy: Add a small pinch of nutmeg or cardamom to the cinnamon sugar for a warmer, spiced flavor.
- Try a powdered sugar coating: If cinnamon isn’t your favorite, roll the warm donut holes in powdered sugar instead.
- Make a simple glaze: Mix 60 g (½ cup) powdered sugar with 1-2 tablespoons of milk and a little vanilla. Drizzle it over the cooled donut holes for a sweeter finish.
- Be careful around hot oil: Use a deep, stable saucepan and lower the dough balls gently into the oil. Keep children away from the frying area, and never leave hot oil unattended.
How to Store Homemade Cinnamon Sugar Donut Holes
These donut holes taste best on the day they’re made, especially while they’re still warm and soft. If you have leftovers, let them cool completely and store them in an airtight container at room temperature for up to 2 days.
The cinnamon sugar coating may soften over time, and the donut holes won’t be quite as fluffy as they are fresh. To warm them up, place them in a 150°C (300°F) oven for about 4-5 minutes. Avoid microwaving them for too long, as they can become chewy.
You can also prepare the cinnamon sugar mixture ahead of time to make baking quicker. I wouldn’t recommend frying the donut holes too far in advance if you want that fresh, tender texture. If you do make them ahead, a quick warm-up before serving makes them more enjoyable.
Final Thoughts
Homemade cinnamon sugar donut holes are a lovely choice when you want to make something sweet and fun without tackling a complicated baking project. The dough is simple, the ingredients are easy to find, and that cinnamon sugar coating makes every bite feel like a little treat.
If you’re searching for good things to bake when you’re bored, these donut holes are a delicious option for a weekend afternoon or a casual get-together. Serve them warm, experiment with different coatings, and don’t be surprised if they disappear from the plate before they’ve had much time to cool.
25. Homemade Cinnamon Rolls
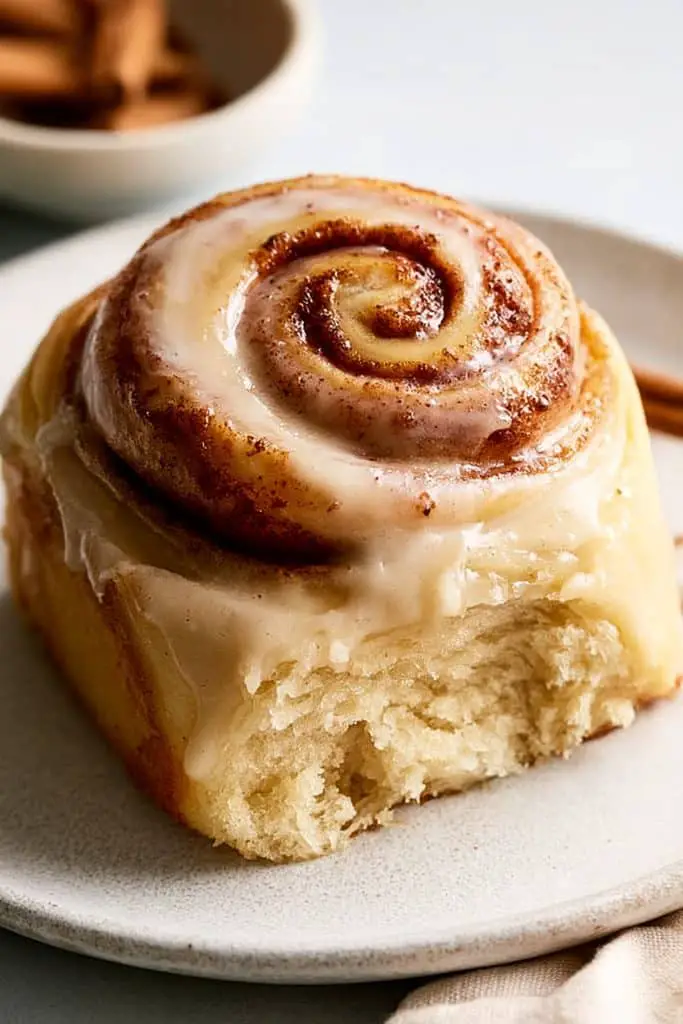
Few things make a kitchen feel cozier than the smell of homemade cinnamon rolls baking in the oven. They’re soft, fluffy, and filled with buttery cinnamon sugar, then finished with a sweet glaze that melts into all those little swirls. If you’re looking for things to bake when you’re bored, this is one of those recipes that’s worth taking your time over.
Cinnamon rolls might look like something you’d only buy from a bakery, but they’re surprisingly manageable to make at home. The dough needs a little time to rise, and rolling and filling it is part of the fun. You don’t need any fancy equipment, just a few everyday ingredients and a little patience.
I especially love serving these rolls warm, when the centers are still soft and the cinnamon filling is fragrant. They’re perfect for a lazy weekend morning, an afternoon baking session, or whenever you’re craving something sweet and comforting. You can keep them classic with a simple vanilla glaze or add cream cheese frosting if you prefer a richer topping.
Prep time: 25 minutes
Rising time: 1½-2 hours
Cook time: 20-25 minutes
Total time: About 2½-3 hours
Difficulty: Moderate
Yield: 12 cinnamon rolls
Ingredients
For the dough:
- 500 g (4 cups) all-purpose flour, plus a little extra for kneading
- 7 g (2¼ teaspoons) instant yeast
- 50 g (¼ cup) granulated sugar
- 1 teaspoon salt
- 240 ml (1 cup) warm milk
- 1 large egg, at room temperature
- 60 g (¼ cup) unsalted butter, melted and slightly cooled
For the cinnamon filling:
- 100 g (½ cup) packed brown sugar
- 2 tablespoons ground cinnamon
- 60 g (¼ cup) unsalted butter, softened
For the vanilla glaze:
- 120 g (1 cup) powdered sugar
- 1-2 tablespoons milk
- ½ teaspoon vanilla extract
Optional cream cheese frosting:
- 60 g (¼ cup) cream cheese, softened
- 30 g (2 tablespoons) unsalted butter, softened
- 80 g (⅔ cup) powdered sugar
- ½ teaspoon vanilla extract
- 1-2 teaspoons milk, if needed
Instructions
- Mix the dough ingredients. In a large bowl, combine the flour, instant yeast, sugar, and salt. Add the warm milk, egg, and melted butter. Stir everything together until a shaggy dough forms. The milk should feel warm rather than hot, as very hot liquid can damage the yeast.
- Knead until smooth. Transfer the dough to a lightly floured surface and knead for about 8-10 minutes, or until it’s smooth, stretchy, and slightly tacky. You can also use a stand mixer with a dough hook for about 5-7 minutes. Add extra flour sparingly because too much can make the rolls dense.
- Let the dough rise. Place the dough in a lightly greased bowl and cover it with a clean kitchen towel or plastic wrap. Leave it in a warm spot for about 1-1½ hours, or until it has roughly doubled in size. The exact time depends on the temperature of your kitchen.
- Prepare the filling. While the dough rises, mix the brown sugar and ground cinnamon in a small bowl. Keep the softened butter nearby so it’s easy to spread when the dough is ready.
- Roll out the dough. Gently press the air out of the risen dough and transfer it to a lightly floured surface. Roll it into a rectangle about 40 × 30 cm (16 × 12 inches). It doesn’t need to be perfectly shaped, but try to keep the thickness even so the rolls bake consistently.
- Add the cinnamon filling. Spread the softened butter evenly over the dough, leaving a small border along one long edge. Sprinkle the cinnamon sugar mixture over the butter and gently press it down so the filling stays in place as you roll.
- Roll the dough into a log. Starting from the long edge opposite the clean border, roll the dough into a snug log. Don’t squeeze it too tightly, or the filling may spill out. Pinch the seam gently to seal it.
- Cut the rolls. Use a sharp knife or unflavored dental floss to cut the log into 12 equal pieces. Dental floss can give you neat slices without squashing the dough. Arrange the rolls cut-side up in a greased 23 × 33 cm (9 × 13-inch) baking dish, leaving a little space between them.
- Let the rolls rise again. Cover the dish and leave the rolls to rise for another 30-45 minutes, until they’re puffy and beginning to touch. This second rise helps give them their soft, fluffy texture.
- Preheat the oven. Heat your oven to 180°C (350°F). Once the rolls have risen, uncover the dish and place it on the middle rack.
- Bake until golden. Bake for about 20-25 minutes, until the rolls are lightly golden on top and cooked through in the center. If they brown too quickly, loosely cover the dish with foil for the last few minutes. Try not to overbake them, as that can make the edges dry.
- Make the vanilla glaze. While the rolls bake, whisk the powdered sugar, vanilla extract, and 1 tablespoon of milk in a small bowl. Add a little more milk if needed until the glaze is smooth and thick enough to drizzle.
- Frost and serve. Let the rolls cool for about 5-10 minutes, then drizzle the glaze over the top while they’re still warm. If you’re making cream cheese frosting, beat the cream cheese and butter together until smooth, then mix in the powdered sugar and vanilla. Add a little milk if needed and spread it over the warm rolls.
Tips and Variations
- Check the milk temperature: Warm milk helps the yeast work, but milk that’s too hot can prevent the dough from rising properly. Aim for lukewarm milk, around 38-43°C (100-110°F).
- Give the dough enough time: Rising times vary depending on the room temperature. Look for the dough to double in size rather than relying only on the clock.
- Keep the filling balanced: A generous layer of cinnamon sugar gives you plenty of flavor, but too much butter or filling can leak out and leave the rolls greasy.
- Avoid adding too much flour: The dough should feel soft and a little tacky. Adding lots of extra flour can make the finished rolls heavy instead of fluffy.
- Use dental floss for neat slices: Slide the floss under the log, cross the ends over the top, and pull to cut each roll cleanly.
- Make them extra soft: Avoid baking the rolls until they’re deeply browned. Take them out once they’re lightly golden and cooked through.
- Add chopped nuts: Sprinkle chopped pecans or walnuts over the cinnamon filling before rolling the dough for a little crunch.
- Try a caramel version: Drizzle caramel sauce over the rolls before serving for a richer, sweeter finish.
- Make chocolate cinnamon rolls: Sprinkle mini chocolate chips over the cinnamon filling before rolling the dough. They melt into the swirls as the rolls bake.
- Prepare them the night before: Arrange the shaped rolls in the baking dish, cover tightly, and refrigerate overnight. The next morning, let them sit at room temperature until puffy before baking. If they still look firm and under-risen, give them more time in a warm spot.
- Don’t skip the second rise: This step helps the rolls become light and fluffy. Baking them too soon can leave you with tighter, denser spirals.
How to Store Homemade Cinnamon Rolls
Homemade cinnamon rolls are best served warm on the day they’re baked, but you can save leftovers for later. Once cooled, store them in an airtight container at room temperature for up to 2 days, or refrigerate them for up to 5 days if they’ve been topped with cream cheese frosting.
To reheat, warm an individual roll in the microwave for about 10-20 seconds, checking that it doesn’t get too hot. You can also cover the rolls with foil and warm them in a 150°C (300°F) oven for about 8-10 minutes. A little warmth brings back some of their soft texture.
For longer storage, freeze the cooled rolls in a freezer-safe container for up to 2-3 months. You can freeze them individually so it’s easy to take out just one or two when you want a sweet snack. Thaw them in the refrigerator or at room temperature, then warm them before serving. If possible, add the glaze or frosting after reheating for the freshest finish.
Final Thoughts
Homemade cinnamon rolls take a little more time than quick cookies or muffins, but most of that time is simply waiting for the dough to rise. The hands-on steps are straightforward, and the reward is a tray of soft, fragrant rolls with plenty of cinnamon sugar tucked into every swirl.
If you’re making a list of fun things to bake when you’re bored at home, these cinnamon rolls are a lovely project for a slow weekend. Enjoy them warm with a cup of tea or coffee, try a new filling, or save a few for breakfast the next morning. Once you get comfortable making them, you may find yourself wanting to bake another batch whenever the cinnamon craving hits.
26. Blueberry Muffins
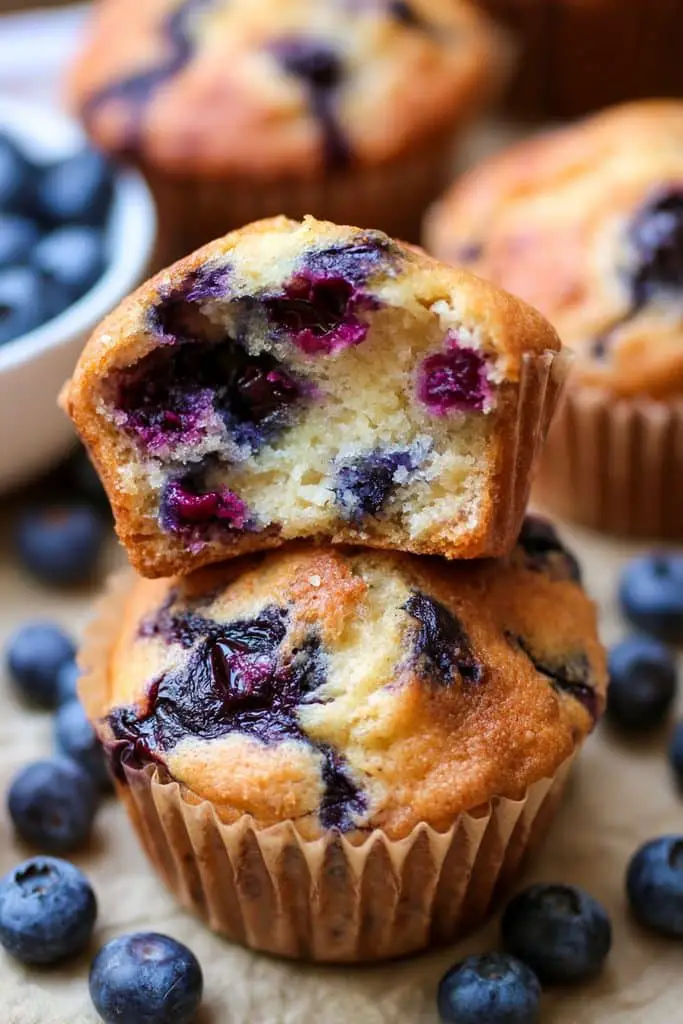
There’s something so lovely about a batch of freshly baked blueberry muffins. They’re soft and fluffy inside, lightly golden on top, and filled with juicy blueberries that burst as they bake. If you’re looking for easy things to bake when you’re bored, these muffins are a great choice because they use simple ingredients and don’t take much effort to make.
I like how versatile blueberry muffins are, too. You can enjoy them for breakfast, have one with your afternoon tea, or serve them as a quick homemade snack when you’re craving something sweet. A little vanilla gives them a lovely flavor, while a touch of lemon zest makes the blueberries taste even brighter.
The best part is that you don’t need a mixer or any special baking skills. Just mix the wet and dry ingredients separately, combine them gently, fold in the blueberries, and let the oven do the rest. Whether you use fresh or frozen blueberries, you’ll end up with a delicious batch that’s hard to resist.
Prep time: 15 minutes
Cook time: 20-25 minutes
Total time: About 40 minutes
Difficulty: Easy
Yield: 12 muffins
Ingredients
- 250 g (2 cups) all-purpose flour
- 150 g (¾ cup) granulated sugar
- 2 teaspoons baking powder
- ¼ teaspoon baking soda
- ½ teaspoon salt
- 2 large eggs, at room temperature
- 120 ml (½ cup) milk
- 120 g (½ cup) plain yogurt or sour cream
- 100 ml (scant ½ cup) neutral vegetable oil
- 2 teaspoons vanilla extract
- 200 g (about 1½ cups) fresh or frozen blueberries
- 1 teaspoon finely grated lemon zest, optional
Optional crunchy topping:
- 1 tablespoon granulated or coarse sugar
Instructions
- Preheat the oven. Heat your oven to 190°C (375°F). Line a 12-cup muffin tin with paper liners or lightly grease each cup with butter or oil.
- Mix the dry ingredients. In a large bowl, whisk together the flour, sugar, baking powder, baking soda, and salt. Make sure the baking powder and baking soda are evenly distributed so the muffins rise properly.
- Combine the wet ingredients. In a separate bowl, whisk the eggs, milk, yogurt, oil, and vanilla extract until smooth. If you’re using lemon zest, add it here. The yogurt helps keep the muffins moist and gives them a tender texture.
- Combine the mixtures. Pour the wet ingredients into the dry ingredients and stir gently with a spatula until just combined. Don’t worry if the batter looks a little lumpy. Overmixing can make muffins dense, so stop once you no longer see large patches of dry flour.
- Prepare the blueberries. If you’re using fresh blueberries, rinse them and dry them thoroughly. If they’re particularly large, you can leave them whole or cut a few in half. Frozen blueberries can go straight into the batter without thawing.
- Fold in the berries. Gently fold the blueberries into the batter, distributing them as evenly as possible without crushing them. If you’re using frozen blueberries, work quickly to prevent the color from streaking too much through the batter.
- Fill the muffin tin. Divide the batter evenly among the 12 muffin cups, filling each about three-quarters full. Sprinkle a little extra sugar over the tops if you’d like a lightly crisp, sweet crust.
- Bake the muffins. Place the tin on the middle rack and bake for about 20-25 minutes, or until the tops are golden and a toothpick inserted into the center of a muffin comes out clean or with a few moist crumbs. Avoid testing directly through a blueberry, as the juice can make the toothpick look wet.
- Let them cool. Leave the muffins in the tin for about 5 minutes before transferring them to a wire rack. Let them cool slightly before eating, since the blueberries can be very hot straight from the oven.
- Serve and enjoy. These muffins are especially good while they’re still a little warm. Serve them on their own or with a little butter for a simple homemade treat.
Tips and Variations
- Don’t overmix the batter: This is one of the most important steps for soft muffins. Stir just until the flour is incorporated, even if the batter isn’t perfectly smooth.
- Use fresh or frozen blueberries: Both work well in this recipe. Frozen berries are especially convenient when fresh blueberries aren’t in season.
- Don’t thaw frozen blueberries: Add them straight from the freezer to keep them from releasing too much juice into the batter.
- Save a few berries for the tops: Press a few blueberries onto each muffin before baking. It gives them a pretty bakery-style look.
- Add lemon flavor: A teaspoon of lemon zest brightens the flavor and pairs beautifully with the blueberries. You can also drizzle a simple lemon glaze over the cooled muffins.
- Make a crunchy topping: Sprinkle coarse sugar over the batter before baking. For a crumb topping, mix 2 tablespoons flour, 2 tablespoons sugar, and 1 tablespoon cold butter until crumbly, then sprinkle it over the muffins.
- Try whole wheat flour: Replace up to half of the all-purpose flour with whole wheat flour. The muffins will have a slightly heartier texture, so avoid replacing all the flour unless you’re adjusting the recipe.
- Use buttermilk: You can replace the milk and yogurt with 240 ml (1 cup) buttermilk for a slightly tangy flavor and tender crumb.
- Add white chocolate chips: Fold in a small handful of white chocolate chips along with the blueberries for a sweeter, dessert-like version.
- Check for doneness carefully: Oven temperatures can vary. If the tops are golden but the centers still look wet, give the muffins a few more minutes.
- Measure the flour properly: Spoon the flour into your measuring cup and level it off instead of packing it down. Too much flour can make the muffins dry.
- Make mini muffins: Divide the batter into a greased or lined mini muffin tin and start checking them after about 10-14 minutes, as the smaller size means they’ll bake faster.
How to Store Blueberry Muffins
Let the muffins cool completely before storing them. Place them in an airtight container lined with a paper towel and keep them at room temperature for up to 2 days. The paper towel helps absorb excess moisture, which can otherwise make the tops sticky.
If you want to keep them fresh for longer, refrigerate them in an airtight container for up to 5 days. Refrigeration can make muffins feel a little firmer, so warm one in the microwave for about 10-15 seconds before serving.
Blueberry muffins also freeze well. Once completely cool, place them in a freezer-safe bag or container and freeze for up to 3 months. Thaw them at room temperature or warm them gently in the oven at 150°C (300°F) for about 8-10 minutes. This is a handy way to keep a homemade snack ready whenever a craving strikes.
Final Thoughts
Blueberry muffins are one of those simple recipes that are easy to come back to again and again. They’re soft, fruity, and sweet without being too rich, and you can make them with ingredients you probably already have at home.
If you’re collecting things to bake when you’re bored, give these muffins a try. Keep them classic with plenty of blueberries, add a little lemon zest, or finish them with a crunchy sugar topping. However you make them, a warm blueberry muffin and a cup of tea make a pretty lovely afternoon treat.
27. Apple Cinnamon Muffins
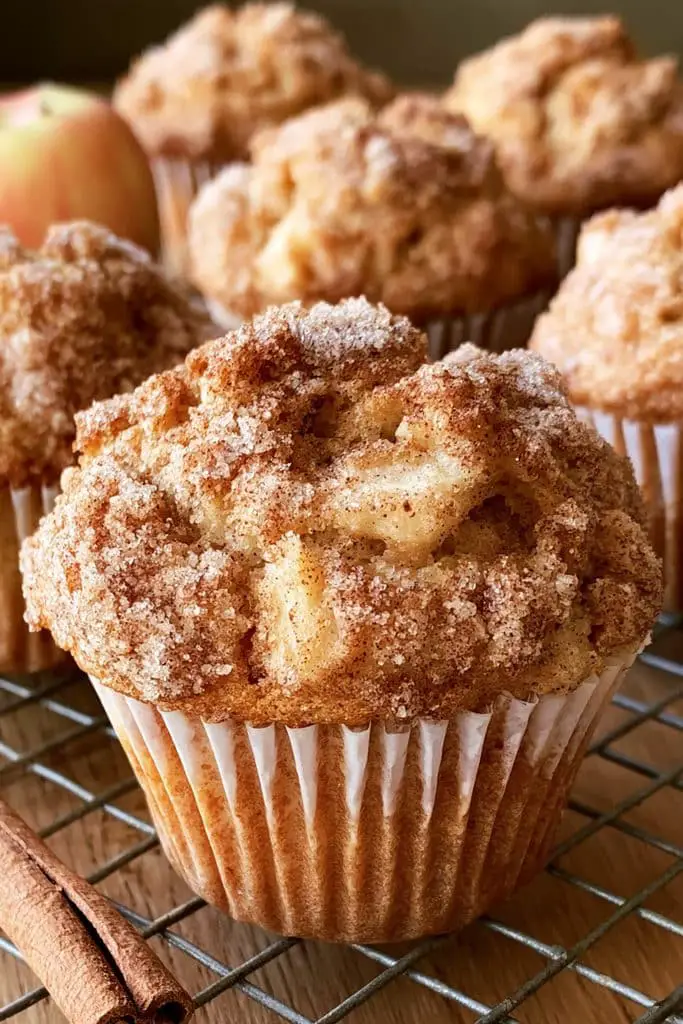
If you love the smell of apples and cinnamon baking together, these apple cinnamon muffins are going to be right up your street. They’re soft, moist, and filled with little pieces of apple, with just enough cinnamon to make every bite feel warm and comforting. When you’re looking for things to bake when you’re bored, this is a lovely recipe to try, especially on a quiet afternoon when you want something homemade.
What I like about these muffins is that they don’t need any fancy ingredients or complicated steps. The chopped apples add natural sweetness and moisture, while the cinnamon gives them that cozy flavor we all love. You can enjoy them plain, sprinkle a little sugar on top before baking, or add a simple glaze if you’re in the mood for something sweeter.
They’re great for breakfast, afternoon tea, or a quick snack when you’re craving something sweet. You can use your favorite apples, too. Tart apples give the muffins a nice contrast to the sugar, while sweeter varieties make them taste a little more like apple cake.
Prep time: 15 minutes
Cook time: 20-25 minutes
Total time: About 40 minutes
Difficulty: Easy
Yield: 12 muffins
Ingredients
For the muffins:
- 250 g (2 cups) all-purpose flour
- 150 g (¾ cup) granulated sugar
- 2 teaspoons baking powder
- ½ teaspoon baking soda
- ½ teaspoon salt
- 1½ teaspoons ground cinnamon
- ¼ teaspoon ground nutmeg, optional
- 2 large eggs, at room temperature
- 120 ml (½ cup) milk
- 120 g (½ cup) plain yogurt or sour cream
- 100 ml (scant ½ cup) neutral vegetable oil
- 1 teaspoon vanilla extract
- 2 medium apples, peeled if desired, cored, and diced into small pieces
Optional cinnamon sugar topping:
- 1 tablespoon granulated sugar
- ¼ teaspoon ground cinnamon
Optional vanilla glaze:
- 60 g (½ cup) powdered sugar
- 1-2 teaspoons milk
- ¼ teaspoon vanilla extract
Instructions
- Preheat the oven. Heat your oven to 190°C (375°F). Line a 12-cup muffin tin with paper liners or lightly grease the cups with butter or oil.
- Prepare the apples. Wash and core the apples, then cut them into small, bite-sized cubes. You can peel them if you prefer a softer texture, but leaving the peel on adds a little extra texture and saves time. Try to keep the pieces similar in size so they soften evenly while baking.
- Mix the dry ingredients. In a large bowl, whisk together the flour, sugar, baking powder, baking soda, salt, cinnamon, and optional nutmeg. Mixing these ingredients first helps distribute the spices and raising agents throughout the flour.
- Combine the wet ingredients. In another bowl, whisk the eggs, milk, yogurt, oil, and vanilla extract until smooth. The yogurt helps keep the muffins moist and gives them a tender crumb.
- Make the batter. Pour the wet ingredients into the dry ingredients and stir gently with a spatula until just combined. A few small lumps are fine, so don’t keep mixing until the batter is completely smooth. Overmixing can make the muffins tough.
- Fold in the apples. Add the diced apples and gently fold them through the batter. Make sure they’re spread evenly so every muffin gets plenty of apple pieces.
- Fill the muffin tin. Divide the batter evenly among the 12 muffin cups, filling each about three-quarters full. If you’re using the cinnamon sugar topping, mix the sugar and cinnamon in a small bowl and sprinkle a little over each muffin.
- Bake until golden. Place the muffin tin on the middle rack and bake for 20-25 minutes. The muffins are ready when the tops are lightly golden and a toothpick inserted into the center comes out clean or with a few moist crumbs. Try to avoid testing directly through a piece of apple, as it can leave moisture on the toothpick.
- Cool the muffins. Let the muffins rest in the tin for about 5 minutes, then transfer them to a wire rack. Allow them to cool slightly before eating, since the apple pieces will be very hot straight from the oven.
- Add the optional glaze. If you want a sweeter finish, whisk the powdered sugar, milk, and vanilla until smooth. Add the milk a little at a time until the glaze reaches a drizzle-friendly consistency. Once the muffins have cooled, drizzle it over the tops.
- Serve and enjoy. These muffins are delicious slightly warm, when the apples are soft and the cinnamon flavor is at its best. Serve them with tea, coffee, or a glass of milk for an easy homemade treat.
Tips and Variations
- Choose the right apples: Granny Smith apples add a pleasant tartness, while Gala, Fuji, or Honeycrisp apples give the muffins a sweeter flavor. Use whichever variety you enjoy most.
- Cut the apples into small pieces: Large chunks can make the muffins harder to slice or eat and may stay firmer in the middle. Small, evenly sized cubes work best.
- Don’t overmix the batter: Stir only until the flour disappears. This helps keep the muffins soft instead of dense.
- Add chopped nuts: Fold in about 50 g (½ cup) of chopped walnuts or pecans for a little crunch. They pair especially well with the apple and cinnamon.
- Make them extra spiced: Add a pinch of ground ginger or allspice along with the cinnamon for a deeper, warmer flavor.
- Try a crumb topping: Mix 30 g (¼ cup) flour, 25 g (2 tablespoons) brown sugar, ½ teaspoon cinnamon, and 15 g (1 tablespoon) cold butter until crumbly. Sprinkle it over the muffins before baking for a sweet, crunchy top.
- Use brown sugar: Replace some or all of the granulated sugar with brown sugar for a slightly richer, caramel-like flavor.
- Add raisins: Fold in a small handful of raisins if you like a little extra sweetness and chewiness.
- Make them dairy-free: Use an unsweetened plant-based milk and a suitable dairy-free yogurt. Check that your other ingredients are dairy-free, too.
- Don’t skip the cooling time: The muffins are delicate straight from the oven. Letting them rest briefly makes them easier to remove from the tin without breaking.
- Make mini muffins: Divide the batter into a mini muffin tin and begin checking for doneness after about 10-14 minutes. The exact baking time will depend on the size of your muffin cups.
- Use fresh apples rather than applesauce: This recipe is designed for diced apples, which give the muffins little pockets of fruit. Replacing them with applesauce would change the moisture balance and texture.
How to Store Apple Cinnamon Muffins
Because these muffins contain fresh apple pieces, it’s best to let them cool completely and store them in an airtight container. Keep them at room temperature for up to 2 days in a cool kitchen. If your kitchen is particularly warm or humid, refrigerate them instead.
For refrigerated storage, keep the muffins in an airtight container for up to 5 days. They may become a little firmer in the fridge, but warming one in the microwave for about 10-15 seconds usually brings back some of that soft texture.
You can also freeze the muffins for up to 3 months. Once they’re completely cool, place them in a freezer-safe bag or container, separating layers with parchment paper if needed. Thaw them at room temperature or warm them gently in the oven at 150°C (300°F) for about 8-10 minutes.
If you’ve added the vanilla glaze, allow it to set before storing the muffins. For the freshest look and texture, you can also leave the glaze off until you’re ready to serve them.
Final Thoughts
Apple cinnamon muffins are a simple way to turn a couple of everyday apples into something warm, sweet, and homemade. The cinnamon makes them smell wonderful as they bake, and the soft apple pieces give each muffin a lovely texture without needing a complicated filling.
If you’re searching for fun things to bake when you’re bored at home, these muffins are an easy place to start. Enjoy them plain, add a crunchy topping, or finish them with a little vanilla glaze. They’re comforting, easy to share, and just as welcome at breakfast as they are with an afternoon cup of tea.
28. Carrot Cake
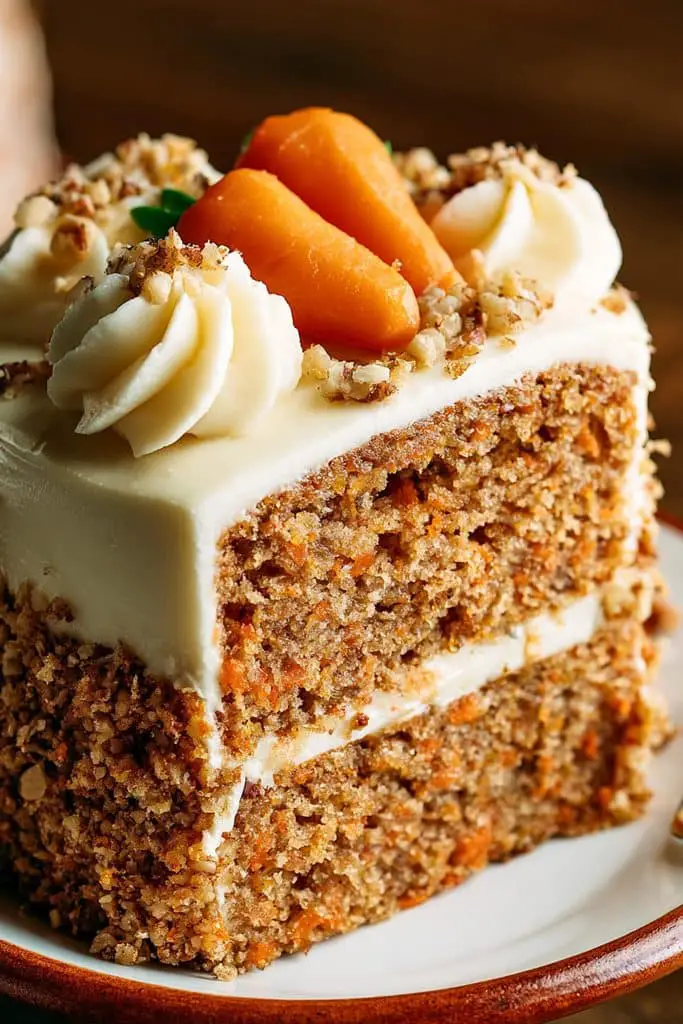
Carrot cake is one of those desserts that surprises people with just how delicious it can be. It’s soft, moist, lightly spiced, and full of finely grated carrots that blend right into the cake. Add a thick layer of cream cheese frosting, and you’ve got a dessert that’s hard to resist. If you’re looking for things to bake when you’re bored, this classic cake is a lovely project to try at home.
What I like about carrot cake is that it feels a little special without being overly complicated. You don’t need a mixer to make the cake batter, and the ingredients are fairly simple. The carrots keep the cake moist, while cinnamon adds warmth and flavor. You can also add walnuts or raisins if you enjoy a little crunch or extra sweetness in every slice.
This recipe makes a two-layer carrot cake with cream cheese frosting, making it perfect for birthdays, family gatherings, or simply when you’re craving something homemade. If you’d rather keep things casual, you can bake the batter in a single square cake pan and enjoy it without worrying about layers.
Prep time: 25 minutes
Cook time: 30-35 minutes
Cooling time: 1 hour
Total time: About 2 hours
Difficulty: Easy to moderate
Yield: 10-12 slices
Ingredients
For the carrot cake:
- 250 g (2 cups) all-purpose flour
- 200 g (1 cup) granulated sugar
- 100 g (½ cup) packed brown sugar
- 2 teaspoons baking powder
- 1 teaspoon baking soda
- 1½ teaspoons ground cinnamon
- ¼ teaspoon ground nutmeg, optional
- ½ teaspoon salt
- 4 large eggs, at room temperature
- 240 ml (1 cup) neutral vegetable oil
- 2 teaspoons vanilla extract
- 300 g (about 3 cups) finely grated carrots
- 80 g (about ¾ cup) chopped walnuts or pecans, optional
- 60 g (½ cup) raisins, optional
For the cream cheese frosting:
- 225 g (8 oz) full-fat cream cheese, softened but still cool
- 115 g (½ cup) unsalted butter, softened
- 240-300 g (2-2½ cups) powdered sugar, sifted
- 1 teaspoon vanilla extract
- A small pinch of salt, optional
For decoration, optional:
- A few chopped walnuts
- A light sprinkle of ground cinnamon
- Small carrot-shaped decorations, if desired
Instructions
- Preheat the oven. Heat your oven to 180°C (350°F). Grease two 20 cm (8-inch) round cake pans and line the bottoms with parchment paper. This makes it much easier to remove the cakes once they’ve cooled.
- Prepare the carrots. Peel and finely grate the carrots using a box grater. Fine shreds blend into the batter more easily and help create a tender cake. Avoid using large chunks, as they can leave the texture uneven.
- Mix the dry ingredients. In a large bowl, whisk together the flour, granulated sugar, brown sugar, baking powder, baking soda, cinnamon, nutmeg, and salt. Break up any lumps of brown sugar so the mixture is evenly combined.
- Combine the wet ingredients. In a separate bowl, whisk the eggs, vegetable oil, and vanilla extract until smooth. There’s no need to beat the eggs for a long time; just make sure everything is well combined.
- Make the batter. Pour the wet mixture into the dry ingredients and stir gently until you have a thick, even batter. Fold in the grated carrots, followed by the optional walnuts or raisins. Stop mixing once everything is evenly distributed.
- Divide between the pans. Pour the batter evenly into the prepared cake pans. Give each pan a gentle tap on the counter to release any large air pockets and help the batter settle.
- Bake the cakes. Place the pans on the middle rack and bake for 30-35 minutes. Check the centers with a toothpick; it should come out clean or with a few moist crumbs, rather than wet batter. If one cake is ready before the other, remove it first.
- Cool completely. Let the cakes rest in their pans for about 10 minutes before turning them out onto a wire rack. Remove the parchment paper and allow the layers to cool completely before frosting. Frosting warm cake will cause the cream cheese mixture to melt.
- Make the frosting. Beat the softened butter and cream cheese together until smooth and creamy. Add the powdered sugar gradually, then mix in the vanilla extract and optional pinch of salt. Start with 240 g of powdered sugar and add more if you’d like a sweeter or firmer frosting.
- Level the cake layers if needed. If the tops have domed, use a serrated knife to trim them carefully once they’re completely cool. This helps the layers sit neatly on top of each other.
- Assemble the cake. Place one cake layer on a serving plate and spread a generous layer of cream cheese frosting over it. Set the second layer on top, then cover the top and sides with the remaining frosting. You can make the finish smooth or leave soft swirls for a more homemade look.
- Decorate and serve. Sprinkle chopped walnuts over the top or add a light dusting of cinnamon. Chill the cake briefly if the frosting feels too soft, then slice and serve.
Tips and Variations
- Grate the carrots finely: Finely grated carrots soften during baking and help keep the cake moist. Large shreds may remain more noticeable in the finished cake.
- Measure the flour carefully: Spoon the flour into your measuring cup and level it off instead of packing it down. Too much flour can make the cake dry.
- Don’t squeeze the carrots: The moisture in freshly grated carrots helps create the cake’s soft texture, so add them directly to the batter without squeezing them dry.
- Use room-temperature eggs: They combine more easily with the oil and help the batter mix evenly.
- Don’t overmix: Once the flour is incorporated, fold in the carrots and optional extras gently. Overmixing can make the cake heavier.
- Add walnuts or pecans: Chopped nuts provide a lovely crunch and pair well with the cinnamon and carrots. Toast them lightly beforehand if you want a deeper nutty flavor, then let them cool before adding.
- Try a little ginger: A small pinch of ground ginger or allspice adds another layer of warmth without overpowering the cake.
- Make it with pineapple: You can add a small amount of well-drained crushed pineapple for a fruity variation, but avoid adding too much extra liquid because it can affect the cake’s texture.
- Make a simple carrot loaf: Instead of using two round pans, bake the batter in a greased 23 × 13 cm (9 × 5-inch) loaf pan. It will need longer to bake, so start checking around 45 minutes and continue until a toothpick comes out clean.
- Turn it into cupcakes: Divide the batter between lined muffin cups, filling each about two-thirds full. Bake at 180°C (350°F) for roughly 18-22 minutes, checking for doneness.
- Keep the frosting cool: Cream cheese frosting can become soft in a warm kitchen. If it starts to lose its shape, refrigerate it briefly before spreading.
- Let the cake cool completely: This is worth the wait. A warm cake can break apart during assembly and cause the frosting to slide off.
How to Store Carrot Cake
Since this carrot cake has cream cheese frosting, store it in the refrigerator. Place it in an airtight cake container or cover it well to keep it from drying out or absorbing other food odors. It will generally keep for up to 5 days in the fridge.
For the best texture, take the cake out of the refrigerator about 20-30 minutes before serving. This gives the cake time to soften slightly and makes the frosting creamier. If your kitchen is particularly warm, don’t leave the cake sitting out for extended periods.
You can also freeze the unfrosted cake layers. Let them cool completely, wrap each layer tightly in plastic wrap, and place them in a freezer-safe bag or container for up to 3 months. Thaw them in the refrigerator or at room temperature while still wrapped, then frost once fully thawed. You can freeze individual frosted slices, too, although the frosting may change texture slightly after thawing.
Final Thoughts
Carrot cake is a wonderful choice when you want to bake something that feels homemade and a little indulgent. The cake itself is simple to prepare, the carrots help keep it moist, and the cream cheese frosting adds a tangy sweetness that works beautifully with the warm spices.
If you’re collecting good things to bake when you’re bored, this recipe is worth keeping on hand. Make it as a layered celebration cake, bake it in a loaf pan for a more casual treat, or turn it into cupcakes for sharing. However you serve it, a slice of homemade carrot cake is a lovely way to make an ordinary afternoon feel special.
29. Coconut Macaroons
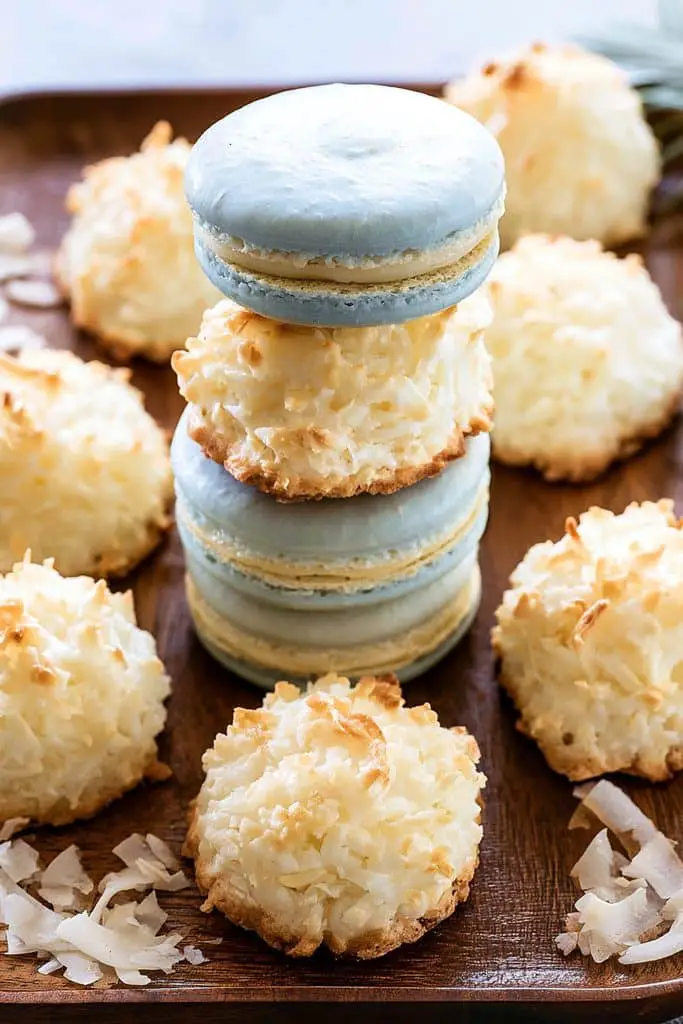
If you love coconut, these little coconut macaroons are definitely worth trying. They’re sweet, chewy in the middle, and lightly golden around the edges, with plenty of coconut flavor in every bite. They’re also one of the easiest things to bake when you’re bored because you only need a handful of ingredients and very little preparation.
What makes coconut macaroons so appealing is their simple texture. The outside gets a little crisp as it bakes, while the inside stays soft and moist. You can enjoy them plain, dip the bottoms in melted chocolate, or drizzle a little chocolate over the tops for a bakery-style finish.
These aren’t the same as French macarons, which are made with almond flour and meringue. Coconut macaroons are much simpler and more forgiving, making them a great choice if you want a sweet homemade treat without spending hours in the kitchen. They’re lovely with a cup of tea or coffee, and they also make a nice addition to a dessert platter.
Prep time: 10 minutes
Cook time: 20-25 minutes
Total time: About 35 minutes
Difficulty: Easy
Yield: About 18-20 macaroons
Ingredients
- 200 g (about 2⅔ cups) unsweetened shredded coconut
- 200 g (about ⅔ cup) sweetened condensed milk
- 2 large egg whites
- 1 teaspoon vanilla extract
- ¼ teaspoon salt
- 100 g (about 3½ oz) dark or semi-sweet chocolate, optional, for dipping or drizzling
Note: This recipe uses unsweetened shredded coconut because the condensed milk already adds plenty of sweetness. If you’re using sweetened coconut, the macaroons will be sweeter, so you may want to reduce the amount of condensed milk slightly and check the mixture’s consistency.
Instructions
- Preheat the oven. Heat your oven to 160°C (325°F). Line a baking sheet with parchment paper to prevent the macaroons from sticking. If you have more than one tray, prepare both so you can work in batches if needed.
- Combine the coconut and condensed milk. In a large bowl, stir together the shredded coconut and sweetened condensed milk until the coconut is evenly coated. The mixture should be sticky and hold together when pressed.
- Add the vanilla and salt. Stir in the vanilla extract and salt. These small additions help balance the sweetness and bring out the coconut flavor.
- Whip the egg whites. Place the egg whites in a clean, dry bowl and beat them with a hand mixer until they form stiff peaks. When you lift the beaters, the peaks should hold their shape rather than immediately falling over.
- Fold everything together. Add the whipped egg whites to the coconut mixture in two additions. Gently fold them in with a spatula, trying to keep as much air in the mixture as possible. The final mixture should be moist and fluffy but still sticky enough to shape.
- Shape the macaroons. Use a tablespoon or small cookie scoop to portion the mixture onto the prepared baking sheet. Leave about 2-3 cm (1 inch) between each mound. Gently press the mixture together with your fingers or the back of a spoon so the macaroons hold their shape.
- Bake until golden. Place the tray on the middle rack and bake for 20-25 minutes, until the edges and tips of the coconut are lightly golden. If you prefer a softer, paler macaroon, start checking around 18 minutes. Keep an eye on them toward the end because coconut can brown quickly.
- Let them cool. Leave the macaroons on the baking sheet for about 5-10 minutes before transferring them to a wire rack. They’re delicate while hot, so giving them time to firm up helps prevent them from breaking.
- Melt the chocolate, if using. Chop the chocolate into small pieces and microwave it in 20-second intervals, stirring between each interval until smooth. You can also melt it in a heatproof bowl over gently simmering water. Keep all water away from the chocolate so it doesn’t seize.
- Dip or drizzle. Once the macaroons have cooled completely, dip their bottoms into the melted chocolate or drizzle chocolate over the tops with a spoon. Place them back on the parchment-lined tray.
- Let the chocolate set. Leave the macaroons at room temperature until the chocolate firms up, or refrigerate them for about 10-15 minutes to speed things along.
- Serve and enjoy. Arrange the macaroons on a plate and serve them with tea, coffee, or a glass of milk. Their chewy centers and toasted coconut edges make them delicious even without the chocolate.
Tips and Variations
- Choose the right coconut: Shredded coconut gives these macaroons their classic chewy texture. Very fine desiccated coconut may absorb moisture differently, so the mixture might need slight adjustment.
- Don’t skip whipping the egg whites: In this recipe, the whipped whites help make the macaroons lighter and hold the coconut mixture together. Use a clean bowl with no traces of grease for the best results.
- Fold gently: Stirring too vigorously can knock the air out of the egg whites. Fold until everything is combined rather than beating the mixture.
- Keep the portions similar: Using a cookie scoop helps the macaroons bake evenly. Larger mounds may need a few extra minutes in the oven.
- Watch the color: Coconut can go from golden to too dark quite quickly. Take the tray out once the edges are nicely toasted, even if the centers still look fairly pale.
- Add a little citrus: A teaspoon of finely grated lemon or orange zest gives the macaroons a fresh flavor that works beautifully with coconut.
- Make chocolate coconut macaroons: Stir 1-2 tablespoons of cocoa powder into the coconut mixture for a chocolate-flavored version. If the mixture becomes too dry, add a small amount of condensed milk until it holds together.
- Try almond coconut macaroons: Add a small handful of finely chopped almonds or a few drops of almond extract for a flavor similar to coconut-almond candy.
- Use a chocolate coating: Dip the bottoms in dark chocolate for a richer finish that balances the sweetness. Let the chocolate set fully before storing.
- Make them festive: Sprinkle a little extra coconut, finely chopped nuts, or colorful sprinkles over the chocolate while it’s still wet.
- Avoid overbaking: The macaroons should be golden around the edges but still slightly soft inside. They’ll firm up more as they cool.
- Check the ingredients if baking for someone else: Coconut macaroons contain egg and may contain other allergens depending on the chocolate and coconut packaging.
How to Store Coconut Macaroons
Once the macaroons have cooled completely and any chocolate coating has set, place them in an airtight container. They can usually be stored at room temperature for about 3-4 days in a cool, dry place. Separate layers with parchment paper if you’re stacking them to keep the chocolate from sticking.
If your kitchen is hot or humid, refrigerate the macaroons in an airtight container for up to a week. Let them sit at room temperature for a few minutes before serving so the centers soften slightly.
Coconut macaroons can also be frozen for up to 2 months. Arrange them in a single layer until firm, then transfer them to a freezer-safe container with parchment between the layers. Thaw them at room temperature before serving. If you’ve dipped them in chocolate, keep them cool while thawing to reduce condensation on the coating.
Final Thoughts
Coconut macaroons are proof that you don’t need a long ingredient list or complicated baking techniques to make something delicious. With their chewy centers, golden coconut edges, and optional chocolate coating, they’re a lovely little treat to make whenever you’re in the mood for something sweet.
If you’re looking for easy things to bake when you’re bored at home, give these a try. They’re simple enough for a beginner, easy to customize, and just right for sharing with friends or keeping in a container for a little afternoon treat.
30. Raspberry White Chocolate Scones
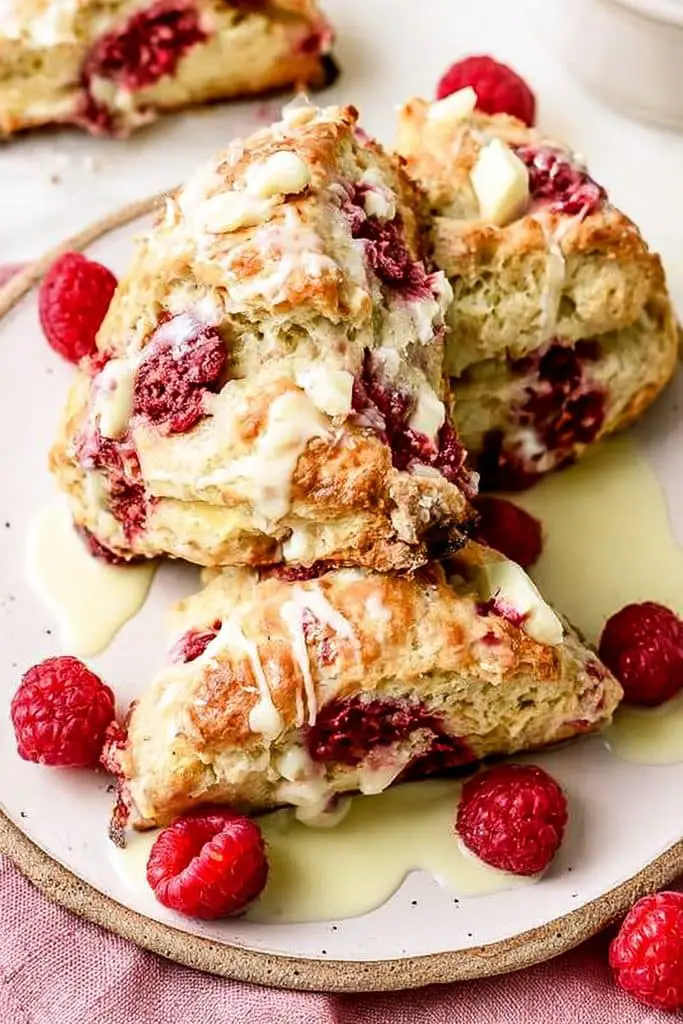
If you’re in the mood for something sweet that feels a little fancy but is still easy to make at home, these raspberry white chocolate scones are a lovely choice. They’re buttery, lightly crisp on the outside, and soft and tender in the middle, with juicy raspberries and little pockets of creamy white chocolate in every bite. The combination of tart fruit and sweet chocolate makes them especially delicious.
I love that scones don’t require much fuss. You don’t need yeast, there’s no dough to knead, and you can have them ready for the oven in about 15 minutes. The trick is to keep the butter cold and handle the dough gently, which helps create that crumbly, bakery-style texture.
These scones are perfect when you’re craving something sweet with your afternoon tea or coffee. They’re also a fun baking idea when you’re bored at home and want to try something a little different from cookies or muffins. Serve them warm from the oven, or add a simple vanilla glaze if you want to make them feel extra special.
Prep time: 15 minutes
Cook time: 18-22 minutes
Total time: About 40 minutes
Difficulty: Easy
Yield: 8 scones
Ingredients
For the scones:
- 300 g (2½ cups) all-purpose flour
- 65 g (⅓ cup) granulated sugar
- 1 tablespoon baking powder
- ½ teaspoon salt
- 115 g (½ cup) cold unsalted butter, cut into small cubes
- 1 large egg
- 120 ml (½ cup) cold heavy cream, plus extra for brushing
- 1 teaspoon vanilla extract
- 125 g (about 1 cup) raspberries, fresh or frozen
- 100 g (about ⅔ cup) white chocolate chips or chopped white chocolate
- 1 teaspoon finely grated lemon zest, optional
Optional vanilla glaze:
- 60 g (½ cup) powdered sugar
- 1-2 teaspoons milk or cream
- ¼ teaspoon vanilla extract
Instructions
- Preheat the oven. Heat your oven to 200°C (400°F). Line a baking sheet with parchment paper and set it aside.
- Mix the dry ingredients. In a large bowl, whisk together the flour, sugar, baking powder, and salt. If you’re using lemon zest, add it now for a little fresh flavor.
- Cut in the cold butter. Add the cold butter cubes to the flour mixture. Use your fingertips, a pastry cutter, or two forks to work the butter into the flour until the mixture resembles coarse crumbs, with some small, pea-sized pieces of butter remaining. Don’t worry about making it perfectly uniform; those little pieces help create a tender, flaky texture.
- Combine the wet ingredients. In a separate bowl, whisk together the egg, cold cream, and vanilla extract until smooth.
- Bring the dough together. Pour the wet ingredients into the flour and butter mixture. Stir gently with a fork or spatula until the dough starts to come together. It should look a little shaggy rather than smooth. If it’s very dry and won’t hold together when pressed, add a teaspoon of cream at a time.
- Add the raspberries and chocolate. Gently fold in the raspberries and white chocolate. Fresh raspberries can break apart easily, so use a light hand. If you’re using frozen raspberries, add them straight from the freezer to help them hold their shape.
- Shape the dough. Turn the dough onto a lightly floured surface and gently bring it together with your hands. Pat it into a round about 2-3 cm (¾-1¼ inches) thick. Avoid kneading it like bread dough, as too much handling can make the scones tough.
- Cut into wedges. Use a sharp knife or bench scraper to cut the round into 8 wedges. If the dough feels very soft or warm, place it in the refrigerator for about 10-15 minutes before baking.
- Arrange and brush. Transfer the wedges to the prepared baking sheet, leaving space between them. Lightly brush the tops with a little cream to help them brown in the oven.
- Bake the scones. Bake for 18-22 minutes, until the tops are lightly golden and the edges look set. The raspberries will release some juice as they bake, so don’t worry if you see a little color around them.
- Let them cool slightly. Leave the scones on the baking sheet for about 5 minutes before transferring them to a wire rack. White chocolate can be very hot straight from the oven, so give them a few minutes before taking a bite.
- Make the optional glaze. Whisk the powdered sugar, vanilla, and enough milk or cream to make a thick but pourable glaze. Once the scones have cooled slightly, drizzle it over the tops.
- Serve warm. Enjoy the scones while they’re still a little warm, when the white chocolate is soft and the raspberry flavor really comes through. They’re delicious on their own or with a cup of tea or coffee.
Tips and Variations
- Keep the butter cold: Cold butter is one of the secrets to tender scones. If it starts to soften while you’re working, chill the mixture briefly before shaping the dough.
- Handle the dough gently: Scone dough shouldn’t be kneaded until smooth. Bring it together just enough to shape it, and avoid adding too much extra flour.
- Use fresh or frozen raspberries: Both work well. Frozen raspberries are easier to handle when added straight from the freezer, while fresh ones may give you more distinct pieces of fruit.
- Don’t overmix the berries: Raspberries are delicate, and too much stirring can turn the dough pink and make it wetter. Fold them in as gently as possible.
- Chop the white chocolate: If you don’t have white chocolate chips, chop a bar into small pieces. The irregular pieces create lovely little pockets of melted chocolate.
- Try lemon and raspberry: Lemon zest adds a fresh, slightly tangy note that pairs beautifully with both raspberries and white chocolate.
- Add a little almond flavor: Replace the vanilla with a small amount of almond extract, or add a few sliced almonds to the top before baking.
- Make them less sweet: Skip the glaze and use a good-quality white chocolate that isn’t overly sweet. The tart raspberries help balance the flavor.
- Make smaller scones: Cut the dough into 12 smaller wedges instead of 8. Start checking them after about 12-16 minutes, as smaller scones bake faster.
- Chill before baking if needed: If the dough becomes sticky or the butter starts to melt, refrigerate the shaped scones for 10-15 minutes. This helps them hold their shape.
- Don’t expect the dough to look perfect: The dough should be slightly rough and may have a few cracks around the edges. That’s completely fine and helps keep the finished scones tender.
- Watch the bottoms: White chocolate can melt and become quite dark where it touches the hot tray. Parchment paper helps prevent sticking and makes cleanup easier.
How to Store Raspberry White Chocolate Scones
These scones taste best on the day they’re baked, especially when the centers are still soft and the white chocolate is slightly warm. Once they’ve cooled completely, store them in an airtight container at room temperature for up to 2 days.
If you need to keep them longer, refrigerate them for up to 4-5 days. The texture may become a little firmer, but you can warm them in a 160°C (325°F) oven for about 5-8 minutes to freshen them up. If you’ve added glaze, let it set before stacking the scones.
You can also freeze baked scones for up to 2 months. Let them cool completely, wrap them individually, and place them in a freezer-safe container. Thaw at room temperature and warm briefly in the oven before serving.
For an even fresher result, freeze the unbaked wedges on a tray until firm, then transfer them to a freezer-safe bag. Bake from frozen at 200°C (400°F), adding a few extra minutes to the baking time and checking that the centers are cooked through.
Final Thoughts
Raspberry white chocolate scones are a lovely change from the usual cookies and muffins. The buttery dough, tart raspberries, and sweet white chocolate make a delicious combination, and the recipe is simple enough to prepare without much baking experience.
If you’re collecting fun things to bake when you’re bored at home, these scones are well worth trying. Serve them warm for an afternoon treat, make a batch for a weekend breakfast, or drizzle them with vanilla glaze when you want something a little sweeter. They’re the kind of homemade bake that looks impressive without requiring a lot of extra work.
31. Chocolate Babka
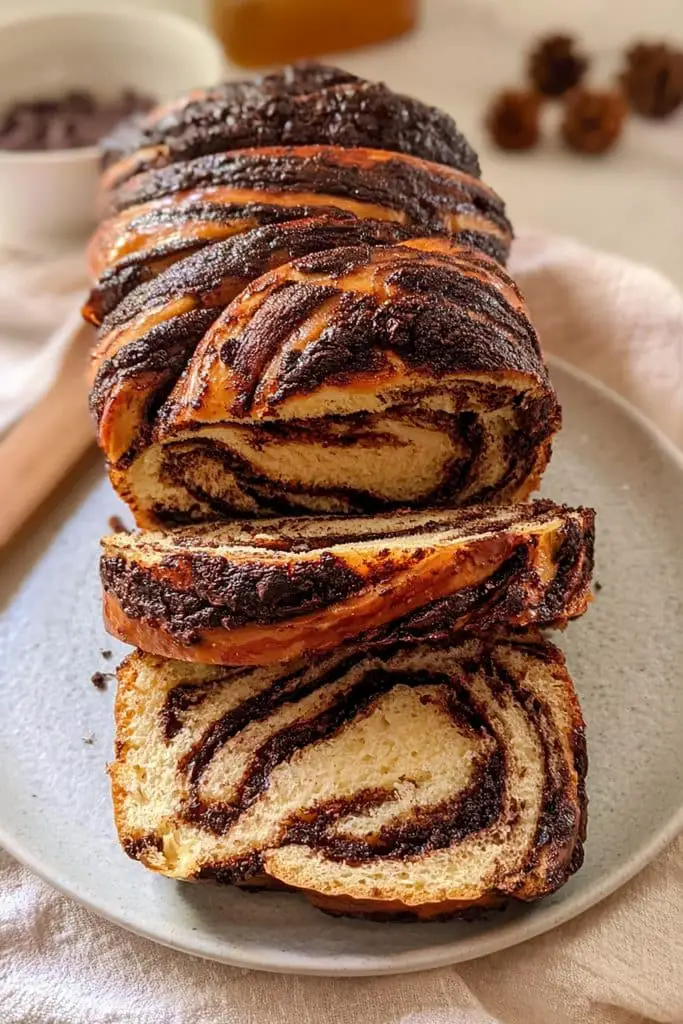
If you’re looking for something a little more special to bake when you’re bored, chocolate babka is a wonderful recipe to try. It’s a soft, buttery, sweet bread filled with rich chocolate and twisted into beautiful swirls. When you slice into it, you get layers of tender bread and chocolate in every piece, making it just as lovely to look at as it is to eat.
I’ll be honest, chocolate babka takes a little more time than cookies or muffins because the dough needs time to rise. But the process is easier than it looks, and you don’t need any fancy baking equipment. Once you get the hang of rolling, filling, and twisting the dough, it becomes a really satisfying bake.
This recipe is perfect for a slow weekend afternoon when you want to spend a little extra time in the kitchen. Enjoy a slice with coffee, serve it for breakfast, or warm it slightly for a chocolatey treat whenever you’re craving something sweet.
Prep time: 35 minutes
Rise time: 2-2½ hours
Cook time: 35-40 minutes
Total time: About 3½ hours
Difficulty: Intermediate
Yield: 1 loaf, about 10-12 slices
Ingredients
For the dough:
- 375 g (3 cups) all-purpose flour, plus a little extra for dusting
- 50 g (¼ cup) granulated sugar
- 2¼ teaspoons instant yeast (1 standard packet)
- ½ teaspoon salt
- 2 large eggs, at room temperature
- 120 ml (½ cup) warm milk, not hot
- 1 teaspoon vanilla extract
- 85 g (6 tablespoons) unsalted butter, softened and cut into pieces
For the chocolate filling:
- 115 g (4 oz) semisweet or dark chocolate, chopped
- 60 g (¼ cup) unsalted butter
- 30 g (¼ cup) powdered sugar
- 20 g (¼ cup) unsweetened cocoa powder
- 1 pinch of salt
For the sugar syrup:
- 50 g (¼ cup) granulated sugar
- 60 ml (¼ cup) water
Instructions
- Mix the dough ingredients. In a large mixing bowl, combine the flour, sugar, instant yeast, and salt. Add the eggs, warm milk, and vanilla extract. Mix with a wooden spoon or the dough hook of a stand mixer until a rough dough forms.
- Knead the dough. Knead for about 5 minutes in a stand mixer on low speed, or 8-10 minutes by hand. The dough should begin to look smoother, although it may still feel slightly sticky.
- Add the butter. Add the softened butter a little at a time, kneading after each addition until it’s incorporated. Continue kneading until the dough is soft, elastic, and smooth. It may feel a bit sticky, but try not to add too much extra flour or the babka can turn out dense.
- Let the dough rise. Place the dough in a lightly greased bowl and cover it with a clean kitchen towel or plastic wrap. Leave it in a warm spot for about 1½-2 hours, or until it has roughly doubled in size. The exact time will depend on how warm your kitchen is.
- Prepare the chocolate filling. While the dough rises, place the chopped chocolate and butter in a heatproof bowl. Melt them together in short bursts in the microwave, stirring between each burst, or use a heatproof bowl over a pan of gently simmering water. Let the mixture cool slightly, then stir in the powdered sugar, cocoa powder, and salt until smooth and spreadable.
- Roll out the dough. Once the dough has risen, transfer it to a lightly floured surface. Roll it into a rectangle about 30 x 40 cm (12 x 16 inches), with one of the longer sides facing you. Try to keep the thickness even so the loaf rolls up neatly.
- Spread the chocolate filling. Spread the cooled chocolate mixture over the dough, leaving a small border around the edges. If the filling is too warm, it may soften the dough and make it harder to handle, so let it cool until it’s spreadable but not runny.
- Roll into a log. Starting from one of the long sides, roll the dough up tightly into a log. Pinch the seam gently to seal it. If the dough feels very soft, place the log in the refrigerator for 10-15 minutes to make the next step easier.
- Cut and twist the dough. Using a sharp knife, cut the log lengthwise down the middle to expose the chocolate layers. Turn the two halves so the cut sides face upward, then cross one half over the other, keeping the chocolate sides facing up as much as possible. Pinch the ends together to hold the twist in place.
- Place the babka in the loaf pan. Grease a 9 x 5-inch (23 x 13 cm) loaf pan or line it with parchment paper. Carefully transfer the twisted dough into the pan, tucking the ends underneath if needed.
- Let it rise again. Cover the loaf loosely and leave it to rise for another 45-60 minutes, until it looks puffy. It doesn’t always double in size during this second rise, so look for a noticeable increase in volume.
- Preheat the oven. Near the end of the second rise, preheat your oven to 175°C (350°F).
- Bake the babka. Bake for 35-40 minutes, until the top is deeply golden and the loaf is cooked through. If the top starts browning too quickly, loosely cover it with foil for the final part of baking. The center should be fully baked rather than doughy.
- Make the sugar syrup. While the babka bakes, combine the sugar and water in a small saucepan. Bring to a gentle simmer, stirring until the sugar dissolves. Remove from the heat.
- Brush with syrup. As soon as the babka comes out of the oven, brush the warm sugar syrup over the top. It might seem like a lot of syrup, but it helps keep the bread moist and gives it a lovely shine.
- Cool before slicing. Let the babka rest in the pan for about 15 minutes, then carefully transfer it to a wire rack. Allow it to cool further before slicing so the chocolate layers have time to settle. It’s tempting to cut into it right away, but a little patience makes neater slices.
Tips and Variations
- Check your milk temperature: The milk should feel warm, not hot. Very hot milk can damage the yeast and prevent the dough from rising properly.
- Give the dough enough time: Rising times can vary depending on the temperature of your kitchen. If the dough hasn’t doubled after 2 hours, give it more time rather than rushing the process.
- Don’t add too much flour: Babka dough should be soft and slightly tacky. Adding lots of flour while kneading can make the finished bread heavy instead of tender.
- Let the filling cool: Warm chocolate filling can melt the butter in the dough and make rolling difficult. Wait until it’s spreadable and no longer hot.
- Chill the log if needed: If the dough is soft or the chocolate filling starts smearing everywhere, a short chill in the refrigerator can make it easier to cut and twist.
- Keep the chocolate layers visible: When twisting the two halves together, try to keep the cut sides facing upward. This creates those beautiful chocolate swirls once the loaf is baked.
- Use your favorite chocolate: Semisweet chocolate gives a balanced flavor, while dark chocolate makes the filling richer and less sweet. You can also use a mix of the two.
- Add a little cinnamon: A small pinch of cinnamon in the filling adds warmth without overpowering the chocolate.
- Try a nutty version: Sprinkle finely chopped hazelnuts or walnuts over the chocolate filling before rolling up the dough. Make sure the pieces are small enough to keep the loaf easy to twist.
- Don’t skip the syrup: The sugar syrup gives the babka its characteristic glossy finish and helps prevent the bread from drying out.
- Check the center: Babka can look beautifully browned on top before it’s completely baked inside. If you have a food thermometer, the center should reach around 88-93°C (190-200°F).
- Plan ahead: You can prepare the dough, cover it, and refrigerate it overnight after the first rise. The next day, let it soften enough to roll out, then add the filling, shape the loaf, and allow it to rise before baking. If the dough is very firm from the fridge, give it a little time at room temperature first.
How to Store Chocolate Babka
Once the babka has cooled completely, store it in an airtight container or wrap it tightly and keep it at room temperature for up to 3 days. It’s delicious at room temperature, but a quick warm-up makes the chocolate soft and brings back that freshly baked flavor.
If you want to keep it longer, slice the loaf and freeze the slices in a freezer-safe bag or container for up to 2 months. You can also freeze the whole cooled loaf, wrapped well to protect it from freezer burn. Let it thaw at room temperature before serving.
To warm a slice, microwave it for about 10-15 seconds, checking that it doesn’t get too hot. You can also place slices in a 160°C (325°F) oven for a few minutes. The chocolate will soften, and the bread will taste wonderfully fresh again.
Final Thoughts
Chocolate babka is one of those baking projects that feels extra rewarding when you finally pull it out of the oven. The soft bread, rich chocolate filling, and pretty swirls make it look like something from a bakery, even though you can make it in your own kitchen with everyday ingredients.
If you’re looking for fun things to bake when you’re bored at home, this is a great recipe to try when you have a little extra time. It takes longer than a quick cookie recipe, but most of that time is spent waiting for the dough to rise. Slice it for breakfast, share it with friends, or keep a few pieces in the freezer for whenever a chocolate craving strikes.
32. Classic Apple Pie
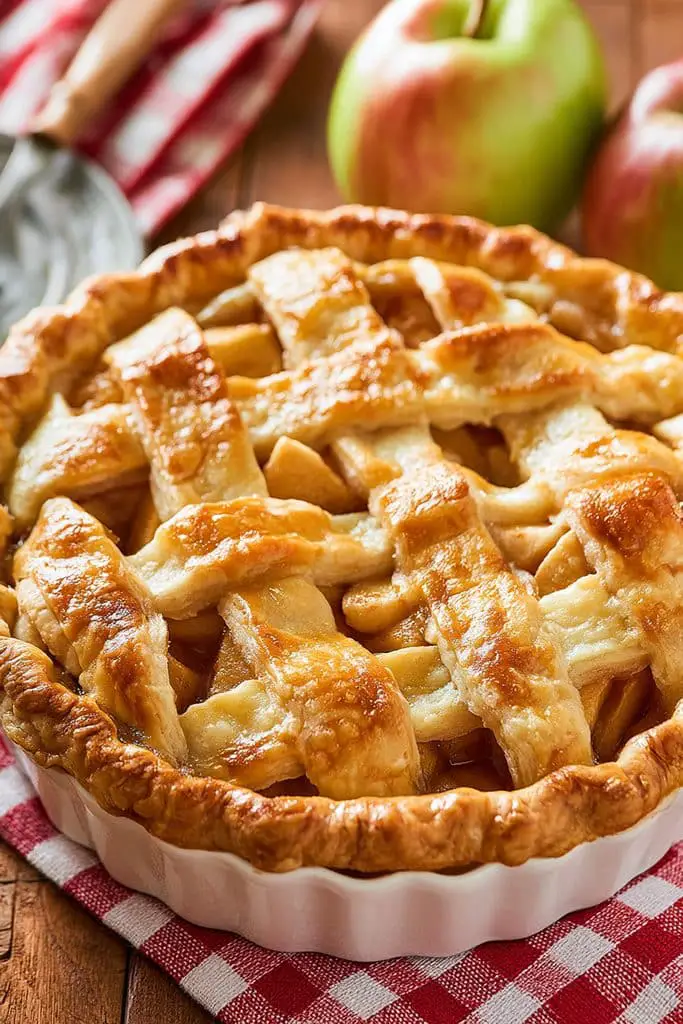
There’s something so comforting about a homemade apple pie. The buttery crust, warm cinnamon, and sweet, tender apples make it one of those desserts that never goes out of style. And honestly, the smell of apple pie baking in the oven is reason enough to make one when you’re craving something sweet.
If you’re looking for good things to bake when you’re bored, this classic apple pie is a lovely project. It takes a little more time than cookies or muffins, but the steps are simple, and you don’t need any special equipment. You can make the crust from scratch, fill it with cinnamon-spiced apples, and finish it with a beautiful golden top.
I especially love serving apple pie slightly warm, when the filling is soft and the crust is still crisp. Add a scoop of vanilla ice cream or a little whipped cream, and you’ve got a dessert that’s perfect for family dinners, weekends, or any day you feel like baking something homemade.
Prep time: 35 minutes
Chilling time: 1 hour
Cook time: 50-60 minutes
Total time: About 2 hours 30 minutes
Difficulty: Intermediate
Yield: 1 9-inch pie, about 8 slices
Ingredients
For the pie crust:
- 315 g (2½ cups) all-purpose flour
- 1 tablespoon granulated sugar
- ½ teaspoon salt
- 225 g (1 cup) cold unsalted butter, cut into small cubes
- 6-8 tablespoons ice-cold water
For the apple filling:
- 6 medium apples (about 900 g to 1 kg before peeling)
- 100 g (½ cup) granulated sugar
- 50 g (¼ cup) packed brown sugar
- 2 tablespoons all-purpose flour
- 1½ teaspoons ground cinnamon
- ¼ teaspoon ground nutmeg, optional
- 1 tablespoon lemon juice
- 1 teaspoon vanilla extract
- 1 tablespoon unsalted butter, cut into small pieces
For the egg wash:
- 1 egg
- 1 tablespoon milk or water
- 1 teaspoon coarse sugar, optional, for sprinkling
Instructions
- Mix the dry ingredients for the crust. In a large bowl, whisk together the flour, sugar, and salt. Add the cold butter cubes and toss them through the flour so they’re lightly coated.
- Work in the butter. Use a pastry cutter, two forks, or your fingertips to work the butter into the flour until the mixture resembles coarse crumbs, with some pea-sized pieces of butter remaining. Those little pieces help create a flaky crust, so don’t try to make the mixture completely smooth.
- Add the cold water. Start by adding 6 tablespoons of ice-cold water, mixing gently with a fork after each addition. Add more water a tablespoon at a time if needed, just until the dough begins to hold together when pressed. It shouldn’t feel wet or sticky.
- Divide and chill the dough. Turn the dough onto a clean surface and bring it together gently. Divide it into two portions, making one slightly larger for the bottom crust if you like. Flatten each portion into a disc, wrap it, and refrigerate for at least 1 hour.
- Prepare the apples. Peel, core, and slice the apples into roughly ½ cm (¼-inch) thick slices. Try to keep them similar in size so they cook evenly. A mix of tart and sweet apples gives the filling a lovely balance.
- Season the filling. Place the apple slices in a large bowl. Add the granulated sugar, brown sugar, flour, cinnamon, nutmeg if using, lemon juice, and vanilla extract. Toss everything together until the apples are evenly coated. Set aside while you roll out the crust.
- Roll out the bottom crust. Lightly flour your work surface and rolling pin. Roll the larger disc into a circle about 12 inches across, turning the dough as you go to prevent sticking. Carefully transfer it to a 9-inch pie dish, gently pressing it into the bottom and sides without stretching the dough.
- Add the apple filling. Spoon the apples into the crust, arranging them fairly evenly. Pour any juices left in the bowl over the apples, then scatter the small pieces of butter across the filling.
- Roll out the top crust. Roll the second disc into a circle large enough to cover the pie. Place it over the apples, or cut it into strips if you’d prefer a lattice top. If using a whole top crust, trim the excess dough, leaving about a 1-inch overhang.
- Seal the edges. Fold the top crust over the bottom crust and press the edges together to seal. Crimp them with your fingers or the tines of a fork. If you used a whole top crust, cut several small slits in the center to let steam escape during baking.
- Chill the assembled pie. Place the pie in the refrigerator for about 15 minutes while you preheat the oven to 200°C (400°F). Chilling helps the butter in the crust stay firm, which improves the texture.
- Brush with egg wash. Whisk the egg with the milk or water. Brush a thin layer over the top crust, taking care not to let too much run down the sides. Sprinkle with coarse sugar if you want a little extra crunch and sparkle.
- Bake the pie. Place the pie on a baking sheet to catch any bubbling juices. Bake at 200°C (400°F) for 20 minutes, then reduce the temperature to 190°C (375°F) and bake for another 30-40 minutes. The crust should be golden brown, and the filling should be bubbling through the vents.
- Protect the crust if needed. If the edges start browning too quickly, cover them loosely with strips of foil or a pie crust shield. The apples need enough time to soften, so don’t take the pie out just because the top looks golden.
- Let the pie cool. Remove the pie from the oven and leave it on a wire rack for at least 2-3 hours before slicing. This gives the filling time to thicken. Cutting too soon can make the juices run out and leave the slices messy.
- Serve and enjoy. Slice the pie and serve it at room temperature or gently warmed. A scoop of vanilla ice cream, a spoonful of whipped cream, or even a little caramel sauce makes it extra delicious.
Tips and Variations
- Choose the right apples: Firm apples that hold their shape during baking work best. Granny Smith apples give the filling a tart flavor, while Honeycrisp, Braeburn, or Pink Lady apples add sweetness. A combination is a great option.
- Keep the butter cold: Cold butter is essential for a flaky pie crust. If the dough starts feeling soft or greasy while you’re rolling it out, pop it back in the refrigerator for 10-15 minutes.
- Don’t add too much water: Add the ice water gradually. The dough should hold together when pressed without becoming sticky. Too much water can make the crust tougher.
- Slice the apples evenly: Thin, even slices cook more consistently than large chunks. Very thick pieces may remain firm even when the crust is fully baked.
- Prevent a soggy bottom: Bake the pie on a preheated metal baking sheet if possible, placing the pie dish on it carefully. The extra heat helps the bottom crust bake more thoroughly.
- Let the filling bubble: Bubbling juices are a useful sign that the filling is hot enough for the flour to thicken it. If the crust is browning too quickly, cover it and continue baking.
- Add a little lemon zest: A small amount of lemon zest brightens the apple flavor without making the pie taste strongly of lemon.
- Try a caramel apple pie: Drizzle a little caramel sauce over the cooled pie or serve it alongside each slice. Avoid adding too much extra liquid to the filling.
- Make a lattice crust: Cut the top dough into strips and weave them over the apples. It looks beautiful and allows steam to escape, although a regular crust with vents works just as well.
- Add some crunch: A small handful of chopped walnuts or pecans can add texture. Sprinkle them over the apples before adding the top crust.
- Use a little extra spice: Along with cinnamon, try a pinch of ground ginger or allspice for a warmer flavor.
- Don’t rush the cooling time: The filling continues to settle as the pie cools. Letting it rest before slicing makes it much easier to serve neat pieces.
How to Store Classic Apple Pie
Once the pie has cooled, cover it loosely and keep it at room temperature for up to 2 days in a cool kitchen. If your kitchen is very warm, or you need to store it longer, refrigerate it in an airtight container or under a suitable cover for up to 4 days.
To reheat a slice, place it in a 175°C (350°F) oven for about 10-15 minutes, or until warmed through. The oven helps the crust crisp up again. You can use the microwave for a quicker option, although the crust will be softer.
Apple pie also freezes well. Once completely cool, wrap individual slices or the whole pie tightly and freeze for up to 3 months. Thaw in the refrigerator overnight, then warm it in the oven before serving.
If you’d like to prepare ahead, you can make the pie dough up to 2 days in advance and keep it refrigerated. You can also assemble the pie and freeze it unbaked. Bake it from frozen, allowing extra time in the oven, and cover the edges if they brown before the filling is cooked.
Final Thoughts
Classic apple pie is one of those recipes that’s worth taking your time over. The flaky homemade crust, soft cinnamon apples, and golden top make it a comforting dessert that feels special without needing complicated ingredients.
If you’ve been searching for fun things to bake when you’re bored at home, this is a lovely recipe to add to your list. It gives you a chance to enjoy the whole baking process, from rolling the dough to filling the kitchen with that warm cinnamon smell. Serve it with ice cream, share it with friends and family, or save a slice for later. Homemade apple pie is always a good idea.