
Valentine’s Day is the perfect time to make something sweet for the people you love. And honestly, I think homemade desserts make the day even more special. Whether it’s a box of chocolate-covered strawberries, a batch of cute heart-shaped cookies, or a rich chocolate dessert to share after dinner, there are so many delicious ways to celebrate.
I love desserts that look beautiful but don’t require hours in the kitchen. That’s why I’ve put together these Valentine’s Day desserts to bake, with a mix of easy treats, chocolate favorites, fruity desserts, and pretty cakes that are perfect for sharing.
Let’s start with one of my favorite Valentine’s Day dessert recipes!
1. Chocolate-Covered Strawberries

Chocolate-covered strawberries are one of those treats that look fancy but are surprisingly easy to make at home. I love the combination of juicy, slightly tart strawberries and smooth chocolate. Every bite has the perfect balance of fresh fruit and sweetness!
What makes this recipe even better is that you don’t need an oven or any complicated baking equipment. You can decorate the strawberries with white chocolate, pink candy melts, or Valentine’s Day sprinkles to make them look extra special.
Prep time: 15 minutes Setting time: 20-30 minutes Total time: 35-45 minutes Difficulty: Easy Servings: 12-16 strawberries
Ingredients
For the strawberries:
- 1 pound (450 g) fresh strawberries, preferably medium to large
- 8 oz (225 g) semi-sweet or dark chocolate, chopped
- 2 oz (55 g) white chocolate, for drizzling (optional)
- Valentine’s Day sprinkles, optional
How to Make Chocolate-Covered Strawberries
1. Prepare the Strawberries
Wash the strawberries gently under cool water and pat them completely dry with paper towels. I always make sure there is no moisture left on the strawberries because even a little water can make melted chocolate seize or prevent it from coating smoothly.
Leave the green stems attached. They make the strawberries easier to hold while dipping and give them a lovely finished look.
2. Melt the Chocolate
Place the chopped dark or semi-sweet chocolate in a dry, heatproof bowl. Melt it in the microwave in 20-second intervals, stirring between each interval until smooth.
You can also melt the chocolate over a saucepan of gently simmering water. Just make sure the bottom of the bowl doesn’t touch the water and no steam or water gets into the chocolate.
3. Dip the Strawberries
Hold each strawberry by its green stem and dip it into the melted chocolate. Turn it gently to coat most of the berry, then lift it and allow the excess chocolate to drip back into the bowl.
Place the dipped strawberries on a baking sheet lined with parchment paper. Repeat until all the strawberries are coated.
4. Add the Decorations
If you want to make these strawberries look more festive, melt the white chocolate in a separate bowl. Transfer it to a small piping bag or use a fork to drizzle thin lines over the chocolate coating.
You can also add pink or red sprinkles while the chocolate is still wet. I like keeping the decoration simple because the contrast between the red strawberries and dark chocolate already looks beautiful.
5. Let the Chocolate Set
Leave the strawberries at cool room temperature until the chocolate firms up, or refrigerate them for about 15-20 minutes.
Once set, arrange them on a pretty plate or place them in a small gift box. They’re ready to serve!
My Tips for the Best Chocolate-Covered Strawberries
- Dry the strawberries well: This is the most important step for a smooth chocolate coating.
- Choose good-quality chocolate: It makes a noticeable difference in the flavor and texture.
- Don’t rush the melting process: Chocolate can burn easily, so use short microwave intervals and stir frequently.
- Make them close to serving time: Fresh strawberries release moisture, so these treats are best enjoyed the day they’re prepared.
- Try different coatings: Use white chocolate, dark chocolate, or pink candy melts for different Valentine’s Day dessert ideas.
2. Heart-Shaped Sugar Cookies

Heart-shaped sugar cookies are one of those Valentine’s Day treats that always look lovely on a dessert table.
The best part is that you can make these cookies a day ahead and decorate them whenever you have time. If you’re looking for cute Valentine’s Day desserts to make at home, these heart-shaped cookies are a great place to start.
Recipe Details
- Prep time: 25 minutes
- Chilling time: 30 minutes
- Bake time: 8-10 minutes per batch
- Total time: About 1 hour 15 minutes
- Difficulty: Easy
- Servings: 20-24 cookies, depending on cutter size
Ingredients
For the cookies:
- 1 cup (225 g) unsalted butter, softened
- ¾ cup (150 g) granulated sugar
- 1 large egg
- 2 teaspoons vanilla extract
- 2½ cups (315 g) all-purpose flour
- ½ teaspoon baking powder
- ¼ teaspoon salt
For decorating (optional):
- 1 cup (120 g) powdered sugar
- 1-2 tablespoons milk
- ¼ teaspoon vanilla extract
- Pink or red food coloring
- Valentine’s Day sprinkles
Instructions
Step 1: Make the cookie dough.
In a large bowl, beat the softened butter and granulated sugar until the mixture looks light and creamy. Add the egg and vanilla extract, then mix until everything is combined.
Step 2: Add the dry ingredients.
In a separate bowl, whisk together the flour, baking powder, and salt. Gradually add the dry ingredients to the butter mixture, mixing just until a soft dough forms. Avoid overmixing, or the cookies may turn out tough.
Step 3: Chill the dough.
Divide the dough into two portions and flatten each into a disc. Wrap and refrigerate for about 30 minutes. Chilling makes the dough easier to roll and helps the cookies hold their heart shapes while baking.
Step 4: Cut out the hearts.
Preheat your oven to 350°F (175°C) and line a baking sheet with parchment paper. On a lightly floured surface, roll the dough to about ¼ inch thick. Use a heart-shaped cookie cutter to cut out the cookies, then place them on the prepared baking sheet, leaving a little space between each one.
Step 5: Bake the cookies.
Bake for 8-10 minutes, or until the edges are just beginning to turn lightly golden. The centers may still look pale, which is fine. Let the cookies cool on the baking sheet for about 5 minutes before transferring them to a wire rack to cool completely.
Step 6: Decorate and enjoy.
To make a simple icing, mix the powdered sugar with 1 tablespoon of milk and the vanilla extract. Add a little more milk if needed until you have a smooth, spreadable consistency. Divide the icing into bowls, tint with pink or red food coloring, and decorate the cooled cookies. Add sprinkles before the icing sets.
3. Red Velvet Cupcakes With Cream Cheese Frosting
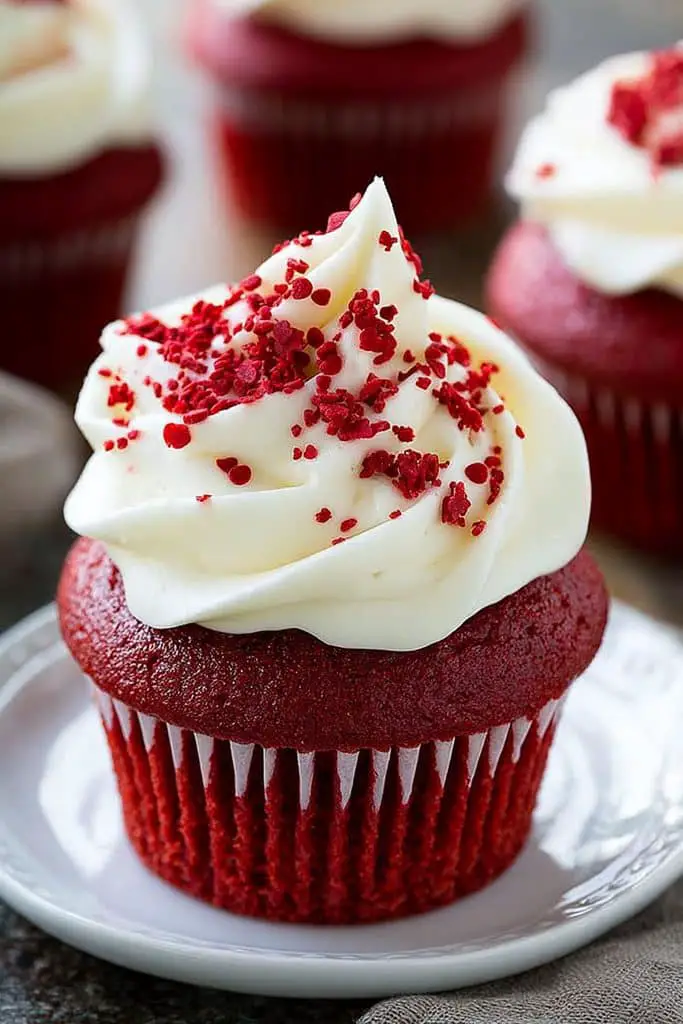
If there’s one dessert that feels made for Valentine’s Day, it’s red velvet cupcakes. Their deep red color, soft texture, and creamy frosting make them look beautiful without needing much decoration.
These cupcakes are also a lovely choice when you want something a little more special than regular cupcakes. Add a few heart-shaped sprinkles or a dusting of red velvet crumbs, and you have a batch of Valentine’s Day desserts that looks just as good as it tastes.
Recipe Details
- Prep time: 20 minutes
- Bake time: 18-22 minutes
- Cooling time: 30 minutes
- Total time: About 1 hour 15 minutes
- Difficulty: Easy
- Servings: 12 cupcakes
Ingredients
For the cupcakes:
- 1¼ cups (160 g) all-purpose flour
- 1 tablespoon unsweetened cocoa powder
- ½ teaspoon baking soda
- ¼ teaspoon salt
- ½ cup (115 g) unsalted butter, softened
- ¾ cup (150 g) granulated sugar
- 1 large egg, at room temperature
- ½ cup (120 ml) buttermilk, at room temperature
- 1 teaspoon vanilla extract
- 1 teaspoon white vinegar
- 1-2 teaspoons red gel food coloring, or as needed
For the cream cheese frosting:
- 8 oz (225 g) full-fat cream cheese, softened but still cool
- ¼ cup (55 g) unsalted butter, softened
- 2 cups (240 g) powdered sugar, sifted
- 1 teaspoon vanilla extract
Instructions
Step 1: Prepare the oven and cupcake pan.
Preheat your oven to 350°F (175°C). Line a 12-cup muffin pan with paper cupcake liners so the cupcakes are easy to remove after baking.
Step 2: Mix the dry ingredients.
In a medium bowl, whisk together the flour, cocoa powder, baking soda, and salt. Set the bowl aside while you prepare the wet ingredients.
Step 3: Cream the butter and sugar.
In a large bowl, beat the softened butter and granulated sugar until light and fluffy, about 2-3 minutes. Add the egg and vanilla extract, then beat until well combined.
Step 4: Add the remaining ingredients.
Mix the buttermilk, vinegar, and red food coloring in a small bowl. Add the dry ingredients to the butter mixture in batches, alternating with the buttermilk mixture. Begin and end with the dry ingredients, mixing gently after each addition. Stop as soon as the batter is combined to keep the cupcakes tender.
Step 5: Bake the cupcakes.
Divide the batter evenly among the cupcake liners, filling each about two-thirds full. Bake for 18-22 minutes, or until a toothpick inserted into the center comes out clean or with a few moist crumbs. Let the cupcakes cool in the pan for 5 minutes, then transfer them to a wire rack to cool completely.
Step 6: Make the cream cheese frosting.
Beat the cream cheese and butter until smooth and creamy. Add the powdered sugar gradually, followed by the vanilla extract. Beat just until fluffy and spreadable. If the frosting feels too soft, refrigerate it for 15-20 minutes before decorating.
Step 7: Frost and decorate.
Once the cupcakes are completely cool, spread or pipe the cream cheese frosting on top. For a Valentine’s Day touch, sprinkle over a little red velvet cake crumb or add small pink and red heart sprinkles.
4. Chocolate Lava Cakes
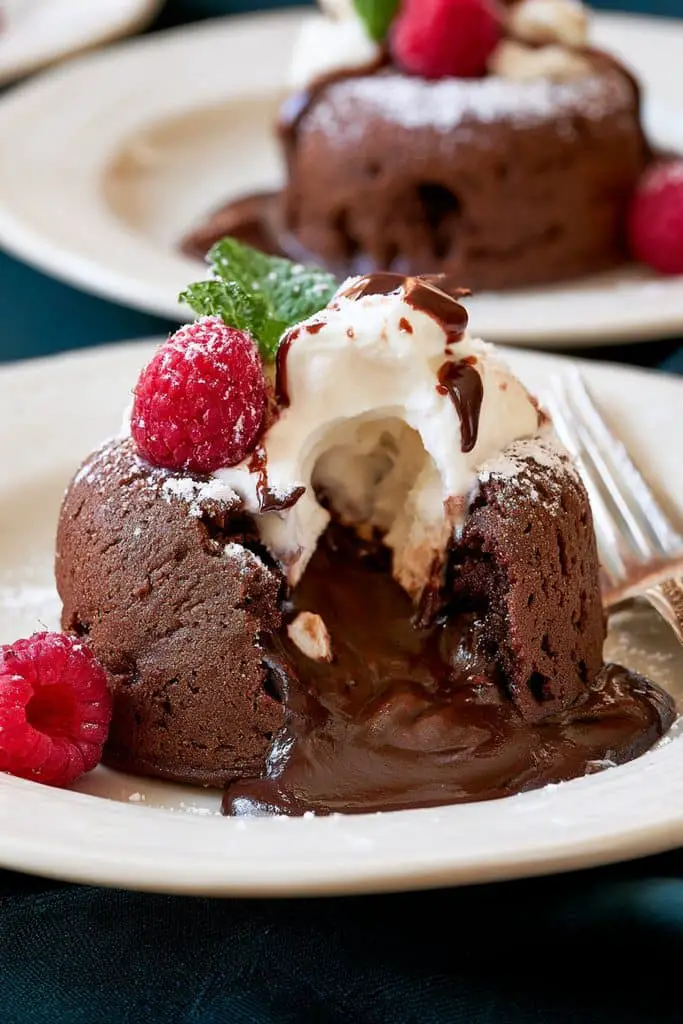
If you’re planning a romantic dessert for Valentine’s Day, chocolate lava cakes are such a lovely choice. They look fancy when you serve them, but they’re surprisingly easy to make at home. The outside is soft and cake-like, while the center stays warm, rich, and wonderfully gooey.
I love serving these little chocolate cakes straight from the oven with a scoop of vanilla ice cream and a few fresh strawberries. When you cut into the middle and the melted chocolate starts flowing out, it feels like something you’d order at a restaurant. They’re perfect when you want a chocolate dessert that feels extra special without spending hours in the kitchen.
Recipe Details
- Prep time: 15 minutes
- Bake time: 10-13 minutes
- Total time: About 30 minutes
- Difficulty: Easy
- Servings: 4 individual cakes
Ingredients
- ½ cup (115 g) unsalted butter, plus extra for greasing
- 6 oz (170 g) semi-sweet or dark chocolate, chopped
- 2 large eggs
- 2 large egg yolks
- ¼ cup (50 g) granulated sugar
- ¼ teaspoon salt
- 2 tablespoons all-purpose flour
- 1 teaspoon vanilla extract
- Cocoa powder, for dusting the ramekins
- Powdered sugar, for serving (optional)
- Vanilla ice cream or fresh berries, for serving (optional)
Instructions
Step 1: Prepare the ramekins.
Preheat your oven to 425°F (220°C). Grease four 6-ounce ramekins with butter, making sure to coat the bottoms and sides. Dust them lightly with cocoa powder, tapping out any extra. This helps the cakes release easily after baking.
Step 2: Melt the chocolate and butter.
Place the chopped chocolate and butter in a heatproof bowl. Melt them together in the microwave in 20-second intervals, stirring between each interval, or use a bowl set over a pan of gently simmering water. Stir until smooth, then let the mixture cool slightly.
Step 3: Whisk the eggs and sugar.
In a separate bowl, whisk the eggs, egg yolks, granulated sugar, salt, and vanilla extract until the mixture looks slightly lighter and well combined.
Step 4: Combine the batter.
Slowly pour the melted chocolate mixture into the egg mixture, whisking as you go. Add the flour and gently fold it in until no dry streaks remain. Try not to overmix, as you want the cakes to stay tender.
Step 5: Fill the ramekins.
Divide the batter evenly among the four prepared ramekins. Place them on a baking sheet to make them easier to move in and out of the oven.
Step 6: Bake until the edges are set.
Bake for 10-13 minutes. The edges should look firm, while the centers should still be soft and slightly jiggly. Baking time can vary depending on your oven and ramekin size, so keep an eye on them during the final few minutes.
Step 7: Turn out and serve.
Let the cakes rest for 1 minute after removing them from the oven. Carefully run a small knife around the edges, place a dessert plate over each ramekin, and invert. Wait a few seconds before lifting the ramekin away. Dust with powdered sugar and serve immediately.
5. Valentine’s Day Chocolate-Covered Pretzels
If you love sweet and salty snacks, these Valentine’s Day chocolate-covered pretzels are such a fun treat to make. The crunchy pretzels, smooth chocolate, and colorful sprinkles make a combination that’s hard to resist. I also love how easy they are to customize with pink, red, and white chocolate, so they look festive without needing much effort.
These are especially great when you want something sweet but don’t feel like turning on the oven. You can make a big batch in one go, arrange them in a pretty gift box, or add them to a Valentine’s Day dessert platter. They’re one of those easy treats that look adorable and taste even better.
Recipe Details
- Prep time: 20 minutes
- Setting time: 20-30 minutes
- Total time: About 50 minutes
- Difficulty: Easy
- Servings: 20-24 pretzel rods, or about 30 small pretzels
Ingredients
- 12 oz (340 g) pretzel rods or small pretzels
- 8 oz (225 g) semi-sweet or milk chocolate, chopped
- 4 oz (115 g) white chocolate, chopped
- Pink or red candy melts, optional
- Valentine’s Day sprinkles, as needed
Instructions
Step 1: Prepare your workspace.
Line a baking sheet or tray with parchment paper. Make sure your pretzels are completely dry and ready to dip. If you’re using pretzel rods, leave enough space on the tray to lay them flat without touching.
Step 2: Melt the chocolate.
Place the semi-sweet or milk chocolate in a microwave-safe bowl. Heat it in 20-second intervals, stirring after each one, until smooth. Repeat with the white chocolate in a separate bowl. If you’re using pink or red candy melts, melt them according to the package instructions.
Step 3: Dip the pretzels.
For pretzel rods, dip each rod about halfway into the melted chocolate, then gently shake off the excess. For small pretzels, use a fork to dip them and lift them out, allowing the extra chocolate to drip back into the bowl.
Step 4: Add the decorations.
Place the dipped pretzels on the prepared tray. While the chocolate is still wet, add Valentine’s Day sprinkles. You can also drizzle white chocolate over dark chocolate pretzels or use pink chocolate over white chocolate for a pretty layered look.
Step 5: Let them set.
Leave the pretzels at room temperature until the chocolate is firm, usually about 20-30 minutes. If your kitchen is warm, place the tray in the refrigerator for 10-15 minutes instead.
Step 6: Serve or package.
Once the chocolate has completely set, transfer the pretzels to a serving plate or arrange them in a gift box. If you’re stacking them, handle them gently so the chocolate decorations don’t break.
6. Strawberry Cheesecake
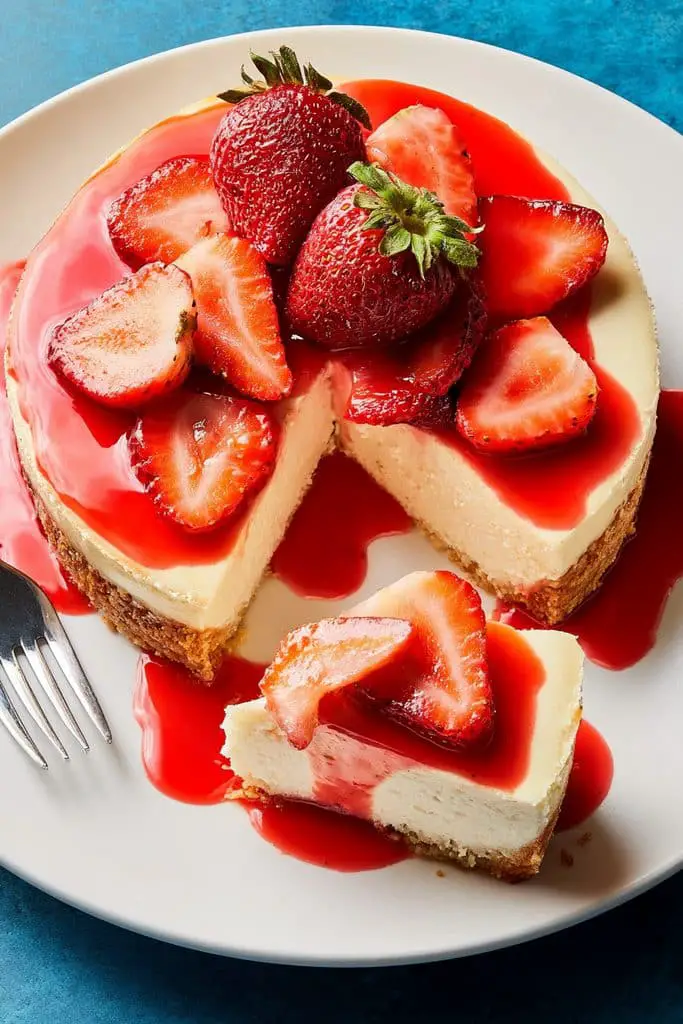
Strawberry cheesecake is one of those desserts that always feels a little special. The creamy filling, buttery biscuit crust, and sweet strawberry topping make every slice so delicious. I love the way fresh strawberries add a fruity flavor that balances the richness of the cheesecake, making it perfect for a Valentine’s Day dinner or a special weekend treat.
This recipe takes a little more time than some of the other desserts on this list because the cheesecake needs to cool and chill properly. But the steps are simple, and you can make it ahead of time, which makes things much easier when you’re preparing a special meal. Add a few fresh strawberries on top, and it becomes a beautiful dessert to share with someone you love.
Recipe Details
- Prep time: 25 minutes
- Bake time: 55-65 minutes
- Cooling time: 1 hour
- Chilling time: At least 4 hours
- Total time: About 6½ hours
- Difficulty: Medium
- Servings: 10-12 slices
Ingredients
For the crust:
- 2 cups (200 g) digestive biscuit or graham cracker crumbs
- 6 tablespoons (85 g) unsalted butter, melted
- 2 tablespoons (25 g) granulated sugar
For the cheesecake filling:
- 24 oz (680 g) full-fat cream cheese, softened
- 1 cup (200 g) granulated sugar
- 3 large eggs, at room temperature
- ½ cup (120 g) sour cream
- 2 teaspoons vanilla extract
- 1 tablespoon all-purpose flour
- 1 teaspoon lemon juice
For the strawberry topping:
- 2 cups (300 g) fresh strawberries, hulled and chopped
- ¼ cup (50 g) granulated sugar
- 1 tablespoon lemon juice
- 1 teaspoon cornstarch mixed with 1 tablespoon water
Instructions
Step 1: Prepare the pan and oven.
Preheat your oven to 325°F (160°C). Lightly grease a 9-inch (23 cm) springform pan. You can also line the base with parchment paper to make serving easier.
Step 2: Make the biscuit crust.
Mix the biscuit crumbs, melted butter, and sugar in a bowl until the crumbs look evenly moistened. Press the mixture firmly into the bottom of the pan using the back of a spoon or the bottom of a glass. Bake for 8-10 minutes, then set aside to cool slightly.
Step 3: Prepare the cheesecake filling.
Beat the cream cheese and sugar until smooth and creamy, scraping down the sides of the bowl as needed. Add the eggs one at a time, mixing on low speed after each addition. Mix in the sour cream, vanilla extract, flour, and lemon juice until just combined. Avoid overbeating, as too much air can cause the cheesecake to crack.
Step 4: Fill the pan and bake.
Pour the filling over the prepared crust and smooth the top. Bake for 55-65 minutes, until the edges look set but the center still has a slight wobble when you gently move the pan.
Turn off the oven, leave the door slightly open, and let the cheesecake sit inside for about 30 minutes. This gradual cooling helps reduce sudden temperature changes.
Step 5: Make the strawberry topping.
While the cheesecake cools, place the chopped strawberries, sugar, and lemon juice in a small saucepan over medium heat. Cook for about 5-7 minutes, stirring occasionally, until the strawberries soften and release their juices.
Stir in the cornstarch mixture and cook for another 1-2 minutes, until the sauce thickens. Remove from the heat and let it cool completely.
Step 6: Chill the cheesecake.
Once the cheesecake has cooled to room temperature, cover it and refrigerate for at least 4 hours, preferably overnight. This helps the filling become firm and makes the cheesecake easier to slice.
Step 7: Add the topping and serve.
Spread the cooled strawberry topping over the chilled cheesecake. Carefully release the springform pan and slice with a sharp knife, wiping the blade between cuts for neat slices. Add a few fresh strawberry halves on top if you like.
7. Heart-Shaped Brownies
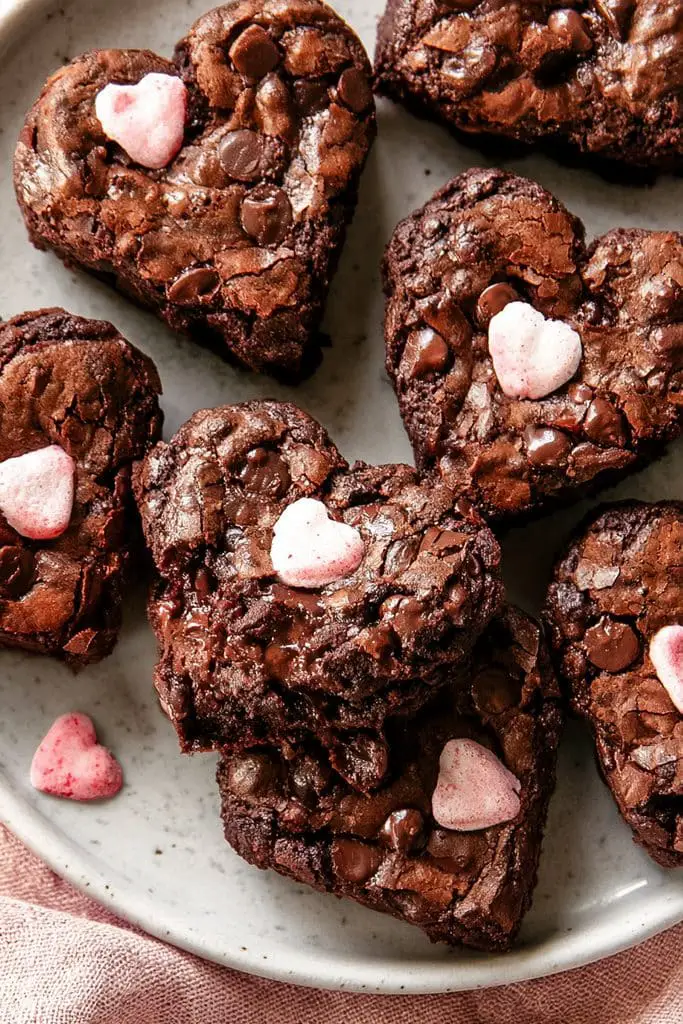
If you’re a chocolate lover, these heart-shaped brownies are such a fun dessert to make for Valentine’s Day.
You don’t need any fancy decorating skills for these, either. A light dusting of powdered sugar looks lovely, but you can also drizzle melted chocolate over the top or add a few Valentine’s Day sprinkles. They’re perfect for sharing, packing into gift boxes, or serving with a scoop of vanilla ice cream.
Recipe Details
- Prep time: 15 minutes
- Bake time: 25-30 minutes
- Cooling time: 1 hour
- Total time: About 1 hour 45 minutes
- Difficulty: Easy
- Servings: 8-12 brownie hearts, depending on cutter size
Ingredients
- ½ cup (115 g) unsalted butter
- 4 oz (115 g) semi-sweet or dark chocolate, chopped
- ¾ cup (150 g) granulated sugar
- 2 large eggs, at room temperature
- 1 teaspoon vanilla extract
- ½ cup (65 g) all-purpose flour
- ¼ cup (25 g) unsweetened cocoa powder
- ¼ teaspoon salt
- ½ cup (85 g) chocolate chips, optional
- Powdered sugar, for decorating (optional)
- Melted white or pink chocolate and sprinkles, optional
Instructions
Step 1: Prepare the baking pan.
Preheat your oven to 350°F (175°C). Line an 8-inch (20 cm) square baking pan with parchment paper, leaving a little extra paper hanging over the sides. This will make it easier to lift the brownies out once they’ve cooled.
Step 2: Melt the butter and chocolate.
Place the butter and chopped chocolate in a heatproof bowl. Melt them together in the microwave in 20-second intervals, stirring between each interval, until smooth. Set the mixture aside for a few minutes to cool slightly.
Step 3: Whisk the eggs and sugar.
In a separate bowl, whisk the sugar and eggs for about 1-2 minutes, until well combined and slightly thickened. Add the vanilla extract, then slowly stir in the melted chocolate mixture.
Step 4: Add the dry ingredients.
Sift in the flour, cocoa powder, and salt. Gently fold everything together until no dry streaks remain. If you’re using chocolate chips, fold them in at this stage. Don’t overmix the batter, as this can make the brownies less tender.
Step 5: Bake the brownies.
Pour the batter into the prepared pan and spread it evenly. Bake for 25-30 minutes. The edges should be set, and a toothpick inserted near the center should come out with a few moist crumbs rather than wet batter.
Step 6: Cool completely.
Let the brownies cool in the pan, then lift them out using the parchment paper. Allow them to cool completely before cutting. This step is important because warm brownies are soft and can lose their shape when you use a cookie cutter.
Step 7: Cut out the hearts.
Use a heart-shaped cookie cutter to cut the brownies into individual shapes. Press straight down and lift carefully. You’ll have some brownie scraps left over, but don’t throw them away. They’re delicious crumbled over ice cream or mixed into a milkshake.
Step 8: Decorate and serve.
Dust the brownie hearts with powdered sugar, or drizzle them with melted white or pink chocolate. Add sprinkles while the chocolate is still wet, then let the decorations set before serving.
8. Valentine’s Day Strawberry Shortcakes
Strawberry shortcakes are such a lovely choice when you want a Valentine’s Day dessert that feels light, fresh, and a little fancy. They combine soft, buttery shortcakes with juicy strawberries and fluffy whipped cream, making every bite sweet and delicious.
What makes this dessert even better is that you can prepare the strawberries and whipped cream ahead of time, then assemble everything just before serving. You can use round shortcakes for a classic look or cut the dough into hearts to make them extra festive. If you’re looking for cute Valentine’s Day desserts to make at home, these strawberry shortcakes are definitely worth trying.
Recipe Details
- Prep time: 20 minutes
- Bake time: 12-15 minutes
- Total time: About 40 minutes
- Difficulty: Easy
- Servings: 6 shortcakes
Ingredients
For the shortcakes:
- 2 cups (250 g) all-purpose flour
- ¼ cup (50 g) granulated sugar
- 1 tablespoon baking powder
- ¼ teaspoon salt
- 6 tablespoons (85 g) cold unsalted butter, cut into small cubes
- ¾ cup (180 ml) cold heavy cream, plus a little extra for brushing
- 1 teaspoon vanilla extract
For the strawberry filling:
- 1 pound (450 g) fresh strawberries, hulled and sliced
- 2 tablespoons granulated sugar, or to taste
For the whipped cream:
- 1 cup (240 ml) cold heavy whipping cream
- 2 tablespoons powdered sugar
- ½ teaspoon vanilla extract
Instructions
Step 1: Prepare the strawberries.
Place the sliced strawberries in a bowl and sprinkle them with 2 tablespoons of sugar. Gently stir and leave them for 15-20 minutes. The sugar will draw out the natural juices, creating a sweet strawberry mixture that’s perfect for spooning over the shortcakes.
Step 2: Mix the dry ingredients.
Preheat your oven to 425°F (220°C) and line a baking sheet with parchment paper. In a large bowl, whisk together the flour, granulated sugar, baking powder, and salt.
Step 3: Add the butter.
Add the cold butter cubes to the flour mixture. Use your fingertips or a pastry cutter to work the butter into the flour until the mixture resembles coarse crumbs, with a few pea-sized pieces of butter remaining. These little pieces help make the shortcakes tender and flaky.
Step 4: Make the dough.
Pour in the cold cream and vanilla extract. Stir gently until the mixture starts to come together. Turn the dough onto a lightly floured surface and bring it together with your hands. Avoid kneading it too much, as overworking the dough can make the shortcakes tough.
Step 5: Shape and bake.
Pat the dough into a slab about ¾ inch thick. Use a round cutter or a heart-shaped cutter to make six shortcakes, gathering and gently reshaping the scraps if needed. Place them on the prepared baking sheet, brush the tops with a little cream, and bake for 12-15 minutes, until risen and lightly golden. Transfer to a rack to cool slightly.
Step 6: Whip the cream.
In a chilled bowl, beat the heavy cream, powdered sugar, and vanilla extract until soft to medium peaks form. The cream should hold its shape but still look smooth and fluffy. Be careful not to overwhip it.
Step 7: Assemble the shortcakes.
Once the shortcakes are cool enough to handle, carefully split each one in half horizontally. Spoon strawberries and their juices onto the bottom half, add a generous layer of whipped cream, and place the top half over it. Finish with a little more cream and a few strawberry slices.
9. Red Velvet Cake With Cream Cheese Frosting
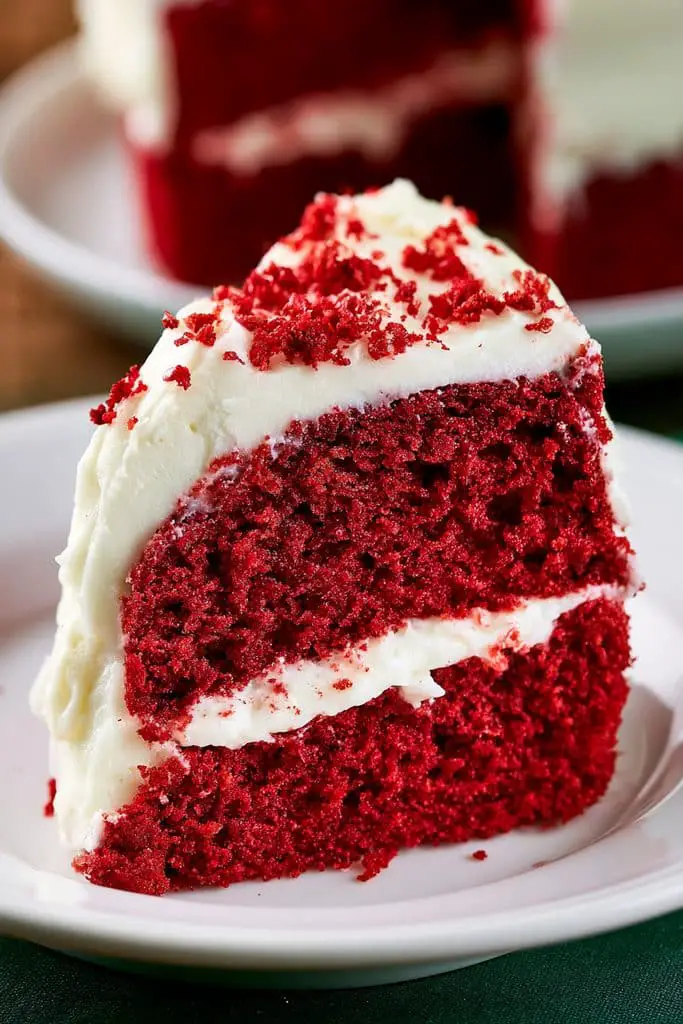
A red velvet cake is always a beautiful choice for Valentine’s Day. With its rich red color, soft and tender crumb, and smooth cream cheese frosting, it looks impressive without needing complicated decorations.
This cake is perfect if you’re planning a romantic dinner, celebrating with family, or simply want to bake something special at home. You can keep the decoration simple with red velvet crumbs around the edges or add fresh strawberries and little chocolate hearts on top. If you’re looking for delicious desserts to bake for Valentine’s Day, this classic cake deserves a place on your list.
Recipe Details
- Prep time: 30 minutes
- Bake time: 25-30 minutes
- Cooling time: 1 hour
- Total time: About 2 hours
- Difficulty: Medium
- Servings: 10-12 slices
Ingredients
For the cake:
- 2½ cups (315 g) all-purpose flour
- 2 tablespoons (12 g) unsweetened cocoa powder
- 1 teaspoon baking soda
- ½ teaspoon salt
- ½ cup (115 g) unsalted butter, softened
- 1½ cups (300 g) granulated sugar
- 2 large eggs, at room temperature
- 1 cup (240 ml) buttermilk, at room temperature
- ½ cup (120 ml) neutral oil, such as vegetable oil
- 2 teaspoons vanilla extract
- 1 teaspoon white vinegar
- 1-2 teaspoons red gel food coloring, or as needed
For the cream cheese frosting:
- 16 oz (450 g) full-fat cream cheese, softened but still cool
- ½ cup (115 g) unsalted butter, softened
- 3 cups (360 g) powdered sugar, sifted
- 2 teaspoons vanilla extract
- A pinch of salt, optional
Instructions
Step 1: Prepare the cake pans.
Preheat your oven to 350°F (175°C). Grease two 8-inch (20 cm) round cake pans and line the bottoms with parchment paper. This helps the cakes release easily after baking.
Step 2: Mix the dry ingredients.
In a medium bowl, whisk together the flour, cocoa powder, baking soda, and salt. Set aside while you prepare the wet ingredients.
Step 3: Cream the butter and sugar.
In a large mixing bowl, beat the softened butter and granulated sugar for about 2-3 minutes, until the mixture looks lighter and fluffy. Add the eggs one at a time, beating well after each addition.
Step 4: Combine the wet ingredients.
In a separate bowl, whisk together the buttermilk, oil, vanilla extract, vinegar, and red food coloring. Add the dry ingredients to the butter mixture in three additions, alternating with the buttermilk mixture. Begin and end with the dry ingredients, mixing gently just until the batter is smooth. Avoid overmixing.
Step 5: Bake the cakes.
Divide the batter evenly between the prepared pans and smooth the tops. Bake for 25-30 minutes, or until a toothpick inserted into the center comes out clean or with a few moist crumbs.
Let the cakes cool in their pans for 10 minutes, then turn them out onto wire racks. Remove the parchment paper and allow the layers to cool completely before frosting.
Step 6: Make the cream cheese frosting.
Beat the cream cheese and softened butter until smooth. Add the powdered sugar gradually, followed by the vanilla extract and a pinch of salt if desired. Mix until creamy and spreadable, but avoid overbeating because cream cheese frosting can become too soft.
If the frosting feels loose, refrigerate it for 15-20 minutes before assembling the cake.
Step 7: Assemble the cake.
If the cake layers have domed tops, carefully trim them flat with a serrated knife. Place one layer on a serving plate and spread an even layer of cream cheese frosting over it. Add the second cake layer, then cover the top and sides with the remaining frosting.
Step 8: Decorate and serve.
Crumble any trimmed cake pieces and gently press the crumbs around the sides or sprinkle them over the top. You can also decorate with fresh strawberries, raspberries, or small chocolate hearts. Refrigerate the cake briefly to help the frosting set before slicing.
10. Raspberry White Chocolate Blondies
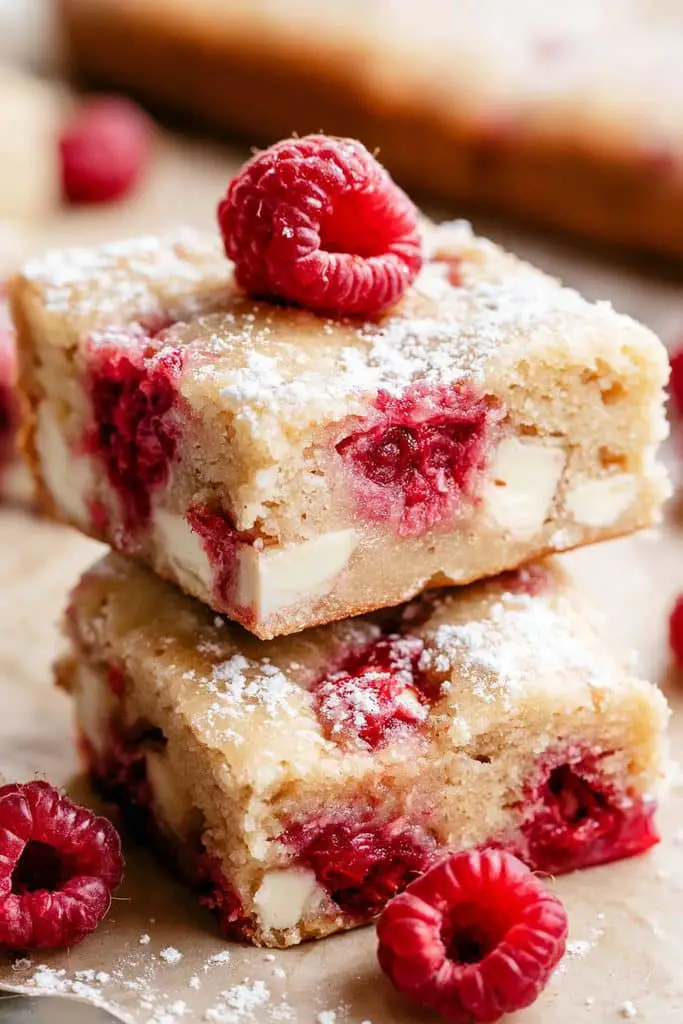
If you love brownies but want something a little different, raspberry white chocolate blondies are such a lovely treat to try.
These blondies are also much easier to make than a layered cake or a decorated dessert. You simply mix the batter, fold in the berries and chocolate, and let the oven do the rest. Cut them into neat squares or use a heart-shaped cutter to make them extra festive. They’re a wonderful addition to your list of Valentine’s Day desserts to bake.
Recipe Details
- Prep time: 15 minutes
- Bake time: 25-30 minutes
- Cooling time: 45 minutes
- Total time: About 1 hour 30 minutes
- Difficulty: Easy
- Servings: 9-12 blondies
Ingredients
- ½ cup (115 g) unsalted butter, melted and slightly cooled
- ¾ cup (150 g) light brown sugar, packed
- 1 large egg, at room temperature
- 2 teaspoons vanilla extract
- 1 cup (125 g) all-purpose flour
- ¼ teaspoon baking powder
- ¼ teaspoon salt
- ¾ cup (130 g) white chocolate chips or chopped white chocolate
- ¾ cup (90 g) fresh raspberries, gently patted dry
Instructions
Step 1: Prepare the baking pan.
Preheat your oven to 350°F (175°C). Line an 8-inch (20 cm) square baking pan with parchment paper, leaving some overhang on the sides so you can lift the blondies out easily later.
Step 2: Mix the butter and sugar.
In a medium bowl, whisk together the melted butter and brown sugar until smooth. Add the egg and vanilla extract, then whisk until everything is well combined.
Step 3: Add the dry ingredients.
Add the flour, baking powder, and salt to the bowl. Fold gently with a spatula until no dry flour remains. The batter will be thick, which is exactly what you want for chewy blondies.
Step 4: Fold in the white chocolate and raspberries.
Gently fold in the white chocolate, then add the raspberries. Try not to stir too much because fresh raspberries are delicate and can break apart easily. A few streaks of raspberry through the batter are perfectly fine.
Step 5: Spread the batter.
Transfer the batter to the prepared pan and spread it evenly into the corners. If you like, press a few extra white chocolate pieces and raspberries gently onto the top for a pretty finish.
Step 6: Bake until lightly golden.
Bake for 25-30 minutes, or until the edges are lightly golden and the center is just set. A toothpick inserted into the center should come out with a few moist crumbs, but not wet batter. Avoid overbaking, as the blondies will continue to firm up while cooling.
Step 7: Cool and slice.
Let the blondies cool completely in the pan before lifting them out with the parchment paper. Cut into 9 large or 12 smaller squares. For a Valentine’s Day look, you can also cut heart shapes from the cooled blondies using a small cookie cutter.
11. Valentine’s Day Sugar Cookie Bars
If you love sugar cookies but don’t feel like rolling out dough and cutting individual shapes, these Valentine’s Day sugar cookie bars are just what you need. They’re soft, buttery, and topped with a sweet layer of pink frosting and plenty of festive sprinkles. I love how they have all the flavor of classic sugar cookies without the extra work of shaping each one.
These bars are perfect for parties, school treats, or a cozy Valentine’s Day celebration at home. You bake the dough in one pan, spread the frosting over the cooled cookie base, and cut everything into squares. It’s an easy way to make a batch of cute Valentine’s Day desserts to share with the people you love.
Recipe Details
- Prep time: 20 minutes
- Bake time: 18-22 minutes
- Cooling time: 45 minutes
- Total time: About 1 hour 30 minutes
- Difficulty: Easy
- Servings: 12-16 bars
Ingredients
For the cookie bars:
- ½ cup (115 g) unsalted butter, softened
- ¾ cup (150 g) granulated sugar
- 1 large egg, at room temperature
- 2 teaspoons vanilla extract
- 1¾ cups (220 g) all-purpose flour
- ½ teaspoon baking powder
- ¼ teaspoon salt
- 2 tablespoons (30 ml) milk, if needed
For the frosting:
- ½ cup (115 g) unsalted butter, softened
- 2 cups (240 g) powdered sugar
- 1 teaspoon vanilla extract
- 1-2 tablespoons milk or cream
- A few drops of pink or red food coloring
- Valentine’s Day sprinkles, for decorating
Instructions
Step 1: Prepare the pan.
Preheat your oven to 350°F (175°C). Line an 8-inch (20 cm) square baking pan with parchment paper, leaving a little overhang on the sides. This makes it easier to lift out the cookie bars once they’ve cooled.
Step 2: Cream the butter and sugar.
In a large bowl, beat the softened butter and granulated sugar until creamy and slightly fluffy, about 2 minutes. Add the egg and vanilla extract, then mix until well combined.
Step 3: Add the dry ingredients.
In a separate bowl, whisk together the flour, baking powder, and salt. Gradually add this mixture to the butter mixture, stirring until a soft dough forms. If the dough seems too dry to come together, add the milk a little at a time. You want a soft, spreadable dough rather than a wet batter.
Step 4: Press the dough into the pan.
Transfer the dough to the prepared baking pan. Use clean hands or a spatula to press it into an even layer, making sure it reaches the corners.
Step 5: Bake the cookie base.
Bake for 18-22 minutes, or until the edges are lightly golden and the center looks set. The top should remain fairly pale. Let the cookie base cool completely in the pan before adding the frosting.
Step 6: Make the frosting.
Beat the softened butter until smooth. Gradually add the powdered sugar, then mix in the vanilla extract and 1 tablespoon of milk or cream. Add a little more liquid if needed until the frosting is creamy and easy to spread. Mix in a few drops of pink or red food coloring.
Step 7: Frost and decorate.
Spread the frosting evenly over the cooled cookie base. Add Valentine’s Day sprinkles while the frosting is still soft. For an extra festive touch, use heart-shaped sprinkles or a mix of pink, red, and white decorations.
Step 8: Cut into bars.
Let the frosting set for about 15-20 minutes, or refrigerate the pan briefly if needed. Lift the cookie slab out using the parchment paper and cut it into 12-16 squares with a sharp knife.
12. Strawberry Cream Truffles
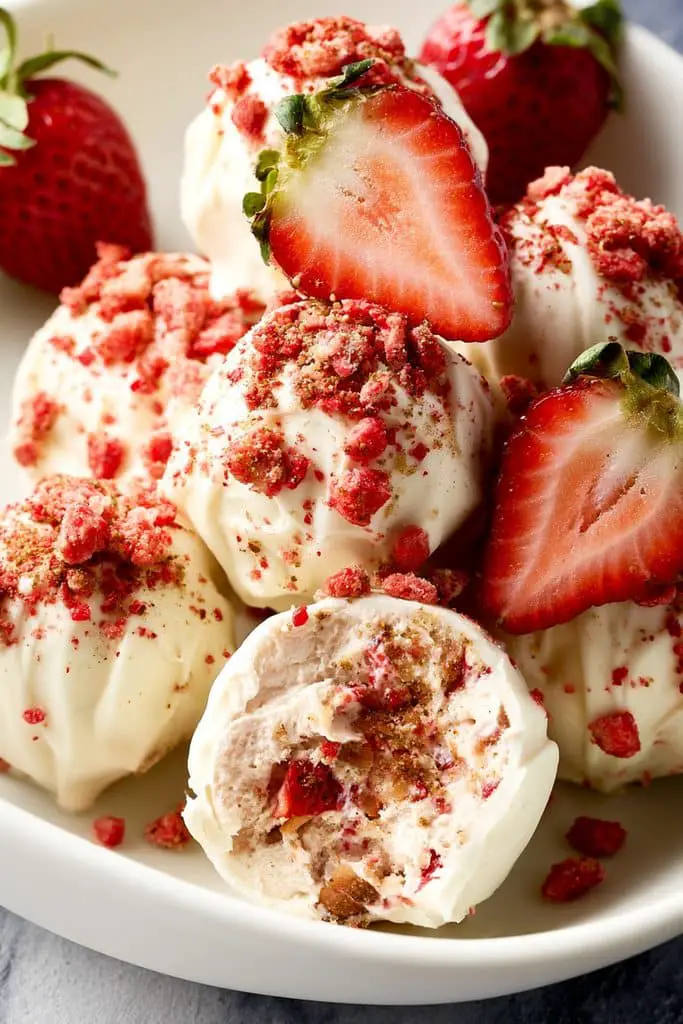
If you love the combination of strawberries and cream, these little truffles are such a lovely Valentine’s Day treat.
The best part is that you don’t need to bake anything. The filling comes together with just a few ingredients, and after a little chilling time, you can roll the mixture into balls and dip them in chocolate. They’re perfect for homemade gift boxes, dessert platters, or whenever you want a sweet treat that’s easy to share.
Recipe Details
- Prep time: 25 minutes
- Chilling time: 1 hour
- Setting time: 20 minutes
- Total time: About 1 hour 45 minutes
- Difficulty: Easy
- Servings: 16-18 truffles
Ingredients
For the strawberry cream filling:
- 8 oz (225 g) cream cheese, softened
- 2 tablespoons (28 g) unsalted butter, softened
- 2 cups (240 g) powdered sugar
- ⅓ cup (35 g) freeze-dried strawberries, finely crushed into powder
- ½ teaspoon vanilla extract
For the chocolate coating:
- 8 oz (225 g) white chocolate or white candy melts
- 1 teaspoon neutral oil, only if needed for a smoother coating
- Pink candy melts or extra white chocolate for drizzling, optional
- Valentine’s Day sprinkles, optional
Instructions
Step 1: Prepare the strawberry powder.
Place the freeze-dried strawberries in a food processor or a sealed bag and crush them into a fine powder. Using freeze-dried strawberries gives the filling a lovely fruity flavor without adding extra moisture.
Step 2: Make the cream filling.
In a mixing bowl, beat the cream cheese and butter until smooth. Add the powdered sugar gradually, followed by the strawberry powder and vanilla extract. Mix until everything is combined and the filling has a soft, thick consistency.
Step 3: Chill the mixture.
Cover the bowl and refrigerate for about 30-45 minutes, or until the mixture is firm enough to handle. If it still feels sticky, chill it a little longer.
Step 4: Shape the truffles.
Scoop out small portions of the chilled mixture and roll them into balls about 1 inch wide. Place them on a parchment-lined tray and refrigerate for another 15-20 minutes while you prepare the coating.
Step 5: Melt the chocolate.
Place the white chocolate or candy melts in a microwave-safe bowl. Heat in 20-second intervals, stirring after each one, until smooth. If using white chocolate and it’s too thick for dipping, stir in a little neutral oil, starting with ½ teaspoon.
Step 6: Dip the truffles.
Use a fork or dipping tool to lower each chilled truffle into the melted coating. Lift it out and gently tap the fork against the bowl to remove excess chocolate. Place the coated truffle back on the parchment-lined tray.
Step 7: Decorate and set.
While the coating is still wet, add sprinkles. For a pretty finish, drizzle melted pink candy melts or a little contrasting chocolate over the tops. Let the truffles set at room temperature or refrigerate them briefly until the coating is firm.
13. Mini Chocolate Cheesecakes
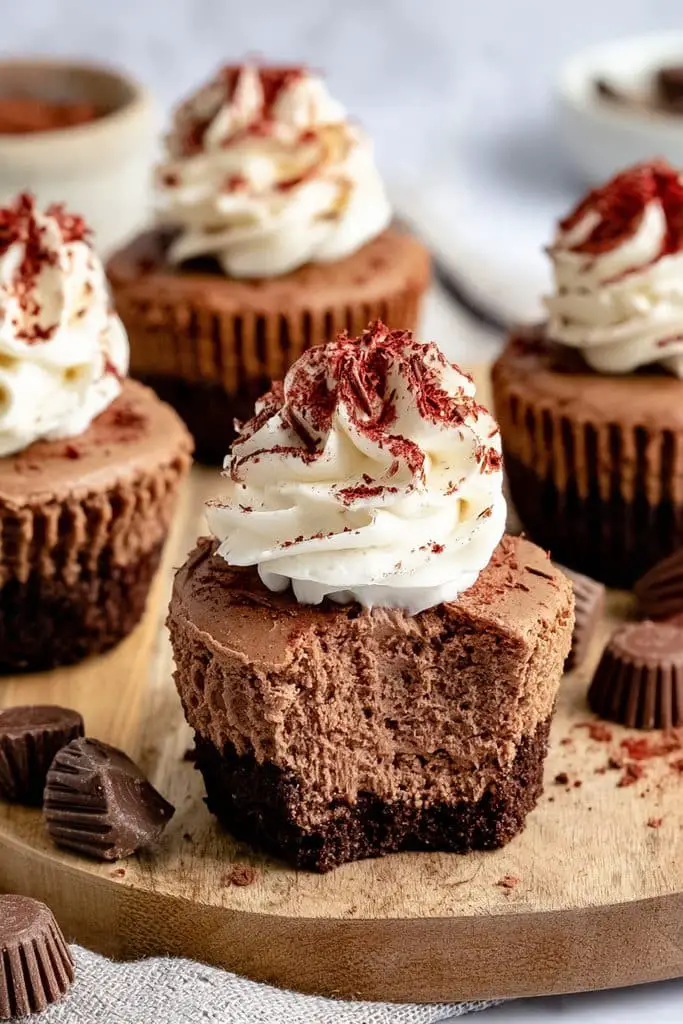
If you love chocolate and cheesecake, these mini chocolate cheesecakes are the perfect combination of both. I love making mini desserts for Valentine’s Day because everyone gets their own little cheesecake, and they look so pretty arranged on a serving tray.
These cheesecakes are easier to serve than a full-sized cheesecake, and you don’t need to worry about cutting perfect slices. You can top them with whipped cream, chocolate shavings, or fresh strawberries to make them extra special. They’re a wonderful choice when you want Valentine’s Day desserts that feel fancy but are still simple enough to make at home.
Recipe Details
- Prep time: 20 minutes
- Bake time: 18-22 minutes
- Cooling time: 30 minutes
- Chilling time: At least 2 hours
- Total time: About 3 hours 15 minutes
- Difficulty: Easy
- Servings: 12 mini cheesecakes
Ingredients
For the chocolate cookie crust:
- 1 cup (110 g) chocolate cookie crumbs
- 3 tablespoons (42 g) unsalted butter, melted
For the chocolate cheesecake filling:
- 16 oz (450 g) full-fat cream cheese, softened
- ½ cup (100 g) granulated sugar
- 2 large eggs, at room temperature
- 4 oz (115 g) semi-sweet chocolate, melted and slightly cooled
- ¼ cup (60 g) sour cream
- 1 teaspoon vanilla extract
- 1 tablespoon unsweetened cocoa powder
For the topping (optional):
- 3 oz (85 g) semi-sweet chocolate, chopped
- ¼ cup (60 ml) heavy cream
- Whipped cream, chocolate shavings, or fresh strawberries for decorating
Instructions
Step 1: Prepare the muffin pan.
Preheat your oven to 325°F (160°C). Line a standard 12-cup muffin pan with paper liners. This makes the mini cheesecakes easier to remove once they’re chilled.
Step 2: Make the crust.
Mix the chocolate cookie crumbs and melted butter in a small bowl until the crumbs are evenly moistened. Divide the mixture among the 12 liners, using about 1 tablespoon per cup. Press firmly into the bottom of each liner with the back of a spoon. Bake for 5 minutes, then set aside.
Step 3: Prepare the filling.
Beat the cream cheese and sugar until smooth and creamy. Add the eggs one at a time, mixing on low speed after each addition. Mix in the melted chocolate, sour cream, vanilla extract, and cocoa powder until just combined. Scrape down the sides of the bowl to make sure there are no lumps.
Step 4: Fill the muffin cups.
Divide the cheesecake mixture evenly among the prepared crusts, filling each liner nearly to the top. Gently tap the pan on the counter to release any large air bubbles.
Step 5: Bake the mini cheesecakes.
Bake for 18-22 minutes, until the edges are set and the centers still have a slight wobble. Remove the pan from the oven and let the cheesecakes cool in the pan for about 20-30 minutes. They’ll firm up further as they cool.
Step 6: Chill until firm.
Once the cheesecakes have cooled, transfer the pan to the refrigerator and chill for at least 2 hours. For the best texture, you can leave them overnight.
Step 7: Add the chocolate topping.
To make a simple chocolate ganache, place the chopped chocolate in a heatproof bowl. Warm the heavy cream until steaming but not boiling, then pour it over the chocolate. Let it stand for 2 minutes before stirring until smooth. Allow the ganache to cool slightly, then spoon a little over each chilled cheesecake.
Step 8: Decorate and serve.
Let the topping set briefly in the refrigerator. Add a swirl of whipped cream, chocolate shavings, or a small strawberry on top just before serving.
14. Pink Strawberry Cupcakes
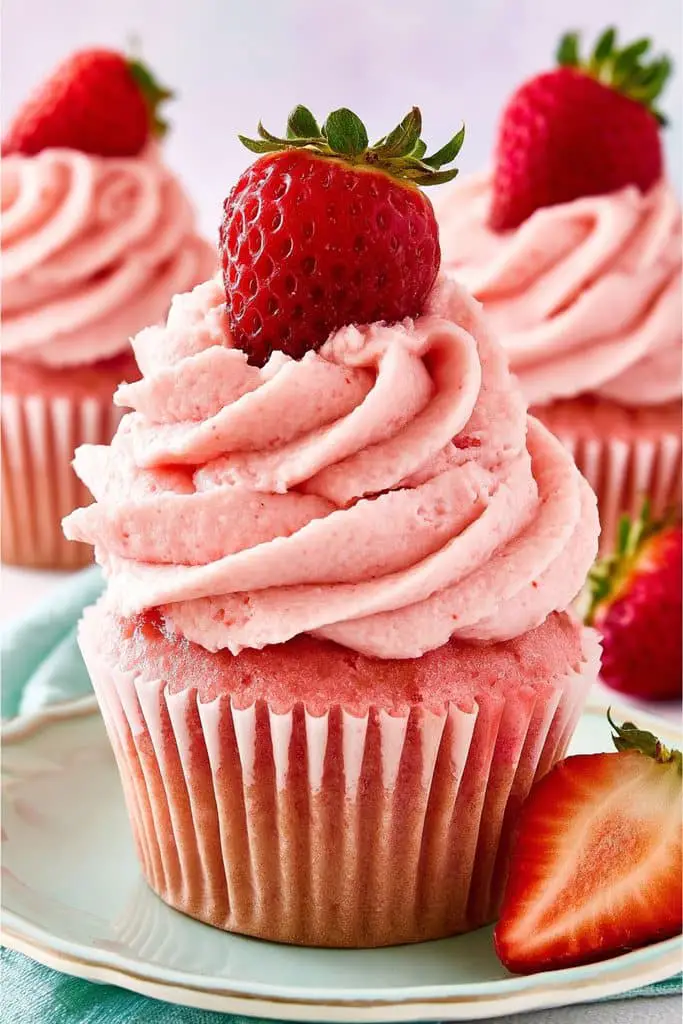
Pink strawberry cupcakes are such a pretty choice for Valentine’s Day. They’re soft, fluffy, and full of sweet strawberry flavor, with a lovely pink frosting that makes them look festive without needing much extra decoration.
These cupcakes are perfect for Valentine’s Day parties, homemade gifts, or a cozy celebration at home. You can decorate them with heart-shaped sprinkles, tiny strawberry slices, or a little pink sugar. If you’re looking for cute Valentine’s Day desserts to make at home, these cupcakes are a lovely way to add something colorful and delicious to your dessert table.
Recipe Details
- Prep time: 25 minutes
- Bake time: 18-22 minutes
- Cooling time: 30 minutes
- Total time: About 1 hour 20 minutes
- Difficulty: Easy
- Servings: 12 cupcakes
Ingredients
For the cupcakes:
- 1½ cups (190 g) all-purpose flour
- 1½ teaspoons baking powder
- ¼ teaspoon salt
- ½ cup (115 g) unsalted butter, softened
- ¾ cup (150 g) granulated sugar
- 2 large eggs, at room temperature
- 1 teaspoon vanilla extract
- ½ cup (120 ml) milk, at room temperature
- ⅓ cup (40 g) freeze-dried strawberries, finely ground into powder
- A few drops of pink food coloring, optional
For the strawberry buttercream:
- ½ cup (115 g) unsalted butter, softened
- 2½ cups (300 g) powdered sugar
- ¼ cup (30 g) freeze-dried strawberries, finely ground into powder
- 2-3 tablespoons milk or cream
- ½ teaspoon vanilla extract
- A few drops of pink food coloring, optional
Instructions
Step 1: Prepare the oven and pan.
Preheat your oven to 350°F (175°C). Line a 12-cup muffin pan with paper cupcake liners so the cupcakes are easy to remove after baking.
Step 2: Mix the dry ingredients.
In a medium bowl, whisk together the flour, baking powder, salt, and ground freeze-dried strawberries. Set aside while you prepare the butter mixture.
Step 3: Cream the butter and sugar.
In a large bowl, beat the softened butter and granulated sugar for about 2-3 minutes, until light and fluffy. Add the eggs one at a time, beating well after each addition. Mix in the vanilla extract.
Step 4: Make the batter.
Add the dry ingredients to the butter mixture in three additions, alternating with the milk. Begin and end with the dry ingredients, mixing gently after each addition. If you’d like a brighter pink color, add a few drops of pink food coloring and mix just until combined. Avoid overmixing so the cupcakes stay soft.
Step 5: Bake the cupcakes.
Divide the batter evenly among the cupcake liners, filling each about two-thirds full. Bake for 18-22 minutes, or until a toothpick inserted into the center comes out clean. Let the cupcakes cool in the pan for 5 minutes, then transfer them to a wire rack to cool completely.
Step 6: Prepare the strawberry buttercream.
Beat the softened butter until creamy. Gradually add the powdered sugar and ground freeze-dried strawberries. Add the vanilla extract and 2 tablespoons of milk or cream, then beat until fluffy. If the frosting is too thick, add a little more milk; if you want a stronger pink shade, add a small amount of food coloring.
Step 7: Frost and decorate.
Once the cupcakes have cooled completely, pipe or spread the strawberry buttercream on top. Finish with heart-shaped sprinkles, a little strawberry powder, or a small piece of freeze-dried strawberry for a pretty Valentine’s Day look.
15. Chocolate Fudge Brownies
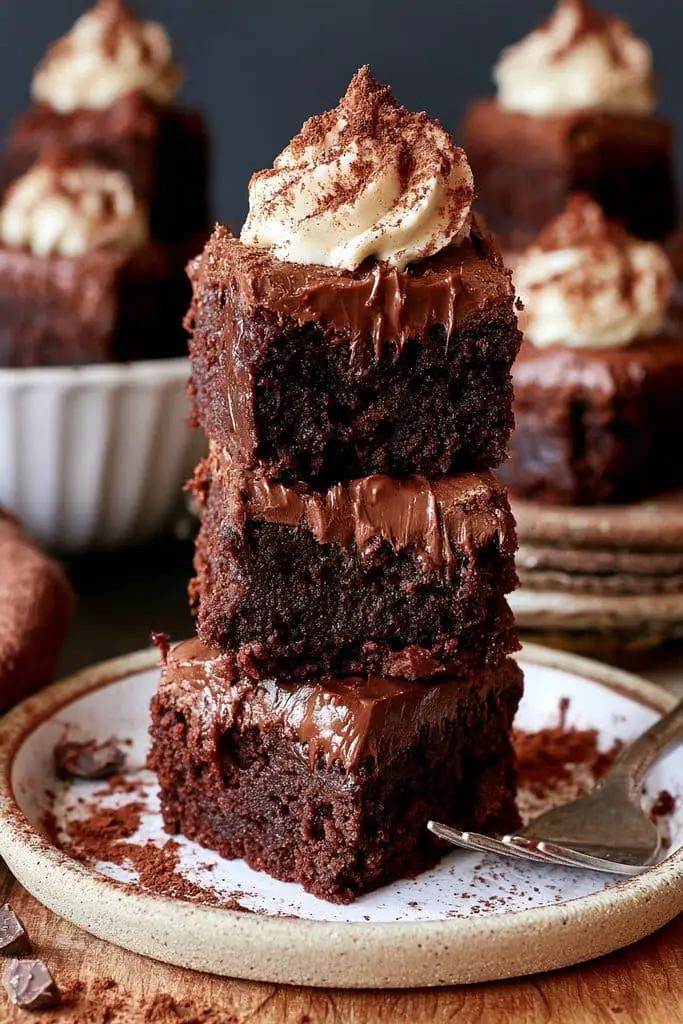
Sometimes, nothing beats a good chocolate brownie. I think they’re one of the easiest desserts to make when you’re craving something sweet, especially if chocolate is your favorite.
What I love most about this recipe is that you don’t need frosting or fancy decorations to make the brownies delicious. They’re perfect just as they are, but you can always add a drizzle of melted chocolate, a handful of chocolate chips, or a few fresh strawberries to give them a Valentine’s Day touch.
Recipe Details
- Prep time: 15 minutes
- Bake time: 25-30 minutes
- Cooling time: 45 minutes
- Total time: About 1 hour 30 minutes
- Difficulty: Easy
- Servings: 9-12 brownies
Ingredients
- ½ cup (115 g) unsalted butter
- 4 oz (115 g) semi-sweet or dark chocolate, chopped
- 1 cup (200 g) granulated sugar
- 2 large eggs, at room temperature
- 1 teaspoon vanilla extract
- ½ cup (65 g) all-purpose flour
- ¼ cup (25 g) unsweetened cocoa powder
- ¼ teaspoon salt
- ½ cup (85 g) chocolate chips or chopped chocolate, optional
Instructions
Step 1: Prepare the baking pan.
Preheat your oven to 350°F (175°C). Line an 8-inch (20 cm) square baking pan with parchment paper, leaving some paper hanging over the sides. This will make it easier to lift the brownies out after baking.
Step 2: Melt the butter and chocolate.
Place the butter and chopped chocolate in a heatproof bowl. Melt them together in the microwave in 20-second intervals, stirring between each interval, until the mixture is smooth. You can also melt them in a heatproof bowl set over a pan of gently simmering water. Let the mixture cool slightly.
Step 3: Whisk the eggs and sugar.
In a separate bowl, whisk the eggs and sugar together for about 1-2 minutes, until the mixture looks smooth and slightly thickened. Stir in the vanilla extract.
Step 4: Combine the chocolate mixture.
Slowly pour the melted chocolate and butter into the egg mixture, stirring until everything is well combined. Make sure the chocolate mixture isn’t piping hot when you add it.
Step 5: Add the dry ingredients.
Sift in the flour, cocoa powder, and salt. Gently fold everything together with a spatula until no dry streaks remain. If you want extra chocolate in every bite, fold in the chocolate chips at this stage. Avoid overmixing to keep the brownies tender.
Step 6: Bake the brownies.
Pour the batter into the prepared pan and spread it evenly. Bake for 25-30 minutes. The edges should look set, and a toothpick inserted near the center should come out with a few moist crumbs rather than wet batter.
Step 7: Cool before slicing.
Let the brownies cool completely in the pan, about 45 minutes or longer if needed. Lift them out using the parchment paper and cut them into squares with a sharp knife. For cleaner slices, wipe the knife between cuts.
16. Cherry Chocolate Cupcakes
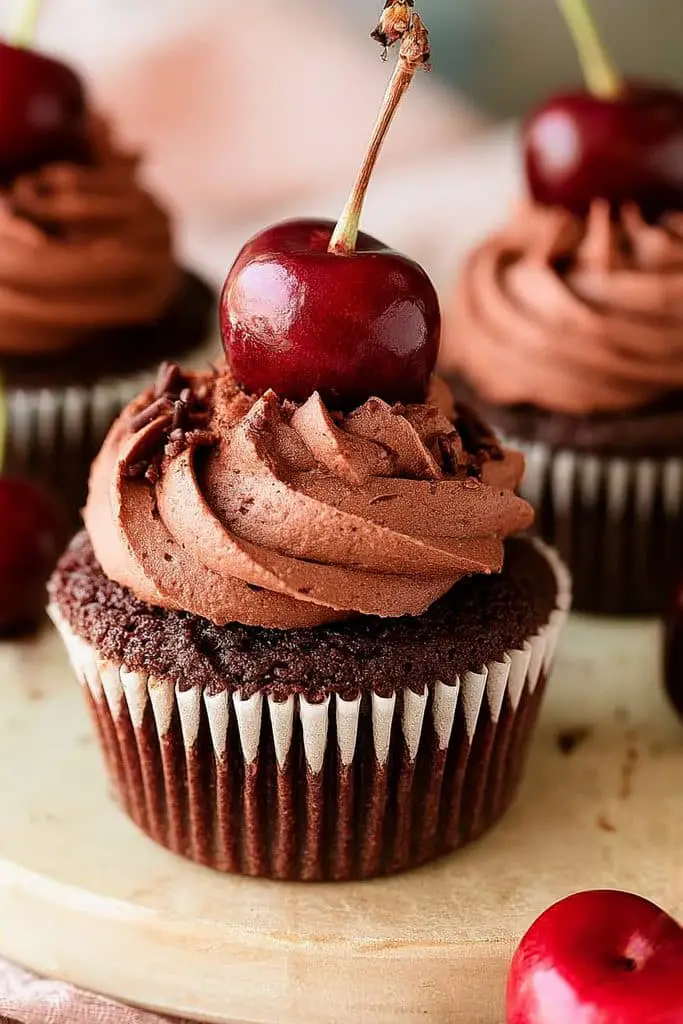
The cupcakes have a soft, rich chocolate base with sweet cherry flavor and a creamy topping that makes them feel extra special. They’re pretty enough for Valentine’s Day but simple enough to make whenever you’re craving a chocolate treat.
For this recipe, we’ll make moist chocolate cupcakes with a little cherry filling in the center and a fluffy cherry buttercream on top. You can use jarred or canned cherries, so there’s no need to wait for cherry season. Add a chocolate curl and a cherry on top, and you’ve got a dessert that looks like it came straight from a bakery.
Recipe Details
- Prep time: 30 minutes
- Bake time: 18-22 minutes
- Cooling time: 30 minutes
- Total time: About 1 hour 30 minutes
- Difficulty: Medium
- Servings: 12 cupcakes
Ingredients
For the chocolate cupcakes:
- 1 cup (125 g) all-purpose flour
- ½ cup (100 g) granulated sugar
- ¼ cup (25 g) unsweetened cocoa powder
- ½ teaspoon baking soda
- ¼ teaspoon baking powder
- ¼ teaspoon salt
- 1 large egg
- ½ cup (120 ml) buttermilk
- ¼ cup (60 ml) neutral oil
- 1 teaspoon vanilla extract
- ½ cup (120 ml) hot coffee or hot water
For the cherry filling:
- 1 cup (150 g) pitted cherries, fresh or canned and drained
- 2 tablespoons granulated sugar
- 1 teaspoon lemon juice
- 1 teaspoon cornstarch mixed with 1 tablespoon water
For the cherry buttercream:
- ½ cup (115 g) unsalted butter, softened
- 2½ cups (300 g) powdered sugar
- 2 tablespoons cooled cherry filling or thick cherry syrup
- 1 teaspoon vanilla extract
- 1-2 tablespoons milk or cream, as needed
For decorating (optional):
- 12 cherries, fresh or well-drained cocktail cherries
- Chocolate shavings or grated chocolate
Instructions
Step 1: Prepare the oven and cupcake pan.
Preheat your oven to 350°F (175°C). Line a 12-cup muffin pan with paper cupcake liners.
Step 2: Mix the dry ingredients.
In a large bowl, whisk together the flour, sugar, cocoa powder, baking soda, baking powder, and salt until evenly combined.
Step 3: Add the wet ingredients.
Add the egg, buttermilk, oil, and vanilla extract to the dry ingredients. Whisk until the batter is smooth. Slowly stir in the hot coffee or hot water. The batter will be quite thin, which helps create soft, moist cupcakes.
Step 4: Bake the cupcakes.
Divide the batter evenly among the liners, filling each about two-thirds full. Bake for 18-22 minutes, or until a toothpick inserted into the center comes out clean or with a few moist crumbs. Let the cupcakes cool in the pan for 5 minutes, then transfer them to a wire rack to cool completely.
Step 5: Make the cherry filling.
Place the pitted cherries, sugar, and lemon juice in a small saucepan over medium heat. Cook for about 5-7 minutes, stirring occasionally, until the cherries soften and release their juices. Stir the cornstarch mixture again, add it to the pan, and cook for another 1-2 minutes until thickened. Let the filling cool completely before using it.
Step 6: Prepare the cherry buttercream.
Beat the softened butter until creamy. Gradually add the powdered sugar, then mix in the vanilla extract and 2 tablespoons of the cooled, thick cherry filling or syrup. Beat until fluffy. If the frosting is too thick, add milk or cream a little at a time. If it’s too soft, refrigerate it briefly before piping.
Step 7: Fill the cupcakes.
Once the cupcakes are completely cool, use a small knife or cupcake corer to remove a little from the center of each one. Spoon in a small amount of the cooled cherry filling, then replace a little of the removed cake if needed.
Step 8: Frost and decorate.
Pipe the cherry buttercream onto each cupcake. Finish with a cherry and a sprinkle of chocolate shavings. If you’re using cocktail cherries, drain and pat them dry first so they don’t make the frosting watery.
17. Heart-Shaped Puff Pastry Palmiers
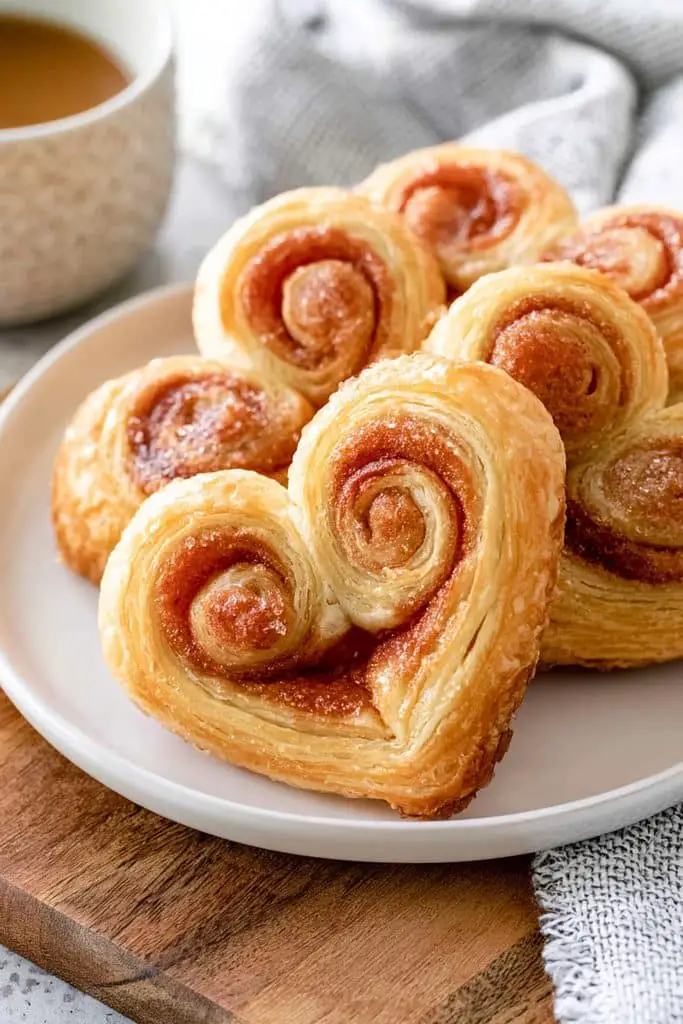
If you’re looking for cute Valentine’s Day desserts to make without spending hours in the kitchen, these heart-shaped puff pastry palmiers are such a lovely idea. They’re crisp, buttery, lightly caramelized, and covered in sweet cinnamon sugar. Best of all, you only need a handful of ingredients to make them.
Store-bought puff pastry does most of the work, so you can focus on shaping the hearts and getting those golden, crispy edges. Serve them with coffee, hot chocolate, or a scoop of ice cream for a simple Valentine’s Day treat.
Recipe Details
- Prep time: 15 minutes
- Bake time: 12-18 minutes
- Chilling time: 20 minutes
- Total time: About 50 minutes
- Difficulty: Easy
- Servings: 16-20 palmiers
Ingredients
- 1 sheet frozen puff pastry, about 250-300 g, thawed but still cold
- ⅓ cup (65 g) granulated sugar
- 1 teaspoon ground cinnamon
- 1 tablespoon melted butter, optional
- 1 tablespoon powdered sugar, optional, for dusting
Instructions
Step 1: Prepare the oven.
Preheat your oven to 400°F (200°C). Line a baking sheet with parchment paper.
Step 2: Mix the cinnamon sugar.
In a small bowl, combine the granulated sugar and ground cinnamon. Sprinkle some of the mixture over a clean work surface.
Step 3: Roll out the pastry.
Unfold the cold puff pastry over the cinnamon sugar. If needed, gently roll it into a rectangle about ¼ inch thick. Sprinkle the remaining cinnamon sugar over the top and lightly press it into the pastry. You can brush the pastry with a very thin layer of melted butter first if you’d like the sugar to stick more easily.
Step 4: Shape the hearts.
Starting from one long edge, roll the pastry inward toward the center. Roll the opposite long edge inward as well, so the two rolls meet in the middle. Gently press them together, then turn the pastry over and slice it into pieces about ½ inch thick. Pinch the bottom point of each piece slightly to give it a more defined heart shape.
Step 5: Chill the pastries.
Arrange the palmiers on the prepared baking sheet, leaving space between them because they’ll spread as they bake. Refrigerate for about 20 minutes to help the pastry hold its shape.
Step 6: Bake until golden.
Bake for 6-9 minutes, then carefully flip each palmier with a spatula. Bake for another 6-9 minutes, or until both sides are golden brown and caramelized. Keep an eye on them near the end, as the sugar can burn quickly.
Step 7: Cool and serve.
Let the palmiers cool on the baking sheet for a few minutes before transferring them to a wire rack. They’ll become crispier as they cool. Dust lightly with powdered sugar if desired.
18. No-Bake Chocolate Peanut Butter Hearts
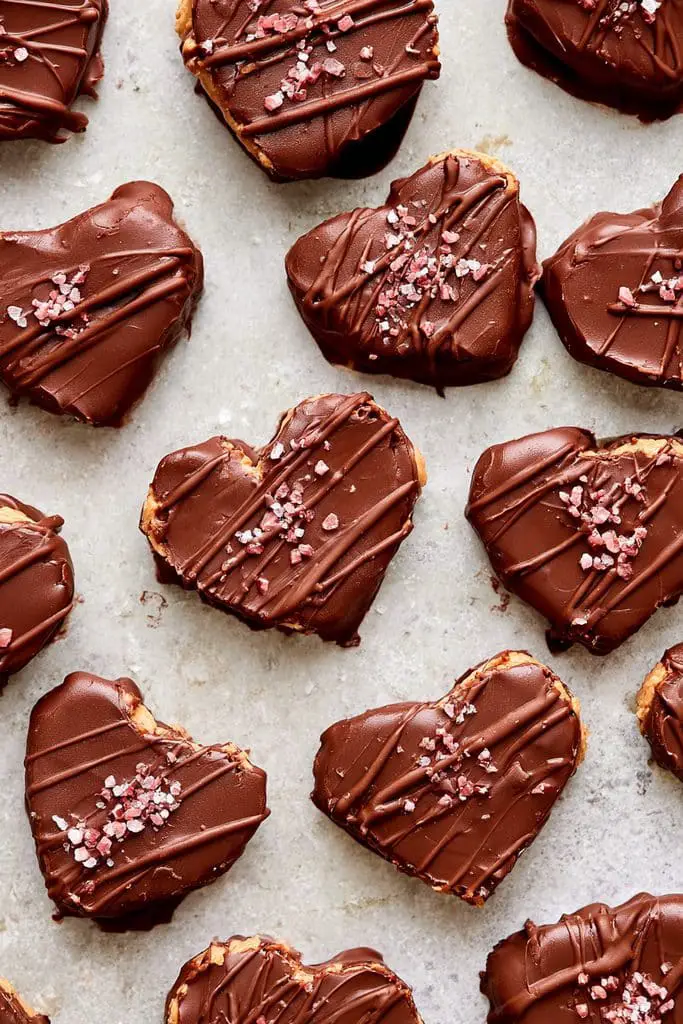
If you love the combination of chocolate and peanut butter, these no-bake chocolate peanut butter hearts are a must-try for Valentine’s Day.
What I love most about this recipe is that you don’t need to turn on the oven. The filling comes together with just a few simple ingredients, and a heart-shaped cookie cutter gives these little candies their cute Valentine’s Day look. They’re perfect for gifting, sharing with friends, or adding to a homemade dessert box.
If you’re searching for Valentine’s Day desserts easy to make at home, these chocolate peanut butter hearts are a delicious choice.
Recipe Details
- Prep time: 25 minutes
- Chilling time: 45-60 minutes
- Cook time: 0 minutes
- Total time: About 1 hour 25 minutes
- Difficulty: Easy
- Servings: 14-18 hearts
Ingredients
For the peanut butter filling:
- 1 cup (250 g) creamy peanut butter
- ¼ cup (56 g) unsalted butter, softened
- 1 teaspoon vanilla extract
- 2 cups (240 g) powdered sugar, plus extra if needed
- ¼ teaspoon salt, if using unsalted peanut butter
For the chocolate coating:
- 2 cups (340 g) semisweet chocolate chips or chopped chocolate
- 1 tablespoon coconut oil or vegetable shortening, optional, for a smoother coating
- Pink or white melted chocolate and Valentine’s Day sprinkles, optional, for decorating
Instructions
Step 1: Make the peanut butter filling.
Add the peanut butter, softened butter, vanilla extract, and salt to a mixing bowl. Stir until everything is smooth and well combined.
Step 2: Add the powdered sugar.
Gradually mix in the powdered sugar until you have a thick, dough-like mixture that you can roll out without it sticking too much to your hands. If the mixture feels too soft, add a little more powdered sugar.
Step 3: Roll out the filling.
Place the mixture between two sheets of parchment paper and roll it out to about ½ inch thick. Transfer it to a baking sheet and refrigerate for 20-30 minutes, or until firm enough to cut.
Step 4: Cut out the hearts.
Use a small heart-shaped cookie cutter to cut out the peanut butter hearts. Gently gather the scraps, press them together, and roll them out again to make more hearts. Place the cutouts on a parchment-lined tray and chill for another 15-20 minutes.
Step 5: Melt the chocolate.
Put the chocolate chips in a microwave-safe bowl. Heat in 20-30 second intervals, stirring between each interval, until melted and smooth. Stir in the coconut oil or shortening if you’re using it.
Step 6: Dip the hearts in chocolate.
Using a fork, dip each chilled peanut butter heart into the melted chocolate, making sure it’s coated on all sides. Lift it out, gently tap the fork against the bowl to remove excess chocolate, and place it back on the parchment-lined tray.
Step 7: Decorate and chill.
While the chocolate is still wet, add Valentine’s Day sprinkles if desired. You can also let the coating set first, then drizzle melted pink or white chocolate over the hearts. Refrigerate for 15-20 minutes, or until the chocolate is firm.
Step 8: Serve and enjoy.
Once the coating has set, transfer the hearts to a serving plate or arrange them in a small gift box lined with parchment paper. They’re ready to share!
19. Lemon Raspberry Cake
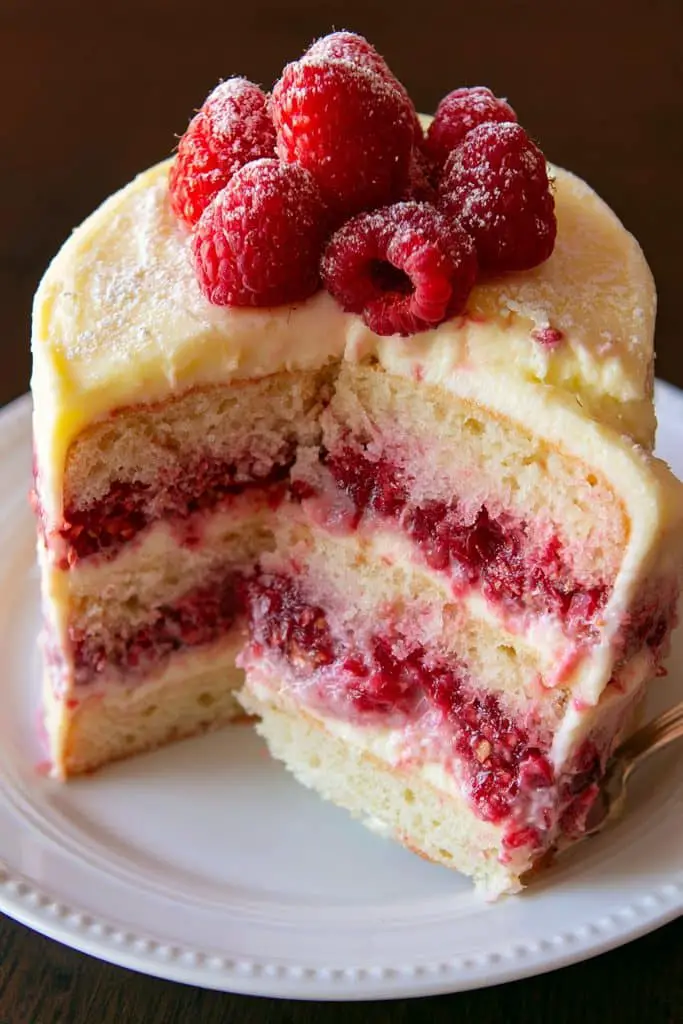
If you’re looking for a Valentine’s Day dessert that’s a little different from all the chocolate treats, this lemon raspberry cake is such a lovely choice. It has soft, fluffy lemon cake layers, a sweet-tart raspberry filling, and a creamy frosting that brings everything together beautifully.
It looks special enough for a Valentine’s Day celebration but is simple enough to make at home when you’re craving something fruity and delicious.
Whether you’re baking for your partner, family, or friends, this cake is one of those Valentine’s Day desserts to bake when you want something fresh, colorful, and full of flavor.
Recipe Details
- Prep time: 30 minutes
- Bake time: 25-30 minutes
- Cooling time: 1 hour
- Total time: About 2 hours
- Difficulty: Medium
- Servings: 8-10 slices
Ingredients
For the lemon cake:
- 2 cups (250 g) all-purpose flour
- 1½ teaspoons baking powder
- ¼ teaspoon baking soda
- ¼ teaspoon salt
- ½ cup (113 g) unsalted butter, softened
- 1 cup (200 g) granulated sugar
- 2 large eggs, at room temperature
- 2 tablespoons finely grated lemon zest
- ¼ cup (60 ml) fresh lemon juice
- 1 teaspoon vanilla extract
- ¾ cup (180 ml) buttermilk, at room temperature
For the raspberry filling:
- 1½ cups (about 180 g) fresh or frozen raspberries
- ¼ cup (50 g) granulated sugar
- 1 tablespoon lemon juice
- 1 teaspoon cornstarch mixed with 1 tablespoon cold water
For the frosting:
- 1 cup (226 g) unsalted butter, softened
- 3 cups (360 g) powdered sugar
- 2 tablespoons heavy cream or milk, plus more if needed
- 1 teaspoon vanilla extract
- A pinch of salt
For decorating:
- Fresh raspberries
- Thin lemon slices or extra lemon zest, optional
Instructions
Step 1: Prepare the cake pans.
Preheat your oven to 350°F (175°C). Grease two 8-inch round cake pans and line the bottoms with parchment paper. This helps the cakes release easily after baking.
Step 2: Mix the dry ingredients.
In a medium bowl, whisk together the flour, baking powder, baking soda, and salt. Set aside while you prepare the wet ingredients.
Step 3: Cream the butter and sugar.
In a large mixing bowl, beat the softened butter and granulated sugar for about 3-4 minutes, until the mixture looks light and fluffy. Add the eggs one at a time, beating well after each addition. Mix in the lemon zest, lemon juice, and vanilla extract.
Step 4: Finish the cake batter.
Add the dry ingredients in three additions, alternating with the buttermilk. Start and finish with the dry ingredients, mixing just until everything is combined. Avoid overmixing, as this can make the cake dense.
Step 5: Bake the cake layers.
Divide the batter evenly between the prepared pans and smooth the tops. Bake for 25-30 minutes, or until a toothpick inserted into the center comes out clean or with a few moist crumbs. Let the cakes cool in their pans for 10 minutes, then turn them out onto a wire rack to cool completely.
Step 6: Make the raspberry filling.
Add the raspberries, sugar, and lemon juice to a small saucepan. Cook over medium heat for about 5-7 minutes, stirring and gently mashing the berries as they soften.
Stir in the cornstarch mixture and cook for another 1-2 minutes, until the filling thickens. Transfer it to a bowl and let it cool completely before assembling the cake.
Step 7: Prepare the frosting.
Beat the softened butter until creamy. Gradually add the powdered sugar, mixing on low speed at first. Add the vanilla, salt, and heavy cream or milk, then beat until smooth and fluffy. If the frosting is too thick, add a little more cream; if it’s too soft, mix in a little extra powdered sugar.
Step 8: Assemble the cake.
Place one completely cooled cake layer on a serving plate. Spread a thin layer of frosting over the top, then spoon the cooled raspberry filling into the center, leaving a small border around the edge to help keep it in place.
Place the second cake layer on top. Spread the remaining frosting over the top and sides of the cake. Smooth it out for a simple finish or create gentle swirls with a spatula.
Step 9: Decorate and serve.
Decorate the top with fresh raspberries and a little lemon zest. If you like, add a few thin lemon slices for an extra pretty look. Chill the cake briefly if needed to help the frosting set, then slice
20. Valentine’s Day Chocolate Chip Cookies
These cookies have soft, chewy centers, lightly crisp edges, and plenty of melted chocolate in every bite.
I love this recipe because it’s easy to make with everyday ingredients, and you can dress the cookies up with pink, red, and white sprinkles to give them a festive look. They’re perfect for sharing with someone you love, packing into little gift bags, or adding to a Valentine’s Day dessert platter.
If you’re looking for Valentine’s Day desserts easy to make at home, these chocolate chip cookies are a classic you really can’t go wrong with.
Recipe Details
- Prep time: 15 minutes
- Chilling time: 30 minutes
- Bake time: 10-12 minutes per batch
- Total time: About 1 hour
- Difficulty: Easy
- Servings: 18-20 cookies
Ingredients
- ½ cup (113 g) unsalted butter, softened
- ½ cup (100 g) packed light brown sugar
- ¼ cup (50 g) granulated sugar
- 1 large egg, at room temperature
- 2 teaspoons vanilla extract
- 1½ cups (190 g) all-purpose flour
- ½ teaspoon baking soda
- ¼ teaspoon salt
- 1 cup (170 g) semisweet chocolate chips or chunks
- 2-3 tablespoons Valentine’s Day sprinkles in pink, red, and white
Instructions
Step 1: Prepare the oven.
Preheat your oven to 350°F (175°C). Line two baking sheets with parchment paper and set them aside.
Step 2: Cream the butter and sugars.
In a large bowl, beat the softened butter, brown sugar, and granulated sugar until creamy and slightly fluffy, about 2 minutes. This helps give the cookies their soft, chewy texture.
Step 3: Add the egg and vanilla.
Mix in the egg and vanilla extract until everything is smooth and well combined. Scrape down the sides of the bowl if needed.
Step 4: Mix the dry ingredients.
In a separate bowl, whisk together the flour, baking soda, and salt. Add the dry mixture to the butter mixture and stir just until a soft dough forms. Try not to overmix, as that can make the cookies tough.
Step 5: Add the chocolate and sprinkles.
Fold in the chocolate chips and most of the Valentine’s Day sprinkles, saving a few to decorate the tops. The colorful sprinkles make these cookies look extra cute without adding much extra work.
Step 6: Chill the dough.
Cover the bowl and refrigerate the dough for about 30 minutes. Chilling helps prevent the cookies from spreading too much and gives the flavors a little time to develop.
Step 7: Shape the cookies.
Scoop the dough into balls, using about 1½ tablespoons of dough for each cookie. Place them on the prepared baking sheets, leaving around 2 inches between each one. Press a few reserved chocolate chips and sprinkles onto the tops.
Step 8: Bake until golden.
Bake for 10-12 minutes, or until the edges are lightly golden but the centers still look slightly soft. Don’t worry if the middle seems a little underdone; the cookies will continue to set as they cool.
Step 9: Cool and enjoy.
Let the cookies rest on the baking sheet for about 5 minutes before transferring them to a wire rack. If you want a bakery-style finish, gently press a few extra chocolate chips into the tops while they’re still warm.
21. Strawberry Brownies
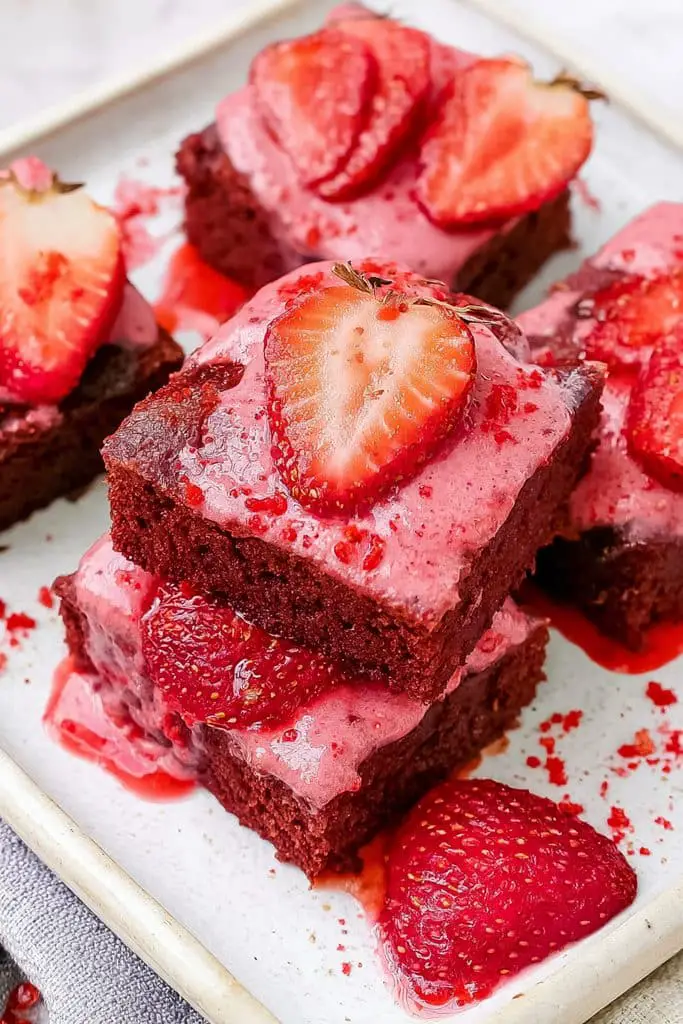
If you love fruity desserts with a pretty pink color, these strawberry brownies are such a fun treat to make for Valentine’s Day. They’re soft, chewy, and full of sweet strawberry flavor, with a lovely pink color that makes them look perfect for the occasion.
What I like most about this recipe is how easy it is. Instead of making a traditional chocolate brownie batter, you use strawberry cake mix to create a soft, dense dessert bar. A simple strawberry glaze on top adds even more flavor and gives the brownies a beautiful finish.
These strawberry brownies are ideal when you’re looking for cute Valentine’s Day desserts to make at home without spending too much time in the kitchen.
Recipe Details
- Prep time: 10 minutes
- Bake time: 18-23 minutes
- Cooling time: 30-45 minutes
- Total time: About 1 hour 15 minutes
- Difficulty: Easy
- Servings: 9-12 squares
Ingredients
For the strawberry brownies:
- 1 box (about 15.25 oz or 432 g) strawberry cake mix
- 2 large eggs
- ⅓ cup (80 ml) neutral vegetable oil
- 1 teaspoon vanilla extract, optional
- ½ cup (85 g) white chocolate chips, optional
For the strawberry glaze:
- 1 cup (120 g) powdered sugar
- 1-2 tablespoons strawberry puree or milk
- ½ teaspoon lemon juice, optional
Instructions
Step 1: Prepare the oven and pan.
Preheat your oven to 350°F (175°C). Line an 8-inch square baking pan with parchment paper, leaving a little overhang on the sides so you can lift the brownies out easily later.
Step 2: Make the batter.
Add the strawberry cake mix, eggs, vegetable oil, and vanilla extract to a large mixing bowl. Stir until everything is combined into a thick batter. It will be much thicker than a regular cake batter, which is what helps give these strawberry brownies their dense texture.
Step 3: Add the white chocolate.
If you’re using white chocolate chips, fold them gently into the batter. They add little pockets of creamy sweetness that pair beautifully with the strawberry flavor.
Step 4: Spread the batter.
Transfer the batter to the prepared baking pan. Use a spatula or the back of a spoon to spread it evenly into the corners. Since the batter is thick, take your time smoothing the top.
Step 5: Bake the brownies.
Bake for 18-23 minutes, or until the edges are set and a toothpick inserted near the center comes out with a few moist crumbs but no wet batter. Avoid overbaking, as the brownies can become dry.
Step 6: Let them cool.
Remove the pan from the oven and place it on a wire rack. Let the brownies cool completely in the pan before adding the glaze. This helps the topping stay smooth instead of melting into the warm brownies.
Step 7: Make the strawberry glaze.
In a small bowl, whisk together the powdered sugar and 1 tablespoon of strawberry puree or milk. Add a little more liquid as needed until the glaze is thick but easy to spread. Stir in the lemon juice if you’d like a little extra brightness.
Step 8: Glaze and slice.
Spread the glaze over the cooled brownies. Let it sit for about 15-20 minutes to set, then lift the brownies out using the parchment paper and cut them into squares with a sharp knife.
22. Raspberry Chocolate Tart
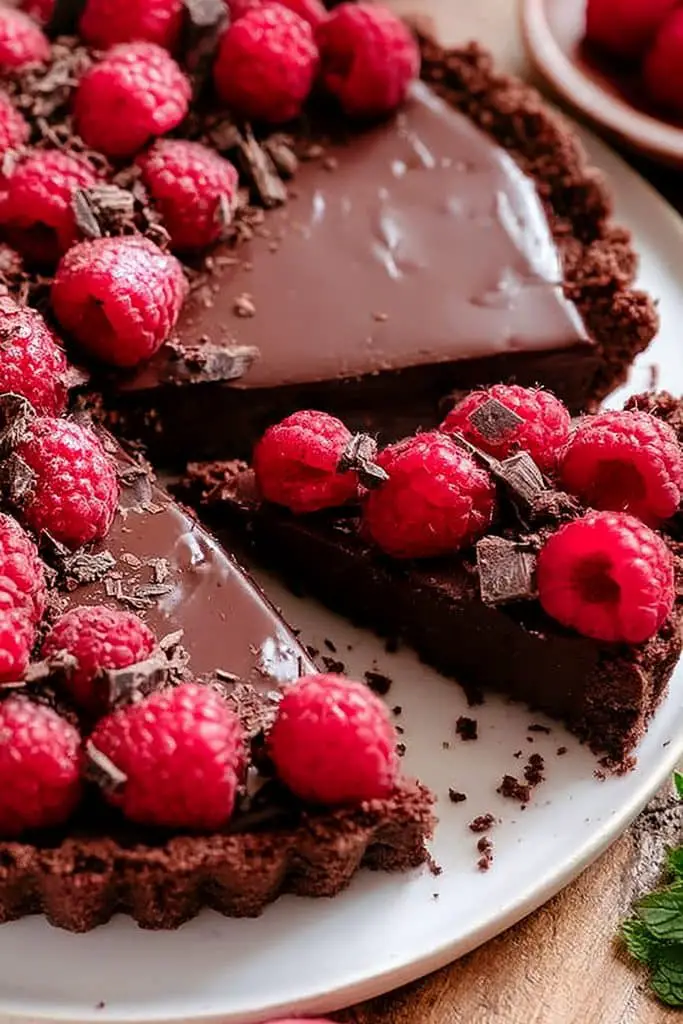
If there’s one dessert that looks like it came straight from a bakery, it’s a raspberry chocolate tart. With a crisp chocolate cookie crust, rich chocolate ganache, and fresh raspberries on top, this dessert is as beautiful as it is delicious.
The best part is that the filling is surprisingly simple to make, and you don’t need any complicated decorating skills to make the tart look impressive.
If you’re planning a romantic dinner or searching for delicious desserts to bake for Valentine’s Day, this raspberry chocolate tart is a lovely choice. It looks elegant on the table and is perfect for sharing with someone special.
Recipe Details
- Prep time: 25 minutes
- Bake time: 10 minutes
- Chilling time: 2 hours
- Total time: About 2 hours 35 minutes
- Difficulty: Medium
- Servings: 8 slices
Ingredients
For the chocolate crust:
- 2 cups (200 g) chocolate cookie crumbs
- 5 tablespoons (70 g) unsalted butter, melted
- 1 tablespoon granulated sugar, optional
For the chocolate ganache filling:
- 8 oz (225 g) semisweet or dark chocolate, finely chopped
- ¾ cup (180 ml) heavy cream
- 1 tablespoon unsalted butter
- 1 teaspoon vanilla extract
- A small pinch of salt
For the topping:
- 1-1½ cups (125-190 g) fresh raspberries
- 1 tablespoon powdered sugar, optional
- Chocolate shavings, optional
Instructions
Step 1: Prepare the oven and tart pan.
Preheat your oven to 350°F (175°C). Lightly grease a 9-inch tart pan with a removable bottom. This makes it much easier to remove the tart neatly once it’s set.
Step 2: Make the chocolate crust.
Place the chocolate cookie crumbs in a bowl and mix them with the melted butter and sugar, if using. Stir until the crumbs resemble damp sand and hold together when pressed.
Step 3: Press and bake the crust.
Press the crumb mixture firmly into the bottom and sides of the tart pan. Use the bottom of a measuring cup to make the crust compact and even. Bake for about 10 minutes, then remove it from the oven and let it cool completely.
Step 4: Prepare the chocolate ganache.
Place the chopped chocolate in a heatproof bowl. Warm the heavy cream in a small saucepan over medium-low heat until it’s steaming and just beginning to simmer around the edges. Don’t let it boil vigorously.
Pour the hot cream over the chocolate and let it sit for 2-3 minutes. Stir slowly from the center outward until the mixture becomes smooth and glossy.
Step 5: Add the finishing ingredients.
Stir the butter, vanilla extract, and pinch of salt into the ganache until everything is fully incorporated. The butter adds a little extra shine and makes the filling wonderfully smooth.
Step 6: Fill the tart shell.
Pour the ganache into the cooled chocolate crust. Gently tilt the pan to spread the filling evenly, or use a spatula to smooth the surface.
Step 7: Chill until set.
Place the tart in the refrigerator for at least 2 hours, or until the chocolate filling is firm enough to slice cleanly. If your kitchen is warm, allow a little extra chilling time.
Step 8: Decorate and serve.
Arrange the fresh raspberries over the top of the tart. You can place them in neat circles or scatter them naturally for a more relaxed look. Add a light dusting of powdered sugar or a few chocolate shavings just before serving.
For cleaner slices, dip a sharp knife in warm water and wipe it dry between cuts.
23. Mini Heart-Shaped Fruit Tarts
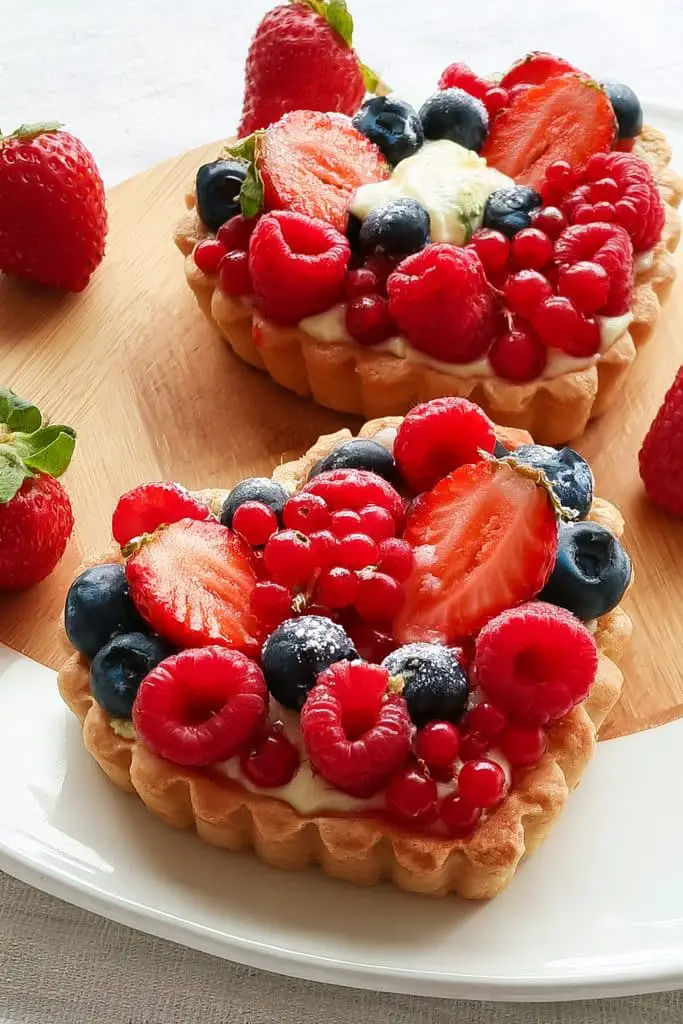
If you want a Valentine’s Day dessert that’s colorful, pretty, and a little different from the usual chocolate treats, these mini heart-shaped fruit tarts are such a sweet idea. They have a crisp, buttery pastry shell, smooth vanilla pastry cream, and a topping of fresh strawberries, raspberries, and other colorful fruit.
I love how these little tarts look on a dessert platter. The heart shape makes them perfect for Valentine’s Day, while the fresh fruit gives them a light, refreshing flavor. They take a little time to assemble, but the result is absolutely worth it.
These mini fruit tarts are perfect for a romantic dinner, a Valentine’s Day party, or whenever you want to make cute Valentine’s Day desserts at home that look as good as they taste.
Recipe Details
- Prep time: 35 minutes
- Bake time: 12-15 minutes
- Cooling and chilling time: 1 hour
- Total time: About 1 hour 50 minutes
- Difficulty: Medium
- Servings: 10-12 mini tarts
Ingredients
For the tart shells:
- 1¼ cups (160 g) all-purpose flour
- ¼ cup (30 g) powdered sugar
- ¼ teaspoon salt
- ½ cup (113 g) cold unsalted butter, cut into small cubes
- 1 large egg yolk
- 1-2 tablespoons cold water, as needed
For the vanilla pastry cream:
- 1 cup (240 ml) whole milk
- 2 large egg yolks
- ¼ cup (50 g) granulated sugar
- 1½ tablespoons cornstarch
- 1 tablespoon unsalted butter
- 1 teaspoon vanilla extract
For the fruit topping:
- ½ cup sliced strawberries
- ½ cup raspberries
- ¼ cup blueberries or kiwi pieces, optional
- 2 tablespoons apricot jam, optional, for glazing
Instructions
Step 1: Make the tart dough.
In a large bowl, whisk together the flour, powdered sugar, and salt. Add the cold butter and rub it into the dry ingredients with your fingertips until the mixture resembles coarse crumbs.
Mix in the egg yolk. Add cold water, one tablespoon at a time, until the dough begins to come together. Avoid adding too much water, as the dough should be soft but not sticky.
Step 2: Chill the dough.
Shape the dough into a flat disc, wrap it, and refrigerate for about 30 minutes. Chilling helps the butter firm up and makes the dough easier to roll without sticking.
Step 3: Roll and cut out the hearts.
Preheat your oven to 350°F (175°C). Lightly flour your work surface and roll the chilled dough to about ⅛ inch thick. Use a heart-shaped cookie cutter to cut out the tart shells.
Gently press the heart-shaped pieces into small heart-shaped tart molds. If you don’t have those, you can use a mini muffin pan and make small round tarts instead.
Step 4: Bake the tart shells.
Prick the bottoms lightly with a fork. Place the molds on a baking sheet and bake for 12-15 minutes, or until the edges are lightly golden. Let the shells cool completely before filling them.
Step 5: Prepare the vanilla pastry cream.
In a bowl, whisk the egg yolks, sugar, and cornstarch until smooth. In a saucepan, heat the milk over medium heat until steaming but not boiling.
Slowly pour a little of the warm milk into the egg mixture while whisking constantly. Gradually whisk in the remaining milk, then return everything to the saucepan.
Step 6: Thicken the cream.
Cook over medium-low heat, whisking constantly, until the mixture thickens and begins to bubble gently. Continue cooking for about 30-60 seconds while whisking. Remove from the heat and stir in the butter and vanilla extract.
Transfer the pastry cream to a clean bowl and press plastic wrap directly onto its surface. Refrigerate until completely cold.
Step 7: Fill the tart shells.
Once the pastry shells and cream are cool, spoon or pipe the pastry cream into each shell. Smooth the tops gently with a small spoon.
Step 8: Add the fresh fruit.
Arrange sliced strawberries, raspberries, and other fruit over the cream. You can make little patterns or simply add a colorful mix to each tart.
Step 9: Add a glossy finish.
For a bakery-style finish, warm the apricot jam with a teaspoon of water and strain it if needed. Lightly brush the glaze over the fruit. This step is optional, but it gives the tarts a lovely shine.
Step 10: Chill and serve.
Refrigerate the finished tarts for about 20 minutes before serving. This helps the filling stay cool and makes the flavors come together.
24. Chocolate-Dipped Shortbread Cookies
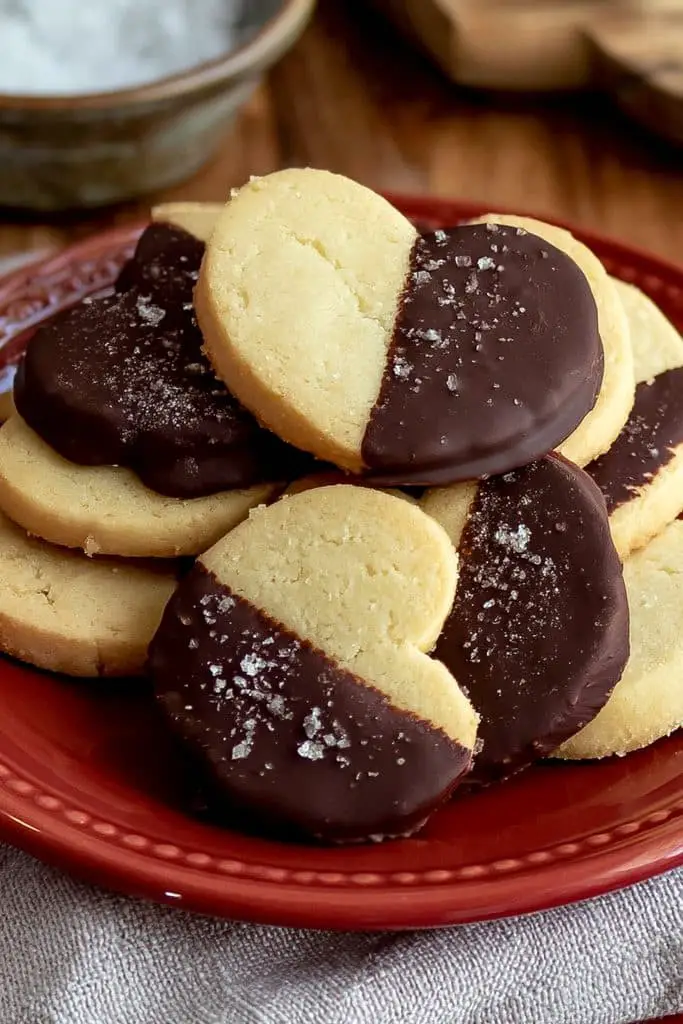
If you love buttery cookies with a little chocolate, these chocolate-dipped shortbread cookies are such a lovely treat to make for Valentine’s Day.
I especially love making these cookies in heart shapes for Valentine’s Day. You can dip half of each cookie in dark or milk chocolate, then finish them with pink sprinkles or a drizzle of white chocolate. They’re simple, pretty, and perfect for sharing with someone you love.
If you’re collecting Valentine’s Day desserts easy to make at home, these shortbread cookies are a wonderful addition to your list.
Recipe Details
- Prep time: 20 minutes
- Chilling time: 30 minutes
- Bake time: 12-15 minutes
- Total time: About 1 hour 5 minutes
- Difficulty: Easy
- Servings: 18-22 cookies
Ingredients
For the shortbread cookies:
- 1 cup (226 g) unsalted butter, softened
- ½ cup (60 g) powdered sugar
- 1 teaspoon vanilla extract
- 2 cups (250 g) all-purpose flour
- ¼ teaspoon salt
For the chocolate coating:
- 6 oz (170 g) semisweet or milk chocolate, chopped
- 1 teaspoon coconut oil, optional, for a smoother coating
- Valentine’s Day sprinkles, optional
- 1 oz (28 g) white chocolate, optional, for drizzling
Instructions
Step 1: Prepare the oven.
Preheat your oven to 350°F (175°C). Line a baking sheet with parchment paper and set it aside.
Step 2: Cream the butter and sugar.
In a large bowl, beat the softened butter and powdered sugar until smooth and creamy, about 2 minutes. Mix in the vanilla extract until combined.
Step 3: Add the dry ingredients.
Add the flour and salt to the butter mixture. Mix on low speed or stir with a wooden spoon until a soft dough forms. The dough may look crumbly at first, but it should come together when pressed between your fingers. Avoid overmixing so the cookies stay tender.
Step 4: Chill the dough.
Shape the dough into a flat disc, wrap it, and refrigerate for about 30 minutes. This makes it easier to roll and helps the cookies hold their shape in the oven.
Step 5: Roll and cut the cookies.
Lightly flour your work surface and roll the dough to about ¼ inch thick. Use a heart-shaped cookie cutter to cut out the cookies. Place them on the prepared baking sheet, leaving a little space between each one. Gather and reroll the scraps as needed.
Step 6: Bake until lightly golden.
Bake for 12-15 minutes, or until the edges are just beginning to turn golden. The centers should remain fairly pale. Let the cookies cool on the baking sheet for 5 minutes, then transfer them to a wire rack to cool completely.
Step 7: Melt the chocolate.
Place the chopped chocolate in a microwave-safe bowl. Heat in 20-30 second intervals, stirring between each, until smooth. Stir in the coconut oil if using. You can also melt the chocolate in a heatproof bowl set over a saucepan of gently simmering water.
Step 8: Dip the cookies.
Dip half of each cooled cookie into the melted chocolate. Let the excess drip back into the bowl, then place the cookie on a parchment-lined tray.
Step 9: Decorate and set.
While the chocolate is still wet, add Valentine’s Day sprinkles. For another pretty finish, melt the white chocolate and drizzle it over the dipped portion of the cookies. Let the chocolate set at room temperature, or refrigerate the tray for 10-15 minutes to speed things up.
Step 10: Serve and enjoy.
Once the chocolate has hardened, arrange the cookies on a plate or pack them into a small gift box. They’re ready to share!
25. Valentine’s Day Chocolate Mousse
If you’re looking for a dessert that feels romantic and elegant but is surprisingly easy to make, this Valentine’s Day chocolate mousse is a lovely choice.
I love serving chocolate mousse in little glasses because it looks beautiful without needing much decoration. A swirl of whipped cream, a few chocolate shavings, and some fresh raspberries are all you need to make it feel like a restaurant-style dessert at home.
The best part is that you don’t need to bake anything. Just prepare the mousse, let it chill, and decorate it before serving. It’s one of my favorite Valentine’s Day desserts to make at home when I want something delicious without spending hours in the kitchen.
Recipe Details
- Prep time: 20 minutes
- Chilling time: 2-3 hours
- Cook time: 5 minutes
- Total time: About 3 hours 25 minutes
- Difficulty: Easy to medium
- Servings: 4-6 portions
Ingredients
For the chocolate mousse:
- 6 oz (170 g) semisweet or dark chocolate, finely chopped
- 2 tablespoons (28 g) unsalted butter
- 3 large eggs, separated and pasteurized
- 2 tablespoons granulated sugar
- 1 teaspoon vanilla extract
- A small pinch of salt
- ½ cup (120 ml) heavy whipping cream, cold
For decorating:
- ½ cup (120 ml) heavy whipping cream, optional
- 1 tablespoon powdered sugar, optional
- Fresh raspberries or strawberries
- Chocolate shavings or cocoa powder
Instructions
Step 1: Melt the chocolate.
Place the chopped chocolate and butter in a heatproof bowl. Set the bowl over a saucepan of gently simmering water, making sure the bottom doesn’t touch the water. Stir until the chocolate and butter have melted and the mixture is smooth.
Remove the bowl from the heat and let the chocolate cool until it’s warm but not hot.
Step 2: Prepare the egg yolks.
In a separate bowl, whisk the egg yolks with the sugar and vanilla extract until the mixture looks slightly thicker and lighter. Gradually whisk in the cooled melted chocolate until smooth.
For food safety, use pasteurized eggs for this recipe because the eggs won’t be fully cooked.
Step 3: Whip the cream.
In a chilled bowl, beat the cold heavy cream until it forms soft peaks. Be careful not to overwhip it; you want the cream fluffy and smooth rather than stiff or grainy.
Step 4: Beat the egg whites.
In a separate, clean bowl, beat the egg whites with the pinch of salt until they form soft peaks. Make sure the bowl and beaters are clean and free of grease so the whites can whip properly.
Step 5: Fold the cream into the chocolate.
Add about one-third of the whipped cream to the chocolate mixture and stir gently to loosen it. Fold in the remaining whipped cream with a spatula, using slow movements to keep the mixture airy.
Step 6: Fold in the egg whites.
Gently fold the whipped egg whites into the chocolate mixture in two additions. Try not to stir too vigorously, as keeping the air in the mixture is what gives chocolate mousse its light texture.
Step 7: Divide into serving glasses.
Spoon or pipe the mousse into four to six small dessert glasses. Smooth the tops if you like, or leave them slightly swirled for a homemade look.
Step 8: Chill until set.
Cover the glasses and refrigerate for at least 2-3 hours, or until the mousse is set and has a soft, creamy texture.
Step 9: Decorate and serve.
If you’re using whipped cream for decoration, beat it with the powdered sugar until soft peaks form. Add a small swirl to each glass, then finish with fresh berries, chocolate shavings, or a light dusting of cocoa powder.
Serve chilled and enjoy!