
Valentine’s Day is the perfect time to enjoy something sweet, and I always think homemade desserts make the celebration even more special. Whether you’re planning a romantic evening, a family gathering, or a party with friends, having a table full of delicious treats is a lovely way to bring everyone together.
What I love most about Valentine’s Day dessert bar ideas is that you don’t need to spend hours making complicated desserts. From fudgy chocolate brownies to creamy strawberry cheesecake bars, there are so many easy Valentine’s Day dessert recipes that look beautiful and taste even better.
In this list, I’ve gathered some of my favorite dessert bar ideas, including fruity treats, rich chocolate desserts, and simple no-bake options. They’re perfect for sharing, easy to portion, and wonderful for anyone planning a Valentine’s Day dessert for a crowd.
Let’s start with one of my favorite classics: fudgy Valentine’s Day brownies!
1. Fudgy Valentine’s Day Brownies
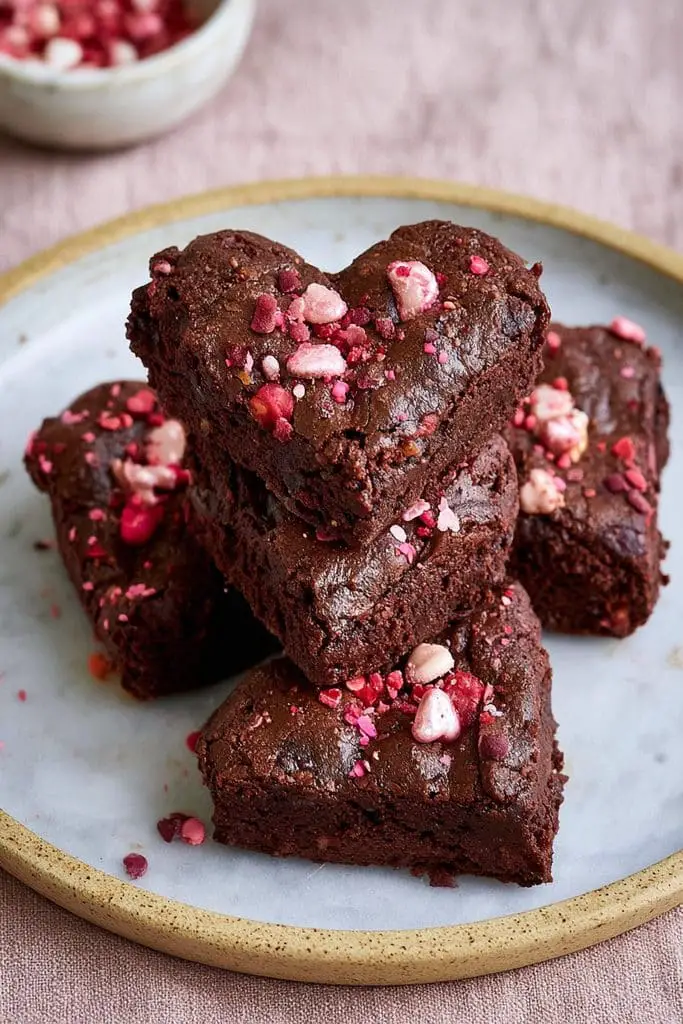
If you’re a chocolate lover like me, these fudgy Valentine’s Day brownies are a must-try! The best part is that you can decorate them with pink and red sprinkles, melted white chocolate, or little heart-shaped decorations to give them a festive Valentine’s Day look.
These brownies are beginner-friendly and take about 15 minutes to prepare, followed by 25-30 minutes of baking. They’re perfect for a Valentine dessert bar because you can bake them in one pan, cut them into small squares, and serve them to a crowd without much fuss.
Ingredients
For the Brownies:
- ½ cup (113 g) unsalted butter
- 1 cup (200 g) granulated sugar
- 2 large eggs, at room temperature
- 1 teaspoon vanilla extract
- ⅓ cup (30 g) unsweetened cocoa powder
- ½ cup (65 g) all-purpose flour
- ¼ teaspoon salt
- ½ cup (85 g) chocolate chips (optional)
For Decorating:
- ¼ cup (45 g) white chocolate chips
- 2 tablespoons Valentine’s Day sprinkles
- Pink or red heart-shaped candies (optional)
How to Make Fudgy Valentine’s Day Brownies
1. Prepare the Oven and Baking Pan
Preheat your oven to 350°F (175°C). Line an 8 × 8-inch (20 × 20 cm) baking pan with parchment paper, leaving a little overhang on the sides. This makes it much easier to lift the brownies out after baking.
2. Melt the Butter and Mix the Sugar
Melt the butter in a microwave-safe bowl or a small saucepan. Let it cool slightly, then whisk in the granulated sugar until well combined.
3. Add the Eggs and Vanilla
Add the eggs one at a time, whisking well after each addition. Stir in the vanilla extract until the mixture looks smooth and glossy.
4. Add the Dry Ingredients
Sift the cocoa powder, flour, and salt into the bowl. Fold everything together gently with a spatula until no dry flour remains. If you’re using chocolate chips, fold them in now.
Be careful not to overmix the batter. Mixing just until combined helps keep the brownies tender and fudgy.
5. Bake the Brownies
Pour the batter into the prepared pan and spread it evenly. Bake for 25-30 minutes, or until the edges are set and a toothpick inserted near the center comes out with a few moist crumbs.
Try not to overbake them, as the brownies will continue to firm up while cooling.
6. Cool and Decorate
Allow the brownies to cool completely in the pan before lifting them out. Melt the white chocolate chips in short microwave intervals, stirring between each one until smooth.
Drizzle the melted chocolate over the brownies, then add Valentine’s Day sprinkles and heart-shaped candies. Once the chocolate has set, cut the brownies into squares and arrange them on a serving plate.
My Tips for the Best Valentine’s Day Brownies
- For extra fudgy brownies: Avoid baking them for too long. A few moist crumbs on a toothpick are a good sign.
- For a romantic look: Use pink, red, and white sprinkles or cut the brownies into hearts with a small cookie cutter.
- For a richer chocolate flavor: Add the optional chocolate chips to the batter.
- For easy party preparation: Bake the brownies a day ahead and decorate them shortly before serving.
- For neat slices: Let the brownies cool completely and wipe your knife clean between cuts.
2. Strawberry Cheesecake Bars
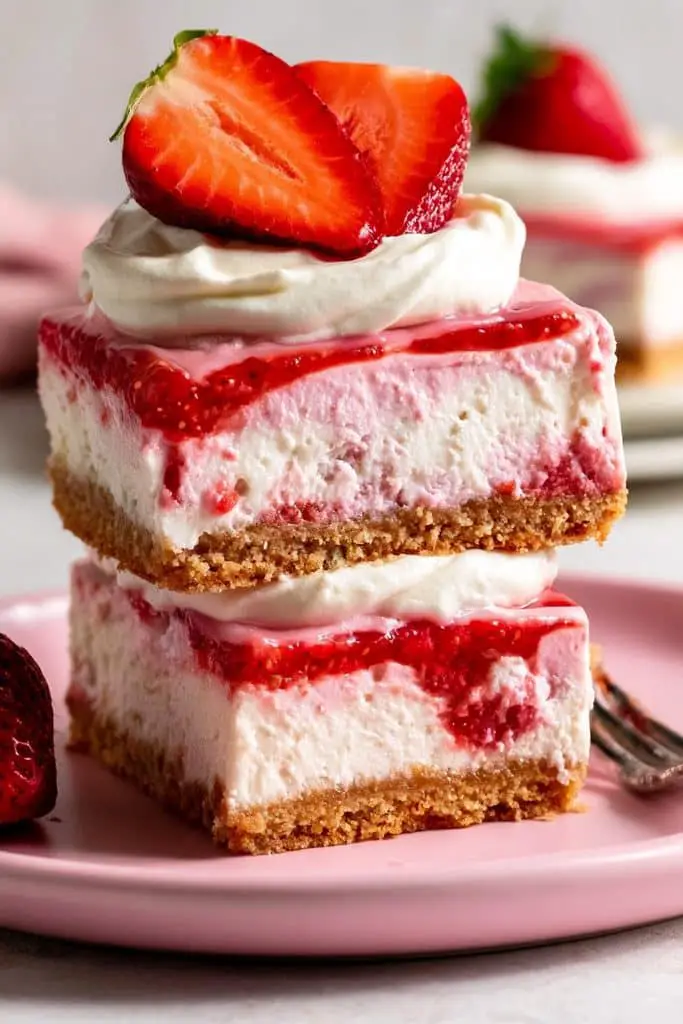
If you love creamy cheesecake and fresh strawberries, these Strawberry Cheesecake Bars are a must-try for Valentine’s Day. They look pretty on a dessert table, taste delicious chilled, and are easy to cut into small squares for sharing.
These bars are a lovely choice when you’re planning a Valentine’s Day dessert for a crowd. You can make them ahead of time, chill them overnight, and decorate them with fresh strawberries for a sweet Valentine’s Day touch.
Prep Time: 20 minutes
Bake Time: 35-40 minutes
Chill Time: 4 hours
Difficulty: Easy
Ingredients
For the crust:
- 2 cups graham cracker crumbs
- 5 tablespoons unsalted butter, melted
- 2 tablespoons granulated sugar
For the cheesecake filling:
- 16 oz (450 g) cream cheese, softened
- ½ cup granulated sugar
- 2 large eggs, at room temperature
- ¼ cup sour cream
- 1 teaspoon vanilla extract
- 1 tablespoon all-purpose flour
For the strawberry topping:
- 1 cup fresh strawberries, finely chopped
- 2 tablespoons granulated sugar
- 1 teaspoon lemon juice
Instructions
- Prepare the crust. Preheat your oven to 325°F (165°C). Line an 8-inch square baking pan with parchment paper. Mix the graham cracker crumbs, melted butter, and sugar until the mixture resembles wet sand. Press it firmly into the bottom of the pan.
- Bake the crust. Bake for 8-10 minutes, then remove it from the oven and let it cool slightly while you prepare the filling.
- Make the strawberry topping. Add the chopped strawberries, sugar, and lemon juice to a small saucepan. Cook over medium-low heat for about 5-8 minutes, stirring occasionally, until the strawberries soften and the mixture thickens. Let it cool completely.
- Prepare the cheesecake filling. Beat the softened cream cheese and sugar until smooth. Add the eggs one at a time, mixing on low speed. Stir in the sour cream, vanilla extract, and flour until just combined. Avoid overmixing to help keep the cheesecake smooth.
- Assemble the bars. Pour the cheesecake filling over the cooled crust. Spoon small amounts of the cooled strawberry mixture over the top and gently swirl with a toothpick or knife to create a pretty pink pattern.
- Bake. Bake for 25-30 minutes, or until the edges are set and the center still has a slight jiggle. Let the bars cool to room temperature.
- Chill and slice. Refrigerate for at least 4 hours, or until completely firm. Lift the cheesecake out using the parchment paper and cut it into neat squares with a sharp knife.
3. Valentine’s Day Sugar Cookie Bars
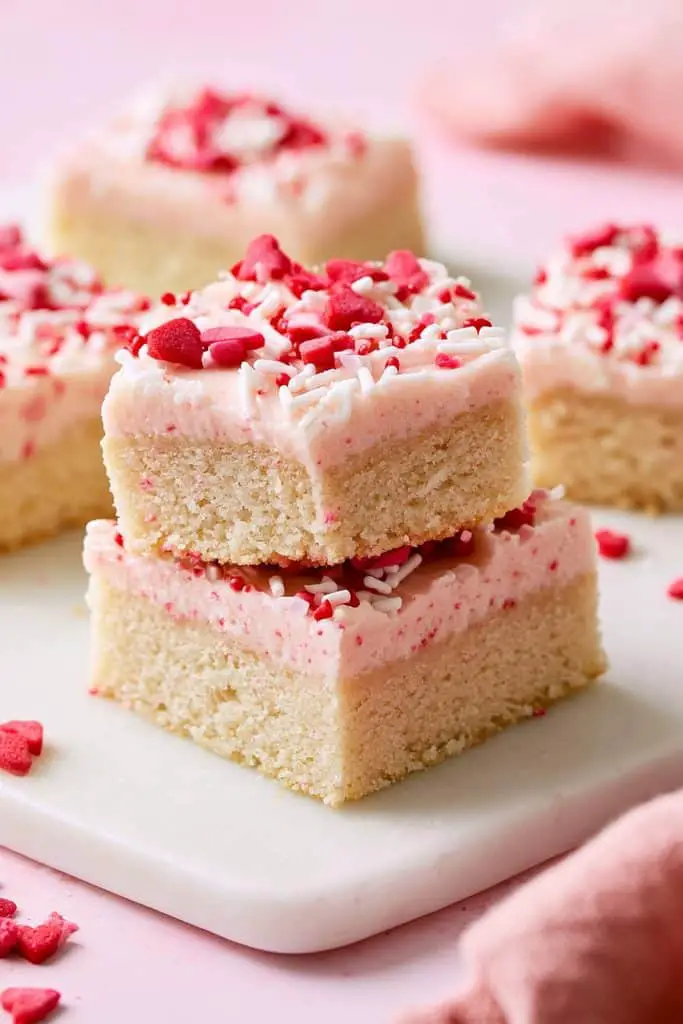
If you love soft sugar cookies but don’t want to spend time rolling and cutting individual cookies, these Valentine’s Day Sugar Cookie Bars are a great choice. I love how easy they are to make in one pan, and the thick layer of pink frosting with festive sprinkles makes them perfect for Valentine’s Day.
Prep Time: 20 minutes
Bake Time: 18-22 minutes
Cooling Time: 30-45 minutes
Difficulty: Easy
Ingredients
For the sugar cookie bars:
- ½ cup unsalted butter, softened
- ¾ cup granulated sugar
- 1 large egg, at room temperature
- 1 teaspoon vanilla extract
- ¼ teaspoon almond extract (optional)
- 1¾ cups all-purpose flour
- ½ teaspoon baking powder
- ¼ teaspoon salt
- 2 tablespoons milk, if needed
For the frosting:
- ½ cup unsalted butter, softened
- 2 cups powdered sugar
- 1-2 tablespoons milk or heavy cream
- 1 teaspoon vanilla extract
- A few drops of pink or red food coloring
- Valentine’s Day sprinkles, for decorating
Instructions
- Prepare the pan. Preheat your oven to 350°F (175°C). Line a 9-inch square baking pan with parchment paper, leaving a little overhang so you can lift out the bars easily.
- Cream the butter and sugar. In a large bowl, beat the softened butter and granulated sugar until light and fluffy. Add the egg, vanilla extract, and almond extract, if using. Mix until smooth.
- Add the dry ingredients. In a separate bowl, whisk together the flour, baking powder, and salt. Gradually add the dry mixture to the butter mixture, mixing just until a soft dough forms. If the dough feels too dry to press into the pan, add milk one tablespoon at a time.
- Press into the pan. Transfer the dough to the prepared pan and press it into an even layer. I like to use the back of a spoon or lightly greased fingertips to smooth the surface.
- Bake the cookie bars. Bake for 18-22 minutes, or until the edges are lightly golden and the center looks set. Try not to overbake, since the bars will continue to firm up as they cool.
- Make the frosting. While the bars cool, beat the softened butter until creamy. Gradually add the powdered sugar, then mix in the vanilla and one tablespoon of milk or cream. Add a little more liquid if needed to reach a smooth, spreadable consistency. Mix in a few drops of pink or red food coloring.
- Frost and decorate. Once the cookie base has cooled completely, spread the frosting evenly over the top. Add heart-shaped sprinkles, pink sugar, or red and white decorations.
- Slice and serve. Let the frosting set slightly, then lift the bars out of the pan and cut them into squares. For cleaner edges, wipe your knife between cuts.
4. Raspberry White Chocolate Blondies
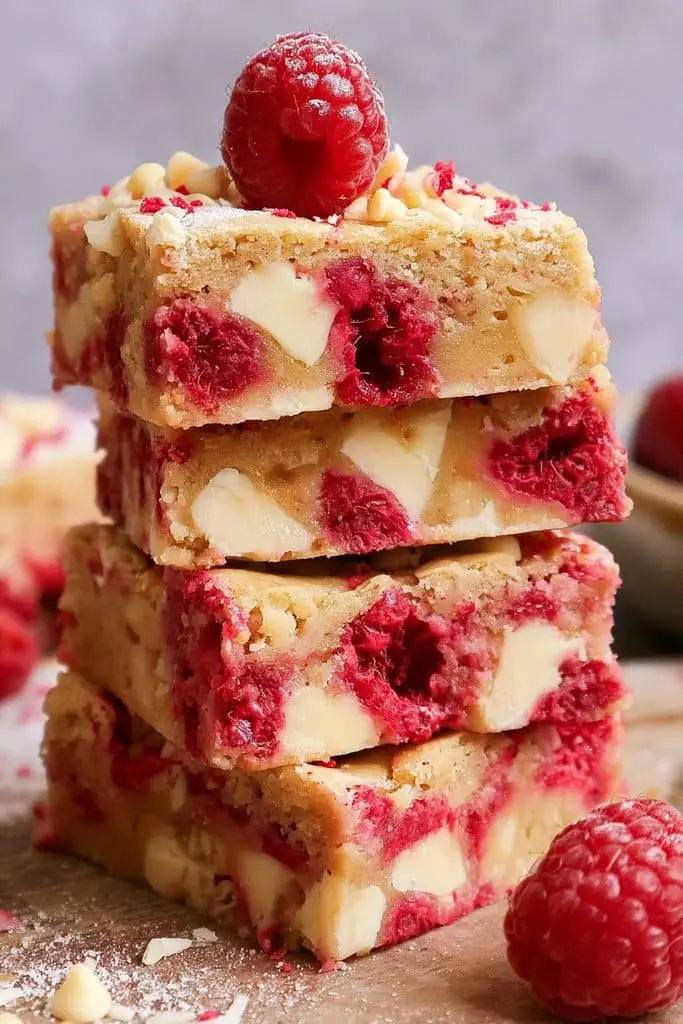
If you’re looking for a Valentine’s Day dessert that feels a little fancy but is still easy to make, these Raspberry White Chocolate Blondies are a lovely choice. The blondies have a soft, chewy center, slightly crisp edges, and pretty pops of red that make them perfect for Valentine’s Day.
They’re a delicious alternative to traditional brownies and fit beautifully into a Valentine dessert bar. Cut them into small squares, arrange them on a serving platter, and you’ve got a colorful treat that’s perfect for sharing with family, friends, or someone special.
Prep Time: 15 minutes
Bake Time: 25-30 minutes
Cooling Time: 30 minutes
Difficulty: Easy
Ingredients
- ½ cup (113 g) unsalted butter, melted
- ¾ cup (150 g) light brown sugar, packed
- 1 large egg, at room temperature
- 1 teaspoon vanilla extract
- 1 cup (125 g) all-purpose flour
- ¼ teaspoon salt
- ½ cup (85 g) white chocolate chips or chopped white chocolate
- ¾ cup (90 g) fresh raspberries
- 2 tablespoons white chocolate chips, for topping (optional)
Instructions
- Prepare the oven and pan. Preheat your oven to 350°F (175°C). Line an 8-inch square baking pan with parchment paper, leaving some overhang so you can lift out the blondies easily.
- Mix the wet ingredients. In a large bowl, whisk the melted butter and brown sugar until combined. Add the egg and vanilla extract, then whisk until the mixture looks smooth.
- Add the dry ingredients. Stir in the flour and salt until just combined. Be careful not to overmix, as this can make the blondies less tender.
- Fold in the chocolate. Gently fold in the white chocolate chips. Add the raspberries last, folding carefully so they don’t break apart too much. If your raspberries are especially large, you can cut them in half.
- Spread the batter. Transfer the batter to your prepared pan and spread it into an even layer. Scatter a few extra white chocolate chips and raspberries on top for a pretty finish.
- Bake. Bake for 25-30 minutes, or until the edges are lightly golden and a toothpick inserted near the center comes out with a few moist crumbs. Avoid waiting for the toothpick to come out completely clean, since that can mean the blondies are overbaked.
- Cool before slicing. Let the blondies cool completely in the pan. Lift them out using the parchment paper and cut them into squares with a sharp knife.
5. Chocolate Peppermint Brownie Bars
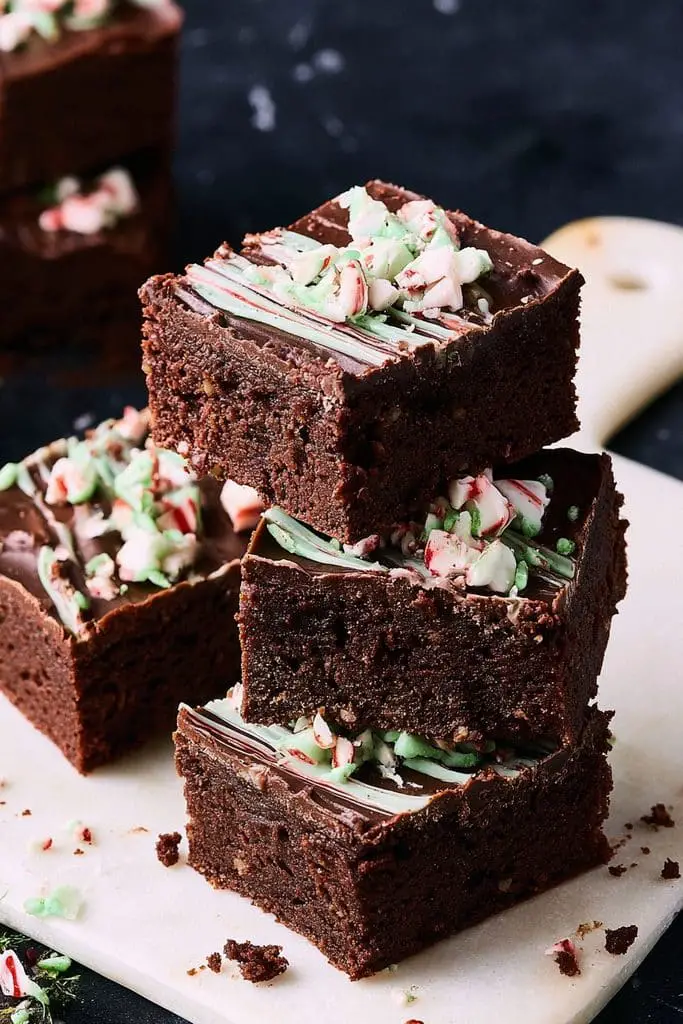
If you’re a fan of rich chocolate desserts with a refreshing minty twist, these chocolate peppermint brownie bars are a delicious addition to your Valentine’s Day dessert table! I love how the little hint of peppermint balances the rich chocolate without making the dessert taste too sweet.
These bars also look beautiful when decorated with pink, red, or white sprinkles. You can cut them into small squares for a party platter or make slightly larger pieces for a special after-dinner treat. They’re a fun option when you want something a little different from traditional Valentine’s Day brownies.
Prep Time: 20 minutes
Bake Time: 25-30 minutes
Cooling and Chilling Time: 2 hours
Difficulty: Easy
Ingredients
For the brownie base:
- ½ cup unsalted butter
- 1 cup granulated sugar
- 2 large eggs
- 1 teaspoon vanilla extract
- ⅓ cup unsweetened cocoa powder
- ½ cup all-purpose flour
- ¼ teaspoon salt
- ¼ teaspoon baking powder
For the peppermint layer:
- 4 tablespoons unsalted butter, softened
- 1 ½ cups powdered sugar
- 1-2 tablespoons milk or cream
- ¼ teaspoon peppermint extract
- A tiny drop of pink or red food coloring, optional
For the chocolate topping:
- ¾ cup semi-sweet chocolate chips
- 1 tablespoon unsalted butter or coconut oil
- Crushed peppermint candies or Valentine’s Day sprinkles, optional
Instructions
- Prepare the pan. Preheat your oven to 350°F (175°C). Line an 8-inch square baking pan with parchment paper, leaving some overhang on the sides for easy removal.
- Make the brownie batter. Melt the butter in a medium bowl and let it cool slightly. Whisk in the sugar, eggs, and vanilla extract until smooth. Add the cocoa powder, flour, salt, and baking powder, stirring just until combined. Avoid overmixing so the brownies stay tender.
- Bake the brownies. Spread the batter evenly in the prepared pan. Bake for 25-30 minutes, or until a toothpick inserted near the center comes out with a few moist crumbs but no wet batter.
- Cool completely. Let the brownie layer cool in the pan before adding the peppermint frosting. This helps keep the layers neat and prevents the frosting from melting.
- Prepare the peppermint layer. Beat the softened butter until creamy. Gradually add the powdered sugar, peppermint extract, and 1 tablespoon of milk or cream. Beat until smooth and spreadable, adding a little more milk if needed. If you want a festive pink layer, mix in a tiny drop of food coloring.
- Spread the frosting. Carefully spread the peppermint mixture over the cooled brownies in an even layer. Place the pan in the refrigerator for about 20-30 minutes to help the frosting firm up.
- Make the chocolate topping. Melt the chocolate chips with the butter or coconut oil in the microwave in 20-second intervals, stirring each time until smooth. You can also use a double boiler over gently simmering water.
- Add the chocolate layer. Pour the melted chocolate over the chilled peppermint layer and spread it gently with a spatula. Sprinkle crushed peppermint candies or Valentine’s Day sprinkles over the top while the chocolate is still soft.
- Chill and slice. Refrigerate the bars for about 45-60 minutes, or until the chocolate topping is set. Lift the slab out using the parchment paper and cut it into squares with a sharp knife. Let the bars sit at room temperature for a few minutes before serving for the best texture.
6. Heart-Shaped Strawberry Brownie Bars
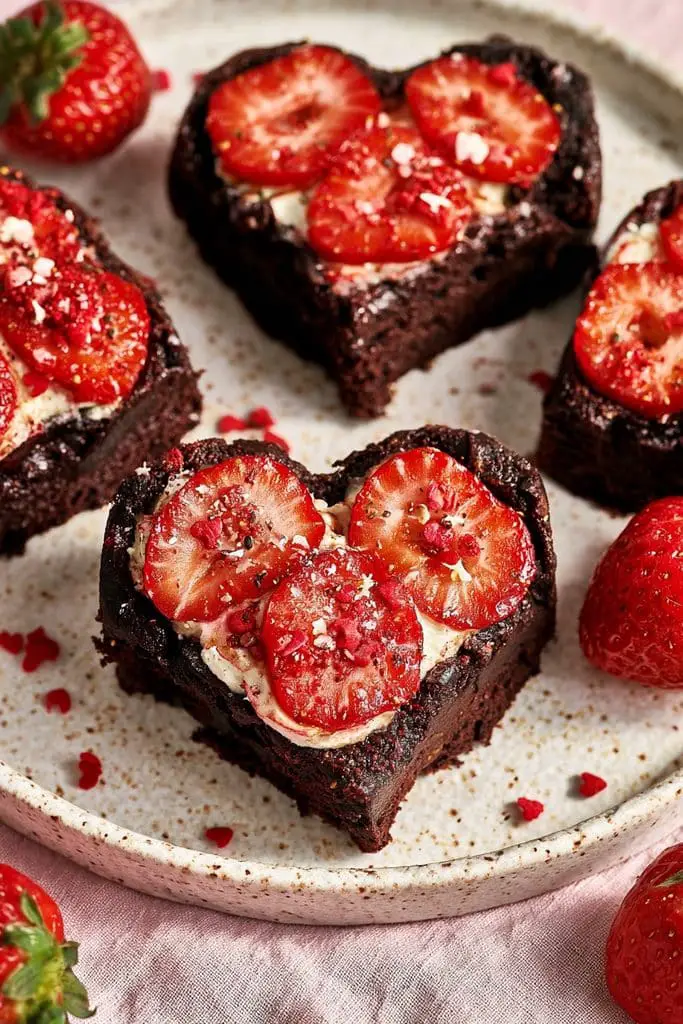
If there’s one dessert that feels made for Valentine’s Day, it’s these heart-shaped strawberry brownie bars! I love how the combination of chocolate and strawberries feels romantic without requiring complicated baking or decorating skills.
These bars are perfect for Valentine’s Day parties, a cozy date night, or a homemade gift for someone special. You can bake the brownies in a regular pan and use a heart-shaped cutter to create the cutest little treats. Add fresh strawberry slices or a few pink sprinkles, and they’re ready to steal the show on your dessert table!
Prep Time: 20 minutes
Bake Time: 25-30 minutes
Cooling Time: 1 hour
Difficulty: Easy
Ingredients
For the brownie base:
- ½ cup unsalted butter
- 1 cup granulated sugar
- 2 large eggs
- 1 teaspoon vanilla extract
- ⅓ cup unsweetened cocoa powder
- ½ cup all-purpose flour
- ¼ teaspoon salt
- ¼ teaspoon baking powder
For the strawberry topping:
- ½ cup finely chopped fresh strawberries
- 2 tablespoons granulated sugar
- 1 teaspoon lemon juice
- 1 teaspoon cornstarch
- 1 tablespoon water
For the pink chocolate drizzle:
- ½ cup white chocolate chips
- ½ teaspoon coconut oil
- A tiny drop of pink food coloring made for chocolate, optional
- Valentine’s Day sprinkles, optional
Instructions
- Prepare your pan. Preheat the oven to 350°F (175°C). Line an 8-inch square baking pan with parchment paper, leaving a little overhang so you can lift out the brownies easily.
- Make the brownie batter. Melt the butter in a medium bowl and let it cool slightly. Whisk in the sugar, eggs, and vanilla extract until smooth. Add the cocoa powder, flour, salt, and baking powder. Stir just until combined, being careful not to overmix.
- Bake the brownies. Spread the batter evenly in the prepared pan. Bake for 25-30 minutes, or until a toothpick inserted near the center comes out with a few moist crumbs. Let the brownies cool completely before cutting them into shapes.
- Prepare the strawberry topping. Add the chopped strawberries, sugar, and lemon juice to a small saucepan. In a separate cup, mix the cornstarch with the water until smooth, then stir it into the strawberries. Cook over medium-low heat for about 4-6 minutes, stirring often, until the fruit softens and the mixture thickens. Let it cool completely.
- Cut out the hearts. Lift the cooled brownie slab from the pan. Use a small heart-shaped cookie cutter to cut out the brownie hearts. Press straight down for clean edges, and save the brownie scraps for snacking or dessert parfaits.
- Add the strawberry topping. Spoon a small amount of the cooled strawberry mixture onto each brownie heart, spreading it gently without letting it run over the edges. If you prefer a cleaner look, add just a small dollop in the center.
- Melt the white chocolate. Place the white chocolate chips and coconut oil in a microwave-safe bowl. Heat in 15-20 second intervals, stirring between each interval until smooth. If desired, add a tiny amount of pink coloring specifically made for chocolate.
- Decorate the brownie hearts. Drizzle the melted pink chocolate over the strawberry-topped brownies. Add a few Valentine’s Day sprinkles while the drizzle is still soft.
- Let everything set. Place the brownie hearts in the refrigerator for about 15-20 minutes to help the topping firm up. Arrange them on a serving plate and enjoy!
7. Red Velvet Cheesecake Brownies
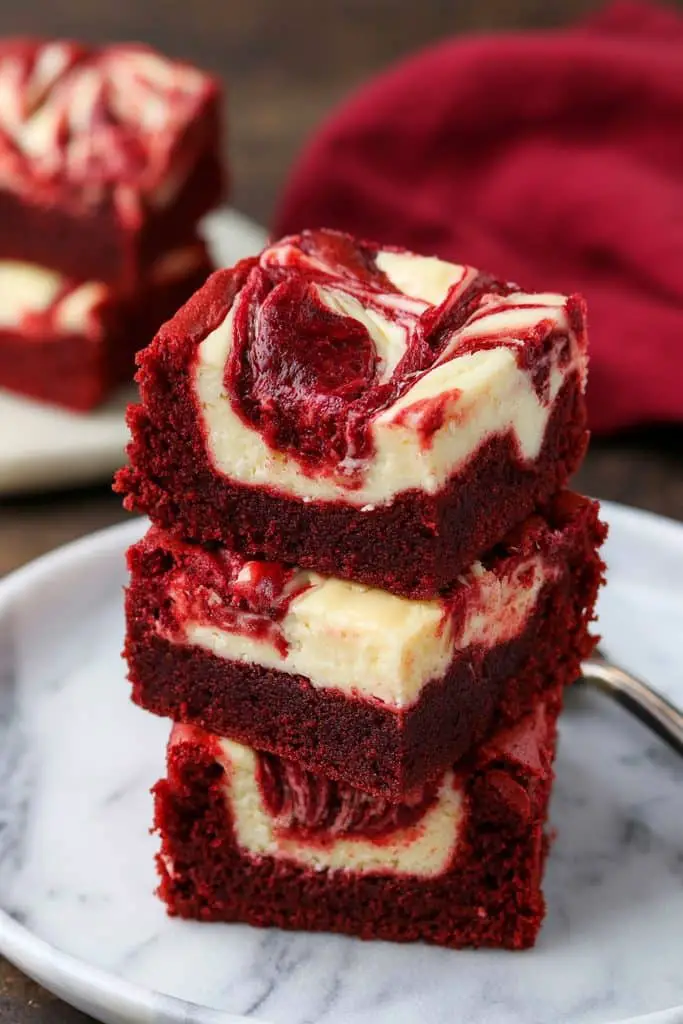
If you’re looking for a dessert that feels made for Valentine’s Day, these Red Velvet Cheesecake Brownies are hard to resist. They combine rich, chocolatey red velvet brownies with a creamy cheesecake swirl that looks beautiful when you cut into each square.
These brownies are a lovely choice for romantic dinners, Valentine’s Day parties, or a dessert bar filled with sweet treats. They look fancy, but the recipe is surprisingly simple to make at home.
Prep Time: 20 minutes
Bake Time: 30-35 minutes
Cooling Time: 1 hour
Difficulty: Easy
Ingredients
For the red velvet brownie layer:
- ½ cup (113 g) unsalted butter, melted
- 1 cup (200 g) granulated sugar
- 2 large eggs, at room temperature
- 1 teaspoon vanilla extract
- 1 tablespoon unsweetened cocoa powder
- 1 tablespoon red food coloring, or as needed for the desired shade
- ¾ cup (95 g) all-purpose flour
- ¼ teaspoon salt
- 1 teaspoon white vinegar (optional, for a subtle red velvet flavor)
For the cheesecake swirl:
- 8 oz (225 g) cream cheese, softened
- ¼ cup (50 g) granulated sugar
- 1 egg yolk
- ½ teaspoon vanilla extract
Instructions
- Prepare the pan. Preheat your oven to 350°F (175°C). Line an 8-inch square baking pan with parchment paper, leaving some overhang so you can remove the brownies easily.
- Make the brownie batter. In a medium bowl, whisk the melted butter and sugar until combined. Add the eggs and vanilla extract, then whisk until smooth. Mix in the cocoa powder, red food coloring, and vinegar, if using.
- Add the flour. Stir in the flour and salt just until combined. Avoid overmixing so the brownies stay soft and tender.
- Prepare the cheesecake filling. In a separate bowl, beat the softened cream cheese and sugar until smooth. Add the egg yolk and vanilla extract, mixing until creamy.
- Layer the batter. Spread about two-thirds of the red velvet brownie batter into the prepared pan. Spoon the cheesecake mixture evenly over the top, then add small dollops of the remaining brownie batter.
- Create the swirl. Use a toothpick or thin knife to gently swirl the red brownie batter through the cheesecake layer. Don’t overdo it, or the colors may blend together instead of creating a pretty pattern.
- Bake. Bake for 30-35 minutes, or until the edges are set and the cheesecake layer looks mostly firm. A toothpick inserted into the brownie portion should come out with a few moist crumbs.
- Cool and slice. Let the brownies cool completely in the pan, then refrigerate for about 1 hour for cleaner slices. Lift them out using the parchment paper and cut into squares with a sharp knife.
8. Strawberry Crumble Bars
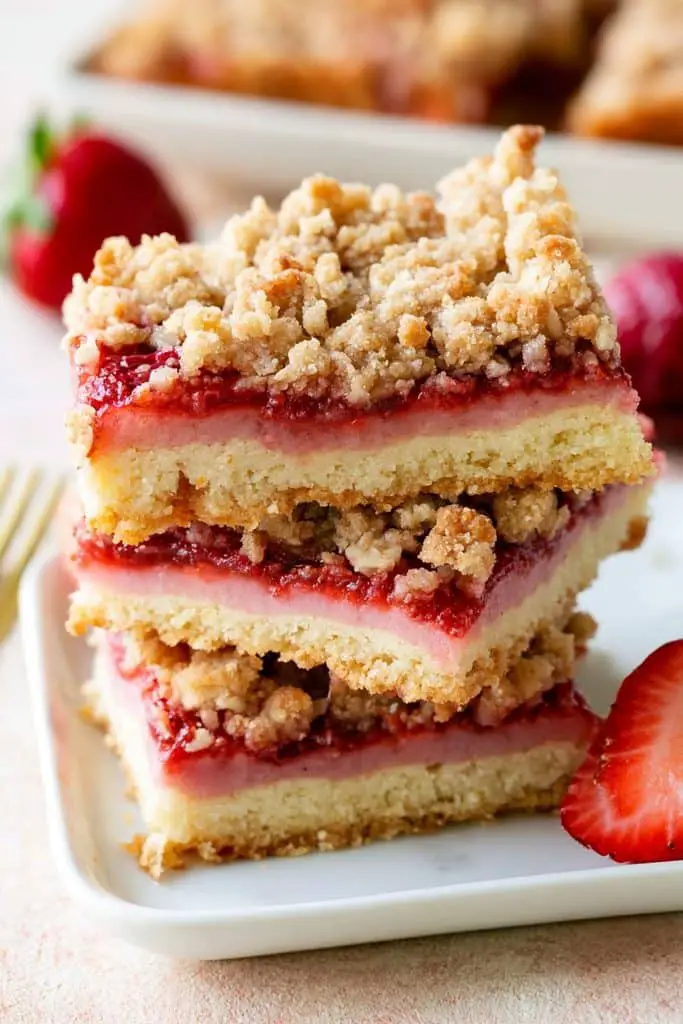
These Strawberry Crumble Bars have a soft, fruity center sandwiched between a golden crust and a crumbly topping. I love how the strawberries become jammy as they bake, giving every bite a delicious mix of sweetness and a little tartness.
These bars are easy to make with simple ingredients and don’t require any fancy decorating. Their pretty red strawberry filling makes them a lovely addition to Valentine’s Day dessert bar ideas, whether you’re hosting a party or putting together a sweet treat box for someone special.
Prep Time: 20 minutes
Bake Time: 35-40 minutes
Cooling Time: 1 hour
Difficulty: Easy
Ingredients
For the crust and crumble topping:
- 2 cups (250 g) all-purpose flour
- ¾ cup (150 g) granulated sugar
- ½ teaspoon baking powder
- ¼ teaspoon salt
- ¾ cup (170 g) unsalted butter, cold and cubed
- 1 large egg
- 1 teaspoon vanilla extract
For the strawberry filling:
- 2 cups (300 g) fresh strawberries, chopped
- ¼ cup (50 g) granulated sugar
- 1 tablespoon cornstarch
- 1 teaspoon lemon juice
- ½ teaspoon vanilla extract
Instructions
- Prepare the oven and pan. Preheat your oven to 350°F (175°C). Line an 8-inch square baking pan with parchment paper, leaving some overhang on the sides.
- Make the crumble mixture. In a large bowl, whisk together the flour, sugar, baking powder, and salt. Add the cold butter and work it into the dry ingredients with a pastry cutter or your fingertips until the mixture resembles coarse crumbs. Stir in the egg and vanilla until the mixture starts to clump together.
- Form the bottom crust. Set aside about one-third of the crumble mixture for the topping. Press the remaining mixture firmly into the bottom of the prepared pan to form an even crust.
- Prepare the strawberry filling. In another bowl, gently toss the chopped strawberries with the sugar, cornstarch, lemon juice, and vanilla extract. Make sure the berries are evenly coated so the filling thickens nicely as it bakes.
- Add the filling. Spread the strawberry mixture evenly over the crust, leaving behind any unusually large puddles of juice in the bowl.
- Add the crumble topping. Sprinkle the reserved dough mixture over the strawberries. Keep some larger crumbs for a rustic, bakery-style look, and don’t worry if a little fruit remains visible.
- Bake until golden. Bake for 35-40 minutes, or until the topping is lightly golden and the strawberry filling is bubbling around the edges.
- Cool and slice. Let the bars cool completely in the pan, about 1 hour or longer. For cleaner slices, refrigerate them for another 30 minutes before lifting them out and cutting into squares.
9. Valentine’s Day Chocolate Chip Cookie Bars
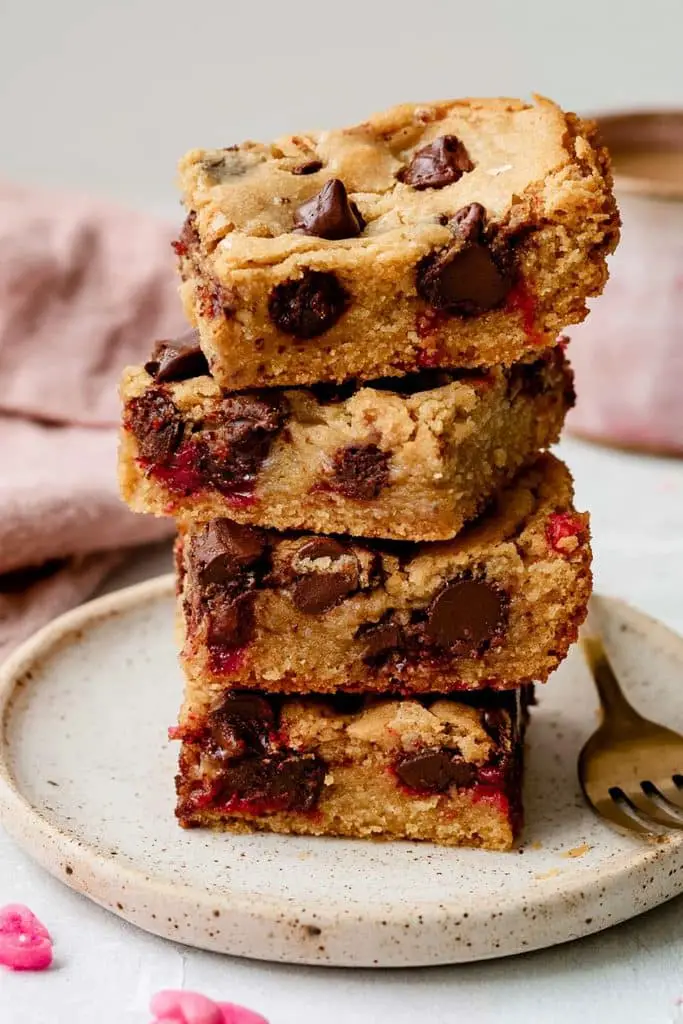
If you love classic chocolate chip cookies but want something easier to make for a Valentine’s Day party, these Chocolate Chip Cookie Bars are just the thing. Instead of scooping individual cookies, you press the dough into one pan, bake it, and slice it into squares.
These cookie bars are also easy to dress up for the holiday. Add pink and red candy-coated chocolates, heart-shaped sprinkles, or a drizzle of white chocolate to turn a simple dessert into a festive treat. They’re one of my favorite easy Valentine’s Day dessert recipes for sharing with a crowd.
Prep Time: 15 minutes
Bake Time: 25-30 minutes
Cooling Time: 30-45 minutes
Difficulty: Easy
Ingredients
- ½ cup (113 g) unsalted butter, melted and slightly cooled
- ¾ cup (150 g) light brown sugar, packed
- ¼ cup (50 g) granulated sugar
- 1 large egg, at room temperature
- 1 teaspoon vanilla extract
- 1½ cups (190 g) all-purpose flour
- ½ teaspoon baking soda
- ¼ teaspoon salt
- 1 cup (170 g) semisweet chocolate chips
- ½ cup pink and red candy-coated chocolates or Valentine’s Day sprinkles (optional)
- 2 tablespoons extra chocolate chips, for topping
Instructions
- Prepare the pan. Preheat your oven to 350°F (175°C). Line a 9-inch square baking pan with parchment paper, leaving a little overhang so you can lift out the bars easily.
- Mix the butter and sugars. In a large bowl, whisk together the melted butter, brown sugar, and granulated sugar until well combined.
- Add the egg and vanilla. Whisk in the egg and vanilla extract until the mixture looks smooth. Make sure the butter isn’t hot when you add the egg.
- Combine the dry ingredients. In a separate bowl, stir together the flour, baking soda, and salt. Add the dry ingredients to the wet mixture and stir until a soft cookie dough forms.
- Fold in the chocolate. Add the chocolate chips and gently fold them into the dough. If you’re using candy-coated chocolates, stir most of them in now and save a few for the top.
- Press into the pan. Spread the dough evenly into the prepared baking pan. Press the reserved chocolate chips and festive candies over the surface for a colorful finish.
- Bake until golden. Bake for 25-30 minutes, or until the edges are golden and the center looks set but still slightly soft. Avoid overbaking if you want chewy cookie bars.
- Cool and slice. Let the bars cool in the pan for at least 30 minutes before lifting them out. Allow them to cool further before slicing into squares so they hold their shape.
10. Lemon Raspberry Cheesecake Bars
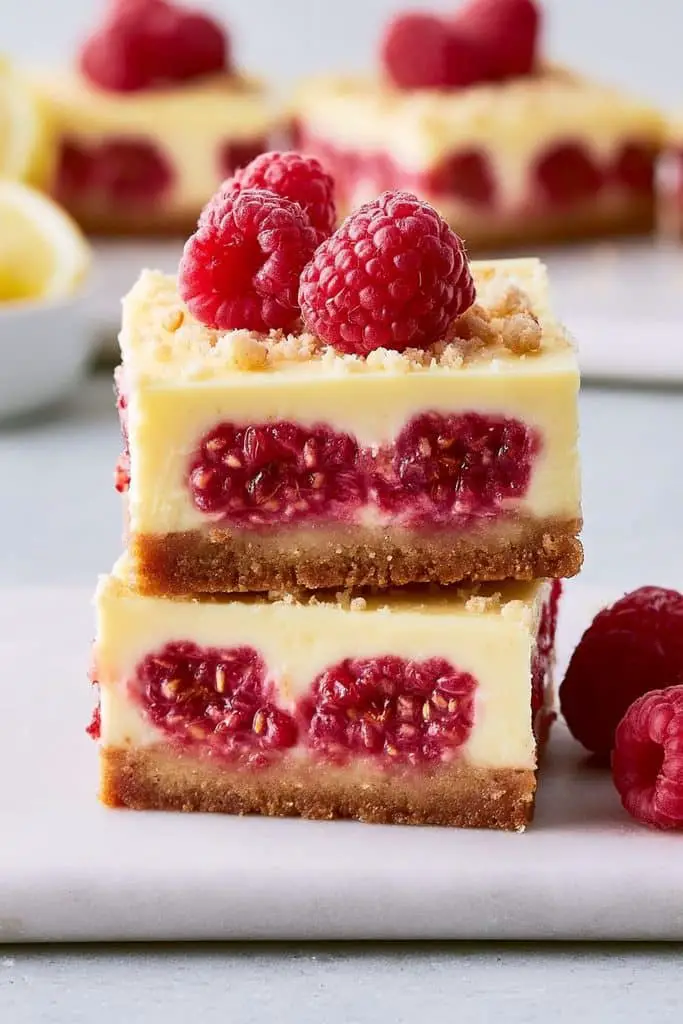
If you love desserts that are sweet, creamy, these Lemon Raspberry Cheesecake Bars are a must-try for Valentine’s Day. I love how the fresh lemon flavor balances the creamy filling while the raspberries add beautiful pops of red and pink.
These bars are a lovely option when you want something a little different from chocolate-heavy desserts. They’re colorful, easy to slice, and perfect for adding variety to your Valentine’s Day dessert bar. You can even make them the night before your celebration to save time.
Prep Time: 20 minutes
Bake Time: 35-40 minutes
Chill Time: 4 hours
Difficulty: Easy
Ingredients
For the crust:
- 2 cups (200 g) graham cracker crumbs
- 6 tablespoons (85 g) unsalted butter, melted
- 2 tablespoons granulated sugar
For the cheesecake filling:
- 16 oz (450 g) cream cheese, softened
- ½ cup (100 g) granulated sugar
- 2 large eggs, at room temperature
- ¼ cup (60 g) sour cream
- 2 tablespoons fresh lemon juice
- 1 tablespoon finely grated lemon zest
- 1 teaspoon vanilla extract
- 1 tablespoon all-purpose flour
- ¾ cup (90 g) fresh raspberries
Instructions
- Prepare the oven and pan. Preheat your oven to 325°F (165°C). Line an 8-inch square baking pan with parchment paper, leaving a little overhang on the sides.
- Make the crust. Mix the graham cracker crumbs, melted butter, and sugar in a bowl until the crumbs are evenly moistened. Press the mixture firmly into the bottom of the pan. Bake for 8-10 minutes, then let it cool slightly.
- Beat the cream cheese. In a large bowl, beat the softened cream cheese and sugar until smooth and creamy. Scrape down the sides of the bowl as needed to remove any lumps.
- Add the remaining filling ingredients. Mix in the eggs one at a time on low speed. Add the sour cream, lemon juice, lemon zest, vanilla extract, and flour. Stir until just combined, being careful not to overmix.
- Add the raspberries. Gently fold in about half of the raspberries. Pour the cheesecake filling over the prepared crust and spread it evenly. Scatter the remaining raspberries over the top, pressing them in lightly.
- Bake the cheesecake bars. Bake for 35-40 minutes, or until the edges are set and the center has a slight jiggle. If the top begins to brown too quickly, check the oven temperature and avoid extending the baking time unnecessarily.
- Cool slowly. Turn off the oven and leave the door slightly open for about 10 minutes. Remove the pan and let the cheesecake cool to room temperature.
- Chill and slice. Refrigerate for at least 4 hours, or until fully set. Lift the cheesecake out using the parchment paper and slice into squares with a sharp knife, wiping the blade between cuts.
11. Chocolate Peanut Butter Bars
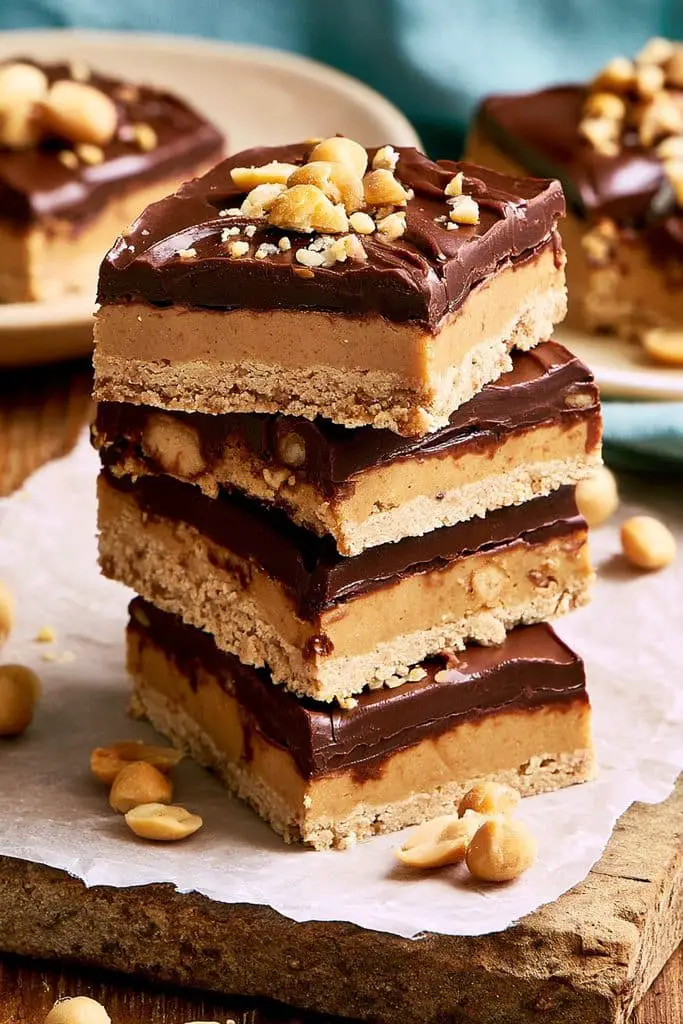
If you’re a fan of the classic chocolate and peanut butter combination, these Chocolate Peanut Butter Bars are a treat you’ll want to add to your Valentine’s Day dessert list. I love how simple they are to make, especially because there’s no baking required.
These bars are perfect when you need a quick Valentine’s Day dessert for a party or a homemade treat to share with someone special. You can prepare them ahead of time, let them chill in the refrigerator, and slice them into neat little squares whenever you’re ready to serve.
Prep Time: 20 minutes
Chill Time: 2 hours
Difficulty: Easy
Ingredients
For the peanut butter layer:
- 1 cup (250 g) creamy peanut butter
- ½ cup (113 g) unsalted butter, melted
- 1½ cups (180 g) powdered sugar
- 1 cup (100 g) graham cracker crumbs
- 1 teaspoon vanilla extract
- ¼ teaspoon salt, if using unsalted peanut butter
For the chocolate topping:
- 1 cup (170 g) semisweet chocolate chips
- 2 tablespoons (30 g) creamy peanut butter
Optional decorations:
- Valentine’s Day sprinkles
- A drizzle of melted white chocolate
- Crushed peanuts
Instructions
- Prepare the pan. Line an 8-inch square baking pan with parchment paper, leaving some overhang on the sides. This will make it easier to lift out the bars once they’re chilled.
- Mix the peanut butter layer. In a large bowl, combine the peanut butter, melted butter, powdered sugar, graham cracker crumbs, vanilla extract, and salt, if needed. Stir until the mixture is thick and evenly combined.
- Press into the pan. Transfer the peanut butter mixture to the prepared pan. Press it firmly into an even layer using the back of a spoon or a spatula. Place the pan in the refrigerator while you prepare the chocolate topping.
- Melt the chocolate. Add the chocolate chips and 2 tablespoons of peanut butter to a microwave-safe bowl. Microwave in 20-second intervals, stirring after each interval, until the mixture is smooth. You can also melt them together using a heatproof bowl set over gently simmering water.
- Add the chocolate topping. Pour the melted chocolate mixture over the peanut butter layer. Spread it evenly with a spatula so every square will have a lovely chocolate coating.
- Decorate. Add Valentine’s Day sprinkles, crushed peanuts, or a drizzle of white chocolate while the topping is still soft. Pink, red, and white decorations give these bars a festive look.
- Chill until firm. Refrigerate for about 2 hours, or until the chocolate topping is set and the peanut butter layer is firm.
- Slice and serve. Lift the bars out using the parchment paper. Let them sit at room temperature for about 5-10 minutes, then cut them into squares with a sharp knife. For cleaner cuts, warm the knife slightly and wipe it between slices.
12. Cherry Cheesecake Bars
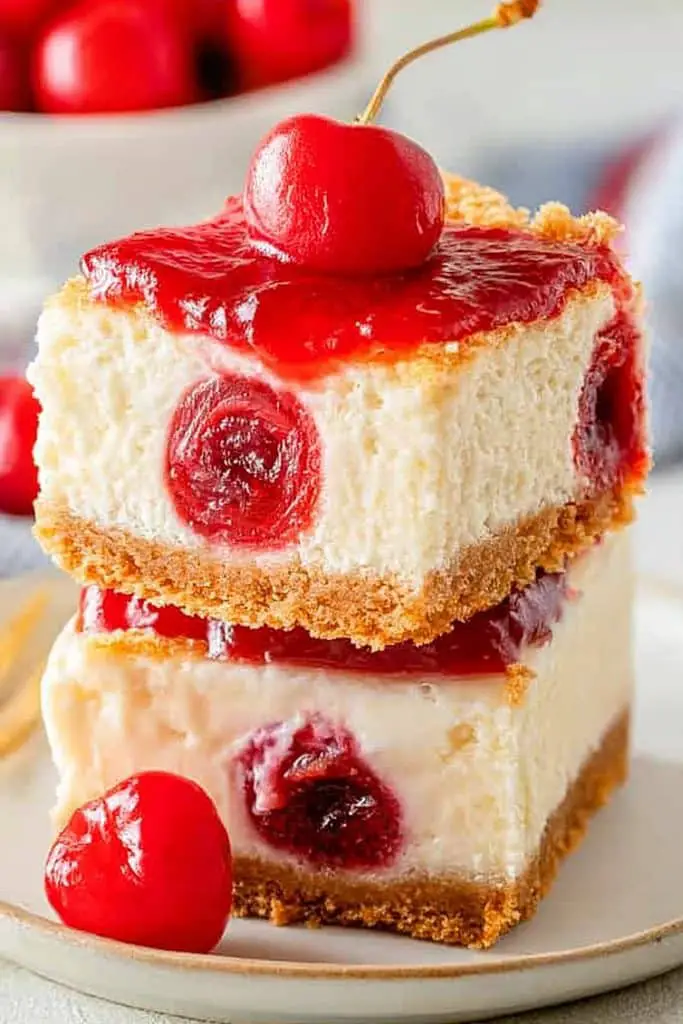
Cherry Cheesecake Bars are one of those desserts that look beautiful on a Valentine’s Day table without requiring a lot of extra decorating. They have a buttery graham cracker crust, a smooth and creamy cheesecake filling, and a sweet cherry topping that adds a lovely pop of red.
These bars are a wonderful choice if you’re planning a Valentine’s Day dessert for a crowd. They’re easy to make ahead, simple to cut into squares, and pretty enough to serve at a romantic dinner or Valentine’s Day party.
Prep Time: 20 minutes
Bake Time: 35-40 minutes
Chill Time: 4 hours
Difficulty: Easy
Ingredients
For the crust:
- 2 cups (200 g) graham cracker crumbs
- 6 tablespoons (85 g) unsalted butter, melted
- 2 tablespoons granulated sugar
For the cheesecake filling:
- 16 oz (450 g) cream cheese, softened
- ½ cup (100 g) granulated sugar
- 2 large eggs, at room temperature
- ¼ cup (60 g) sour cream
- 1 teaspoon vanilla extract
- 1 tablespoon all-purpose flour
For the cherry topping:
- 1 cup (150 g) pitted cherries, fresh or frozen
- 3 tablespoons granulated sugar
- 1 teaspoon lemon juice
- 1 teaspoon cornstarch
- 1 tablespoon water
Shortcut option: You can use about ¾ cup of prepared cherry pie filling instead of making the homemade topping.
Instructions
- Prepare the pan. Preheat your oven to 325°F (165°C). Line an 8-inch square baking pan with parchment paper, leaving some overhang on the sides for easy removal.
- Make the crust. Combine the graham cracker crumbs, melted butter, and sugar in a bowl. Stir until the crumbs resemble wet sand, then press the mixture firmly into the bottom of the prepared pan. Bake for 8-10 minutes and let it cool slightly.
- Prepare the cheesecake filling. Beat the softened cream cheese and sugar in a large bowl until smooth. Add the eggs one at a time, mixing on low speed. Stir in the sour cream, vanilla extract, and flour until just combined.
- Fill the crust. Pour the cheesecake mixture over the prepared crust and spread it into an even layer. Gently tap the pan on the counter to release any large air bubbles.
- Bake the cheesecake layer. Bake for 25-30 minutes, or until the edges are set and the center still has a slight jiggle. The filling will continue to firm up as it cools.
- Make the cherry topping. While the cheesecake bakes, combine the cherries, sugar, and lemon juice in a small saucepan. Cook over medium-low heat for about 5-7 minutes, stirring gently until the cherries soften and release their juices. Mix the cornstarch with the water, stir it into the cherries, and cook for another 1-2 minutes until thickened. Allow the topping to cool completely.
- Cool and decorate. Let the cheesecake cool to room temperature, then spread the cooled cherry topping over the surface. If you’re using prepared cherry pie filling, simply spoon it evenly over the cooled cheesecake.
- Chill and slice. Refrigerate for at least 4 hours, or until fully set. Lift the cheesecake out using the parchment paper and cut it into squares with a sharp knife, wiping the blade between cuts.
13. White Chocolate Strawberry Blondies
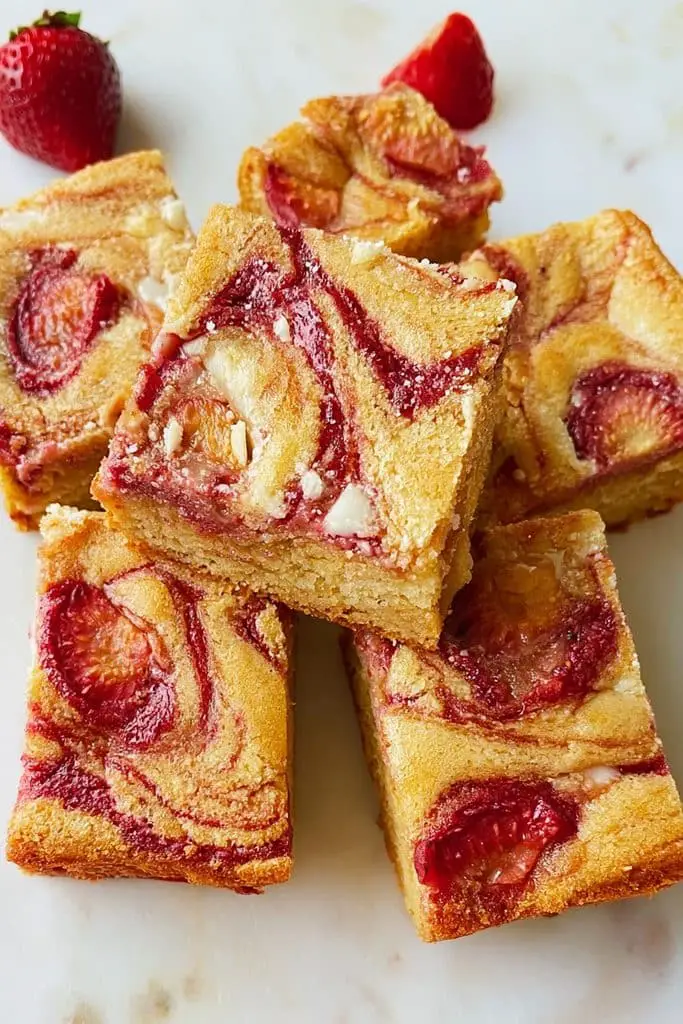
If you love soft, chewy desserts with a fruity twist, these White Chocolate Strawberry Blondies are a lovely treat to make for Valentine’s Day. They have a buttery, vanilla-rich base filled with creamy white chocolate and sweet strawberries.
These blondies are easy to prepare in one pan and don’t need much decorating to look festive. Cut them into small squares, add a drizzle of melted white chocolate, and you’ll have a beautiful addition to your Valentine’s Day dessert bar.
Prep Time: 15 minutes
Bake Time: 25-30 minutes
Cooling Time: 45 minutes
Difficulty: Easy
Ingredients
- ½ cup (113 g) unsalted butter, melted and slightly cooled
- ¾ cup (150 g) light brown sugar, packed
- 1 large egg, at room temperature
- 1 teaspoon vanilla extract
- 1 cup (125 g) all-purpose flour
- ¼ teaspoon baking powder
- ¼ teaspoon salt
- ¾ cup (130 g) white chocolate chips or chopped white chocolate
- ¾ cup (100 g) fresh strawberries, diced small and patted dry
- 2 tablespoons extra white chocolate, for drizzling (optional)
Instructions
- Prepare the oven and pan. Preheat your oven to 350°F (175°C). Line an 8-inch square baking pan with parchment paper, leaving a little overhang on the sides.
- Mix the butter and sugar. In a large bowl, whisk together the melted butter and brown sugar until smooth. Let the butter cool slightly first so it doesn’t cook the egg when you add it.
- Add the egg and vanilla. Whisk in the egg and vanilla extract until everything is well combined.
- Mix in the dry ingredients. Add the flour, baking powder, and salt. Stir gently until the flour is just incorporated. Avoid overmixing to help keep the blondies soft and chewy.
- Fold in the white chocolate and strawberries. Gently fold in the white chocolate chips and diced strawberries. Make sure the strawberry pieces are small and patted dry, as too much moisture can make the center soggy.
- Spread the batter. Transfer the mixture to your prepared pan and spread it into an even layer. Sprinkle a few extra white chocolate chips on top if you like.
- Bake until set. Bake for 25-30 minutes, or until the edges are lightly golden and the center looks set. A toothpick inserted near the center should come out with a few moist crumbs, not wet batter.
- Cool and decorate. Let the blondies cool completely in the pan before lifting them out. If desired, drizzle melted white chocolate over the top and allow it to set before slicing into squares.
14. S’mores Dessert Bars
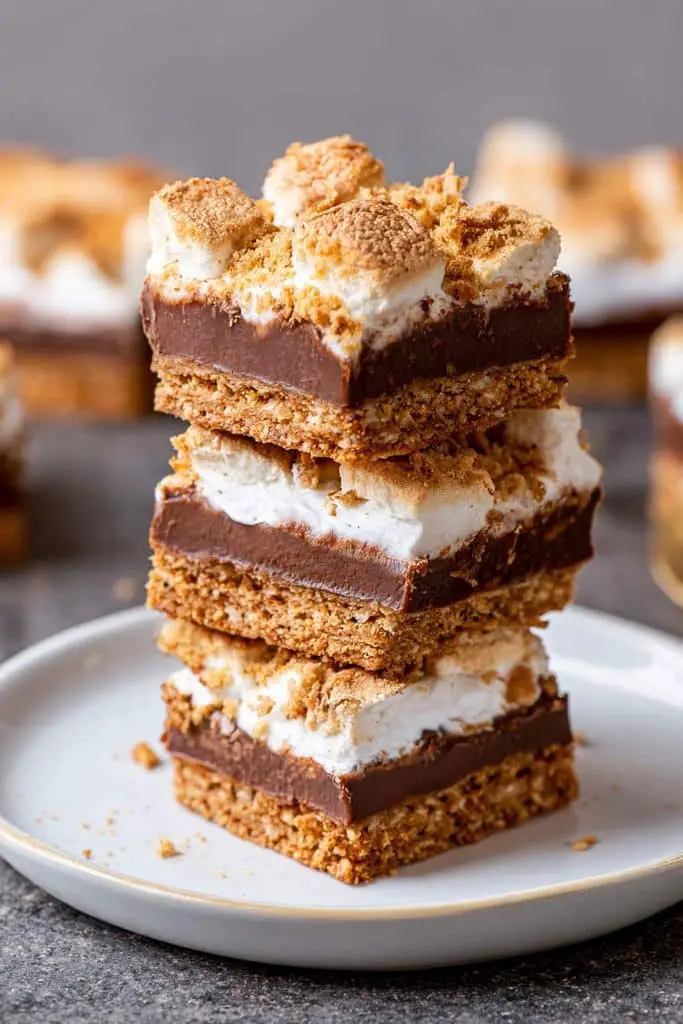
If you love the classic combination of chocolate, marshmallows, and graham crackers, these S’mores Dessert Bars are a fun treat to add to your Valentine’s Day dessert table. They have a buttery graham cracker base, a rich chocolate layer, and gooey toasted marshmallows on top. I love how they bring all the flavors of campfire s’mores into an easy-to-make dessert you can bake right in your kitchen.
These bars are perfect for parties because they’re easy to cut into squares and share. You can even use heart-shaped sprinkles or drizzle pink and white chocolate over the top to give them a Valentine’s Day makeover.
Prep Time: 15 minutes
Bake Time: 20-25 minutes
Cooling Time: 30 minutes
Difficulty: Easy
Ingredients
- 1½ cups (150 g) graham cracker crumbs
- ½ cup (113 g) unsalted butter, melted
- ¼ cup (50 g) granulated sugar
- 1½ cups (255 g) milk or semisweet chocolate chips
- 2 cups (100 g) mini marshmallows
- ½ teaspoon vanilla extract (optional)
- 2 tablespoons Valentine’s Day sprinkles (optional)
Instructions
- Prepare the oven and pan. Preheat your oven to 350°F (175°C). Line an 8-inch square baking pan with parchment paper, leaving some overhang so you can lift the bars out easily.
- Make the graham cracker base. In a bowl, mix the graham cracker crumbs, melted butter, and sugar until the crumbs are evenly coated. Press the mixture firmly into the bottom of the prepared pan.
- Bake the crust. Bake for 8 minutes, then remove the pan from the oven. Let the crust cool for a few minutes before adding the chocolate.
- Add the chocolate layer. Sprinkle the chocolate chips evenly over the warm crust. Return the pan to the oven for 2-3 minutes, just until the chocolate begins to soften. Spread it gently into an even layer with a spatula.
- Add the marshmallows. Scatter the mini marshmallows evenly over the chocolate. If you like, add a few extra chocolate chips between the marshmallows for an even richer dessert.
- Bake until golden. Return the pan to the oven for another 5-8 minutes, or until the marshmallows puff up and turn lightly golden. Keep a close eye on them because marshmallows can brown quickly.
- Decorate. Remove the pan from the oven and add Valentine’s Day sprinkles while the marshmallows are still warm. For an extra festive touch, drizzle a little melted pink or white chocolate over the top after the bars have cooled slightly.
- Cool and slice. Let the bars cool for about 30 minutes before cutting. For cleaner slices, lightly grease a sharp knife and wipe it between cuts. The chocolate and marshmallow layers will still be a little gooey, which is part of their charm.
15. Raspberry Oatmeal Crumble Bars
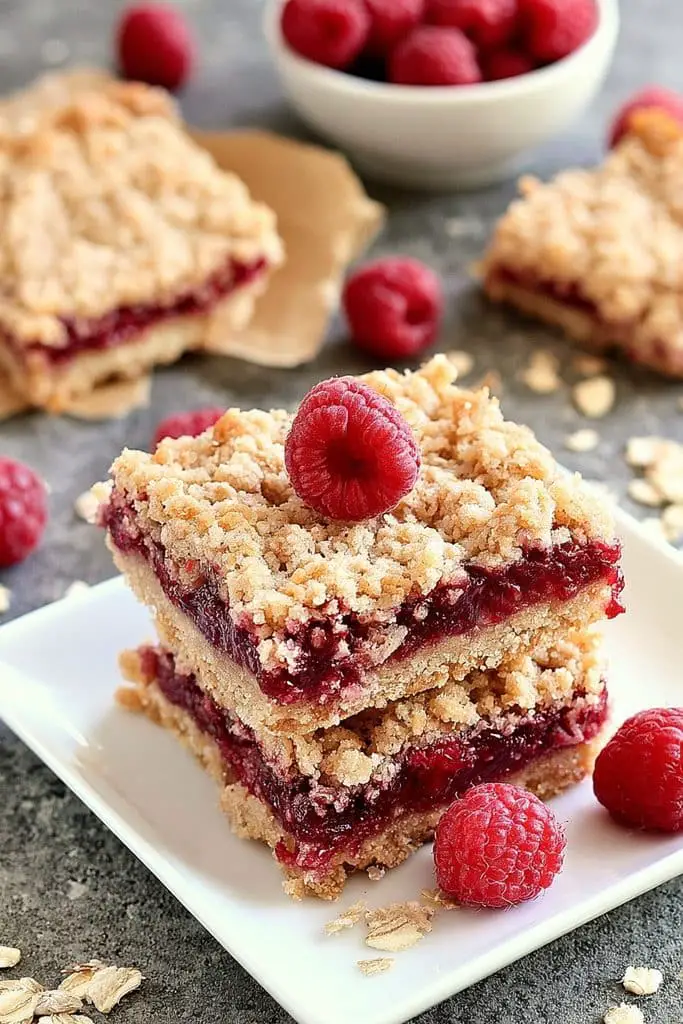
If you love fruity desserts with a buttery, crunchy topping, these Raspberry Oatmeal Crumble Bars are a delicious choice for Valentine’s Day.
These bars are easy to make with simple pantry ingredients, and their pretty red filling makes them perfect for a Valentine’s Day dessert table. They’re also easy to slice into small squares, so you can serve them alongside brownies, cheesecake bars, and other sweet treats.
Prep Time: 15 minutes
Bake Time: 30-35 minutes
Cooling Time: 1 hour
Difficulty: Easy
Ingredients
For the oatmeal crust and crumble:
- 1 cup (125 g) all-purpose flour
- 1 cup (90 g) old-fashioned rolled oats
- ½ cup (100 g) light brown sugar, packed
- ¼ teaspoon baking soda
- ¼ teaspoon salt
- ½ cup (113 g) unsalted butter, melted
- 1 teaspoon vanilla extract
For the raspberry filling:
- 1½ cups (180 g) raspberries, fresh or frozen
- ¼ cup (50 g) granulated sugar
- 1 tablespoon cornstarch
- 1 teaspoon lemon juice
Instructions
- Prepare the oven and pan. Preheat your oven to 350°F (175°C). Line an 8-inch square baking pan with parchment paper, leaving some overhang on the sides for easy removal.
- Make the oatmeal mixture. In a large bowl, combine the flour, rolled oats, brown sugar, baking soda, and salt. Add the melted butter and vanilla extract, then stir until the mixture forms moist crumbs.
- Form the bottom crust. Set aside about one-third of the oat mixture for the topping. Press the remaining mixture firmly into the bottom of the prepared pan to create an even crust.
- Prepare the raspberry filling. In a separate bowl, gently mix the raspberries with the granulated sugar, cornstarch, and lemon juice. If you’re using frozen raspberries, add them straight from the freezer rather than thawing them first.
- Add the filling. Spread the raspberry mixture evenly over the crust. Try to distribute the berries all the way to the edges so every square has plenty of fruity filling.
- Add the crumble topping. Sprinkle the reserved oatmeal mixture over the raspberries. Leave a few small gaps so the bright red filling peeks through after baking.
- Bake until golden. Bake for 30-35 minutes, or until the topping is lightly golden and the raspberry filling is bubbling around the edges.
- Cool and slice. Let the bars cool completely in the pan for about 1 hour. For firmer, cleaner slices, refrigerate them for another 30 minutes before lifting them out and cutting into squares.
16. Valentine’s Day M&M Cookie Bars
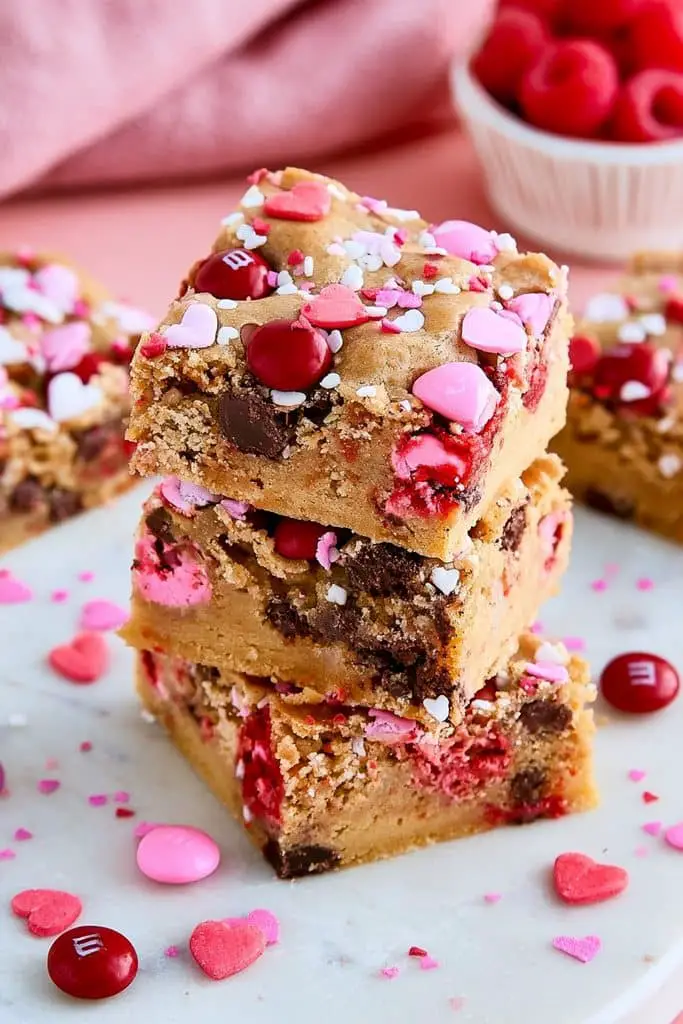
If you love soft, chewy cookies packed with colorful candies, these Valentine’s Day M&M Cookie Bars are such a fun dessert to make. They have buttery cookie dough, plenty of chocolate chips, and red, pink, and white M&M’s in every bite. I love how the colorful candies make these bars look festive without needing extra frosting or complicated decorations.
They’re also perfect when you’re making several desserts for a party. Instead of scooping and baking individual cookies, you can press the dough into one pan, bake it, and cut it into squares. It’s an easy way to prepare a sweet treat for a Valentine’s Day dessert bar.
Prep Time: 15 minutes
Bake Time: 22-28 minutes
Cooling Time: 30-45 minutes
Difficulty: Easy
Ingredients
- ½ cup (113 g) unsalted butter, melted and slightly cooled
- ¾ cup (150 g) light brown sugar, packed
- ¼ cup (50 g) granulated sugar
- 1 large egg, at room temperature
- 1 teaspoon vanilla extract
- 1½ cups (190 g) all-purpose flour
- ½ teaspoon baking soda
- ¼ teaspoon salt
- ¾ cup (130 g) red, pink, and white M&M’s
- ½ cup (85 g) semisweet chocolate chips
- 2 tablespoons extra M&M’s, for topping
Instructions
- Prepare the pan. Preheat your oven to 350°F (175°C). Line a 9-inch square baking pan with parchment paper, leaving some overhang so you can lift out the cookie bars easily.
- Mix the butter and sugars. In a large bowl, whisk together the melted butter, brown sugar, and granulated sugar until well combined.
- Add the egg and vanilla. Whisk in the egg and vanilla extract until the mixture looks smooth. Make sure the butter has cooled slightly before adding the egg.
- Combine the dry ingredients. In a separate bowl, mix the flour, baking soda, and salt. Add the dry mixture to the wet ingredients and stir until a soft dough forms. Stop mixing once the flour is incorporated.
- Fold in the candies and chocolate. Gently stir in the M&M’s and chocolate chips, saving a few candies for the top. This gives every bite a nice mix of chocolate and candy crunch.
- Press the dough into the pan. Transfer the dough to the prepared pan and press it into an even layer. Scatter the reserved M&M’s and a few chocolate chips over the surface.
- Bake until lightly golden. Bake for 22-28 minutes, or until the edges are golden and the center looks set but still slightly soft. Avoid overbaking, as the bars will continue to firm up while cooling.
- Cool and slice. Let the cookie bars cool in the pan for at least 30 minutes. Lift them out using the parchment paper and cut into squares with a sharp knife.
17. Pink Strawberry Shortcake Bars
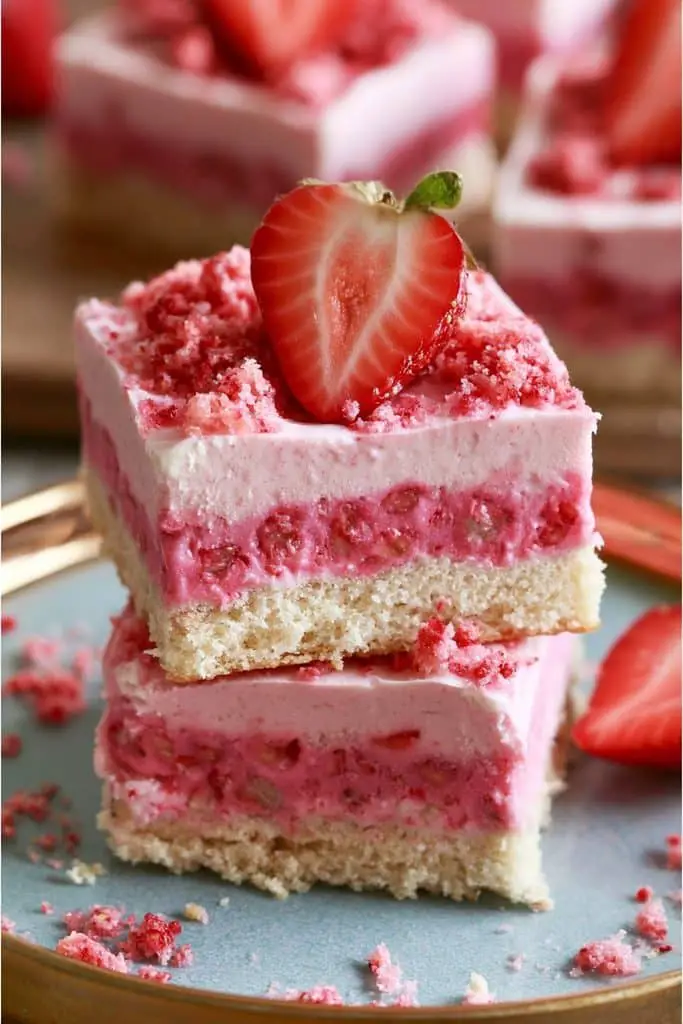
If you love strawberry shortcake, these pink strawberry shortcake bars are such a fun dessert to make for Valentine’s Day!
These bars are perfect when you want something fruity, sweet, and a little different from the usual chocolate desserts. Cut them into neat squares, add a few fresh strawberry slices on top, and you have a lovely treat to share with family, friends, or someone special.
Prep Time: 20 minutes
Bake Time: 25-30 minutes
Cooling Time: 1 hour
Difficulty: Easy
Ingredients
For the shortcake base:
- 1 ½ cups all-purpose flour
- ½ cup unsalted butter, softened
- ½ cup granulated sugar
- 1 large egg
- 1 teaspoon vanilla extract
- ½ teaspoon baking powder
- ¼ teaspoon salt
For the strawberry filling:
- 1 cup finely chopped fresh strawberries
- 2 tablespoons granulated sugar
- 1 teaspoon lemon juice
- 1 tablespoon cornstarch
For the pink topping:
- 4 ounces cream cheese, softened
- 2 tablespoons unsalted butter, softened
- 1 cup powdered sugar
- ½ teaspoon vanilla extract
- 1-2 teaspoons strawberry puree or a tiny drop of pink food coloring
- Fresh strawberry slices, for decorating
Instructions
- Prepare the pan. Preheat your oven to 350°F (175°C). Line an 8-inch square baking pan with parchment paper, leaving a little overhang so you can lift the bars out easily later.
- Make the shortcake dough. In a mixing bowl, beat the softened butter and sugar until creamy. Add the egg and vanilla extract, mixing until combined. Stir in the flour, baking powder, and salt until a soft dough forms.
- Press the base into the pan. Set aside about ½ cup of the dough for the top. Press the remaining dough evenly into the prepared pan.
- Prepare the strawberry filling. In a small saucepan, combine the chopped strawberries, sugar, lemon juice, and cornstarch. Cook over medium-low heat for about 4-6 minutes, stirring often, until the strawberries soften and the mixture thickens. Let it cool for a few minutes.
- Add the filling and topping dough. Spread the strawberry mixture over the shortcake base. Crumble the reserved dough over the top, leaving a few small gaps so the pink filling peeks through.
- Bake the bars. Bake for 25-30 minutes, or until the edges are lightly golden and the top looks set. Let the bars cool completely in the pan before adding the frosting.
- Make the pink topping. Beat the cream cheese and butter until smooth. Add the powdered sugar and vanilla, then mix until creamy. Stir in the strawberry puree a little at a time for a soft pink color. If you want a brighter shade, add a tiny drop of pink food coloring.
- Frost and decorate. Spread the pink topping over the cooled bars. Add a few fresh strawberry slices just before serving, then lift the bars from the pan and cut them into squares.
18. No-Bake Chocolate Oat Bars
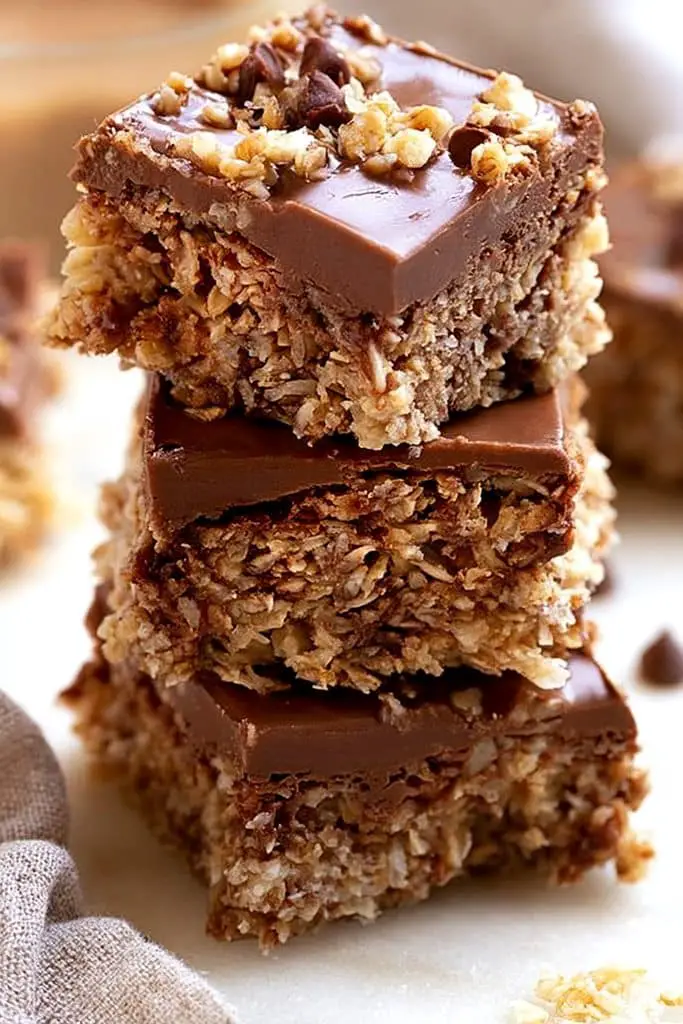
If you’re looking for an easy Valentine’s Day dessert that doesn’t require turning on the oven, these no-bake chocolate oat bars are a great choice! They’re made with chewy oats, creamy peanut butter, and rich chocolate, giving you a sweet treat with a little crunch in every bite.
These bars are also easy to customize with Valentine’s Day sprinkles, pink candy hearts, or a drizzle of white chocolate. Cut them into small squares, arrange them on a pretty serving plate, and they’re ready for your Valentine’s Day celebration!
Prep Time: 15 minutes
Chill Time: 2 hours
Bake Time: None
Difficulty: Easy
Ingredients
For the oat layer:
- 2 cups old-fashioned rolled oats
- ½ cup creamy peanut butter
- ⅓ cup honey
- ¼ cup unsalted butter
- 1 teaspoon vanilla extract
- ¼ teaspoon salt
For the chocolate topping:
- 1 cup semi-sweet chocolate chips
- 1 tablespoon coconut oil or butter
- Valentine’s Day sprinkles or pink candy hearts, optional
Instructions
- Prepare the pan. Line an 8-inch square baking pan with parchment paper, leaving a little extra hanging over the sides. This makes it much easier to lift out the bars later.
- Warm the wet ingredients. Add the peanut butter, honey, and butter to a small saucepan. Heat over low heat, stirring until everything melts together into a smooth mixture. Remove from the heat and stir in the vanilla extract and salt.
- Mix in the oats. Place the rolled oats in a large bowl. Pour the peanut butter mixture over them and stir until the oats are evenly coated.
- Press the oat mixture into the pan. Transfer the mixture to your prepared pan. Press it down firmly with the back of a spoon or the bottom of a measuring cup. A compact layer helps the bars hold together when sliced.
- Melt the chocolate. Combine the chocolate chips and coconut oil in a microwave-safe bowl. Microwave in 20-second intervals, stirring between each interval, until smooth. You can also melt the chocolate gently using a double boiler.
- Add the chocolate topping. Pour the melted chocolate over the oat layer and spread it evenly with a spatula. Add Valentine’s Day sprinkles or candy hearts while the chocolate is still soft.
- Chill until firm. Refrigerate the pan for about 2 hours, or until the chocolate is set and the oat mixture feels firm.
- Slice and serve. Lift the slab out using the parchment paper and cut it into bars or small squares with a sharp knife. For cleaner cuts, let the bars sit at room temperature for a few minutes before slicing.
19. Mini Lemon Bars with Pink Sugar
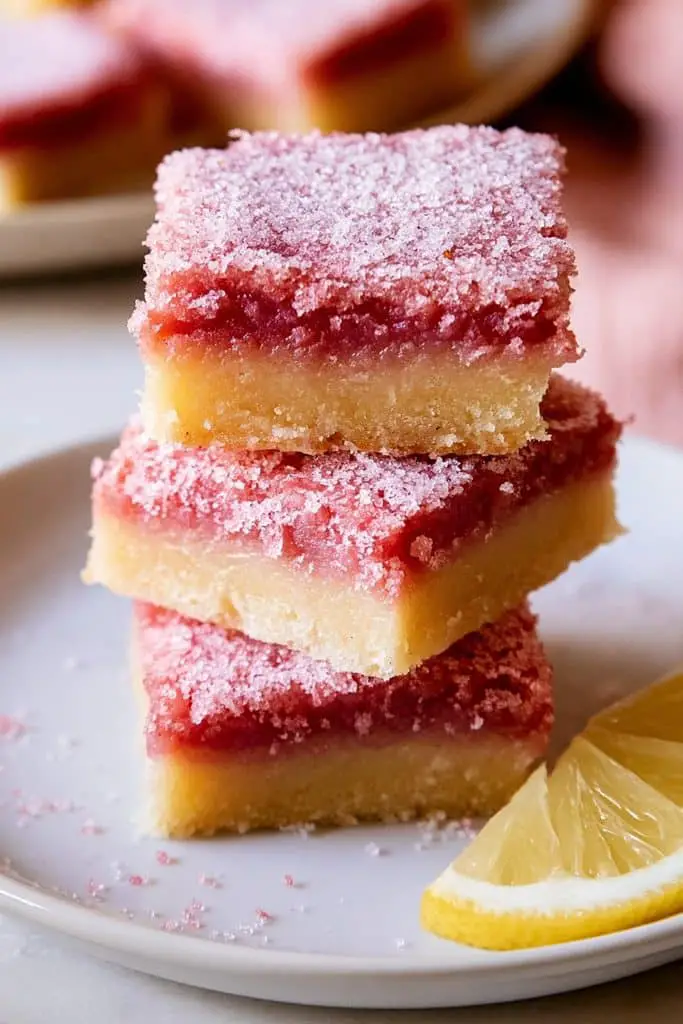
They have a buttery shortbread crust, a bright lemon filling, and a pretty dusting of pink sugar that makes them look extra festive.
These little bars are perfect for parties because you can cut them into bite-sized squares that are easy to serve and share. The pink sugar gives them a romantic touch without needing fancy decorations, and the citrusy filling makes every bite taste light and refreshing.
Prep Time: 20 minutes
Bake Time: 30-35 minutes
Cooling Time: 2 hours
Difficulty: Easy
Ingredients
For the shortbread crust:
- 1 cup all-purpose flour
- ¼ cup powdered sugar
- ½ cup unsalted butter, melted
- ¼ teaspoon salt
- ½ teaspoon vanilla extract
For the lemon filling:
- 2 large eggs
- ¾ cup granulated sugar
- 2 tablespoons all-purpose flour
- ¼ cup fresh lemon juice
- 1 tablespoon finely grated lemon zest
- ¼ teaspoon baking powder
For the pink sugar topping:
- ¼ cup granulated sugar
- A tiny drop of pink food coloring
- Extra powdered sugar, optional
Instructions
- Prepare the baking pan. Preheat your oven to 350°F (175°C). Line an 8-inch square baking pan with parchment paper, leaving a little overhang on the sides so you can lift the bars out easily.
- Make the shortbread crust. In a medium bowl, mix the flour, powdered sugar, and salt. Add the melted butter and vanilla extract, stirring until the mixture resembles soft, crumbly dough.
- Bake the crust. Press the mixture evenly into the bottom of the prepared pan. Bake for 15-18 minutes, or until the edges are just beginning to turn lightly golden.
- Prepare the lemon filling. While the crust bakes, whisk the eggs and granulated sugar in a bowl until smooth. Add the flour and baking powder, then whisk in the lemon juice and lemon zest until everything is well combined.
- Add the filling. Pour the lemon mixture over the warm crust as soon as it comes out of the oven. Return the pan to the oven and bake for another 15-18 minutes, until the filling is set and no longer looks liquid in the center.
- Make the pink sugar. Place the granulated sugar in a small bowl. Add a tiny drop of pink food coloring and rub it into the sugar with a spoon or your fingertips until the color is evenly distributed. If the sugar becomes slightly damp, spread it on a plate and let it dry before using.
- Cool the bars completely. Let the lemon bars cool in the pan, then refrigerate them for about 1-2 hours to help the filling firm up.
- Cut and decorate. Lift the chilled bars from the pan and cut them into small squares. Sprinkle the pink sugar over the top just before serving. Add a light dusting of powdered sugar too, if you like.
20. Chocolate Peppermint Brownie Bars
If you’re a fan of rich chocolate desserts with a refreshing minty twist, these chocolate peppermint brownie bars are a delicious addition to your Valentine’s Day dessert table! I love how the little hint of peppermint balances the rich chocolate without making the dessert taste too sweet.
These bars also look beautiful when decorated with pink, red, or white sprinkles. You can cut them into small squares for a party platter or make slightly larger pieces for a special after-dinner treat. They’re a fun option when you want something a little different from traditional Valentine’s Day brownies.
Prep Time: 20 minutes
Bake Time: 25-30 minutes
Cooling and Chilling Time: 2 hours
Difficulty: Easy
Ingredients
For the brownie base:
- ½ cup unsalted butter
- 1 cup granulated sugar
- 2 large eggs
- 1 teaspoon vanilla extract
- ⅓ cup unsweetened cocoa powder
- ½ cup all-purpose flour
- ¼ teaspoon salt
- ¼ teaspoon baking powder
For the peppermint layer:
- 4 tablespoons unsalted butter, softened
- 1 ½ cups powdered sugar
- 1-2 tablespoons milk or cream
- ¼ teaspoon peppermint extract
- A tiny drop of pink or red food coloring, optional
For the chocolate topping:
- ¾ cup semi-sweet chocolate chips
- 1 tablespoon unsalted butter or coconut oil
- Crushed peppermint candies or Valentine’s Day sprinkles, optional
Instructions
- Prepare the pan. Preheat your oven to 350°F (175°C). Line an 8-inch square baking pan with parchment paper, leaving some overhang on the sides for easy removal.
- Make the brownie batter. Melt the butter in a medium bowl and let it cool slightly. Whisk in the sugar, eggs, and vanilla extract until smooth. Add the cocoa powder, flour, salt, and baking powder, stirring just until combined. Avoid overmixing so the brownies stay tender.
- Bake the brownies. Spread the batter evenly in the prepared pan. Bake for 25-30 minutes, or until a toothpick inserted near the center comes out with a few moist crumbs but no wet batter.
- Cool completely. Let the brownie layer cool in the pan before adding the peppermint frosting. This helps keep the layers neat and prevents the frosting from melting.
- Prepare the peppermint layer. Beat the softened butter until creamy. Gradually add the powdered sugar, peppermint extract, and 1 tablespoon of milk or cream. Beat until smooth and spreadable, adding a little more milk if needed. If you want a festive pink layer, mix in a tiny drop of food coloring.
- Spread the frosting. Carefully spread the peppermint mixture over the cooled brownies in an even layer. Place the pan in the refrigerator for about 20-30 minutes to help the frosting firm up.
- Make the chocolate topping. Melt the chocolate chips with the butter or coconut oil in the microwave in 20-second intervals, stirring each time until smooth. You can also use a double boiler over gently simmering water.
- Add the chocolate layer. Pour the melted chocolate over the chilled peppermint layer and spread it gently with a spatula. Sprinkle crushed peppermint candies or Valentine’s Day sprinkles over the top while the chocolate is still soft.
- Chill and slice. Refrigerate the bars for about 45-60 minutes, or until the chocolate topping is set. Lift the slab out using the parchment paper and cut it into squares with a sharp knife. Let the bars sit at room temperature for a few minutes before serving for the best texture.