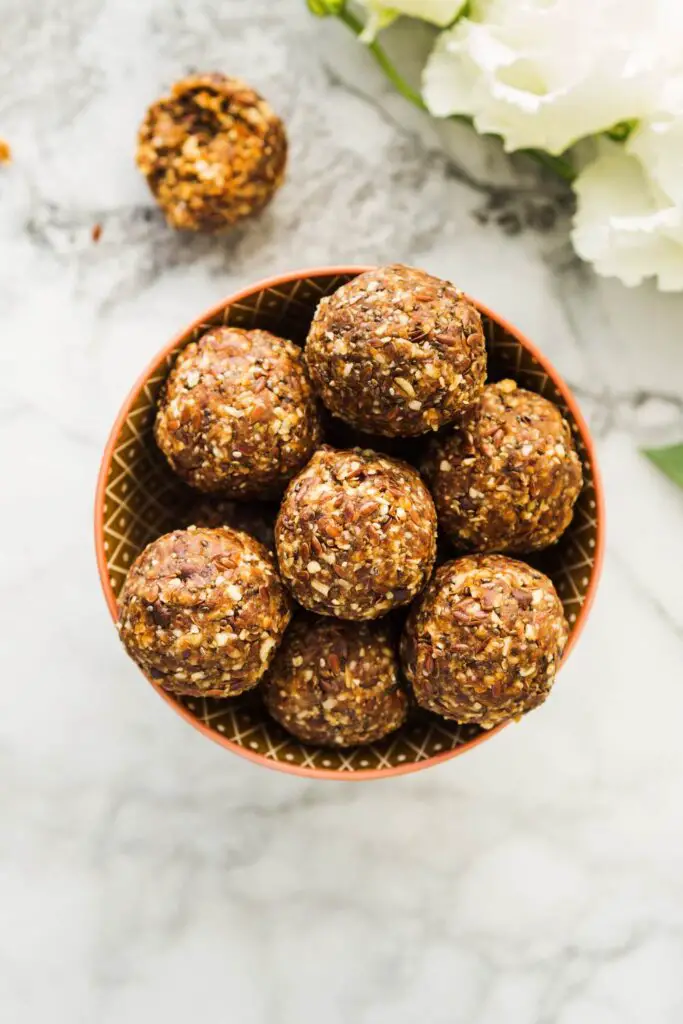
These healthy snacks are made with just three ingredients and follow a simple method that makes them perfect for busy days. All you need are a ripe banana, creamy peanut butter, and rolled oats!
How Simple Is It?
- Mash the Banana
- Combine the Ingredients
- Roll and Chill
This recipe is as straightforward as it gets: no baking, no special tools, and only wholesome ingredients.
Ingredients
- Ripe Banana:
- The banana provides natural sweetness, making this recipe free of added sugar. Ensure the banana is ripe, as ripe bananas are softer and sweeter, which helps bind the ingredients together. Look for a banana with brown spots on the peel for the best results.
- Peanut Butter:
- You can use either creamy or natural peanut butter. Creamy peanut butter results in a smooth, cohesive texture, while natural peanut butter (with minimal added sugar or oil) makes the recipe healthier and slightly nuttier.
- Rolled Oats:
- Rolled oats are ideal for this recipe as they provide structure and a slightly chewy texture. Quick oats can work, but they’ll produce a softer texture, and steel-cut oats are not recommended since they won’t soften enough.
How To Make 3 ingredient Peanut Butter Banana Oatmeal Balls no Sugar
1. Mash the Banana
- Preparation: Peel a ripe banana and place it in a medium mixing bowl.
- Mashing Process: Use a fork or potato masher to mash the banana until it’s smooth and free of large chunks. A well-mashed banana ensures even sweetness throughout the mixture and helps the ingredients bind together.
- Consistency: The mashed banana should resemble a thick puree. If the banana is underripe, it may not mash easily and might affect the texture and sweetness of the balls.
2. Mix with Peanut Butter
- Adding Peanut Butter: Add your peanut butter to the mashed banana. Start with the recommended amount (usually around 2–3 tablespoons).
- Combining: Use a spoon to mix the peanut butter and banana together until fully combined. The mixture should be creamy and smooth, with no visible streaks of either ingredient.
- Why This Step Matters: The peanut butter not only adds protein and healthy fats but also acts as a natural binder, ensuring the balls hold their shape.
3. Add the Rolled Oats
- Incorporating Oats: Gradually add rolled oats to the banana-peanut butter mixture, stirring as you go. Start with about ½–¾ cup, adjusting as needed.
- Mixing: Ensure the oats are evenly distributed. The mixture should be thick but not overly dry. If it feels too wet, add a bit more oats; if too dry, add a small spoonful of peanut butter or a few drops of water.
- Let It Rest: Allow the mixture to sit for 5–10 minutes. This gives the oats time to absorb moisture from the banana and peanut butter, softening slightly and making the mixture easier to work with.
4. Form the Balls
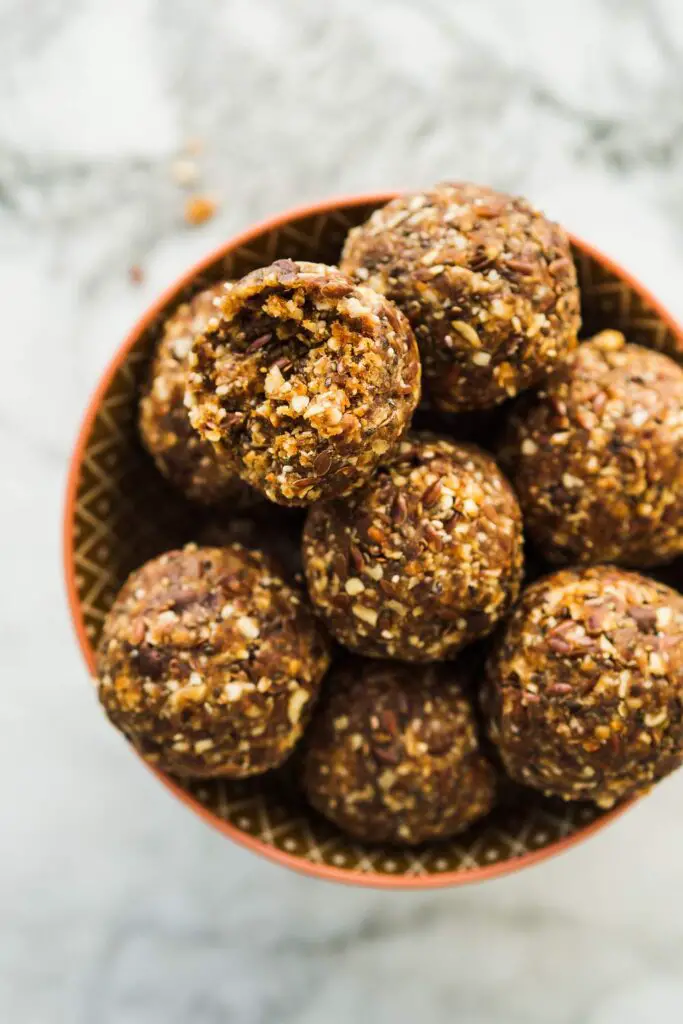
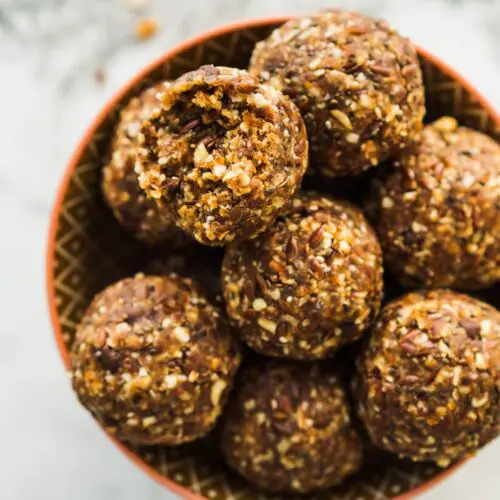
- Shaping: Use a spoon or small cookie scoop to portion out the mixture. Scoop approximately 1 tablespoon of the mixture at a time and roll it between your hands to form a ball.
- Size: Aim for bite-sized balls, about 1–1.5 inches in diameter. This size makes them easy to snack on and ensures they hold together well.
- Yield: You should get about 12–15 balls, depending on the size.
5. Chill and Serve
- Chilling: Place the balls on a baking sheet or plate lined with parchment paper. This prevents them from sticking. Refrigerate the balls for at least 30 minutes to firm up. The chilling process helps them set, making them easier to handle and enhancing their texture.
- Serving: Once chilled, they’re ready to enjoy! Serve them as a healthy snack, post-workout treat, or even a quick breakfast option.

Optional Add-Ins:
- Chocolate Chips
- Chia or Flax Seeds
- Cinnamon or Vanilla Extract
Pro Tips for Success
- Choose the Right Peanut Butter:
- If using natural peanut butter, stir it well before adding to ensure it’s not too oily or dry.
- Adjust the Oats:
- The amount of oats you need can vary depending on the size and ripeness of your banana. Start with less and add more if needed.
- Customize the Recipe:
- Add a handful of mix-ins like mini chocolate chips, chopped nuts, or dried fruit for variety and additional flavor.
- Storage:
- Store the balls in an airtight container in the refrigerator for up to 5 days. For longer storage, freeze them for up to 3 months and thaw as needed.
- Make It Vegan:
- Use plant-based peanut butter and oats certified as vegan if you’re serving them to someone following a vegan diet.
- No-Bake Perfection:
- Since these balls are no-bake, they’re perfect for hot weather or when you want a quick snack without turning on the oven.
Storage Instructions
Proper storage ensures that your Peanut Butter Banana Oatmeal Balls remain fresh, flavorful, and safe to eat.
Refrigeration (Short-Term Storage)
- Why Refrigerate?
Since the balls are made with ripe bananas and no preservatives, they are perishable and need to be stored in the refrigerator to prevent spoilage. The cool environment slows the growth of bacteria and keeps the balls firm and fresh. - Storage Method:
- Airtight Container: Place the oatmeal balls in a clean, dry airtight container. Use a container with a secure lid to prevent air from getting in, which can dry out the balls or cause them to absorb odors from the refrigerator.
- Layering: If you’re stacking the balls, place a piece of parchment or wax paper between layers. This prevents them from sticking together and makes it easier to grab one when needed.
- Placement: Store the container in the main compartment of your refrigerator, not the door. The temperature in the door fluctuates more, which could affect the freshness of the balls.
- Shelf Life:
- These oatmeal balls will stay fresh in the refrigerator for up to one week.
Freezing (Long-Term Storage)
- Why Freeze?
Freezing is a great option if you want to prepare these snacks in bulk or if you don’t plan to eat them within a week. Proper freezing preserves their texture and flavor for a much longer time. - Freezing Method:
- Pre-Freezing: Arrange the balls in a single layer on a baking sheet lined with parchment paper. Ensure they’re not touching each other to prevent sticking. Place the baking sheet in the freezer for about 1–2 hours or until the balls are firm.
- Transfer to Storage: Once the balls are frozen solid, transfer them to a freezer-safe airtight container or zip-top freezer bag.
- If using a freezer bag, squeeze out as much air as possible before sealing.
- If using a container, you can stack the balls with parchment paper between layers.
- Label: Write the date on the container or bag so you can keep track of how long they’ve been stored.
- Shelf Life:
- In the freezer, these oatmeal balls will stay fresh for up to 3 months.
Thawing and Serving
- Thaw in Refrigerator: For best results, remove the desired number of balls from the freezer and place them in the refrigerator overnight to thaw gradually.
- Quick Thawing: If you need them sooner, let them sit at room temperature for about 10–15 minutes. This will soften them enough to enjoy without compromising their texture.
- No Thaw Needed: Some people enjoy eating these balls straight from the freezer for a firmer, chewier texture—perfect for hot days or a refreshing snack!
More Recipes
3 ingredient Peanut Butter Banana Oatmeal Balls
These healthy snacks are made with just three ingredients and follow a simple method that makes them perfect for busy days. All you need are a ripe banana, creamy peanut butter, and rolled oats!
Ingredients
- 1 ripe banana: Adds natural sweetness and moisture.
- ½ cup peanut butter: Use creamy or natural peanut butter for best results.
- 1 cup rolled oats: The base ingredient for texture and binding.
Instructions
Mash the Banana:
- In a medium bowl, mash the ripe banana until smooth. Ensure there are no large chunks.
Mix with Peanut Butter:
- Add the peanut butter to the mashed banana and mix until fully combined. The mixture should be creamy and cohesive.
Add the Oats:
- Stir in the rolled oats gradually until evenly mixed. Let the mixture sit for 5-10 minutes to allow the oats to soften slightly.
Form Balls:
- Using a spoon or your hands, scoop out small portions of the mixture and roll them into bite-sized balls. You should get about 12-15 balls.
Chill and Serve:
- Place the balls on a baking sheet lined with parchment paper and refrigerate for at least 30 minutes to firm up. Enjoy as a snack or dessert!