
Christmas baking is one of those things I enjoy even more when I have friends or family around. There’s something so nice about making a big batch of cookie recipes together, decorating them, and then sharing everything at the end.
If you’re planning an easy Christmas baking day, a cookie exchange, or just want some delicious treats to enjoy with friends and family, these Christmas cookies are a great place to start.
1. Classic Christmas Sugar Cookies

I love this recipe because the dough is simple, the cookies hold their shape well, and everyone can have fun choosing their favorite Christmas shapes and decorations.
These are also one of my favorite Christmas cookies to make with friends because you can prepare the dough together and then turn decorating into its own little activity. You can keep them simple with a little sugar, or go all out with icing, sprinkles, and colorful candies.
Prep Time: 30 minutes
Chill Time: 1 hour
Cook Time: 10–12 minutes
Total Time: About 1 hour 45 minutes
Difficulty: Easy
Makes: About 24–30 cookies
Ingredients
For the Cookies:
- 2 ½ cups (300g) all-purpose flour
- ¼ teaspoon baking powder
- ¼ teaspoon salt
- ¾ cup (170g) unsalted butter, softened
- ¾ cup (150g) granulated sugar
- 1 large egg
- 1 teaspoon vanilla extract
For Simple Decorating:
- 2 cups (240g) powdered sugar
- 2–3 tablespoons milk
- ½ teaspoon vanilla extract
- Red and green food coloring, optional
- Christmas sprinkles, optional
- Colored sugar, optional
This basic combination of butter, sugar, egg, flour, baking powder, and vanilla is a classic starting point for rolled Christmas sugar cookies. Similar proportions and chilling methods are used in established sugar-cookie recipes from Food Network and King Arthur Baking.
How to Make Christmas Sugar Cookies
1. Prepare the Dough
In a medium bowl, whisk together the flour, baking powder, and salt. Set it aside while you prepare the butter mixture.
In a large mixing bowl, beat the softened butter and sugar together for about 3–5 minutes, until the mixture looks light and fluffy.
Add the egg and vanilla extract. Beat again until everything is well combined.
2. Add the Dry Ingredients
Gradually add the flour mixture to the butter mixture.
Mix just until a soft dough forms. Try not to overmix the dough because this can make the cookies tougher instead of tender.
If the dough feels a little sticky, that’s okay. It will become easier to work with after chilling.
3. Chill the Dough
Divide the dough into two portions and flatten each portion into a disk.
Wrap the dough and place it in the refrigerator for about 1 hour.
I don’t like skipping this step. Chilled dough is much easier to roll, and it helps the cookies keep those pretty Christmas shapes while baking.
4. Roll and Cut the Cookies
Preheat your oven to 350°F (175°C) and line two baking sheets with parchment paper.
Place one piece of chilled dough between two sheets of parchment paper. Roll it out to about ⅛-inch thick.
Use your favorite Christmas cookie cutters to cut out shapes such as stars, Christmas trees, snowflakes, and gingerbread-style people.
Carefully transfer the cookies to the prepared baking sheets, leaving about 1–2 inches between them.
If the dough becomes too soft while you’re working, place it back in the refrigerator for a few minutes.
5. Bake
Bake the cookies for about 10–12 minutes, or until the edges are just beginning to turn lightly golden.
You don’t want them to become dark brown. For soft-centered sugar cookies, I like to take them out when the centers are set but still look fairly pale.
Let them cool on the baking sheet for a few minutes, then transfer them to a wire rack to cool completely. Established recipes also recommend cooling the cookies fully before decorating.
Make a Simple Christmas Cookie Icing
In a small bowl, whisk together the powdered sugar, milk, and vanilla extract.
Add the milk slowly because you may not need all of it. You want a smooth icing that is thick enough to spread but thin enough to drizzle.
Divide the icing between small bowls if you want different colors. Add a little red or green food coloring, then decorate your cooled cookies.
This is where I think baking with friends becomes the most fun. Put all the icing, sprinkles, and candies on the table and let everyone decorate their own cookies.
Easy Variations
If you want to change these classic Christmas sugar cookies a little, there are plenty of simple options.
- Add ½ teaspoon almond extract for a slightly nutty flavor.
- Add a little orange or lemon zest to the dough.
- Sprinkle colored sugar over the cookies before baking.
- Dip half of each cooled cookie in melted chocolate.
- Use different cookie cutters for Christmas trees, stars, bells, and snowflakes.
If you love the flavor of butter Christmas cookies, you can also keep the decorations very simple and let the buttery cookie itself shine.
2. Classic Gingerbread Christmas Cookies

I don’t think Christmas baking feels complete without a batch of gingerbread cookies. These classic gingerbread Christmas cookies are warm, spiced, slightly chewy, and so much fun to decorate with friends and family. I especially like making gingerbread men because everyone can decorate them differently, which makes them perfect for a Christmas cookie exchange or a relaxed baking afternoon.
The dough is simple to make, but it does need some chilling time before you roll and cut it. Similar classic gingerbread recipes use molasses, brown sugar, ginger, cinnamon, and cloves, then bake the cookies at around 350°F until just set.
Prep time: 30 minutes
Chill time: 1 hour
Cook time: 8-10 minutes
Total time: About 1 hour 40 minutes
Difficulty: Easy
Makes: About 30-36 cookies
Ingredients
- 3 3/4 cups all-purpose flour
- 1 teaspoon baking powder
- 1/2 teaspoon baking soda
- 1 teaspoon salt
- 2 teaspoons ground ginger
- 2 teaspoons ground cinnamon
- 1/4 teaspoon ground cloves
- 12 tablespoons unsalted butter, softened
- 3/4 cup packed brown sugar
- 3/4 cup molasses
- 1 large egg
- 1 teaspoon vanilla extract
For Decorating
- 2 cups powdered sugar
- 2–3 tablespoons milk
- 1/2 teaspoon vanilla extract
- Food coloring, optional
- Sprinkles or small candies, optional
How to Make Gingerbread Christmas Cookies
Mix the dry ingredients.
In a medium bowl, whisk together the flour, baking powder, baking soda, salt, ginger, cinnamon, and cloves. Set it aside.
Cream the butter and sugar.
In a large bowl, beat the softened butter and brown sugar until smooth and creamy. This usually takes about 2–3 minutes.
Add the wet ingredients.
Beat in the molasses, egg, and vanilla until everything is well combined.
Make the dough.
Slowly add the dry ingredients to the wet mixture. Mix just until a soft dough forms. Don’t worry if the dough feels a little soft at this stage.
Chill the dough.
Divide the dough into two portions, flatten each one into a disc, wrap, and refrigerate for at least 1 hour. Chilling makes the dough much easier to roll and helps the cookies keep their shape.
Roll and cut.
Preheat the oven to 350°F and line baking sheets with parchment paper. Roll the chilled dough to about 1/4-inch thickness on a lightly floured surface. Cut out gingerbread men, stars, Christmas trees, or any other shapes you like.
Bake.
Place the cookies on the prepared baking sheets, leaving a little space between them. Bake for 8–10 minutes, or until the edges look set and the centers are still slightly soft.
Have fun with them.
This is my favorite part. Give everyone their own cookies and let them decorate them with icing, sprinkles, buttons, little candy pieces, or whatever you have in the kitchen.
Easy Variations
For a stronger ginger flavor, I sometimes add another 1/2 teaspoon of ground ginger. You can also add a little orange zest for a fresh citrus note.
If you prefer softer cookies, roll the dough slightly thicker and be careful not to overbake them. For crispier gingerbread cookies, roll them a little thinner and give them an extra minute or two in the oven.
You can also make mini gingerbread cookies instead of large ones. They are especially cute for gift boxes and cookie exchange recipes.
3. Buttery Shortbread Christmas Cookies

Shortbread is also one of those easy Christmas cookie recipes that works really well when you’re baking with friends and family. The dough comes together with just a few basic ingredients, and you can shape the cookies into fingers, rounds, stars, or other festive shapes. Traditional shortbread is built around the simple combination of butter, flour, and sugar, with vanilla or almond extract often added for extra flavor.
Prep time: 15 minutes
Chill time: 30 minutes
Cook time: 15–20 minutes
Total time: About 1 hour 5 minutes
Difficulty: Easy
Makes: About 24 cookies
Ingredients
- 1 cup (225g) unsalted butter, softened
- 1/2 cup (100g) granulated sugar
- 2 cups (240g) all-purpose flour
- 1 teaspoon vanilla extract
- 1/4 teaspoon salt
For Decorating
- 2–3 tablespoons powdered sugar, for dusting
- 3 ounces melted chocolate, optional
- Colored sugar or sprinkles, optional
- Finely chopped almonds or pistachios, optional
How to Make Shortbread Christmas Cookies
Cream the butter and sugar.
Add the softened butter and sugar to a large bowl. Beat until smooth, light, and creamy. I like to take my time with this step because it gives the cookies a nice texture.
Add the vanilla.
Mix in the vanilla extract and salt until well combined.
Add the flour.
Gradually add the flour and mix just until a soft dough forms. The mixture may look crumbly at first, but keep mixing and it should come together into a smooth dough. Traditional shortbread dough can feel quite dry before it comes together.
Chill the dough.
Shape the dough into a flat disc, wrap it, and refrigerate for about 30 minutes. This makes it easier to roll and helps the cookies hold their shape.
Roll and cut.
Preheat the oven to 350°F (175°C) and line a baking sheet with parchment paper. Roll the dough to about 1/4-inch thickness on a lightly floured surface. Cut into Christmas shapes or simple rounds.
Prepare for baking.
Place the cookies on the baking sheet. If you’re making traditional shortbread fingers, you can prick the tops lightly with a fork. This is a classic way to prepare shortbread and also gives the cookies a nice homemade look.
Bake.
Bake for 15–20 minutes, or until the cookies are set and just starting to turn lightly golden around the edges. Try not to let them get too dark because shortbread is best when it stays pale and buttery.
Easy Variations
For a little extra holiday flavor, I like adding 1/2 teaspoon of almond extract along with the vanilla. It gives the cookies a lovely nutty flavor and works especially well if you’re making almond Christmas cookies later in your cookie platter.
You can also add a little lemon or orange zest to the dough for a fresh citrus flavor. If chocolate is your thing, dip half of each cooled cookie into melted dark or milk chocolate and let it set.
For something really simple, skip the icing altogether and sprinkle the tops with a little granulated or colored sugar before baking.
4. Almond Christmas Cookies
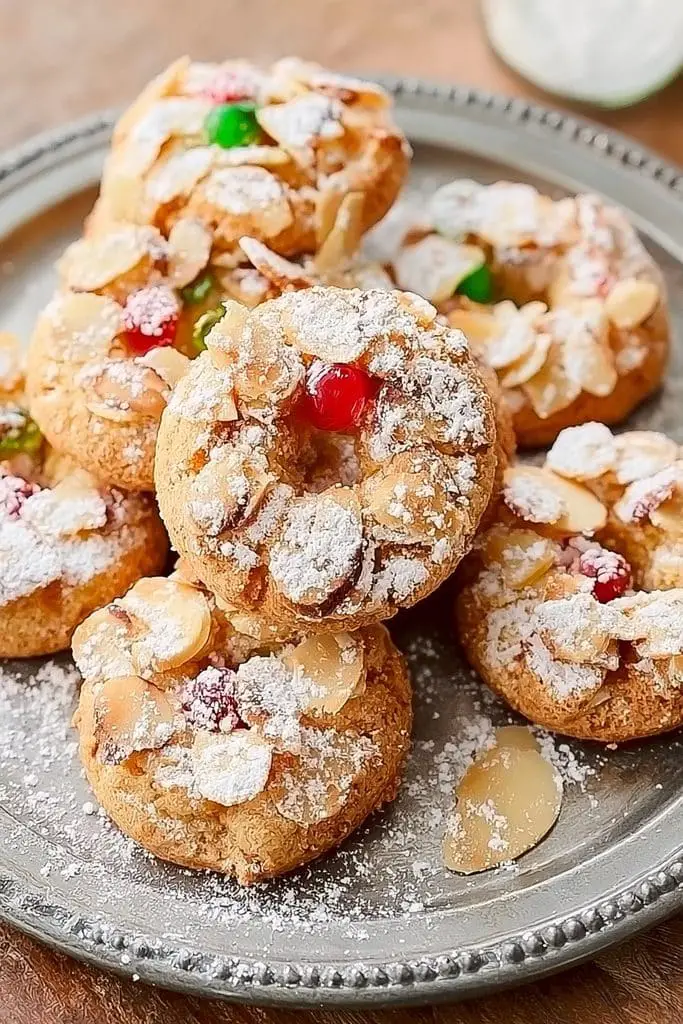
These almond Christmas cookies are crisp around the edges with a tender, buttery center. I use a little almond extract to bring out the flavor and finish them with a simple almond glaze and sliced almonds. They’re also a lovely addition to a cookie exchange because they look festive without needing a lot of decorating.
Prep time: 20 minutes
Chill time: 30 minutes
Cook time: 8–10 minutes
Total time: About 1 hour
Difficulty: Easy
Makes: About 30 cookies
Ingredients
- 1 cup (225g) unsalted butter, softened
- 3/4 cup (150g) granulated sugar
- 1 large egg
- 1 teaspoon almond extract
- 1 teaspoon vanilla extract
- 2 cups (240g) all-purpose flour
- 1/2 teaspoon baking powder
- 1/4 teaspoon salt
For the Almond Glaze
- 1 cup powdered sugar
- 1–2 tablespoons milk
- 1/2 teaspoon almond extract
- 1/4 teaspoon vanilla extract
- Sliced almonds, for topping
- A little colored sugar or sprinkles, optional
How to Make Almond Christmas Cookies
Cream the butter and sugar.
Add the softened butter and sugar to a large mixing bowl. Beat until light and creamy, about 2–3 minutes.
Add the egg and extracts.
Beat in the egg, almond extract, and vanilla extract until smooth. The almond extract gives these cookies their signature flavor.
Mix the dry ingredients.
In another bowl, whisk together the flour, baking powder, and salt.
Make the dough.
Slowly add the dry ingredients to the butter mixture. Mix just until everything comes together into a soft dough. Try not to overmix.
Chill the dough.
Cover the dough and refrigerate for about 30 minutes. This makes it easier to roll and helps the cookies keep their shape while baking. Holiday almond sugar-cookie recipes commonly use a longer chill when making cut-out shapes.
Roll and cut.
Preheat the oven to 350°F (175°C) and line baking sheets with parchment paper. Roll the dough to about 1/4-inch thickness on a lightly floured surface. Cut out stars, trees, bells, hearts, or any other Christmas shapes you like.
Bake.
Arrange the cookies on the prepared baking sheets and bake for 8–10 minutes, just until the edges are lightly golden. Keep an eye on them because almond cookies are best when they stay tender rather than becoming too dark.
Cool the cookies.
Let them cool on the baking sheet for a few minutes before transferring them to a wire rack. Make sure they are completely cool before adding the glaze.
Make the almond glaze.
Mix the powdered sugar, milk, almond extract, and vanilla until smooth. Add a few drops of milk if the glaze feels too thick.
Decorate.
Drizzle or spread the glaze over the cooled cookies. Sprinkle sliced almonds over the top while the glaze is still wet. You can also add a little colored sugar for a more festive look.
Easy Variations
If you want a stronger almond flavor, add another 1/4 teaspoon of almond extract to the dough. I would go slowly with it because almond extract can become quite strong.
For a softer, nuttier cookie, replace about 1/2 cup of the all-purpose flour with finely ground almond flour. Almond-flour cookies are also a great option if you want a softer, chewier texture.
You can also add a little orange or lemon zest to the dough. The citrus cuts through the buttery flavor and gives these cookies a really nice holiday taste.
For an even easier version, skip the cookie cutters. Roll the dough into small balls, place them on the baking sheet, flatten them gently with the bottom of a glass, and bake. You’ll still have delicious almond Christmas cookies without spending extra time shaping them.
5. Butter Christmas Cookies

I’ve always liked butter cookies because they don’t need much to be delicious. They’re rich, soft in the middle, lightly crisp around the edges, and have that simple buttery flavor that feels perfect for Christmas. When I’m making cookie recipes with friends or family, this is the kind of recipe I like to have because everyone can help shape and decorate the cookies.
These butter Christmas cookies are also really flexible. You can cut them into festive shapes, sprinkle them with colored sugar, dip them in chocolate, or simply leave them plain. They’re easy to make and hold up well on a Christmas cookie platter or in a cookie exchange.
Prep time: 20 minutes
Chill time: 1 hour
Cook time: 10–12 minutes
Total time: About 1 hour 30 minutes
Difficulty: Easy
Makes: About 30 cookies
Ingredients
- 1 cup (225g) unsalted butter, softened
- 1 cup (200g) granulated sugar
- 1 large egg
- 1 teaspoon vanilla extract
- 3 cups (375g) all-purpose flour
- 1 teaspoon baking powder
- 1/4 teaspoon salt
For Decorating
- 1 cup powdered sugar
- 1–2 tablespoons milk
- 1/2 teaspoon vanilla extract
- Colored sprinkles, optional
- Colored sugar, optional
- Melted chocolate, optional
How to Make Butter Christmas Cookies
Cream the butter and sugar.
Add the softened butter and sugar to a large bowl. Beat until light, creamy, and smooth, about 2–3 minutes.
Add the egg and vanilla.
Beat in the egg and vanilla extract until everything is well combined.
Mix the dry ingredients.
In a separate bowl, whisk together the flour, baking powder, and salt.
Make the dough.
Gradually add the dry ingredients to the butter mixture. Mix just until the flour is incorporated and a soft dough forms. Try not to overmix because that can make the cookies less tender.
Chill the dough.
Cover the dough and refrigerate for about 1 hour. This gives the butter time to firm up and makes the dough easier to roll and cut.
Roll out the dough.
Preheat the oven to 350°F (175°C) and line your baking sheets with parchment paper. Roll the chilled dough on a lightly floured surface to about 1/4-inch thickness.
Cut into Christmas shapes.
Use cookie cutters to cut out stars, Christmas trees, bells, snowflakes, or any shapes you like. Place them on the prepared baking sheets, leaving a little space between each cookie.
Bake.
Bake for 10–12 minutes, or until the cookies are set and the edges are just beginning to turn lightly golden. You don’t want them to become too brown.
Easy Variations
For a more festive flavor, add 1/2 teaspoon of almond extract along with the vanilla. This gives the cookies a subtle nutty flavor and makes them a little different from traditional sugar cookies.
You can also add 1 teaspoon of finely grated orange or lemon zest to the dough. I especially like orange zest with buttery cookies because it adds a fresh flavor without making the recipe complicated.
If you want chocolate butter cookies, replace 1/4 cup of the flour with 1/4 cup unsweetened cocoa powder. You may need a small splash of milk if the dough feels too dry.
For a really simple Christmas look, brush the tops lightly with milk and sprinkle with colored sugar before baking. No icing is needed.
6. Pillsbury Christmas Tree Cookies

When I want something festive without spending a whole afternoon making cookie dough, Pillsbury Christmas tree cookies are one of the easiest options. The dough is already shaped, so there’s no mixing, rolling, or cutting involved. You simply place the cookies on a baking sheet, bake them, and then have fun decorating.
I especially like these for baking with friends and family because most of the work is really in the decorating. Put out some icing, sprinkles, colored sugar, and little candies, and everyone can make their own Christmas trees. Pillsbury’s ready-to-bake Christmas Tree Sugar Cookie Dough comes with 20 pre-cut cookies and is designed to bake in about 10–12 minutes.
Prep time: 10 minutes
Cook time: 10–12 minutes
Total time: About 25 minutes
Difficulty: Very easy
Makes: 20 cookies
Ingredients
- 1 package Pillsbury Ready to Bake! Christmas Tree Shape Sugar Cookie Dough
- 1 cup powdered sugar
- 1–2 tablespoons milk
- 1/2 teaspoon vanilla extract
- Green food coloring, optional
- Red and green sprinkles
- Colored sugar
- Mini candy-coated chocolates or other small candies, optional
How to Make Pillsbury Christmas Tree Cookies
Preheat the oven.
Heat your oven to 350°F (175°C). If you’re using a nonstick cookie sheet, Pillsbury recommends 325°F.
Arrange the cookie dough.
Take the pre-cut Christmas tree cookie dough rounds out of the package and place them on an ungreased baking sheet. Leave some space between the cookies because they will spread slightly while baking.
Bake the cookies.
Bake for 10–12 minutes, or until the cookies are set and the edges are lightly baked. Try not to overbake them. Pillsbury notes that the cookies should remain fairly pale rather than becoming deeply golden.
Let them cool.
Leave the cookies on the baking sheet for about 1 minute, then carefully transfer them to a wire rack. Let them cool completely before decorating.
Make the icing.
Mix the powdered sugar, milk, and vanilla in a small bowl until smooth. If you want green icing for the trees, add a little green food coloring.
Decorate the trees.
Spread or pipe the icing over the cooled cookies. Add sprinkles, colored sugar, and small candies to make them look like Christmas tree ornaments.
Let the decorations set.
Leave the cookies at room temperature for a little while so the icing can firm up before stacking or serving.
Easy Variations
The easiest way to change these cookies is simply to switch up the decorations. You can use green icing and colorful sprinkles for traditional Christmas trees, or keep the icing white and add red and green candies for a simple snowy look.
If you’re making these with kids, I like putting different decorations into small bowls and letting everyone create their own tree. It keeps things relaxed and turns these easy Christmas cookies into a fun activity.
You can also make Pillsbury Christmas tree sandwich cookies by baking the tree cookies as directed, cooling them completely, and sandwiching two cookies together with vanilla frosting. Pillsbury has a version that uses frosting and sprinkles around the edges.
7. Peanut Butter Blossoms
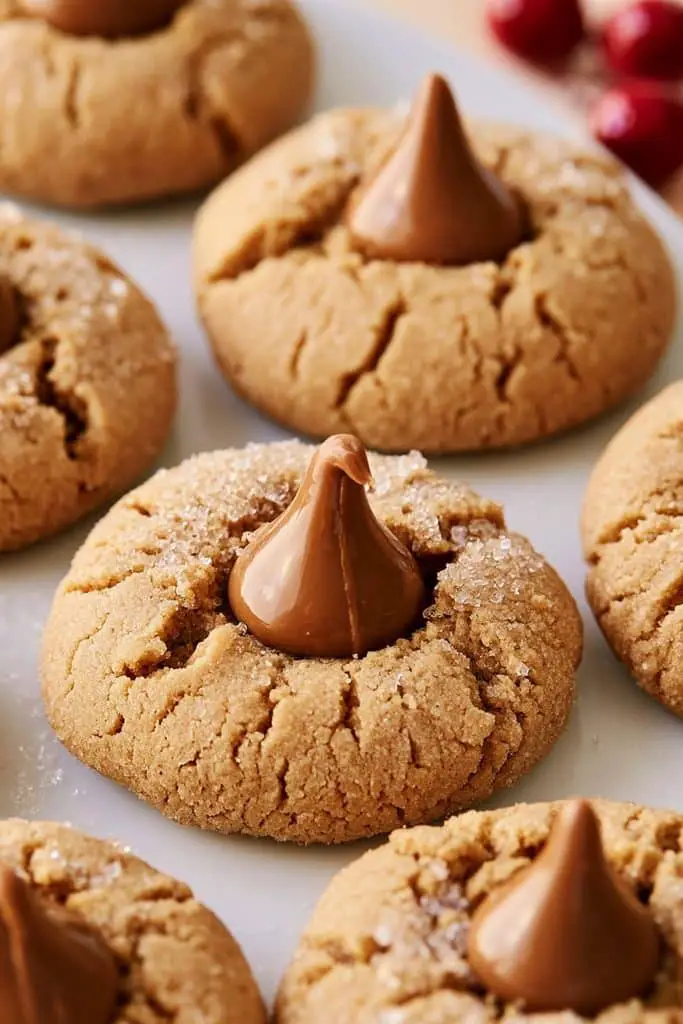
Peanut butter blossoms are one of those Christmas cookies I always like to have on the baking list. The combination of soft peanut butter cookies and a chocolate candy in the center is simple, but it works every time. I also love making these with friends because they don’t need fancy decorating, and everyone can help roll the dough and press the chocolate into the warm cookies.
The cookies have a soft, slightly chewy texture with a rich peanut butter flavor, while the chocolate center adds just the right amount of sweetness. They’re easy enough for a relaxed afternoon of baking and are a great choice when you need cookie exchange recipes that look homemade and festive.
Prep time: 20 minutes
Chill time: 30 minutes
Cook time: 10–12 minutes
Total time: About 1 hour
Difficulty: Easy
Makes: About 30 cookies
Ingredients
- 1/2 cup (115g) unsalted butter, softened
- 1/2 cup creamy peanut butter
- 1/2 cup granulated sugar
- 1/2 cup packed light brown sugar
- 1 large egg
- 1 teaspoon vanilla extract
- 1 3/4 cups (220g) all-purpose flour
- 1 teaspoon baking soda
- 1/2 teaspoon salt
- 2 tablespoons milk
- 1/4 cup granulated sugar, for rolling
- 30 chocolate kisses or similar chocolate candies, unwrapped
How to Make Peanut Butter Blossoms
Cream the butter, peanut butter, and sugars.
Add the softened butter, peanut butter, granulated sugar, and brown sugar to a large bowl. Beat until smooth and creamy.
Add the egg and vanilla.
Mix in the egg and vanilla until everything is well combined.
Mix the dry ingredients.
In a separate bowl, whisk together the flour, baking soda, and salt.
Make the dough.
Gradually add the dry ingredients to the peanut butter mixture. Add the milk and mix just until a soft dough forms.
Chill the dough.
Cover the bowl and refrigerate the dough for about 30 minutes. This makes it easier to roll into neat balls.
Shape the cookies.
Preheat the oven to 375°F (190°C) and line your baking sheets with parchment paper. Scoop out about 1 tablespoon of dough at a time and roll it into a ball.
Coat with sugar.
Roll each dough ball in the extra granulated sugar until lightly coated. Place them on the prepared baking sheets, leaving about 2 inches between each cookie.
Bake.
Bake for 10–12 minutes, until the cookies are puffed and lightly golden around the edges.
Add the chocolate.
As soon as the cookies come out of the oven, gently press one chocolate candy into the center of each cookie. The warm cookie will soften around the chocolate and create the classic blossom shape.
Easy Variations
For a little extra chocolate flavor, roll the dough balls in a mixture of granulated sugar and a small amount of cocoa powder before baking.
You can also use chocolate stars, mini peanut butter cups, or another chocolate candy in place of the traditional chocolate kiss. Just make sure the candy is small enough to sit neatly in the center of the cookie.
If you like a little crunch, use crunchy peanut butter instead of creamy. The cookies will have small pieces of peanuts throughout, which gives them a nice texture.
For a holiday cookie platter, I also like making half the batch with milk chocolate and half with dark chocolate. It gives everyone a choice and makes the tray look a little more interesting.
8. Snowball Christmas Cookies
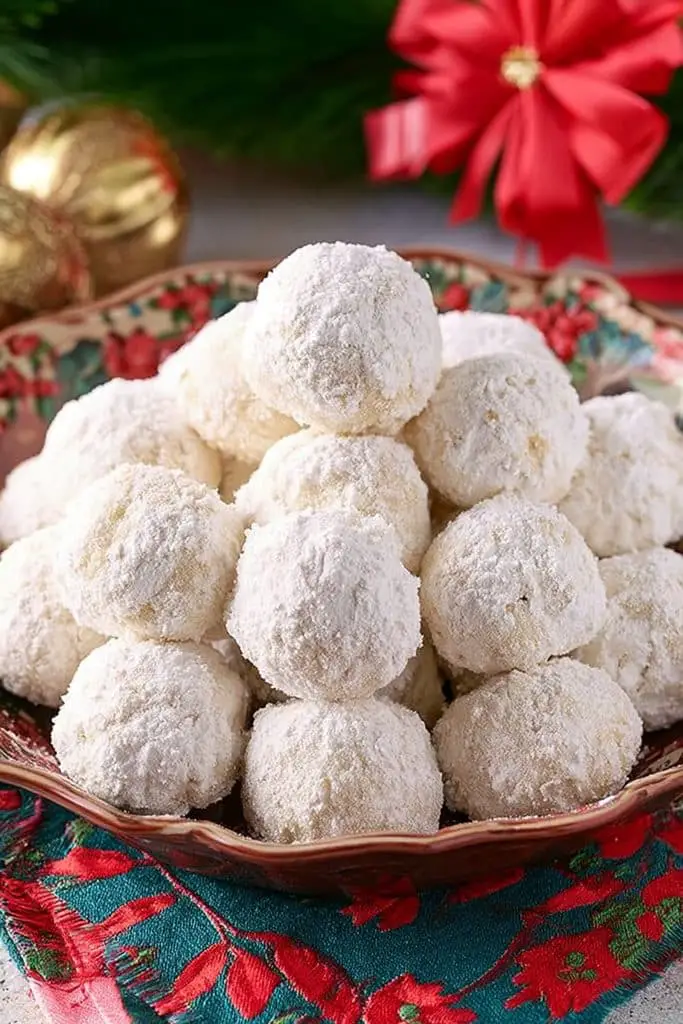
Snowball cookies are one of those Christmas treats that always look a little more special than the amount of work they actually take. I love the buttery, crumbly texture and the generous coating of powdered sugar. They look just like little snowballs, which makes them perfect for a Christmas cookie platter, holiday gifts, or a cookie exchange with friends and family.
These cookies are also sometimes called Mexican wedding cookies or Russian tea cakes. They use a simple buttery dough with finely chopped pecans, then get rolled in powdered sugar while they’re still warm. The result is a tender cookie that practically melts in your mouth.
Prep time: 20 minutes
Chill time: 30 minutes
Cook time: 12–15 minutes
Total time: About 1 hour 5 minutes
Difficulty: Easy
Makes: About 30 cookies
Ingredients
- 1 cup (225g) unsalted butter, softened
- 1/2 cup (60g) powdered sugar
- 1 teaspoon vanilla extract
- 2 cups (240g) all-purpose flour
- 1/4 teaspoon salt
- 1 cup (110g) finely chopped pecans
- 1 cup powdered sugar, for rolling
How to Make Snowball Christmas Cookies
Cream the butter and powdered sugar.
Add the softened butter and 1/2 cup powdered sugar to a large bowl. Beat until smooth and creamy.
Add the vanilla.
Mix in the vanilla extract until well combined.
Add the flour and salt.
Gradually add the flour and salt. Mix on low speed just until the dough starts to come together.
Add the pecans.
Fold in the finely chopped pecans. Make sure they’re chopped fairly small so the cookies stay easy to shape.
Chill the dough.
Cover the dough and refrigerate for about 30 minutes. Chilling makes it easier to roll the dough into balls and helps the cookies hold their shape.
Shape the cookies.
Preheat the oven to 350°F (175°C) and line a baking sheet with parchment paper. Scoop out about 1 tablespoon of dough and roll each portion into a small ball.
Bake.
Arrange the dough balls on the prepared baking sheet and bake for 12–15 minutes, until the cookies are set and the bottoms are lightly golden. Try not to let the tops become too brown.
Roll in powdered sugar.
Let the cookies cool for about 5 minutes, then gently roll each warm cookie in powdered sugar. Be generous with the coating because some of the sugar will soak into the buttery surface.
Coat them again.
Once the cookies have cooled completely, roll them in powdered sugar a second time. This gives them that beautiful snowy finish.
Easy Variations
Pecans are my favorite for these cookies, but you can easily use walnuts instead. They have a slightly different flavor but still work really well with the buttery dough.
For a little extra holiday flavor, add 1/2 teaspoon of almond extract along with the vanilla. You can also add a small amount of finely grated orange zest for a fresh citrus note.
If you want to make these without nuts, you can leave the pecans out. The cookies will still be buttery and delicious, although the texture will be a little different.
For an extra festive touch, mix a small amount of finely crushed peppermint candy into the second powdered-sugar coating.
9. Chocolate Crinkle Christmas Cookies
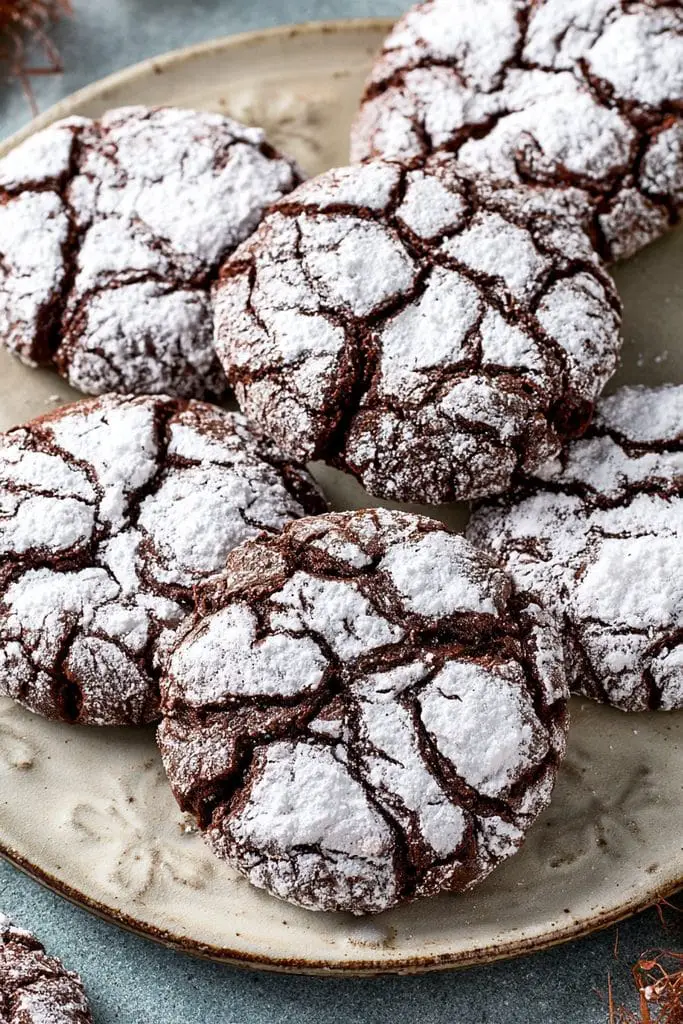
If you love chocolate, these chocolate crinkle Christmas cookies are hard to resist. They have a rich, brownie-like center, a slightly crisp outside, and that beautiful powdered sugar coating that cracks as the cookies bake. I especially like making these around Christmas because they look festive without needing any extra decorating.
The dough does need some chilling time, so I usually make it ahead and let it firm up in the fridge while I get everything else ready. That extra time is worth it because cold dough is much easier to roll, and it helps create those deep crinkles that make these cookies so pretty.
Prep time: 20 minutes
Chill time: 2 hours
Cook time: 10–12 minutes
Total time: About 2 hours 35 minutes
Difficulty: Easy
Makes: About 30 cookies
Ingredients
- 1 cup (125g) all-purpose flour
- 1/2 cup (45g) unsweetened cocoa powder
- 1 teaspoon baking powder
- 1/2 teaspoon salt
- 4 ounces (115g) bittersweet or semisweet chocolate, chopped
- 1/2 cup (115g) unsalted butter
- 1 cup (200g) packed light brown sugar
- 3 large eggs
- 1 teaspoon vanilla extract
- 1 cup powdered sugar, for coating
How to Make Chocolate Crinkle Cookies
- Mix the dry ingredients.
In a medium bowl, whisk together the flour, cocoa powder, baking powder, and salt. Set aside. - Melt the chocolate and butter.
Add the chopped chocolate and butter to a microwave-safe bowl. Heat in short intervals, stirring between each one, until melted and smooth. Let it cool slightly before adding it to the rest of the mixture. - Beat the eggs and brown sugar.
In a large bowl, beat the brown sugar and eggs until smooth and slightly thickened. Add the vanilla and mix again. - Add the chocolate.
Slowly mix the melted chocolate and butter into the egg mixture until smooth and well combined. - Add the dry ingredients.
Add the flour mixture and mix just until no dry streaks remain. The dough will be quite soft at this point, so don’t add extra flour. It will firm up as it chills. - Chill the dough.
Cover the bowl and refrigerate for at least 2 hours. You can also leave it in the fridge overnight if you want to prepare the dough ahead of time. - Prepare for baking.
Preheat the oven to 350°F (175°C) and line baking sheets with parchment paper. Put the powdered sugar into a shallow bowl. - Shape the cookies.
Scoop out about 1 tablespoon of chilled dough at a time and roll it into a ball. Drop each ball into the powdered sugar and roll it around until it is generously coated. You want a thick layer of sugar because this creates the classic white-and-chocolate crinkle effect. - Bake.
Place the cookies on the baking sheets, leaving about 2 inches between them. Bake for 10–12 minutes, until the cookies have spread and the tops are cracked. The centers should still look soft and fudgy.
Easy Variations
For an even deeper chocolate flavor, add 1 teaspoon of instant espresso powder to the dry ingredients. It doesn’t make the cookies taste strongly of coffee; instead, it helps bring out the chocolate flavor.
For a Christmas twist, add 1/2 teaspoon of peppermint extract to the dough and sprinkle a little crushed peppermint candy over the cooled cookies.
You can also replace the vanilla with 1/2 teaspoon almond extract for a subtle nutty flavor. This works especially well if you’re serving these alongside almond Christmas cookies. A small amount of almond extract is also suggested as a variation in established chocolate crinkle recipes.
If you want extra chocolate, press a few mini chocolate chips into the dough before rolling it into balls.
10. Italian Christmas Cookies
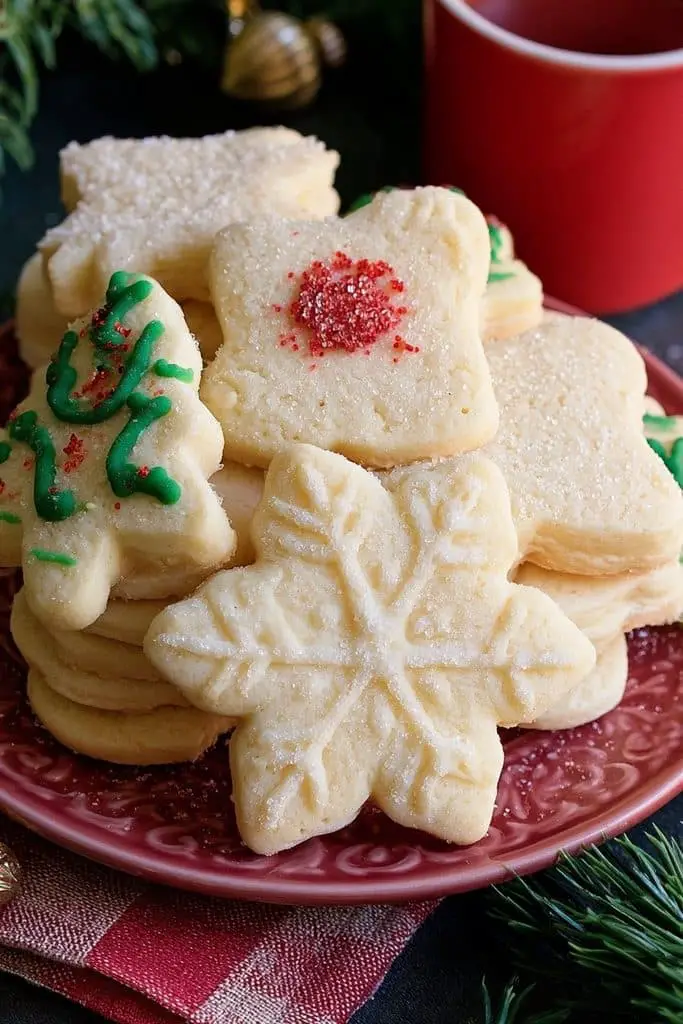
Italian Christmas cookies are one of my favorite ways to add something a little different to a holiday cookie platter. They’re soft, lightly sweet, and have a simple vanilla flavor that works really well with a sweet glaze and colorful sprinkles. I also love making these with friends because shaping and decorating the cookies becomes part of the fun.
This version is inspired by the soft, cake-like Italian Christmas cookies commonly found on holiday cookie trays. Traditional versions vary from region to region, but many Italian Christmas cookies are finished with a simple glaze and festive sprinkles.
Prep time: 25 minutes
Chill time: 1 hour
Cook time: 10–12 minutes
Total time: About 1 hour 40 minutes
Difficulty: Easy
Makes: About 30 cookies
Ingredients
- 2 1/2 cups (315g) all-purpose flour
- 1 1/2 teaspoons baking powder
- 1/4 teaspoon baking soda
- 1/2 teaspoon salt
- 1/2 cup (115g) unsalted butter, softened
- 3/4 cup (150g) granulated sugar
- 2 large eggs
- 1 teaspoon vanilla extract
- 1/2 teaspoon almond extract
For the Glaze
- 2 cups powdered sugar
- 3 tablespoons milk
- 1/2 teaspoon vanilla extract
- 1/4 teaspoon almond extract, optional
- Red, green, and white sprinkles
How to Make Italian Christmas Cookies
- Mix the dry ingredients.
In a medium bowl, whisk together the flour, baking powder, baking soda, and salt. Set it aside. - Cream the butter and sugar.
Add the softened butter and sugar to a large bowl. Beat until light and fluffy, about 2–3 minutes. - Add the eggs and extracts.
Beat in the eggs one at a time, mixing well after each addition. Add the vanilla and almond extracts and mix until combined. - Make the dough.
Slowly add the dry ingredients to the butter mixture. Mix just until the dough comes together. It should be soft and slightly sticky. - Chill the dough.
Cover the bowl and refrigerate for about 1 hour. Chilling makes the dough easier to handle and helps the cookies keep their shape while baking. Some established Italian Christmas cookie recipes chill the dough for even longer, so don’t skip this step. - Shape the cookies.
Preheat the oven to 350°F (175°C) and line baking sheets with parchment paper. Scoop about 1 tablespoon of dough at a time and roll it into a ball. Place the dough balls on the prepared baking sheets, leaving some space between them. - Bake.
Bake for 10–12 minutes, or until the cookies are set and the bottoms are just lightly golden. The tops should stay fairly pale. - Cool completely.
Let the cookies cool on the baking sheet for a few minutes before transferring them to a wire rack. Make sure they are completely cool before adding the glaze. - Make the glaze.
Whisk together the powdered sugar, milk, vanilla, and almond extract until smooth. If the glaze is too thick, add a few drops of milk. If it’s too thin, add a little more powdered sugar. - Glaze and decorate.
Dip the tops of the cooled cookies into the glaze, allowing the excess to drip off. Immediately add red, green, and white sprinkles before the glaze starts to set.
Easy Variations
For a more traditional citrus flavor, replace the almond extract with 1 teaspoon of lemon extract and add a little grated lemon zest to the dough. Lemon-flavored Italian cookies are another popular style of Italian holiday cookie.
You can also make an orange version by adding 1 teaspoon of finely grated orange zest to the dough. I really like this variation because the citrus adds a fresh flavor to the buttery cookie.
If you love chocolate, add 1/2 cup of mini chocolate chips to the dough. You can also drizzle the finished cookies with melted chocolate instead of using the glaze.
For a more colorful Christmas look, divide the glaze into three bowls and tint each one red, green, and white. This takes a little more time, but it makes the cookies look beautiful on a holiday platter.
11. Christmas Thumbprint Cookies

Christmas thumbprint cookies are one of those little treats that always look beautiful on a holiday cookie platter. I love the buttery cookie base with a bright spoonful of raspberry jam in the middle. They’re simple to make, but the colorful jam makes them feel festive without needing much decorating.
These cookies are also great for baking with friends because everyone can help roll the dough and make the little thumbprint in the center. You can use raspberry, strawberry, apricot, or even blueberry jam depending on what you have. Classic thumbprint recipes also work well with chocolate or caramel fillings, so there’s plenty of room to make them your own.
Prep time: 20 minutes
Chill time: 30 minutes
Cook time: 12–14 minutes
Total time: About 1 hour 5 minutes
Difficulty: Easy
Makes: About 24 cookies
Ingredients
- 1 cup (225g) unsalted butter, softened
- 1/2 cup (100g) granulated sugar
- 1 large egg yolk
- 1 teaspoon vanilla extract
- 2 cups (240g) all-purpose flour
- 1/4 teaspoon salt
- 1/2 cup raspberry jam
For Decorating
- 1/2 cup powdered sugar, optional
- 1–2 teaspoons milk, if making a simple drizzle
- A few extra raspberries or festive sprinkles, optional
How to Make Christmas Thumbprint Cookies
- Cream the butter and sugar.
Add the softened butter and sugar to a large bowl. Beat until light, smooth, and creamy. - Add the egg yolk and vanilla.
Mix in the egg yolk and vanilla extract until everything is well combined. - Add the flour and salt.
Gradually add the flour and salt. Mix just until a soft dough forms. Try not to overmix because you want the cookies to stay tender. - Chill the dough.
Cover the dough and refrigerate for about 30 minutes. Chilling makes the dough easier to shape and helps the cookies keep their form while baking. - Shape the cookies.
Preheat the oven to 350°F (175°C) and line a baking sheet with parchment paper. Scoop out about 1 tablespoon of dough at a time and roll it into a smooth ball. - Make the thumbprints.
Place the dough balls on the prepared baking sheet, leaving about 2 inches between them. Use your thumb or the back of a small measuring spoon to gently press an indentation into the center of each cookie. Don’t press all the way through. - Fill with jam.
Spoon about 1/2 teaspoon of raspberry jam into each indentation. Try not to overfill them because the jam can spread while baking. - Bake.
Bake for 12–14 minutes, or until the cookies are set and the edges are just beginning to turn lightly golden. Classic thumbprint recipes commonly bake at 350°F for around 12–14 minutes. - Cool the cookies.
Let the cookies cool on the baking sheet for about 5 minutes before transferring them to a wire rack. The jam will be hot when the cookies first come out, so give them time to cool before serving.
Easy Variations
Raspberry jam is my favorite because the bright red color feels perfect for Christmas, but you can easily switch it up. Strawberry, apricot, cherry, or blueberry jam all work well.
For a richer version, fill the centers with melted chocolate or chocolate ganache instead of jam. Caramel and sweetened nut butter are also options used in classic thumbprint cookies.
If you want a little almond flavor, add 1/2 teaspoon almond extract to the dough. You can also replace 1/4 cup of the all-purpose flour with almond flour for a softer, nuttier cookie.
For a chocolate version, replace 1/4 cup of the flour with unsweetened cocoa powder and use raspberry jam in the center. Chocolate and raspberry make a really nice combination.
12. Peppermint Chocolate Christmas Cookies

Chocolate and peppermint are two flavors I always associate with Christmas. These peppermint chocolate Christmas cookies are rich, soft, and fudgy, with just enough peppermint to give them that cool holiday flavor. I love making these when I want something a little more indulgent than a regular sugar cookie.
They’re also fun to make with friends because you can decorate them in a few different ways. I like dipping the cooled cookies in chocolate and adding crushed peppermint candy on top. The red and white pieces make the dark chocolate cookies look extra festive without much effort.
Prep time: 20 minutes
Chill time: 1 hour
Cook time: 10–12 minutes
Total time: About 1 hour 35 minutes
Difficulty: Easy
Makes: About 24 cookies
Ingredients
- 1 3/4 cups (220g) all-purpose flour
- 1/2 cup (45g) unsweetened cocoa powder
- 1 teaspoon baking soda
- 1/2 teaspoon salt
- 1/2 cup (115g) unsalted butter, softened
- 3/4 cup (150g) granulated sugar
- 1/2 cup (100g) packed brown sugar
- 1 large egg
- 1 teaspoon vanilla extract
- 1/2 teaspoon peppermint extract
- 2 tablespoons milk
For the Chocolate-Peppermint Topping
- 4 ounces (115g) semisweet or dark chocolate
- 1/4 teaspoon peppermint extract
- 1/3 cup crushed peppermint candy or candy canes
How to Make Peppermint Chocolate Cookies
- Mix the dry ingredients.
In a medium bowl, whisk together the flour, cocoa powder, baking soda, and salt. Set the bowl aside. - Cream the butter and sugars.
Add the softened butter, granulated sugar, and brown sugar to a large mixing bowl. Beat until light and creamy, about 2–3 minutes. - Add the egg and extracts.
Beat in the egg, vanilla extract, and peppermint extract. Mix until smooth. If you prefer a milder peppermint flavor, you can start with 1/4 teaspoon and add more next time. - Combine everything.
Gradually add the dry ingredients to the butter mixture. Add the milk and mix just until a soft chocolate dough forms. - Chill the dough.
Cover the dough and refrigerate for about 1 hour. This helps the cookies hold their shape and makes the dough easier to handle. - Shape the cookies.
Preheat the oven to 350°F (175°C) and line baking sheets with parchment paper. Scoop out about 1 tablespoon of dough at a time and roll it into balls. Place them on the baking sheets with about 2 inches of space between each one. - Bake.
Bake for 10–12 minutes. The edges should look set while the centers still look slightly soft. Avoid overbaking because you want the cookies to stay fudgy. - Cool completely.
Let the cookies rest on the baking sheet for a few minutes, then transfer them to a wire rack. Allow them to cool completely before adding the topping. - Melt the chocolate.
Melt the semisweet or dark chocolate in a microwave-safe bowl in short intervals, stirring between each one. Once smooth, stir in the peppermint extract. - Decorate the cookies.
Dip half of each cooled cookie into the melted chocolate or drizzle the chocolate over the tops. Immediately sprinkle crushed peppermint candy over the chocolate.
Easy Variations
If you want an even stronger chocolate flavor, use dark chocolate for the topping instead of semisweet chocolate. For a sweeter version, milk chocolate works nicely too.
You can also add 1/2 cup of mini chocolate chips to the cookie dough. I like this variation when I want the cookies to be extra chocolatey.
For a simpler version, skip the melted chocolate and sprinkle the cookies with crushed peppermint candy while they are still slightly warm. The candy won’t stick as firmly, but it gives the cookies a simple homemade look.
If you enjoy the chocolate-and-peppermint combination but want a softer cookie, make the dough balls slightly larger and reduce the baking time by a minute or two. Just keep a close eye on them.
13. Raspberry Almond Thumbprint Cookies
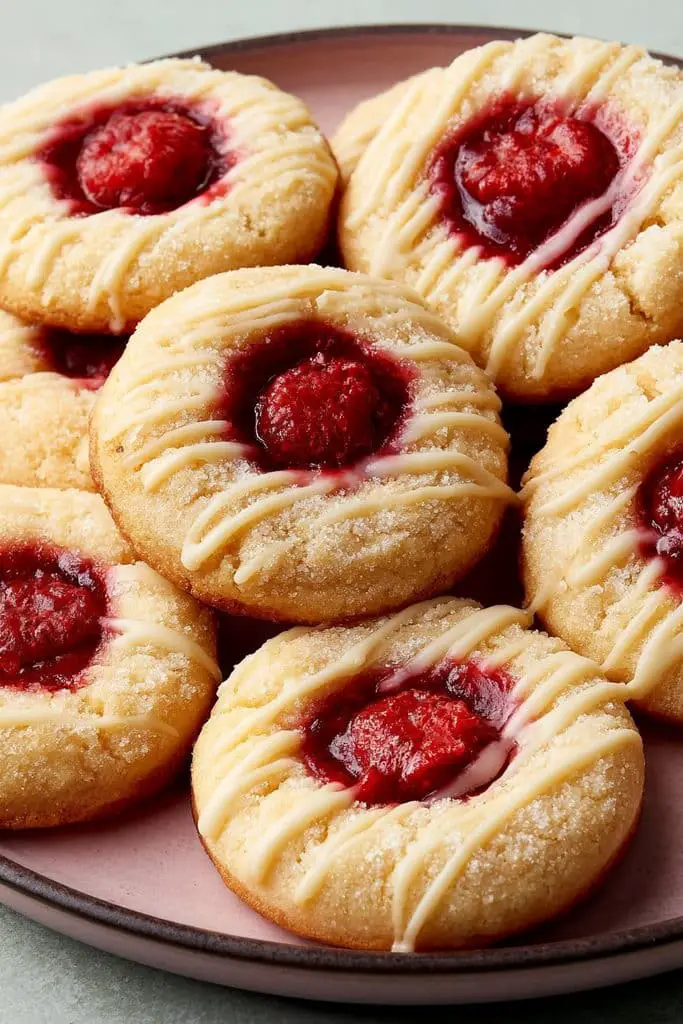
Raspberry and almond are such a lovely combination, especially in Christmas cookies. These raspberry almond thumbprint cookies are buttery and tender, with a little almond flavor and a bright raspberry center. I love how pretty they look on a holiday cookie tray, even though they’re actually quite simple to make.
They’re also a great choice when I’m making cookies with friends because everyone can help shape the dough and fill the little centers with jam. The red raspberry filling gives them a festive look, while the almond flavor makes them feel a little more special than a basic thumbprint cookie.
Prep time: 20 minutes
Chill time: 30 minutes
Cook time: 12–14 minutes
Total time: About 1 hour 5 minutes
Difficulty: Easy
Makes: About 24 cookies
Ingredients
- 1 cup (225g) unsalted butter, softened
- 1/2 cup (60g) powdered sugar
- 1/4 cup (50g) granulated sugar
- 1 large egg yolk
- 1 teaspoon vanilla extract
- 1 teaspoon almond extract
- 2 cups (240g) all-purpose flour
- 1/4 teaspoon salt
- 1/2 cup raspberry jam
For Decorating
- 1/2 cup powdered sugar
- 1–2 tablespoons milk
- 1/4 teaspoon almond extract
- Sliced almonds, optional
How to Make Raspberry Almond Thumbprint Cookies
- Cream the butter and sugars.
Add the softened butter, powdered sugar, and granulated sugar to a large bowl. Beat until smooth, creamy, and slightly fluffy. - Add the egg yolk and extracts.
Mix in the egg yolk, vanilla extract, and almond extract until well combined. The almond extract gives these cookies that warm, nutty flavor without needing a lot of extra ingredients. - Add the dry ingredients.
In a separate bowl, whisk together the flour and salt. Gradually add the mixture to the butter mixture and mix just until a soft dough forms. - Chill the dough.
Cover the dough and refrigerate for about 30 minutes. This makes it easier to shape and helps the cookies hold their form while baking. - Prepare the baking sheet.
Preheat the oven to 350°F (175°C) and line a baking sheet with parchment paper. - Shape the cookies.
Scoop about 1 tablespoon of dough at a time and roll it into a smooth ball. Place the balls on the prepared baking sheet, leaving about 2 inches between them. - Make the thumbprints.
Gently press your thumb into the center of each dough ball to create a small indentation. You can also use the back of a 1/2-teaspoon measuring spoon for a more even shape. - Add the raspberry jam.
Fill each indentation with about 1/2 teaspoon of raspberry jam. Don’t overfill them because the jam can bubble and spread as the cookies bake. - Bake.
Bake for 12–14 minutes, or until the edges are lightly golden and the cookies are set. - Cool the cookies.
Leave them on the baking sheet for about 5 minutes, then carefully transfer them to a wire rack. Let them cool completely before decorating. - Make the almond glaze.
Whisk the powdered sugar, milk, and almond extract together until smooth. Add a few drops of milk if it’s too thick. - Decorate.
Drizzle a little glaze over the cooled cookies. If you like, sprinkle a few sliced almonds over the top while the glaze is still wet.
Easy Variations
If you want a stronger almond flavor, add another 1/4 teaspoon of almond extract to the dough. I wouldn’t add too much at once because almond extract has a strong flavor.
You can also replace the raspberry jam with strawberry, cherry, or apricot jam. Raspberry is my favorite because the bright red center looks so festive, but all of these work well.
For extra texture, roll the dough balls in finely chopped almonds before making the thumbprint. Then fill the center with raspberry jam. This gives the cookies a lovely nutty coating.
If you want to make these a little more chocolatey, drizzle the finished cookies with melted white or dark chocolate instead of the almond glaze.
14. Stained Glass Christmas Cookies
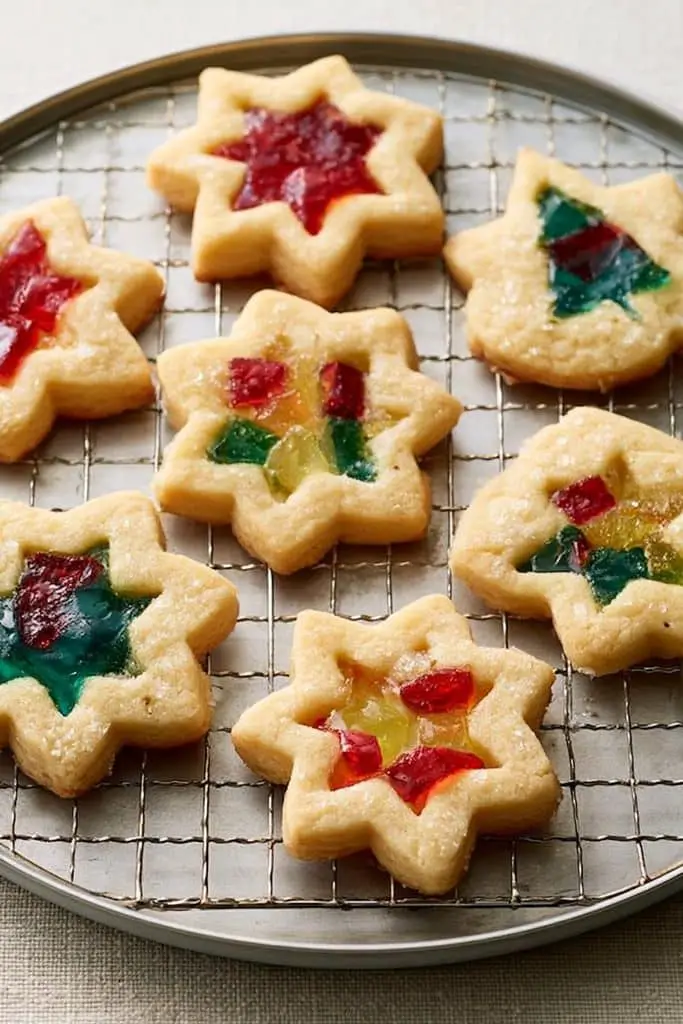
Stained glass Christmas cookies are one of those recipes that always get people talking. The first time you put them on a Christmas cookie platter, they almost look like little decorations instead of something you can eat. The centers are made with crushed hard candy, which melts in the oven and turns into a colorful, glass-like window.
I love making these with friends because there are a few fun jobs for everyone. Someone can roll and cut the dough, someone else can crush the candies, and then everyone can choose their own colors. They’re a little more hands-on than some of the other cookie recipes on this list, but the finished cookies are worth it.
Prep time: 25 minutes
Chill time: 1 hour
Cook time: 12–15 minutes
Total time: About 1 hour 40 minutes
Difficulty: Easy
Makes: About 24 cookies
Ingredients
- 2 1/2 cups (315g) all-purpose flour
- 1 teaspoon baking powder
- 1/4 teaspoon salt
- 1 cup (225g) unsalted butter, softened
- 3/4 cup (150g) granulated sugar
- 1 large egg
- 1 teaspoon vanilla extract
- 14–20 assorted brightly colored hard candies
For Decorating
- 1/2 cup powdered sugar
- 1–2 tablespoons milk
- 1/2 teaspoon vanilla extract
- Colored sprinkles, optional
How to Make Stained Glass Christmas Cookies
Mix the dry ingredients.
In a medium bowl, whisk together the flour, baking powder, and salt. Set aside.
Cream the butter and sugar.
In a large bowl, beat the softened butter and sugar until light and fluffy, about 3–4 minutes.
Add the egg and vanilla.
Beat in the egg and vanilla until just combined.
Make the dough.
Gradually add the dry ingredients and mix just until a soft dough forms. Try not to overmix.
Chill the dough.
Divide the dough into two portions, flatten each into a disc, wrap, and refrigerate for at least 1 hour. Chilling helps make the dough easier to roll and keeps the cookies from spreading too much.
Crush the candy.
While the dough chills, separate the hard candies by color. Put each color into a separate zip-top bag and crush them into small pieces using a rolling pin. You want small pieces rather than a completely fine powder. This allows the candy to melt evenly in the cookie centers.
Roll out the dough.
Preheat the oven to 350°F (175°C) and line baking sheets with parchment paper. Roll the chilled dough to about 1/8-inch thickness between two sheets of parchment paper.
Cut out the cookies.
Use a large Christmas cookie cutter to cut out shapes such as stars, Christmas trees, snowflakes, or ornaments. Transfer the cookies carefully to the prepared baking sheets.
Cut out the centers.
Use a smaller cookie cutter to remove the center of each cookie. You want to leave a border around the outside so the cookie keeps its shape.
Add the candy.
Fill each center about two-thirds full with crushed hard candy. Keep the candy inside the cut-out area so it doesn’t melt onto the parchment.
Bake.
Bake for 12–15 minutes, or until the cookies are lightly golden and the candy has completely melted. If you’re baking more than one tray at a time, rotate the pans halfway through.
Cool completely.
Let the cookies cool on the baking sheets for at least 5 minutes, then leave them there until the candy centers are completely hard. This is important because the melted candy will be very hot and fragile at first.
Decorate if you like.
Mix the powdered sugar, milk, and vanilla into a simple glaze. Drizzle it around the edges of the cooled cookies or add a few sprinkles. I usually keep the decorating light because the colorful candy center is already the main attraction.
Easy Variations
The easiest variation is to play around with the candy colors. Red and green look traditional for Christmas, while blue, purple, and yellow can give the cookies a more colorful stained-glass look.
You can also use different Christmas shapes. Stars and snowflakes are especially pretty, but Christmas trees, ornaments, bells, and gingerbread shapes work just as well.
If you want to turn the cookies into edible Christmas decorations, make a small hole near the top of each cookie before baking. Once they’ve cooled completely, thread a thin ribbon through the hole and hang them on the tree. This technique is also used in established stained-glass cookie recipes.
For a little extra flavor, add 1/2 teaspoon of almond extract along with the vanilla. It gives the buttery cookie a subtle nutty taste that works really well with the sweet candy center.
15. Easy Christmas Sugar Cookie Bars
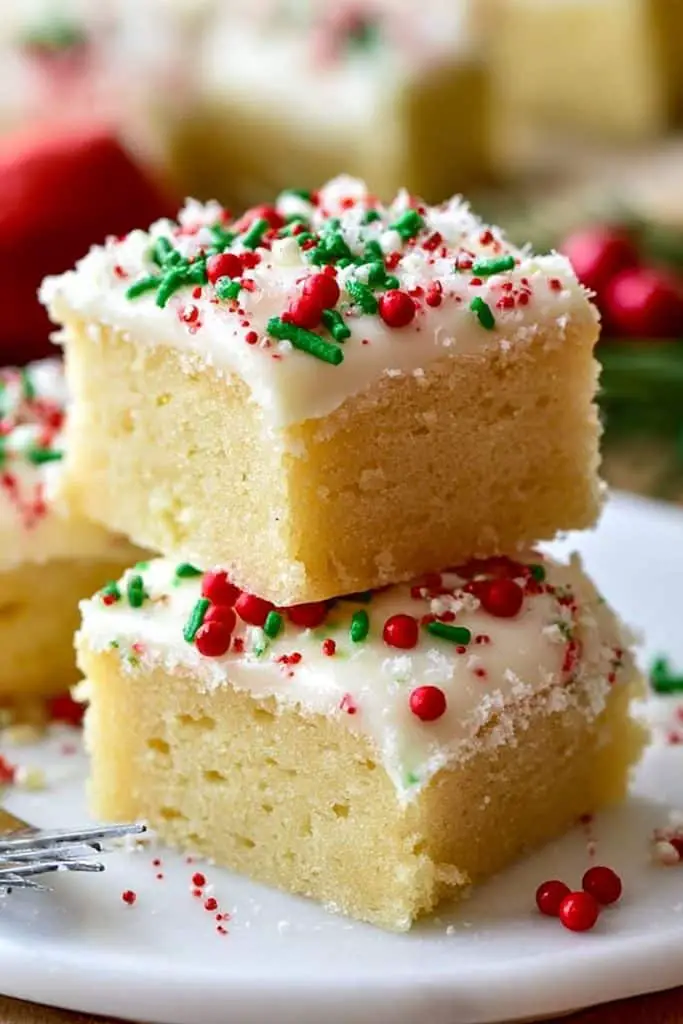
If you want something festive without spending a lot of time rolling and cutting cookie dough, these easy Christmas sugar cookie bars are just the thing. I love this recipe when I’m baking with friends because everyone can help with the frosting and decorating, and there’s no need to make a dozen different cookie shapes.
The bars are soft, buttery, and sweet, with a creamy frosting on top and plenty of colorful sprinkles. They’re also easy to change depending on the holiday colors you like. Red and green are classic for Christmas, but I also love using white frosting with a mix of gold, silver, or colorful sprinkles.
Prep time: 15 minutes
Cook time: 20–25 minutes
Cooling time: 30 minutes
Total time: About 1 hour 10 minutes
Difficulty: Easy
Makes: 16–20 bars
Ingredients
For the Sugar Cookie Bars
- 1 3/4 cups (220g) all-purpose flour
- 1 teaspoon baking powder
- 1/4 teaspoon salt
- 1/2 cup (115g) unsalted butter, softened
- 3/4 cup (150g) granulated sugar
- 1 large egg
- 1 teaspoon vanilla extract
- 2 tablespoons milk
For the Christmas Frosting
- 1/2 cup (115g) unsalted butter, softened
- 2 cups (240g) powdered sugar
- 2–3 tablespoons heavy cream or milk
- 1 teaspoon vanilla extract
- Red or green food coloring, optional
- Christmas sprinkles, colored sugar, or crushed peppermint, for decorating
How to Make Easy Christmas Sugar Cookie Bars
Prepare the pan.
Preheat the oven to 350°F (175°C). Line a 9-inch square baking pan with parchment paper, leaving a little overhang on the sides. This makes the finished bars much easier to lift out.
Mix the dry ingredients.
In a medium bowl, whisk together the flour, baking powder, and salt. Set aside.
Cream the butter and sugar.
In a large bowl, beat the softened butter and sugar until light and creamy, about 2–3 minutes.
Add the egg and vanilla.
Beat in the egg and vanilla until everything is well combined.
Make the dough.
Add the dry ingredients and mix on low speed until just combined. Add the milk and mix until you have a soft, thick dough. Don’t overmix, or the bars can become less tender.
Press into the pan.
Transfer the dough to the prepared baking pan. Use your fingers or the back of a spoon to press it into an even layer. If the dough is sticky, lightly grease your hands or use a piece of parchment to help press it down.
Bake.
Bake for 20–25 minutes, or until the edges are lightly golden and the center is set. Try not to overbake them because you want the middle to stay soft.
Cool completely.
Let the cookie bars cool in the pan for about 30 minutes, or until completely cool. It’s important to cool them before frosting so the frosting doesn’t melt.
Make the frosting.
Beat the softened butter until smooth. Gradually add the powdered sugar, followed by the vanilla and 2 tablespoons of cream or milk. Beat until light and fluffy. Add a little more milk if the frosting feels too thick.
Add some Christmas color.
Divide the frosting if you want different colors. Tint one portion red or green, or keep it white for a simple Christmas look.
Frost and decorate.
Spread the frosting evenly over the cooled cookie bars. Add Christmas sprinkles, colored sugar, or a little crushed peppermint while the frosting is still soft.
Easy Variations
For a little extra holiday flavor, add 1/2 teaspoon almond extract along with the vanilla. It gives the bars a flavor similar to classic almond Christmas cookies.
You can also make peppermint sugar cookie bars by adding 1/4 teaspoon peppermint extract to the frosting and sprinkling crushed peppermint candy over the top.
For chocolate lovers, spread a thin layer of melted chocolate over the cooled bars before adding the frosting. Or mix a handful of mini chocolate chips into the dough before pressing it into the pan.
And if you’re making these for a cookie exchange, cut them into smaller squares. You’ll get more pieces to add to your Christmas cookie boxes without making another batch.