
1. Garlic Butter Air Fryer Chicken Thighs
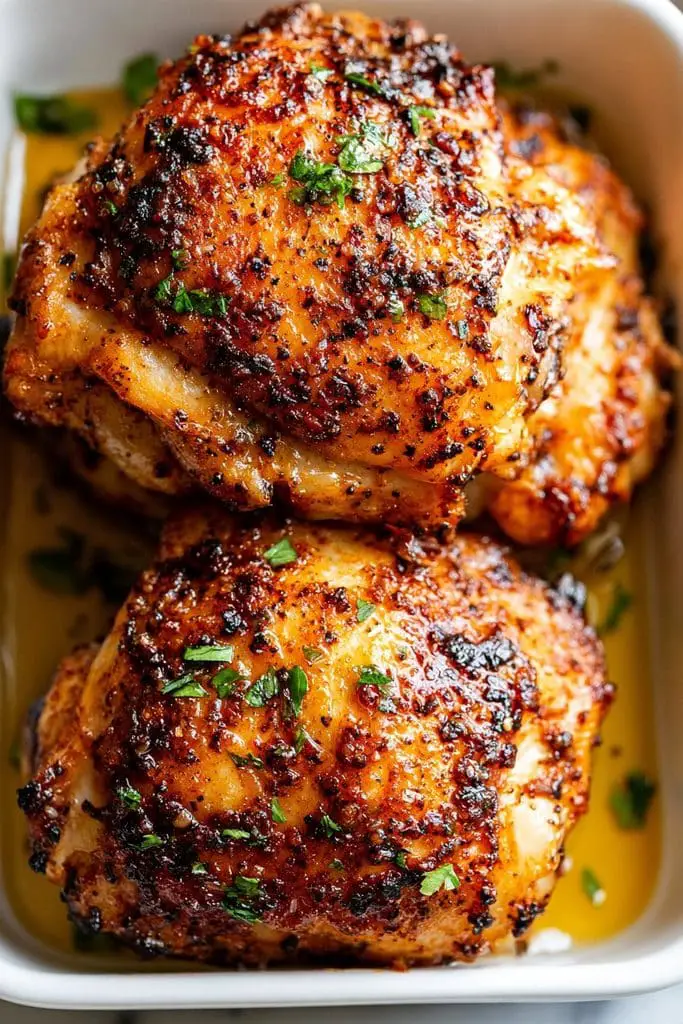
Garlic butter and chicken have always been a perfect match for me. There is something about the combination of juicy chicken, rich butter, and fragrant garlic that makes a simple dinner feel extra special.
And when I make it in the air fryer? Even better! The chicken turns beautifully golden on the outside while staying tender and juicy inside. It’s one of my favorite air fryer dinner ideas with chicken, especially on those chilly evenings when I want something comforting without spending too much time in the kitchen.
What I love most about this recipe is how simple it is. With just a handful of everyday ingredients, you can prepare a delicious meal that tastes like you put much more effort into it.
Prep Time: 10 minutes Cook Time: 25 minutes Total Time: 35 minutes Difficulty: Easy Servings: 4 Cooking Temperature: 380°F (193°C)
Ingredients
For the Chicken:
- 4 medium chicken thighs (about 1½ lb / 680g), bone-in or boneless
- 2 tablespoons unsalted butter, melted
- 1 tablespoon olive oil
- 4 cloves garlic, minced
- 1 teaspoon smoked paprika
- 1 teaspoon dried thyme
- ½ teaspoon dried rosemary
- ½ teaspoon onion powder
- ½ teaspoon salt, or to taste
- ¼ teaspoon freshly ground black pepper
For Garnish:
- 1 tablespoon fresh parsley, chopped
- Lemon wedges, optional
How to Make Garlic Butter Air Fryer Chicken Thighs
1. Prepare the Chicken
Start by patting the chicken thighs dry with paper towels. This little step makes a difference because removing excess moisture helps the outside brown more beautifully.
In a small bowl, combine melted butter, olive oil, minced garlic, smoked paprika, thyme, rosemary, onion powder, salt, and black pepper. Mix everything until well combined.
Brush the garlic butter mixture generously over both sides of the chicken thighs, making sure every piece is nicely coated.
2. Preheat the Air Fryer
Preheat your air fryer to 380°F (193°C) for about 3 minutes, if your model requires preheating.
Arrange the chicken thighs in the basket in a single layer. Try not to overcrowd them because proper airflow helps the chicken cook evenly and develop that delicious golden exterior.
3. Air Fry the Chicken
Cook the chicken for approximately 22–28 minutes if using bone-in thighs, turning halfway through cooking.
Boneless thighs usually cook faster, taking around 16–22 minutes, depending on their thickness.
For food safety, check the thickest part of the chicken with a meat thermometer. It should reach at least 165°F (74°C), without touching the bone.
4. Add the Finishing Touches
Once the chicken is cooked, remove it from the air fryer and let it rest for about 5 minutes.
I like to brush a little extra melted garlic butter over the top and finish with freshly chopped parsley. A squeeze of lemon juice also adds a lovely brightness that balances the rich butter flavor.
My Tips for the Best Air Fryer Chicken Thighs
- For extra crispy skin: Pat the chicken thoroughly dry before adding the seasoning.
- For deeper flavor: Let the seasoned chicken rest in the refrigerator for 30 minutes before cooking.
- For juicy chicken: Avoid overcooking and always check the internal temperature.
- For extra richness: Add a small amount of butter during the final few minutes.
- For a little heat: Add ¼ teaspoon of cayenne pepper to the seasoning mixture.
What to Serve with Garlic Butter Chicken Thighs
I personally love serving these chicken thighs with creamy mashed potatoes or crispy air fryer potato wedges. They soak up all those delicious garlic butter juices!
You can also pair them with:
- Roasted carrots and broccoli
- Garlic green beans
- Buttered rice
- A fresh garden salad
- Warm dinner rolls
If you’re looking for easy air fryer dinner recipes with chicken that are flavorful, comforting, and beginner-friendly, this recipe is definitely worth trying.
It’s simple enough for a regular weeknight but delicious enough to serve when you have family or friends over. And honestly, that is exactly what I look for in a good winter dinner!
2. Crispy Air Fryer Parmesan Crusted Chicken
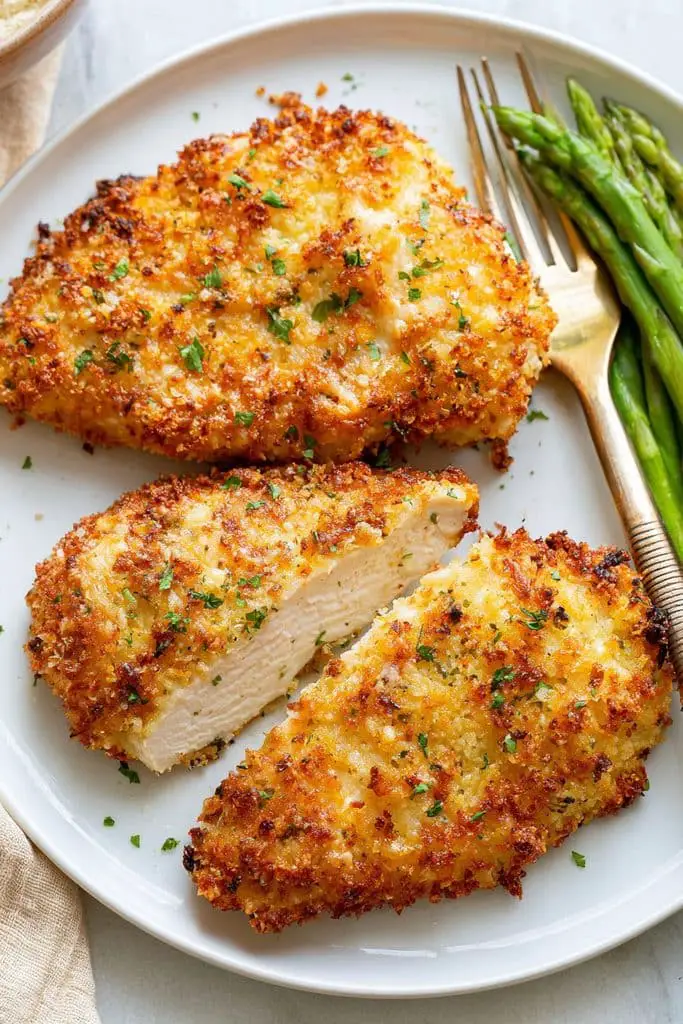
If you love chicken with a crispy, golden coating but don’t want to deal with deep frying, this crispy air fryer Parmesan crusted chicken is a great dinner to try. The outside turns beautifully crunchy, while the inside stays juicy and tender. I especially like how the Parmesan adds a savory, cheesy flavor without making the recipe complicated.
This is one of those air fryer dinner recipes with chicken that feels a little special but is still simple enough for a busy weeknight. Serve it with roasted vegetables, mashed potatoes, or a fresh salad for a cozy winter meal.
Prep Time: 15 minutes Cook Time: 12–16 minutes Total Time: 27–31 minutes Difficulty: Easy Servings: 2
Ingredients
- 2 boneless, skinless chicken breasts (about 1 lb / 450 g)
- ½ cup finely grated Parmesan cheese
- ½ cup panko breadcrumbs
- 1 large egg
- 2 tablespoons all-purpose flour
- ½ teaspoon garlic powder
- ½ teaspoon Italian seasoning
- ¼ teaspoon paprika
- ¼ teaspoon black pepper
- ½ teaspoon salt, or to taste
- Olive oil spray
Instructions
Step 1: Prepare the chicken
Pat the chicken breasts dry with paper towels. If they are very thick, slice them horizontally into thinner cutlets or gently pound them to an even thickness. This helps them cook evenly and keeps the outside from getting too dark before the center is done.
Step 2: Set up the coating
Prepare three shallow bowls. Add the flour to the first bowl. In the second, beat the egg until smooth. In the third, combine the Parmesan, panko breadcrumbs, garlic powder, Italian seasoning, paprika, salt, and black pepper.
Step 3: Coat the chicken
Dip each chicken breast first into the flour, shaking off any extra. Next, coat it in the beaten egg, then press it into the Parmesan breadcrumb mixture until both sides are covered. I like to gently press the coating onto the chicken so it sticks well and creates a crispier crust.
Step 4: Preheat the air fryer
Preheat your air fryer to 380°F (193°C) for about 3 minutes, if your model recommends preheating. Lightly spray the air fryer basket with oil to help prevent sticking.
Step 5: Air fry the chicken
Place the coated chicken breasts in the basket in a single layer, leaving a little space between them. Lightly spray the tops with olive oil.
Air fry for 12–16 minutes, flipping carefully halfway through. The coating should look golden and crisp, and the thickest part of each chicken breast should reach 165°F (74°C) on a food thermometer. Cooking time will vary depending on the thickness of the chicken and your air fryer.
Step 6: Rest and serve
Let the chicken rest for about 3–5 minutes before slicing. This helps keep the juices inside, so every bite stays tender.
Tips for the Best Parmesan Crusted Chicken
- Use finely grated Parmesan: It blends more evenly with the breadcrumbs and helps create a flavorful crust.
- Don’t overcrowd the basket: Cook in batches if needed. Good airflow is important for a crispy coating.
- Spray the coating lightly: A little oil helps the breadcrumbs turn golden without deep frying.
- Check the temperature: Chicken is ready when it reaches 165°F (74°C) in the thickest part.
- Avoid moving it too early: Let the crust set before flipping to reduce the chance of the coating coming off.
Easy Variations
- Add a little heat: Mix ¼ teaspoon of chili flakes or cayenne pepper into the breadcrumb mixture.
- Make it extra cheesy: Add 1 tablespoon of shredded mozzarella to the Parmesan coating.
- Use chicken tenders: Cut the chicken into strips and reduce the cooking time, checking for doneness early.
- Make it gluten-free: Use gluten-free flour and breadcrumbs.
What to Serve with Parmesan Crusted Chicken
This chicken pairs especially well with warm, comforting sides. For a simple winter dinner, try serving it with:
- Creamy mashed potatoes
- Air fryer roasted broccoli or green beans
- Garlic butter rice
- A crisp Caesar salad
- Roasted carrots or Brussels sprouts
For an easy dinner for two, I would serve each chicken breast with mashed potatoes and a side of roasted vegetables. It makes a satisfying meal without requiring too much work.
Why You’ll Love This Recipe
This crispy air fryer Parmesan crusted chicken is a lovely option when you want something comforting, flavorful, and easy to prepare. The crunchy coating gives it that satisfying texture, while the chicken stays tender inside.
It’s also a flexible recipe that works for a family dinner or a simple meal for two. Honestly, when I want a chicken dinner that feels a little different from the usual baked or pan-fried chicken, this is exactly the kind of recipe I would reach for.
3. Air Fryer Honey Garlic Chicken Bites
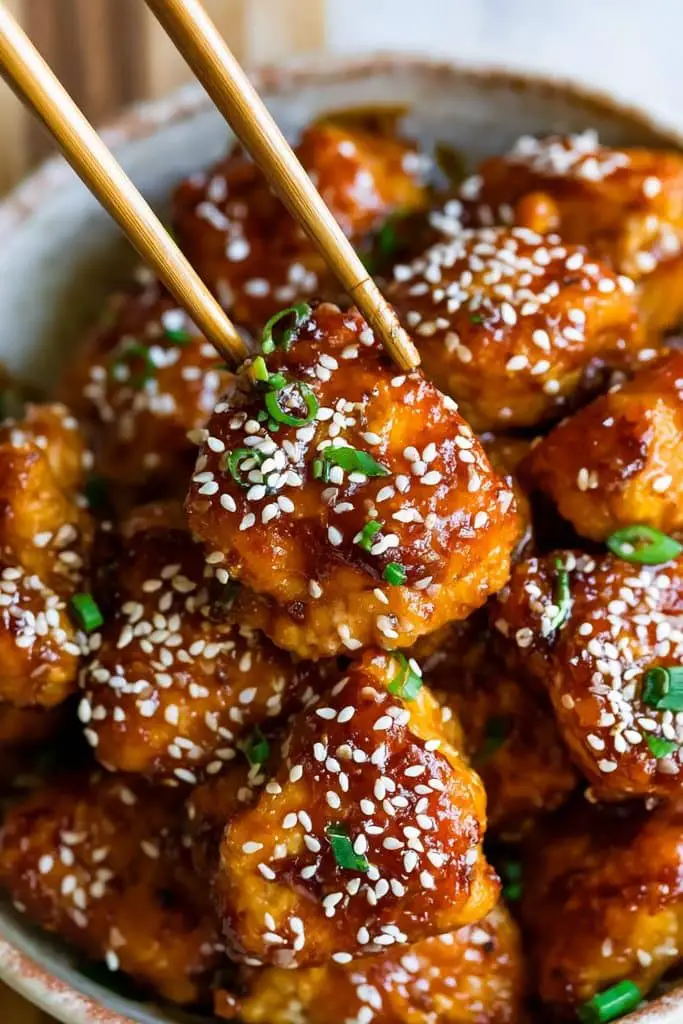
If you are looking for a quick chicken dinner that is sweet, savory, and full of flavor, these air fryer honey garlic chicken bites are a recipe worth trying. The chicken gets lightly crispy on the outside, while the honey garlic sauce gives every piece a delicious sticky coating.
I love how simple this meal is to put together. You don’t need complicated ingredients, and the chicken cooks quickly in the air fryer. It is one of those easy air fryer dinner recipes that works beautifully for a busy winter evening, especially when you want something comforting without spending too much time in the kitchen.
Prep Time: 10 minutes Cook Time: 12–15 minutes Total Time: 22–25 minutes Difficulty: Easy Servings: 2–3
Ingredients
For the chicken:
- 1 lb (450 g) boneless, skinless chicken breasts or thighs
- 1 tablespoon olive oil
- ½ teaspoon garlic powder
- ½ teaspoon paprika
- ½ teaspoon salt
- ¼ teaspoon black pepper
- 1 tablespoon cornstarch
For the honey garlic sauce:
- 3 tablespoons honey
- 2 tablespoons soy sauce
- 3 garlic cloves, minced
- 1 tablespoon water
- 1 teaspoon rice vinegar or lemon juice
- ½ teaspoon grated fresh ginger (optional)
- 1 teaspoon cornstarch mixed with 1 tablespoon water
For serving (optional):
- Sesame seeds
- Sliced green onions
- A pinch of chili flakes
Instructions
Step 1: Cut the chicken
Cut the chicken into bite-sized pieces, roughly 1-inch cubes. Try to keep the pieces similar in size so they cook evenly. Pat them dry with paper towels to remove excess moisture.
Step 2: Season the chicken
Place the chicken pieces in a bowl and add olive oil, garlic powder, paprika, salt, black pepper, and cornstarch. Toss everything together until the chicken is evenly coated.
The cornstarch helps create a lightly crisp outside, which works especially well with the sticky honey garlic sauce.
Step 3: Preheat the air fryer
Preheat your air fryer to 380°F (193°C) for about 3 minutes, if needed. Lightly spray the basket with oil to prevent sticking.
Step 4: Air fry the chicken bites
Arrange the chicken in a single layer in the air fryer basket, leaving space between the pieces. Cook for 10–15 minutes, shaking the basket or turning the chicken halfway through.
Check the thickest pieces with a food thermometer. The chicken should reach an internal temperature of 165°F (74°C) before serving. Depending on the size of the pieces and your air fryer, cooking time may vary.
Step 5: Make the honey garlic sauce
While the chicken cooks, add the honey, soy sauce, minced garlic, water, rice vinegar, and ginger to a small saucepan. Stir over medium-low heat until the mixture begins to simmer gently.
Add the cornstarch slurry and stir for 1–2 minutes, until the sauce thickens slightly. Keep the heat moderate so the honey doesn’t burn.
Step 6: Coat the chicken
Transfer the cooked chicken bites to a bowl and pour the warm honey garlic sauce over them. Toss gently until every piece is coated.
Step 7: Garnish and serve
Finish with sesame seeds, sliced green onions, or a little chili if you like some heat. Serve immediately while the chicken is warm and the sauce is glossy.
Tips for the Best Honey Garlic Chicken Bites
- Cut the chicken evenly: Similar-sized pieces cook more consistently and help prevent smaller pieces from drying out.
- Don’t overcrowd the basket: Cook in batches if necessary. This helps the chicken brown instead of steam.
- Use fresh garlic: It gives the sauce a stronger, more delicious flavor than garlic powder alone.
- Keep the sauce slightly thick: It should coat the chicken without becoming too sticky or heavy.
- Add the sauce after cooking: Tossing the chicken in the sauce at the end helps preserve its crisp edges.
- Check doneness with a thermometer: Chicken should reach 165°F (74°C) in the thickest pieces.
Easy Variations
- Make it spicy: Add ½ teaspoon of chili flakes or a little sriracha to the sauce.
- Use chicken thighs: Boneless, skinless thighs are a great option if you prefer extra juicy chicken.
- Add a citrus twist: Replace the rice vinegar with fresh lemon juice for a brighter flavor.
- Make it less sweet: Reduce the honey to 2 tablespoons and add an extra teaspoon of soy sauce.
- Add vegetables: Serve with air-fried broccoli, bell peppers, or carrots for a more complete dinner.
What to Serve with Honey Garlic Chicken Bites
These chicken bites are especially good with simple sides that balance their sweet and savory sauce. Some of my favorite serving ideas include:
- Steamed jasmine rice
- Garlic butter noodles
- Air fryer roasted broccoli
- Stir-fried green beans
- Mashed potatoes
- A fresh cucumber and carrot salad
For air fryer dinner ideas for 2, I would serve these chicken bites over a bowl of warm rice with roasted broccoli on the side. It is filling, colorful, and easy to prepare without making a lot of extra dishes.
Why You’ll Love This Recipe
These air fryer honey garlic chicken bites are a wonderful choice when you want a homemade dinner that tastes like something special but takes very little effort. The chicken is tender, the sauce is rich with garlic flavor, and the touch of honey brings everything together.
It is also a flexible recipe that you can adjust to suit your family’s taste. Whether you serve it over rice, alongside vegetables, or with noodles, it makes a comforting and satisfying dinner for a cold evening.
4. Air Fryer Chicken and Potatoes
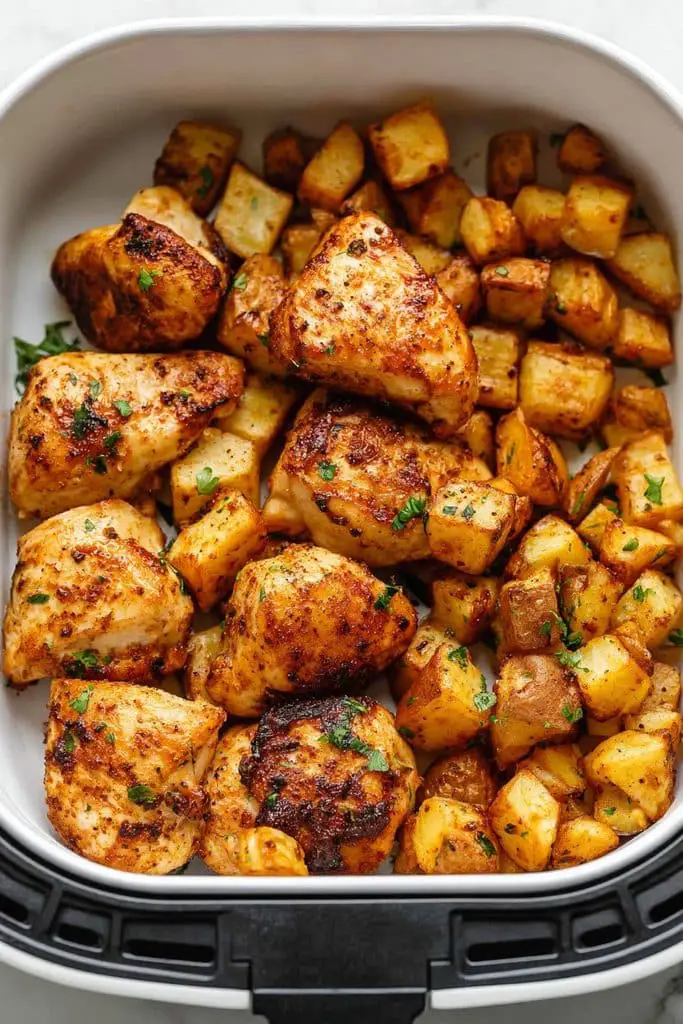
There is something so comforting about a dinner that includes juicy chicken and golden, crispy potatoes. This air fryer chicken and potatoes recipe brings both together in one simple meal, with garlic, paprika, and herbs adding plenty of flavor.
I especially like this recipe for cold evenings when I want a filling homemade dinner without spending too much time cooking. It is one of those air fryer dinner ideas with chicken that feels complete on its own, and you can easily add a side of vegetables if you want a little extra.
The chicken turns tender and flavorful, while the potatoes develop lightly crisp edges and a soft center. Best of all, the ingredients are simple and easy to find.
Prep Time: 15 minutes Cook Time: 25–30 minutes Total Time: 40–45 minutes Difficulty: Easy Servings: 2–3
Ingredients
- 1 lb (450 g) boneless, skinless chicken thighs or breasts, cut into bite-sized pieces
- 1 lb (450 g) baby potatoes, halved or quartered
- 2 tablespoons olive oil, divided
- 3 garlic cloves, minced
- 1 teaspoon paprika
- 1 teaspoon dried Italian seasoning
- ½ teaspoon dried rosemary
- ½ teaspoon onion powder
- ¾ teaspoon salt, or to taste
- ¼ teaspoon black pepper
- 1 tablespoon chopped fresh parsley (optional)
- Lemon wedges, for serving (optional)
Instructions
Step 1: Prepare the potatoes
Wash the potatoes and cut them into evenly sized halves or quarters, depending on their size. Pat them dry with a clean kitchen towel. Drying the potatoes helps them brown better in the air fryer.
Step 2: Season the potatoes
Place the potatoes in a bowl and toss with 1 tablespoon olive oil, half of the minced garlic, paprika, Italian seasoning, rosemary, salt, and black pepper.
Make sure the seasoning is spread evenly over the potatoes so every bite has plenty of flavor.
Step 3: Start cooking the potatoes
Preheat your air fryer to 380°F (193°C) if your model requires it. Place the potatoes in the basket in a single layer as much as possible.
Air fry for about 10 minutes, shaking the basket halfway through. Starting the potatoes first gives them a little extra cooking time because they generally take longer than small chicken pieces.
Step 4: Season the chicken
While the potatoes cook, place the chicken pieces in a separate bowl. Add the remaining olive oil, garlic, onion powder, and a little extra salt and pepper if needed. Toss until the chicken is evenly coated.
Step 5: Add the chicken
After the potatoes have cooked for 10 minutes, add the seasoned chicken pieces to the basket. Spread everything out so the chicken and potatoes have enough room for hot air to circulate.
Air fry for another 15–20 minutes, shaking the basket or turning the ingredients halfway through. If your air fryer is small, cook in batches rather than overcrowding it.
Step 6: Check for doneness
Check the chicken with a food thermometer. It should reach an internal temperature of 165°F (74°C) at the thickest point. The potatoes should be fork-tender with golden edges.
If the potatoes need more time, remove the cooked chicken and continue cooking the potatoes for a few extra minutes.
Step 7: Garnish and serve
Sprinkle with fresh parsley and serve with lemon wedges if you like. The little touch of lemon brightens the garlic and herb flavors beautifully.
Tips for the Best Air Fryer Chicken and Potatoes
- Cut everything evenly: Similar-sized potato pieces and chicken chunks help the ingredients cook more consistently.
- Start the potatoes first: This gives them time to become tender and golden without overcooking the chicken.
- Avoid overcrowding: If the basket is too full, the ingredients may steam instead of crisp.
- Use baby potatoes: They are convenient, have a lovely texture, and require very little preparation.
- Choose chicken thighs for extra juiciness: Chicken breasts work too, but they can dry out more easily if overcooked.
- Check both ingredients separately: Chicken must reach 165°F (74°C), while potatoes should be tender all the way through.
Easy Variations
- Add vegetables: Toss in chopped bell peppers, zucchini, or broccoli during the last 8–10 minutes of cooking, adjusting as needed for their size.
- Make it spicy: Add ¼ teaspoon cayenne pepper or chili flakes to the seasoning.
- Use Cajun seasoning: Replace the Italian herbs and paprika with Cajun seasoning for a bolder flavor.
- Add Parmesan: Sprinkle grated Parmesan over the potatoes during the last 2–3 minutes of cooking.
- Try sweet potatoes: Replace some or all of the regular potatoes with cubed sweet potatoes. Cut them evenly and check for tenderness as they may cook at a different rate.
What to Serve with Air Fryer Chicken and Potatoes
This recipe is already quite filling, but a simple side can make it feel even more like a cozy winter dinner. I would pair it with:
- Steamed green beans
- Roasted broccoli
- A fresh garden salad
- Garlic yogurt sauce
- Creamy coleslaw
- Warm dinner rolls
For a simple dinner for two, serve the chicken and potatoes with a small salad and garlic yogurt dip. It makes a satisfying meal without requiring a long list of ingredients or extra cooking.
Why You’ll Love This Recipe
This air fryer chicken and potatoes recipe is the kind of dinner I would keep in my regular weeknight rotation. It uses everyday ingredients, comes together with very little fuss, and gives you a delicious combination of tender chicken and crispy potatoes.
It is also easy to adjust depending on what you have in the fridge. Whether you add vegetables, change the seasoning, or keep it simple with garlic and herbs, this is a dependable option for a warm and comforting winter meal.
5. Crispy Air Fryer Salmon with Garlic Butter
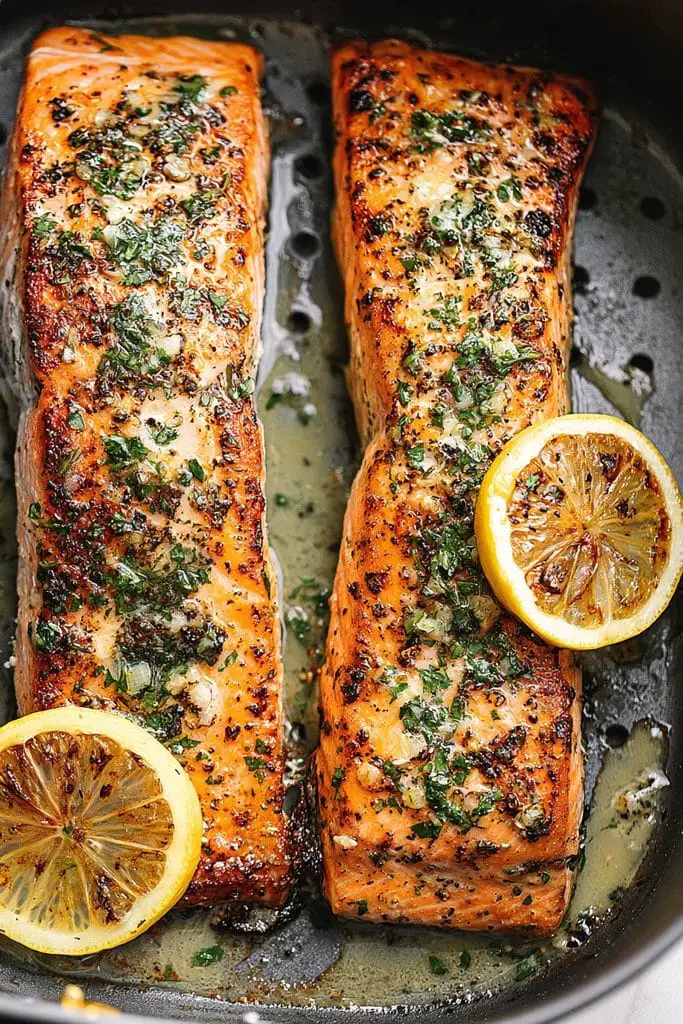
When I want a dinner that feels a little fancy but is actually very easy to make, this crispy air fryer salmon with garlic butter is one of my favorite ideas. The salmon cooks quickly, develops beautifully crisp edges, and the garlic butter melts into the fish for a rich, savory flavor.
This is also a great choice when you want an easy air fryer dinner recipe without chicken. You only need a few simple seasonings, and the air fryer does most of the work. Serve it with roasted vegetables, potatoes, or rice for a warm and satisfying winter dinner.
Prep Time: 10 minutes
Cook Time: 8–12 minutes
Total Time: 18–22 minutes
Difficulty: Easy
Servings: 2
Ingredients
- 2 salmon fillets, about 6 oz (170 g) each
- 1 tablespoon olive oil
- ½ teaspoon paprika
- ½ teaspoon garlic powder
- ½ teaspoon dried parsley
- ¼ teaspoon salt
- ¼ teaspoon black pepper
For the garlic butter:
- 2 tablespoons unsalted butter, melted
- 2 garlic cloves, finely minced
- 1 teaspoon fresh lemon juice
- 1 tablespoon chopped fresh parsley
- Lemon wedges, for serving
Instructions
Step 1: Prepare the salmon
Pat the salmon fillets dry with paper towels. Removing excess moisture helps the surface brown nicely in the air fryer.
If your salmon has skin, you can leave it on. I usually find it helps keep the fillet together while cooking.
Step 2: Make the garlic butter
In a small bowl, mix the melted butter, minced garlic, lemon juice, and chopped parsley. Set it aside while you season the salmon.
The garlic butter is simple, but it makes such a difference. The combination of butter, fresh garlic, and lemon gives the salmon a lovely rich flavor without needing a complicated sauce.
Step 3: Season the salmon
Brush the salmon lightly with olive oil. Sprinkle the paprika, garlic powder, dried parsley, salt, and black pepper evenly over the top.
Gently rub the seasonings over the surface without pressing too hard into the fish.
Step 4: Preheat the air fryer
Preheat your air fryer to 400°F (200°C) for about 3 minutes if your model recommends preheating.
Lightly spray the basket with cooking oil. If the salmon has skin, place it skin-side down in the basket.
Step 5: Air fry the salmon
Place the salmon fillets in the basket with some space between them. Air fry for about 8–12 minutes, depending on the thickness of the fillets.
There is usually no need to flip salmon. Keeping it in one position helps the top develop a nicely browned surface.
For the most reliable result, check the thickest part with a food thermometer. The FDA recommends cooking fish to 145°F (63°C). The salmon should also flake easily with a fork.
Step 6: Add the garlic butter
During the last 1–2 minutes of cooking, brush the salmon generously with the garlic butter mixture. You can also brush it on immediately after cooking for an even fresher garlic flavor.
Be careful not to add too much butter too early, as the butter can drip into the air fryer and smoke.
Step 7: Rest and serve
Let the salmon rest for 2–3 minutes before serving. Spoon any remaining garlic butter over the top and finish with fresh parsley and a squeeze of lemon.
Tips for Crispy Air Fryer Salmon
- Dry the salmon first: Excess moisture can prevent the surface from browning properly.
- Don’t overcrowd the basket: Give each fillet enough space for hot air to circulate.
- Keep the skin on if possible: It helps hold the salmon together and can become nicely crisp.
- Don’t overcook it: Salmon can become dry quickly, so start checking thicker or thinner fillets early.
- Use fresh garlic: It gives the butter sauce a much better flavor than dried garlic.
- Add lemon at the end: Fresh lemon juice brightens the rich garlic butter beautifully.
Easy Variations
Honey Garlic Salmon: Add 1 teaspoon of honey to the garlic butter for a sweet and savory glaze.
Spicy Salmon: Mix ¼ teaspoon of chili flakes or cayenne pepper into the seasoning.
Lemon Herb Salmon: Add a little fresh dill, parsley, or thyme to the garlic butter.
Parmesan Salmon: Sprinkle a small amount of grated Parmesan over the salmon during the last 2–3 minutes of cooking.
Blackened Salmon: Replace the simple seasoning with your favorite Cajun or blackened seasoning for a bolder dinner.
What to Serve with Air Fryer Salmon
There are so many easy sides that work with this salmon. For a cozy winter dinner, I would serve it with:
- Crispy air fryer potatoes
- Roasted broccoli
- Steamed green beans
- Garlic butter rice
- Creamy mashed potatoes
- Roasted carrots
- A simple cucumber salad
For air fryer dinner ideas for 2, salmon is especially convenient because you can cook two fillets at once and prepare a simple side while they are in the air fryer.
Why You’ll Love This Recipe
This crispy air fryer salmon with garlic butter is proof that a simple dinner doesn’t have to feel boring. The salmon is tender and flavorful inside, while the top gets lightly crisp and golden. The garlic butter adds just the right amount of richness, and a squeeze of lemon keeps everything fresh.
I also love that this recipe comes together so quickly. When you need a warm dinner on a busy winter night, this is one of those air fryer dinner recipes that gives you a delicious meal without a lot of effort.
6. Air Fryer BBQ Chicken Drumsticks
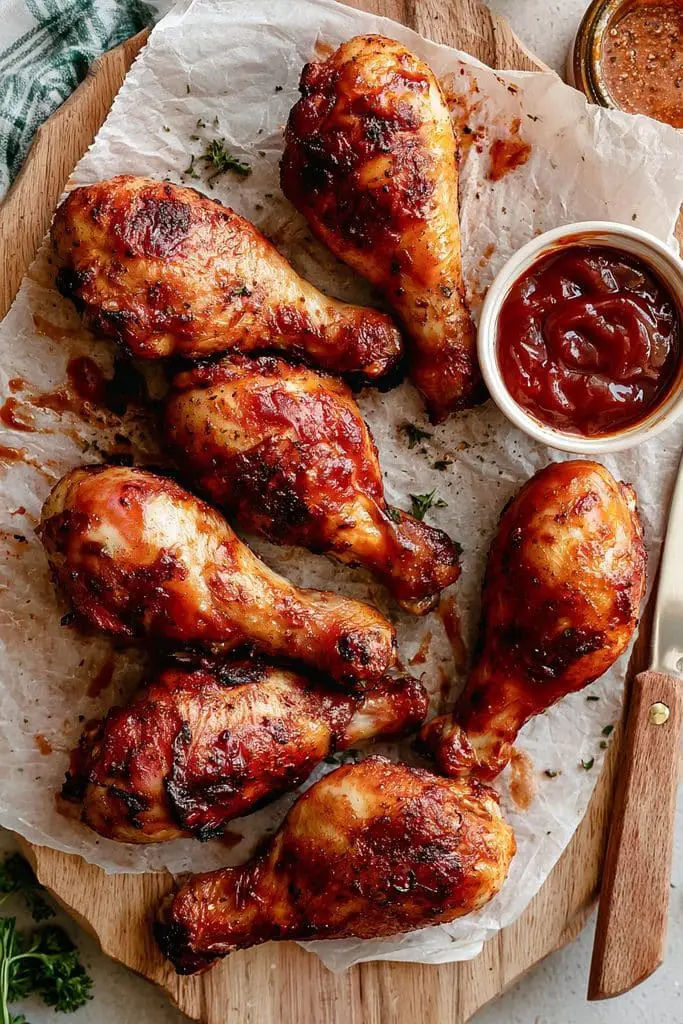
If you want a chicken dinner that is easy, flavorful, and a little messy in the best way, these air fryer BBQ chicken drumsticks are a great choice. The chicken gets beautifully browned on the outside, while the BBQ sauce turns sticky and caramelized as it cooks.
I like drumsticks for simple family dinners because they are budget-friendly, easy to season, and don’t need much preparation. This is also one of those air fryer dinner recipes kid friendly enough for the whole family, especially when served with crispy potatoes or corn on the side.
Prep Time: 10 minutes
Cook Time: 25–30 minutes
Total Time: 35–40 minutes
Difficulty: Easy
Servings: 4
Ingredients
- 8 chicken drumsticks, about 2½ lb (1.1 kg)
- 1 tablespoon olive oil
- 1 teaspoon smoked paprika
- 1 teaspoon garlic powder
- ½ teaspoon onion powder
- ½ teaspoon dried oregano
- ½ teaspoon salt
- ¼ teaspoon black pepper
- ½ cup BBQ sauce
Optional for extra flavor:
- 1 tablespoon honey
- ½ teaspoon chili powder or chili flakes
Instructions
Step 1: Prepare the chicken
Pat the drumsticks dry with paper towels. This small step helps remove excess moisture so the skin can brown better in the air fryer.
If there are any large pieces of excess skin or loose fat, trim them away.
Step 2: Season the drumsticks
Place the chicken drumsticks in a large bowl. Add olive oil, smoked paprika, garlic powder, onion powder, oregano, salt, and black pepper.
Toss everything together until the drumsticks are evenly coated. If you like a little heat, add chili powder or chili flakes here.
Step 3: Preheat the air fryer
Preheat the air fryer to 380°F (193°C) for about 3 minutes if your model recommends preheating.
Lightly spray the basket with oil if needed to prevent sticking.
Step 4: Air fry the drumsticks
Arrange the drumsticks in the basket in a single layer, leaving a little space between them. Depending on the size of your air fryer, you may need to cook them in batches.
Air fry for 18–22 minutes, turning the drumsticks halfway through. The exact cooking time will depend on their size and your air fryer.
Step 5: Add the BBQ sauce
Mix the BBQ sauce with honey if you want a slightly sweeter glaze.
Brush the cooked drumsticks generously with the BBQ sauce. Return them to the air fryer and cook at 400°F (200°C) for another 4–7 minutes, turning once if needed.
The sauce should become glossy, sticky, and lightly caramelized. Keep an eye on them during this final stage because BBQ sauce contains sugar and can burn if left too long.
Step 6: Check for doneness
Use a food thermometer to check the thickest part of a drumstick without touching the bone. Chicken should reach at least 165°F (74°C) internally.
For drumsticks, I usually like them cooked until they are well browned and tender, but don’t rely on color alone to judge whether the chicken is safe to eat.
Step 7: Rest and serve
Let the drumsticks rest for about 5 minutes before serving. Brush with a little extra BBQ sauce if you want an even saucier finish.
Tips for the Best Air Fryer BBQ Chicken
- Dry the chicken well: This helps the skin brown and crisp instead of steaming.
- Don’t add BBQ sauce too early: Adding it near the end prevents the sugary sauce from burning.
- Don’t overcrowd the basket: Leave room for the hot air to circulate around each drumstick.
- Turn halfway through: This helps the chicken cook and brown more evenly.
- Use a thermometer: Chicken should reach at least 165°F (74°C) in the thickest part.
- Watch the final glaze: BBQ sauce can darken quickly because of its sugar content.
Easy Variations
Honey BBQ Drumsticks: Mix 1 tablespoon honey into the BBQ sauce for a sweeter, stickier glaze.
Spicy BBQ Chicken: Add cayenne pepper, hot sauce, or chili flakes to the BBQ sauce.
Smoky BBQ: Use smoked paprika in the seasoning and a smoky BBQ sauce for extra barbecue flavor.
Garlic BBQ: Add ½ teaspoon garlic powder to the BBQ sauce before brushing it onto the chicken.
Maple BBQ: Replace the honey with 1 tablespoon maple syrup for a slightly different sweet flavor.
What to Serve with BBQ Chicken Drumsticks
These drumsticks pair beautifully with simple comfort-food sides. For a cozy winter dinner, try serving them with:
- Crispy air fryer potatoes
- Creamy coleslaw
- Corn on the cob
- Mac and cheese
- Roasted vegetables
- Garlic bread
- Simple green salad
For an easy dinner for two, you can simply cook four drumsticks and serve them with crispy potatoes and a fresh salad. It makes a filling meal without a lot of extra work.
Why You’ll Love This Recipe
These air fryer BBQ chicken drumsticks are everything I want from an easy winter dinner: juicy chicken, crispy browned edges, and a sweet, smoky BBQ glaze. They are simple enough for a weeknight but flavorful enough that everyone at the table will be reaching for another piece.
And because the air fryer handles most of the cooking, there is no need to stand over a hot pan. Just season the chicken, let it cook, add the BBQ sauce near the end, and you have a delicious family-friendly dinner ready to enjoy.
7. Crispy Air Fryer Chicken Tenders
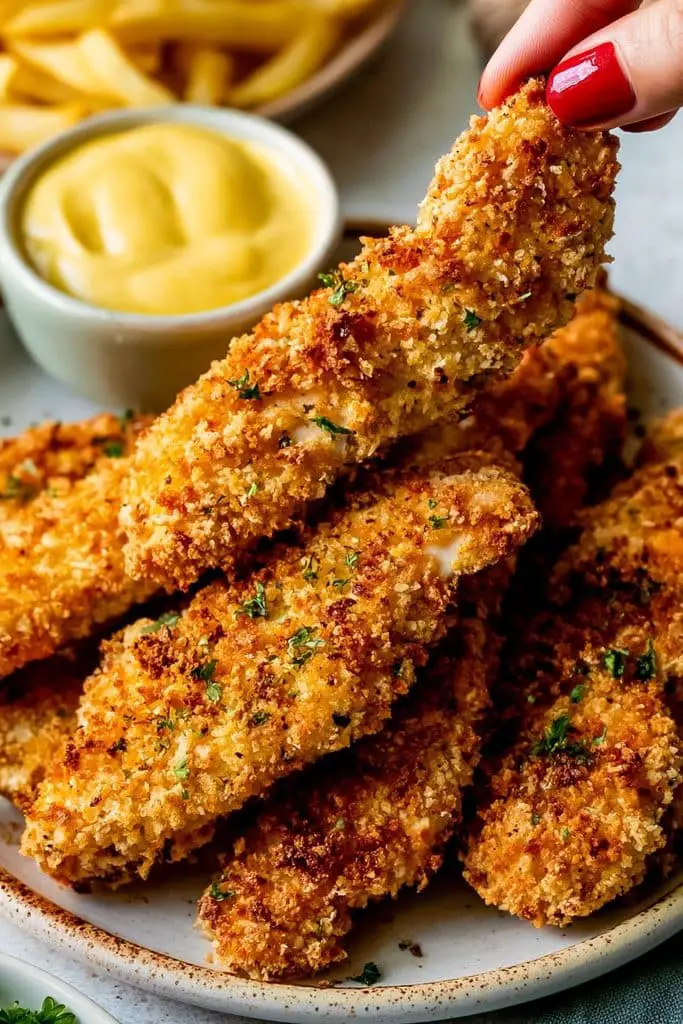
When I need a simple chicken dinner that everyone is likely to enjoy, crispy air fryer chicken tenders are always a good choice. They have a crunchy golden coating on the outside, while the chicken stays tender and juicy inside.
I especially like this recipe because it gives you that crispy fried-chicken feeling without deep frying. These tenders are also one of my favorite air fryer dinner recipes kid friendly, and you can serve them with different dipping sauces so everyone can choose their favorite.
Prep Time: 15 minutes
Cook Time: 10–14 minutes
Total Time: 25–29 minutes
Difficulty: Easy
Servings: 3–4
Ingredients
- 1 lb (450 g) chicken tenderloins
- ½ cup all-purpose flour
- 1 large egg
- 1 tablespoon milk
- 1 cup panko breadcrumbs
- ½ teaspoon garlic powder
- ½ teaspoon paprika
- ½ teaspoon onion powder
- ½ teaspoon Italian seasoning
- ½ teaspoon salt
- ¼ teaspoon black pepper
- Olive oil spray
Instructions
Step 1: Prepare the chicken
Pat the chicken tenderloins dry with paper towels. If they are very large, you can cut them in half lengthwise so they cook more evenly.
Removing excess moisture also helps the coating stick better.
Step 2: Set up the coating stations
Place the flour in one shallow bowl.
In a second bowl, whisk together the egg and milk.
In a third bowl, combine the panko breadcrumbs, garlic powder, paprika, onion powder, Italian seasoning, salt, and black pepper.
This three-step coating process gives the chicken tenders their crisp, crunchy outside.
Step 3: Coat the chicken
Take one chicken tender at a time and coat it lightly in flour. Shake off any excess, then dip it into the egg mixture.
Finally, press it into the seasoned panko breadcrumbs, making sure all sides are covered.
I like to gently press the breadcrumbs onto the chicken rather than simply rolling it around. This helps create a thicker, crispier coating.
Step 4: Preheat the air fryer
Preheat your air fryer to 400°F (200°C) for about 3 minutes if your model recommends preheating.
Lightly spray the basket with oil.
Step 5: Air fry the chicken tenders
Place the coated chicken tenders in the basket in a single layer. Leave a little space between each piece so the hot air can circulate properly.
Lightly spray the tops with olive oil. Air fry for 5–7 minutes, then carefully flip the tenders and spray the other side lightly with oil.
Continue cooking for another 5–7 minutes, or until the coating is golden and the chicken reaches 165°F (74°C) internally.
The exact cooking time will depend on the thickness of your chicken tenders and your particular air fryer.
Step 6: Rest and serve
Let the chicken tenders rest for 2–3 minutes before serving. This gives the coating a chance to settle while keeping the chicken juicy inside.
Serve them warm with your favorite dipping sauces.
Tips for Extra Crispy Chicken Tenders
- Use panko breadcrumbs: They create a lighter and crunchier coating than regular breadcrumbs.
- Don’t skip the oil spray: A light coating of oil helps the breadcrumbs turn golden and crisp.
- Keep the tenders in a single layer: Overcrowding traps moisture and can make the coating softer.
- Press the breadcrumbs on firmly: This helps prevent the coating from falling off while cooking.
- Don’t overcook the chicken: Start checking the thickest pieces early, especially if your tenders are small.
- Cook in batches if necessary: A little extra cooking time is worth it for crispier results.
Easy Variations
Parmesan Chicken Tenders: Add ¼ cup finely grated Parmesan to the panko mixture.
Spicy Chicken Tenders: Add ¼ teaspoon cayenne pepper or chili powder to the breadcrumbs.
Ranch Chicken Tenders: Add 1 teaspoon ranch seasoning to the breadcrumb mixture.
Garlic Herb Tenders: Increase the garlic powder slightly and add extra dried parsley or Italian seasoning.
Honey Mustard Tenders: Serve the cooked chicken with a simple mixture of honey and Dijon mustard for dipping.
What to Serve with Chicken Tenders
These crispy tenders are incredibly versatile, so you can turn them into a complete dinner in different ways. Some easy sides include:
- Air fryer French fries
- Crispy potato wedges
- Coleslaw
- Roasted broccoli
- Corn on the cob
- Simple green salad
- Mac and cheese
For air fryer dinner ideas for 2, I would make four to six tenders and serve them with potato wedges, a small salad, and two dipping sauces. It is an easy dinner that feels fun without requiring much preparation.
Best Dipping Sauces
You can keep things simple with store-bought sauces, or make quick homemade versions. Try the chicken tenders with:
- Honey mustard
- Ranch dressing
- BBQ sauce
- Garlic mayo
- Sweet chili sauce
- Ketchup
For kids, I usually like to offer a couple of mild choices alongside the chicken and let everyone pick their favorite.
Why You’ll Love This Recipe
These crispy air fryer chicken tenders are one of those dinner air fryer recipes for beginners that are easy to get right. There is no complicated cooking technique, and the air fryer gives the chicken a wonderfully crisp coating with much less oil than traditional frying.
They are also easy to customize with different seasonings and dipping sauces. Whether you’re making a quick family dinner, a cozy winter meal, or an easy dinner for two, these golden chicken tenders are a simple recipe you’ll want to make again.
8. Air Fryer Stuffed Bell Peppers with Ground Beef
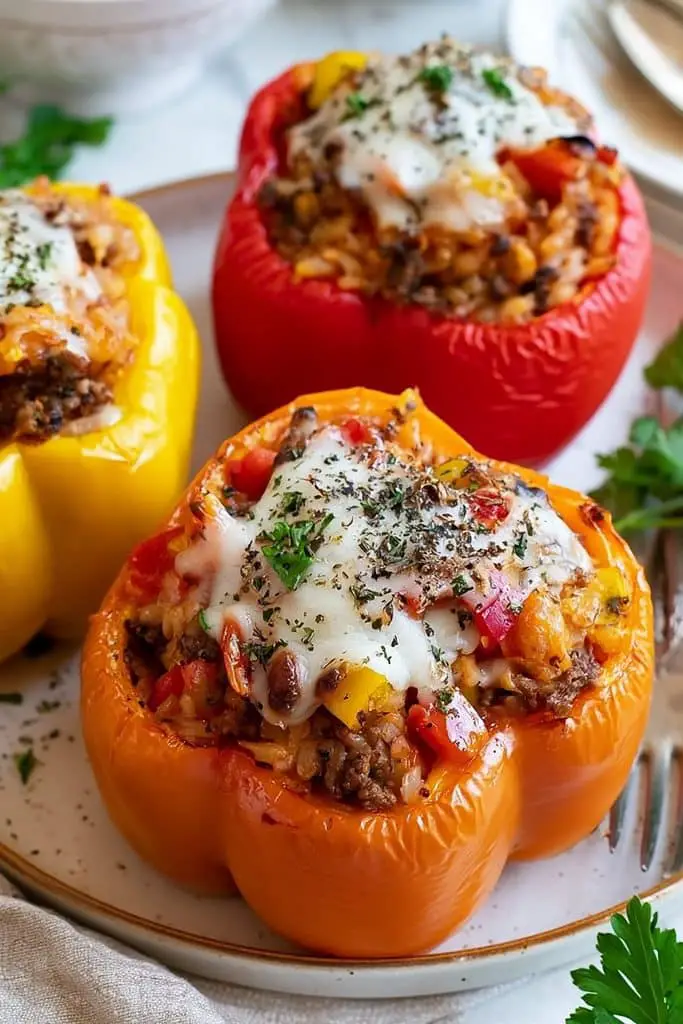
These air fryer stuffed bell peppers with ground beef are such a comforting dinner, especially when you’re craving something warm and filling on a cold evening. The peppers become tender around the edges while the savory beef and rice filling stays hearty and flavorful underneath a layer of melted cheese.
I like this recipe because it feels like a complete meal without needing a lot of side dishes. It is also a great option when you’re looking for air fryer dinner ideas that are a little different from the usual chicken recipes.
Prep Time: 15 minutes
Cook Time: 20–25 minutes
Total Time: 35–40 minutes
Difficulty: Easy
Servings: 4
Ingredients
- 4 medium bell peppers
- 1 tablespoon olive oil
- 1 lb (450 g) lean ground beef
- ½ small onion, finely diced
- 2 garlic cloves, minced
- 1 cup cooked white or brown rice
- ½ cup tomato sauce
- 1 teaspoon paprika
- ½ teaspoon Italian seasoning
- ½ teaspoon salt
- ¼ teaspoon black pepper
- ½ cup shredded mozzarella or cheddar cheese
- 2 tablespoons chopped fresh parsley, optional
Instructions
Step 1: Prepare the peppers
Wash the bell peppers and pat them dry. Cut off the tops and carefully remove the seeds and white membranes from inside.
You can use any color of bell pepper you like. Red and yellow peppers are naturally sweeter, while green peppers give the dish a slightly more savory flavor.
Step 2: Cook the beef filling
Heat a large skillet over medium heat and add the olive oil. Add the diced onion and cook for 2–3 minutes, until it begins to soften.
Add the ground beef and cook for about 6–8 minutes, breaking it apart with a spoon as it cooks. Continue until the beef is browned and cooked through.
Stir in the minced garlic and cook for another 30 seconds.
Step 3: Add the filling ingredients
Stir the cooked rice, tomato sauce, paprika, Italian seasoning, salt, and black pepper into the beef.
Cook for another 2–3 minutes, stirring occasionally, until everything is hot and well combined.
Taste the filling and adjust the seasoning if needed.
Step 4: Fill the peppers
Spoon the beef and rice mixture into each bell pepper. Don’t pack the filling down too tightly because you want the warm air to circulate around the peppers.
Leave a little space at the top and finish each pepper with shredded cheese.
Step 5: Preheat the air fryer
Preheat the air fryer to 360°F (180°C) for about 3 minutes if your model recommends preheating.
Lightly spray the basket with oil if needed.
Step 6: Air fry the stuffed peppers
Carefully place the stuffed peppers upright in the air fryer basket. Depending on the size of your air fryer, you may need to cook them in two batches.
Air fry for about 15–20 minutes, or until the peppers are tender and the cheese is melted and lightly golden.
If the peppers are very large or thick, they may need a few extra minutes.
Step 7: Rest and serve
Carefully remove the peppers from the basket and let them rest for 2–3 minutes.
Sprinkle with fresh parsley and serve warm.
Tips for the Best Stuffed Peppers
- Choose peppers that stand upright: Flat-bottomed peppers are easier to fill and less likely to tip over.
- Don’t overfill them: Leave a little room at the top so the filling stays inside while cooking.
- Use cooked rice: Since the filling only cooks briefly in the air fryer, the rice should already be fully cooked.
- Don’t overcrowd the basket: The peppers need enough room for hot air to move around them.
- Watch the cheese: If it starts browning too quickly, loosely cover the tops with a small piece of foil if your air fryer manufacturer permits it.
- Adjust the cooking time: Larger peppers will generally take longer to become tender than smaller ones.
Easy Variations
Mexican-Style Stuffed Peppers: Add ½ teaspoon cumin, a little chili powder, and some canned corn or black beans to the beef filling.
Cheesy Beef and Pepper: Add extra mozzarella or cheddar for an even cheesier filling.
Low-Carb Version: Replace the rice with cauliflower rice or finely chopped sautéed vegetables.
Turkey Stuffed Peppers: Use ground turkey instead of beef for a lighter option.
Spicy Stuffed Peppers: Add diced jalapeño or a pinch of red pepper flakes to the filling.
What to Serve with Stuffed Bell Peppers
These stuffed peppers are filling enough to serve as a complete meal, but I like adding something fresh on the side. Try serving them with:
- Simple green salad
- Garlic bread
- Roasted broccoli
- Steamed green beans
- Sour cream or plain Greek yogurt
- Fresh avocado
- Salsa
For air fryer dinner ideas for 2, you can simply make two stuffed peppers and save the extra filling for another meal. It is a nice way to avoid wasting food while still having a satisfying dinner.
Why You’ll Love This Recipe
These air fryer stuffed bell peppers are warm, hearty, and packed with familiar flavors. The seasoned ground beef and rice make the filling satisfying, while the melted cheese on top adds that little extra comfort I always want from a winter dinner.
I also love how adaptable this recipe is. You can change the seasoning, swap the meat, add extra vegetables, or make it spicy depending on what your family enjoys. It’s a simple air fryer dinner recipe that looks impressive but is actually quite easy to put together.
9. Air Fryer Meatballs with Marinara Sauce
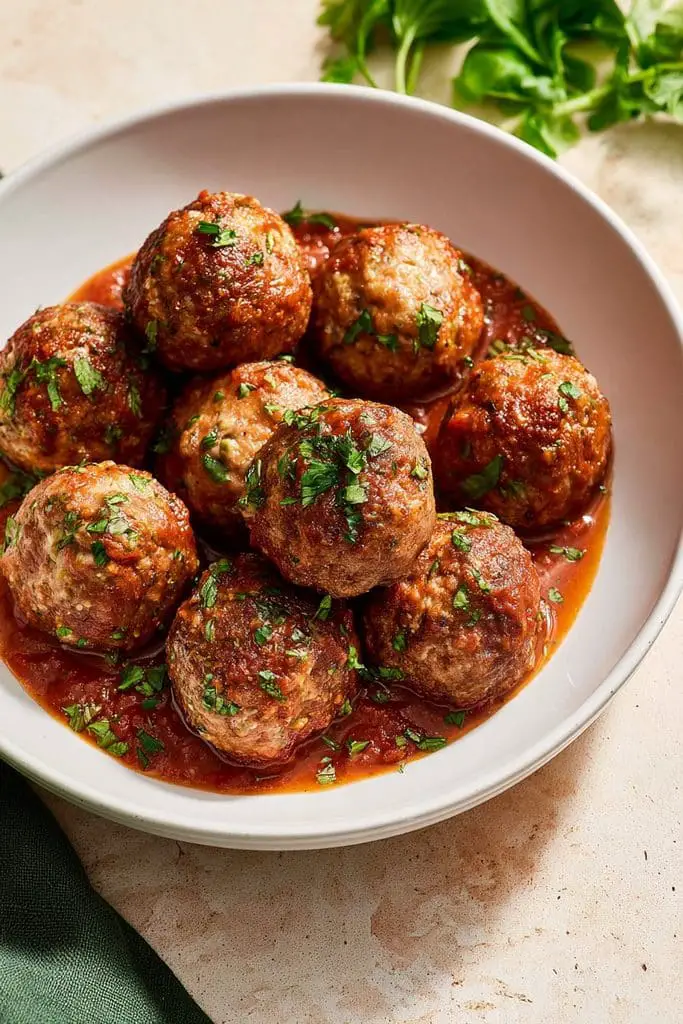
There is something so comforting about a bowl of warm meatballs covered in rich tomato sauce. These air fryer meatballs with marinara sauce are easy to make, packed with flavor, and perfect for a cozy winter dinner.
I love using the air fryer for meatballs because they brown beautifully on the outside while staying tender and juicy inside. You can serve them with pasta, crusty bread, rice, or even enjoy them on their own for a simple meal.
Prep Time: 15 minutes
Cook Time: 10–14 minutes
Total Time: 25–29 minutes
Difficulty: Easy
Servings: 4
Ingredients
For the meatballs:
- 1 lb (450 g) ground beef
- ½ cup breadcrumbs
- ¼ cup finely grated Parmesan cheese
- 1 large egg
- 2 garlic cloves, minced
- 2 tablespoons finely chopped onion
- 1 teaspoon Italian seasoning
- ½ teaspoon dried parsley
- ½ teaspoon salt
- ¼ teaspoon black pepper
- 1 tablespoon milk
For the marinara sauce:
- 2 cups marinara sauce
- 1 tablespoon olive oil
- 1 small garlic clove, minced
- ¼ teaspoon Italian seasoning
- ¼ teaspoon black pepper
For serving:
- Grated Parmesan
- Fresh parsley or basil
- Crusty bread or cooked pasta
Instructions
Step 1: Make the meatball mixture
Add the ground beef, breadcrumbs, Parmesan, egg, minced garlic, chopped onion, Italian seasoning, dried parsley, salt, pepper, and milk to a large bowl.
Gently mix everything together with your hands or a fork until just combined. Try not to overmix the meat because this can make the meatballs dense instead of tender.
Step 2: Shape the meatballs
Divide the mixture into about 16–18 portions and roll each one gently between your hands.
Aim for meatballs about 1½ inches (4 cm) wide. Keeping them close in size helps them cook evenly.
Step 3: Preheat the air fryer
Preheat the air fryer to 380°F (193°C) for about 3 minutes if your model recommends preheating.
Lightly spray the basket with oil to help prevent sticking.
Step 4: Air fry the meatballs
Arrange the meatballs in the basket in a single layer, leaving a little space between them.
Air fry for 10–14 minutes, turning or shaking the basket halfway through. The exact time will depend on the size of your meatballs and the air fryer.
Check the center of the largest meatball with a food thermometer. For ground beef, cook to at least 160°F (71°C).
Step 5: Make the marinara sauce
While the meatballs cook, heat the olive oil in a saucepan over medium-low heat. Add the minced garlic and cook for about 30 seconds.
Pour in the marinara sauce and add the Italian seasoning and black pepper. Stir and let the sauce gently simmer for about 5–7 minutes.
You can use your favorite store-bought marinara to keep things quick, or homemade sauce if you have some ready.
Step 6: Combine the meatballs and sauce
Once the meatballs are cooked, carefully transfer them into the warm marinara sauce.
Spoon some sauce over the top and let them simmer together for 2–3 minutes. This gives the meatballs a chance to soak up some of that rich tomato flavor.
Step 7: Garnish and serve
Transfer the meatballs to a serving dish and sprinkle with Parmesan and fresh parsley or basil.
Serve immediately with pasta, bread, or your favorite side.
Tips for the Best Air Fryer Meatballs
- Don’t overmix the meat: Mix just until the ingredients come together for softer meatballs.
- Keep them the same size: This helps everything cook at the same rate.
- Leave space between meatballs: Good airflow helps them brown evenly.
- Don’t skip the thermometer: Ground beef should reach at least 160°F (71°C).
- Don’t overcrowd the basket: Cook in batches if necessary.
- Use a gentle simmer for the sauce: A low simmer keeps the marinara smooth and prevents it from becoming too thick.
Easy Variations
Italian Meatballs: Add a little extra Parmesan, parsley, and Italian seasoning to the mixture.
Spicy Meatballs: Add ¼ teaspoon red pepper flakes or a pinch of cayenne.
Turkey Meatballs: Replace the ground beef with ground turkey. Because turkey can be leaner, avoid overcooking it.
Cheesy Meatballs: Add a small cube of mozzarella inside each meatball before rolling it closed.
Garlic Herb Meatballs: Add fresh parsley, basil, or a little rosemary to the mixture.
What to Serve with Meatballs
These meatballs are incredibly versatile, which is one reason I like keeping them in my list of easy air fryer dinner recipes. You can serve them with:
- Spaghetti or your favorite pasta
- Garlic bread
- Creamy mashed potatoes
- Roasted vegetables
- Parmesan polenta
- Steamed green beans
- A simple green salad
For air fryer dinner ideas for 2, serve four to six meatballs with a small portion of spaghetti and a side salad. You can refrigerate the remaining meatballs for another meal.
Make Them Kid Friendly
If you’re looking for air fryer dinner recipes kid friendly, these meatballs are an easy option. Keep the seasoning mild and serve the marinara on the side if your kids prefer to dip rather than have the meatballs fully covered in sauce.
You can also make smaller meatballs for little hands, but remember that smaller pieces will cook more quickly, so check them early with a thermometer.
Why You’ll Love This Recipe
These air fryer meatballs with marinara sauce are warm, comforting, and surprisingly easy to make. The meatballs develop a nicely browned exterior in the air fryer, while the marinara adds plenty of rich tomato flavor.
I also like that you can turn the same basic meatballs into several different dinners. Put them over pasta for a classic meal, serve them with crusty bread for dipping, or add roasted vegetables for a simple winter dinner.
10. Crispy Air Fryer Parmesan Potatoes and Vegetables
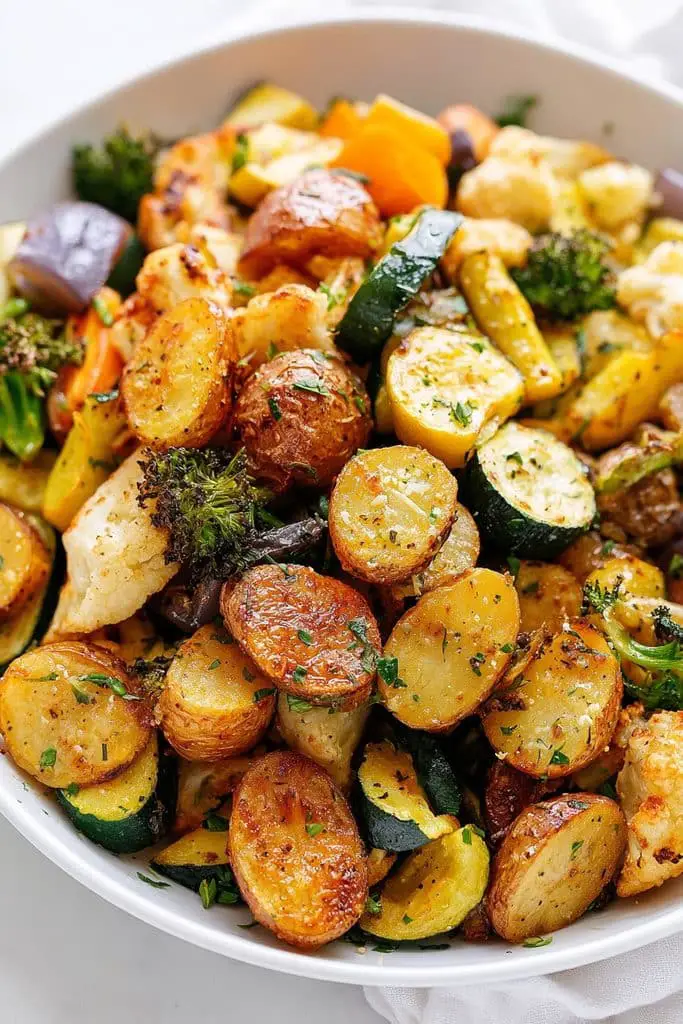
When I want a simple side dish that can also turn into a light dinner, these crispy air fryer Parmesan potatoes and vegetables are a great option. The potatoes become golden and crisp, while the vegetables roast around them with savory Parmesan and garlic flavor.
This is one of those simple air fryer dinner recipes that doesn’t need much preparation. I also love that you can change the vegetables depending on what you have in the fridge, so there is plenty of room to make it your own.
Prep Time: 10 minutes
Cook Time: 18–22 minutes
Total Time: 28–32 minutes
Difficulty: Easy
Servings: 3–4
Ingredients
- 1 lb (450 g) baby potatoes, halved or quartered
- 1 cup broccoli florets
- 1 medium carrot, sliced into thin rounds
- 1 small zucchini, cut into half-moons
- 2 tablespoons olive oil
- ½ cup finely grated Parmesan cheese
- 1 teaspoon garlic powder
- ½ teaspoon Italian seasoning
- ½ teaspoon paprika
- ½ teaspoon salt
- ¼ teaspoon black pepper
- 1 tablespoon chopped fresh parsley, optional
Instructions
Step 1: Prepare the vegetables
Wash and dry all the vegetables. Cut the potatoes into similar-sized pieces so they cook evenly.
Keep the broccoli florets and zucchini pieces reasonably large. They cook faster than potatoes, so cutting them too small can make them soft before the potatoes are ready.
Step 2: Season the potatoes
Place the potatoes in a large bowl. Add 1 tablespoon olive oil, garlic powder, Italian seasoning, paprika, salt, and black pepper.
Toss until the potatoes are evenly coated.
Step 3: Start the potatoes
Preheat the air fryer to 380°F (193°C) for about 3 minutes if your model recommends preheating.
Place the potatoes in the basket in a single layer and air fry for about 8 minutes. Shake the basket halfway through.
Starting the potatoes first gives them the extra cooking time they need to become tender and crispy.
Step 4: Add the vegetables
Add the broccoli, carrots, and zucchini to the basket. Drizzle with the remaining olive oil and toss everything together carefully.
Air fry for another 8–10 minutes, shaking the basket once or twice so the vegetables brown evenly.
Step 5: Add the Parmesan
Sprinkle the Parmesan cheese over the potatoes and vegetables during the final 2–3 minutes of cooking.
Continue air frying until the cheese melts and develops golden, crispy spots.
Keep an eye on the Parmesan during these final minutes because it can brown quickly.
Step 6: Check for doneness
The potatoes should be tender when pierced with a fork, while the vegetables should be roasted with lightly browned edges.
If the potatoes need more time, continue cooking for another 2–3 minutes and check again.
Step 7: Garnish and serve
Transfer everything to a serving dish and sprinkle with fresh parsley.
I like adding a little extra Parmesan and a squeeze of lemon just before serving. The lemon cuts through the richness and makes the vegetables taste even brighter.
Tips for Crispy Parmesan Potatoes and Vegetables
- Dry the potatoes well: Excess moisture can prevent them from becoming crisp.
- Don’t overcrowd the basket: Cook in batches if necessary for better browning.
- Start with the potatoes: They take longer to cook than most of the vegetables.
- Add Parmesan near the end: This keeps the cheese from burning before the potatoes are tender.
- Cut vegetables according to cooking time: Larger pieces of quick-cooking vegetables help everything finish together.
- Shake the basket regularly: This helps the ingredients brown on multiple sides.
Easy Variations
Cheesy Potato and Broccoli: Add extra Parmesan during the final minutes and sprinkle with mozzarella just before serving.
Spicy Parmesan Vegetables: Add ¼ teaspoon red pepper flakes or cayenne pepper to the seasoning.
Garlic Herb Version: Add fresh minced garlic and a little dried rosemary or thyme.
Mediterranean Style: Add cherry tomatoes during the last few minutes and finish with fresh parsley and lemon.
Add More Vegetables: Bell peppers, cauliflower, Brussels sprouts, and green beans can all work well. Just adjust the cooking time depending on how quickly they soften.
Make It a Complete Dinner
These Parmesan potatoes and vegetables work beautifully as a side dish, but you can easily turn them into a complete meal.
For a vegetarian dinner, serve them with:
- Fried or poached eggs
- Chickpeas
- White beans
- Grilled halloumi
- A simple yogurt sauce
For a heartier meal, pair them with grilled chicken, salmon, or air fryer meatballs.
If you’re looking for air fryer dinner ideas for 2, divide the cooked vegetables between two bowls and add your favorite protein. A little garlic yogurt sauce on top makes the whole meal feel extra comforting.
What to Serve with Parmesan Potatoes
If you’re making these as a side dish, they pair nicely with almost any main course. Try them alongside:
- Air fryer chicken thighs
- Garlic butter salmon
- BBQ chicken drumsticks
- Pork chops
- Roasted chicken
- Grilled fish
They are especially useful during winter because you get crispy, roasted vegetables without turning on the oven.
Why You’ll Love This Recipe
These crispy air fryer Parmesan potatoes and vegetables are simple, colorful, and full of comforting flavor. The potatoes have crispy golden edges, the vegetables become tender and roasted, and the Parmesan adds a delicious savory finish.
I like recipes like this because they are flexible. You don’t have to follow the vegetable combination perfectly, just use what you have, keep the pieces a similar size, and let the air fryer do the work. It is an easy addition to any air fryer dinner when you want something warm, crispy, and satisfying.
11. Air Fryer Garlic Butter Shrimp
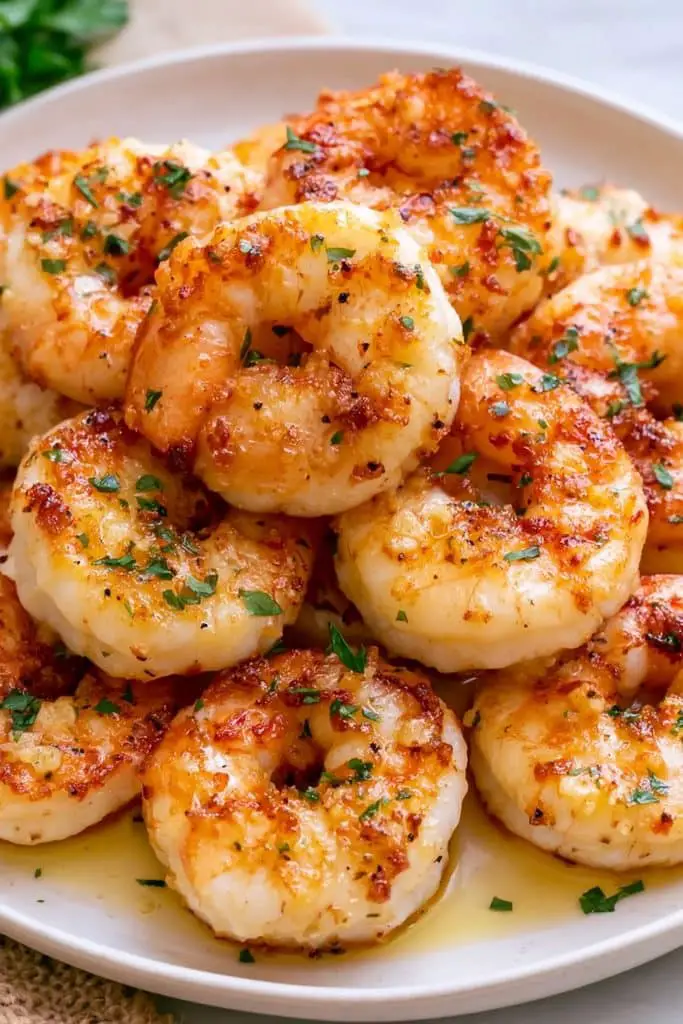
If you need a quick dinner that tastes like you spent much more time making it, these air fryer garlic butter shrimp are a perfect choice. The shrimp cook in just a few minutes and come out juicy, tender, and coated in a rich garlic butter sauce.
I especially like this recipe for busy evenings because there is very little prep involved. Pair the shrimp with rice, pasta, crusty bread, or roasted vegetables, and you have a complete meal without much fuss.
Prep Time: 8 minutes
Cook Time: 6–8 minutes
Total Time: 14–16 minutes
Difficulty: Easy
Servings: 2–3
Ingredients
- 1 lb (450 g) large shrimp, peeled and deveined
- 2 tablespoons unsalted butter, melted
- 1 tablespoon olive oil
- 3 garlic cloves, finely minced
- ½ teaspoon paprika
- ½ teaspoon Italian seasoning
- ¼ teaspoon salt
- ¼ teaspoon black pepper
- 1 tablespoon fresh lemon juice
- 1 tablespoon chopped fresh parsley
- Lemon wedges, for serving
Instructions
Step 1: Prepare the shrimp
If using frozen shrimp, thaw them completely and pat them very dry with paper towels. Removing excess moisture helps the shrimp roast rather than steam.
If your shrimp still have tails attached, you can leave them on for presentation or remove them for easier eating.
Step 2: Make the garlic butter mixture
In a medium bowl, combine the melted butter, olive oil, minced garlic, paprika, Italian seasoning, salt, and black pepper.
Add the shrimp and gently toss until every piece is coated.
I like adding a little olive oil along with the butter because it helps the seasoning coat the shrimp evenly and keeps the butter from being the only source of fat.
Step 3: Preheat the air fryer
Preheat your air fryer to 400°F (200°C) for about 3 minutes if your model recommends preheating.
Lightly spray the basket with oil if needed.
Step 4: Air fry the shrimp
Arrange the shrimp in a single layer in the air fryer basket. Try not to overlap them.
Air fry for 3–4 minutes, then shake the basket or turn the shrimp. Continue cooking for another 3–4 minutes.
The shrimp are ready when they are opaque and cooked through. Depending on their size and your air fryer, they may need slightly less or more time.
Step 5: Add the lemon and parsley
Transfer the cooked shrimp to a bowl and immediately toss them with fresh lemon juice and chopped parsley.
If you have any garlic butter left in the bowl, drizzle it over the shrimp before serving.
Tips for the Best Air Fryer Garlic Butter Shrimp
- Use large shrimp: They are less likely to overcook and become rubbery.
- Dry the shrimp well: Excess water can prevent good browning.
- Don’t overcrowd the basket: Arrange the shrimp in one layer so they cook evenly.
- Watch the cooking time: Shrimp cook very quickly, especially smaller ones.
- Use fresh garlic: It gives the butter sauce a much stronger flavor.
- Add lemon at the end: Fresh lemon keeps the flavor bright without overpowering the garlic butter.
How to Know When Shrimp Are Done
Shrimp should become opaque and firm when cooked. They should also curl into a loose C shape rather than a very tight circle.
For the most reliable result, use a food thermometer and cook shrimp to 145°F (63°C).
Try not to leave them in the air fryer longer than necessary. Overcooked shrimp can quickly become tough and chewy.
Easy Variations
Spicy Garlic Shrimp: Add ¼–½ teaspoon red pepper flakes or cayenne pepper to the garlic butter.
Lemon Herb Shrimp: Add fresh dill, parsley, and a little extra lemon zest.
Honey Garlic Shrimp: Add 1 teaspoon honey to the butter mixture for a sweet and savory glaze.
Parmesan Shrimp: Sprinkle 2 tablespoons finely grated Parmesan over the shrimp during the last minute of cooking.
Cajun Shrimp: Replace the paprika and Italian seasoning with your favorite Cajun seasoning for a bolder flavor.
What to Serve with Garlic Butter Shrimp
These shrimp are delicious with simple sides, so you can easily turn them into a complete dinner. Try serving them with:
- Steamed white rice
- Garlic butter pasta
- Creamy mashed potatoes
- Air fryer vegetables
- Roasted broccoli
- Crusty garlic bread
- Fresh green salad
For easy air fryer dinner recipes for two, I love serving the shrimp over warm rice with roasted broccoli on the side. The buttery garlic sauce drips into the rice, which makes every bite extra flavorful.
Turn It Into a Pasta Dinner
If you’re craving something a little more comforting, toss the cooked shrimp with your favorite pasta.
Add a little of the garlic butter, a splash of pasta water, fresh parsley, and Parmesan. You can also add spinach or roasted cherry tomatoes for extra color and flavor.
This is an especially easy way to turn a small batch of shrimp into a satisfying winter dinner.
Why You’ll Love This Recipe
These air fryer garlic butter shrimp are quick, flavorful, and incredibly easy to prepare. The shrimp cook in minutes, while the garlic butter, lemon, and parsley give them plenty of flavor without needing a long ingredient list.
I also love how flexible they are. Serve them with rice for a simple dinner, toss them with pasta for something cozy, or add roasted vegetables for a lighter meal. When you need a fast air fryer dinner recipe, this one is hard to beat.
12. Air Fryer Chicken Fajitas
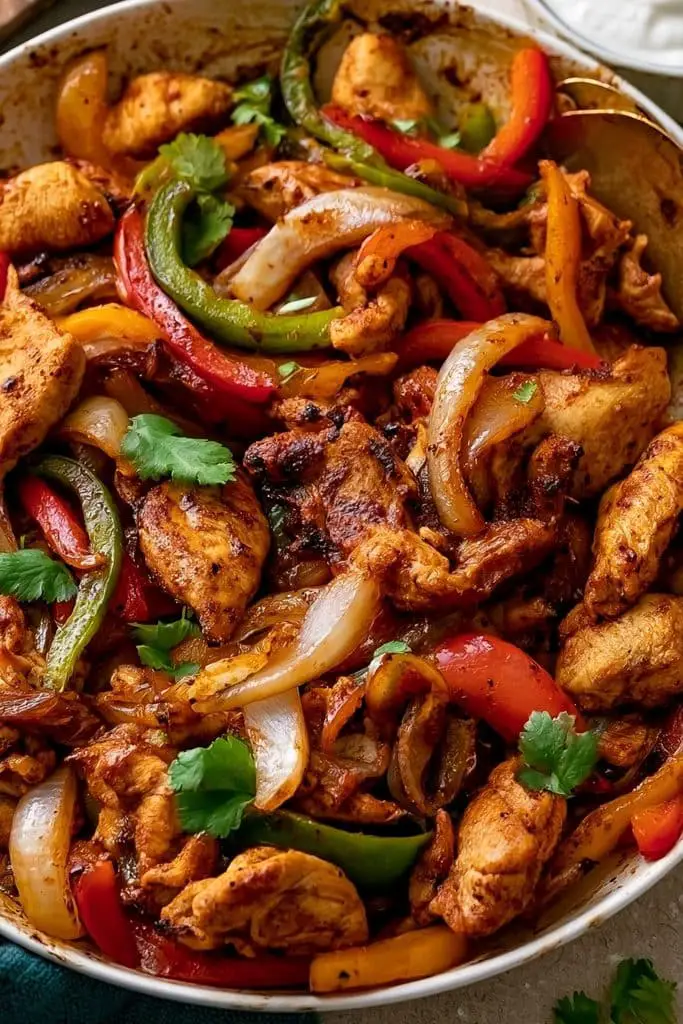
If you want a dinner that is quick, colorful, and full of flavor, these air fryer chicken fajitas are such a good option. The chicken gets nicely browned around the edges, while the peppers and onions become tender with a little bit of char.
I love recipes like this because everyone can build their own fajitas at the table. Add warm tortillas, avocado, sour cream, salsa, or cheese, and suddenly a simple air fryer meal feels like a fun family dinner.
Prep Time: 10 minutes
Cook Time: 12–15 minutes
Total Time: 22–25 minutes
Difficulty: Easy
Servings: 3–4
Ingredients
- 1 lb (450 g) boneless, skinless chicken breasts or thighs
- 1 red bell pepper, thinly sliced
- 1 yellow or green bell pepper, thinly sliced
- 1 small onion, thinly sliced
- 2 tablespoons olive oil
- 1 teaspoon chili powder
- 1 teaspoon paprika
- ½ teaspoon ground cumin
- ½ teaspoon garlic powder
- ½ teaspoon onion powder
- ½ teaspoon salt
- ¼ teaspoon black pepper
- Juice of ½ lime
For serving:
- 6–8 small flour or corn tortillas
- Sliced avocado
- Sour cream or Greek yogurt
- Salsa
- Shredded cheese
- Fresh cilantro
- Lime wedges
Instructions
Step 1: Slice the chicken
Pat the chicken dry with paper towels, then cut it into thin strips about ½ inch wide.
Try to keep the strips similar in size so they cook evenly. Thin strips also cook quickly and develop nicely browned edges in the air fryer.
Step 2: Prepare the vegetables
Slice the bell peppers and onion into thin, even strips.
I like using a combination of red, yellow, and green peppers because they give the fajitas plenty of color, but you can use whatever peppers you have available.
Step 3: Make the fajita seasoning
In a small bowl, combine the chili powder, paprika, cumin, garlic powder, onion powder, salt, and black pepper.
Add the seasoning, olive oil, and lime juice to the chicken and vegetables. Toss everything together until well coated.
Step 4: Preheat the air fryer
Preheat your air fryer to 390°F (200°C) for about 3 minutes if your model recommends preheating.
Lightly spray the basket with oil if needed.
Step 5: Cook the chicken and vegetables
Place the chicken, peppers, and onions in the air fryer basket in as close to a single layer as possible.
Air fry for 6–8 minutes, then shake the basket or toss everything with tongs.
Continue cooking for another 6–7 minutes, or until the chicken is cooked through and the vegetables are tender with lightly browned edges.
If your basket is small, cook in batches rather than overcrowding it.
Step 6: Check the chicken
Use a food thermometer to check the thickest pieces of chicken. They should reach 165°F (74°C) internally.
If the chicken needs another minute or two, continue cooking and check again.
Step 7: Warm the tortillas
While the fajita filling cooks, warm the tortillas in a dry skillet, microwave, or air fryer for a short time.
Keep them covered with a clean kitchen towel so they stay warm and soft.
Step 8: Assemble the fajitas
Fill each warm tortilla with the chicken, peppers, and onions. Add your favorite toppings, such as avocado, sour cream, salsa, shredded cheese, and fresh cilantro.
Finish with an extra squeeze of lime for a fresh, bright flavor.
Tips for the Best Air Fryer Chicken Fajitas
- Slice the chicken thinly: This helps it cook quickly and evenly.
- Don’t overcrowd the basket: Too much food at once can cause the chicken and vegetables to steam instead of brown.
- Cut vegetables evenly: Similar-sized strips will cook at roughly the same rate.
- Use chicken thighs for extra juiciness: They work especially well if you prefer darker meat.
- Add lime at the end: A final squeeze of fresh lime makes the fajitas taste brighter.
- Warm the tortillas: This small step makes the finished fajitas much more enjoyable.
Easy Variations
Steak Fajitas: Replace the chicken with thinly sliced steak. Adjust the cooking time according to the thickness and desired doneness.
Shrimp Fajitas: Use peeled and deveined shrimp and cook them separately from the vegetables because shrimp cook much faster.
Vegetarian Fajitas: Skip the chicken and add extra peppers, mushrooms, zucchini, or black beans.
Spicy Chicken Fajitas: Add cayenne pepper or sliced jalapeños to the mixture.
Cheesy Fajitas: Sprinkle shredded cheddar or Monterey Jack over the hot chicken and vegetables before serving.
What to Serve with Chicken Fajitas
These fajitas already make a complete dinner, but a few simple sides can turn them into a bigger meal. Try serving them with:
- Mexican-style rice
- Black beans
- Corn salad
- Guacamole
- Salsa
- Pico de gallo
- Tortilla chips
- Fresh green salad
For air fryer dinner ideas for 2, simply halve the ingredients and make four smaller fajitas. Add some avocado and a little salsa, and you have a quick dinner without a lot of leftovers.
Make a Simple Fajita Bowl
If you don’t want tortillas, turn the same recipe into a fajita bowl.
Start with warm rice, then add the air fryer chicken, peppers, and onions. Top with avocado, black beans, salsa, cilantro, and a squeeze of lime.
This is also a great option for meal prep because the chicken and vegetables can be reheated and served in different ways throughout the week.
Why You’ll Love This Recipe
These air fryer chicken fajitas are one of those easy air fryer dinner recipes that make a regular weeknight feel a little more exciting. The chicken is seasoned with warm spices, the peppers become tender and slightly charred, and the fresh toppings bring everything together.
I also love how customizable they are. Everyone can add their favorite toppings, so you can make the fajitas mild, spicy, cheesy, or extra fresh depending on what you’re in the mood for.
13. Air Fryer Salmon Bites with Honey Garlic Glaze
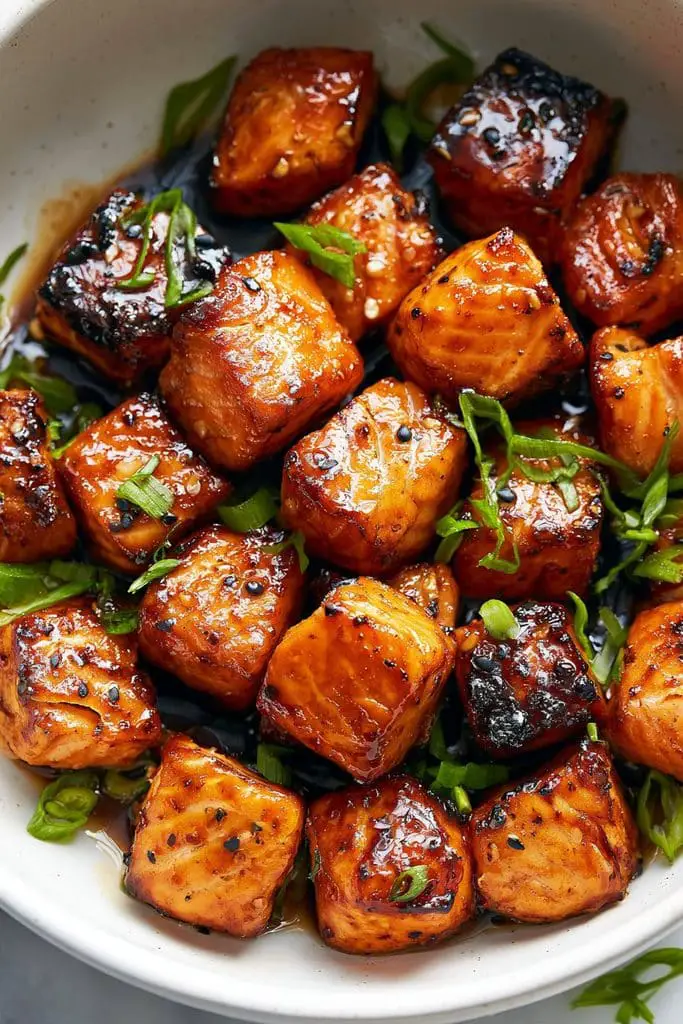
If you love salmon but want something a little more fun than a whole fillet, these air fryer salmon bites with honey garlic glaze are a great choice. The salmon is cut into bite-sized pieces, air fried until lightly crisp around the edges, and then coated in a sweet and savory honey garlic glaze.
I really like this style of salmon for a quick dinner because the small pieces cook fast and pick up plenty of flavor. Serve them over rice, tuck them into wraps, or pair them with roasted vegetables for an easy winter meal.
Prep Time: 10 minutes
Cook Time: 8–10 minutes
Total Time: 18–20 minutes
Difficulty: Easy
Servings: 2–3
Ingredients
For the salmon:
- 1 lb (450 g) skinless salmon fillet, cut into 1-inch cubes
- 1 tablespoon olive oil
- ½ teaspoon paprika
- ½ teaspoon garlic powder
- ¼ teaspoon salt
- ¼ teaspoon black pepper
- 1 tablespoon cornstarch
For the honey garlic glaze:
- 3 tablespoons honey
- 2 tablespoons soy sauce
- 2 garlic cloves, minced
- 1 tablespoon fresh lemon juice
- ½ teaspoon grated fresh ginger, optional
- 1 teaspoon cornstarch
- 1 tablespoon water
For serving:
- Sesame seeds
- Sliced green onions
- Lemon wedges
- Cooked rice or vegetables
Instructions
Step 1: Cut the salmon
Remove the skin and any bones from the salmon fillet. Cut it into evenly sized pieces, about 1 inch each.
Pat the salmon dry with paper towels. Keeping the pieces similar in size helps them cook at the same rate.
Step 2: Season the salmon
Place the salmon cubes in a bowl and add olive oil, paprika, garlic powder, salt, black pepper, and cornstarch.
Gently toss until each piece is lightly coated. The cornstarch helps create slightly crisp edges in the air fryer.
Step 3: Preheat the air fryer
Preheat the air fryer to 400°F (200°C) for about 3 minutes if your model recommends preheating.
Lightly spray the basket with oil.
Step 4: Air fry the salmon
Arrange the salmon pieces in a single layer, leaving some space between them.
Air fry for 4–5 minutes, then gently shake the basket or turn the salmon pieces. Continue cooking for another 4–5 minutes, depending on the size of the pieces.
The salmon should be opaque and cooked through. For the most reliable result, check the thickest piece with a food thermometer; fish should reach 145°F (63°C).
Step 5: Make the honey garlic glaze
While the salmon cooks, add the honey, soy sauce, minced garlic, lemon juice, and ginger to a small saucepan.
Mix the cornstarch with 1 tablespoon water in a small bowl to make a slurry. Add it to the saucepan and cook over medium-low heat for about 1–2 minutes, stirring constantly, until the glaze thickens slightly.
Don’t let it boil aggressively because the honey can burn.
Step 6: Coat the salmon
Transfer the cooked salmon bites to a bowl. Pour the warm honey garlic glaze over them and gently toss until each piece is coated.
If you prefer the salmon extra crispy, toss it lightly rather than soaking the pieces in too much sauce.
Step 7: Garnish and serve
Sprinkle the salmon bites with sesame seeds and sliced green onions. Add a squeeze of fresh lemon just before serving.
Serve immediately while the salmon is warm and the glaze is glossy.
Tips for the Best Salmon Bites
- Use a firm salmon fillet: Fresh or properly thawed frozen salmon both work well.
- Dry the salmon first: This helps the outside brown instead of steam.
- Cut the pieces evenly: Similar-sized cubes will cook at the same rate.
- Don’t overcrowd the basket: Give each salmon bite enough room for hot air to circulate.
- Add the glaze after cooking: This keeps the salmon edges crisp and prevents the honey from burning.
- Don’t overcook the salmon: Small pieces cook quickly, so start checking them early.
Easy Variations
Spicy Honey Garlic Salmon: Add ½ teaspoon chili flakes or sriracha to the glaze.
Maple Garlic Salmon: Replace the honey with maple syrup for a slightly deeper sweetness.
Lemon Pepper Salmon: Add extra lemon zest and black pepper to the salmon seasoning.
Teriyaki-Style Salmon Bites: Replace the honey garlic glaze with your favorite teriyaki sauce and finish with sesame seeds.
Garlic Butter Salmon Bites: Skip the honey glaze and toss the cooked salmon with melted butter, garlic, lemon, and parsley.
What to Serve with Salmon Bites
These little salmon pieces are incredibly versatile. I like serving them with:
- Steamed jasmine rice
- Garlic butter rice
- Air fryer broccoli
- Roasted carrots
- Stir-fried vegetables
- Cucumber salad
- Avocado
- Noodles
For air fryer dinner ideas for 2, serve the salmon bites over warm rice with broccoli and sliced avocado. Drizzle any extra honey garlic glaze over the rice, and you have a filling dinner with very little effort.
Make a Salmon Rice Bowl
One of my favorite ways to serve these salmon bites is as a simple rice bowl.
Start with warm rice, then add the honey garlic salmon, cucumber slices, avocado, shredded carrots, and green onions. Finish with sesame seeds and a little extra glaze.
You can also add a drizzle of spicy mayo if you enjoy a little heat.
Why You’ll Love This Recipe
These air fryer salmon bites with honey garlic glaze are quick, flavorful, and perfect when you want something a little different. The salmon gets lightly crisp around the edges, while the sticky glaze brings together sweet honey, savory soy sauce, fresh garlic, and a touch of lemon.
I love that you can serve them in so many ways. Turn them into rice bowls, serve them with vegetables, or wrap them in warm tortillas. They are an easy addition to your collection of air fryer dinner recipes and a lovely choice for a cozy winter night.
14. Air Fryer Crispy Gnocchi with Roasted Vegetables
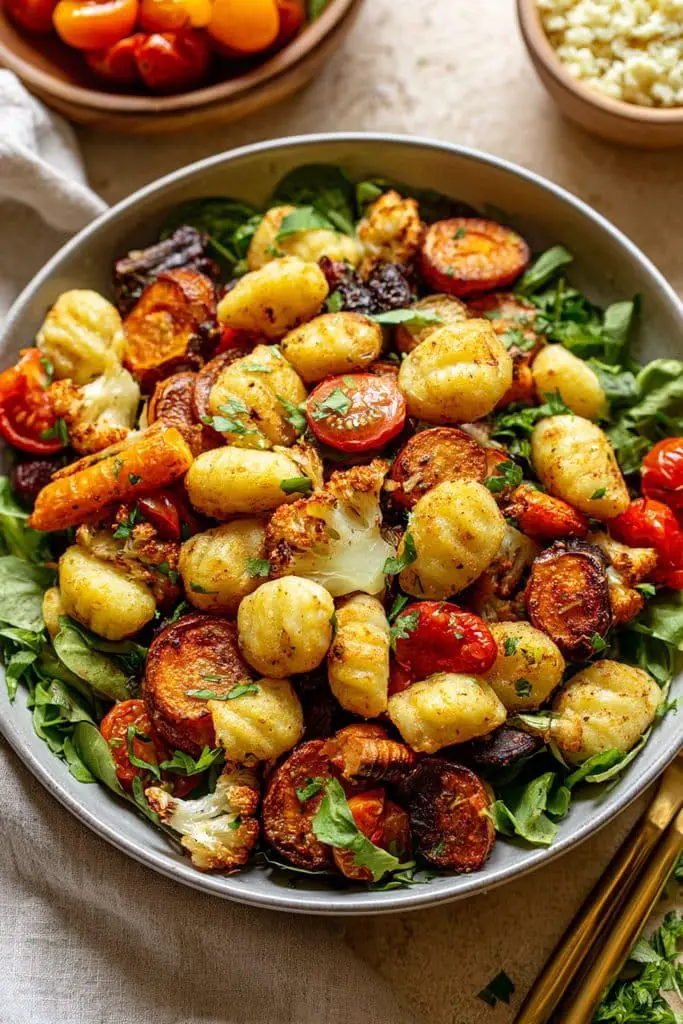
If you’ve never tried gnocchi in the air fryer, you’re in for a treat. Instead of boiling it until soft, you can toss shelf-stable or refrigerated gnocchi straight into the air fryer and turn it into little golden, crispy bites.
I love pairing the gnocchi with colorful roasted vegetables because everything cooks together with very little effort. Add some Parmesan, garlic, and Italian herbs, and you have a cozy meatless dinner that feels much more special than the amount of work it takes.
Prep Time: 10 minutes
Cook Time: 15–18 minutes
Total Time: 25–28 minutes
Difficulty: Easy
Servings: 3–4
Ingredients
- 1 package (16 oz/450 g) shelf-stable or refrigerated gnocchi
- 1 red bell pepper, cut into bite-sized pieces
- 1 small zucchini, sliced
- 1 cup broccoli florets
- 1 small red onion, cut into chunks
- 2 tablespoons olive oil
- 1 teaspoon garlic powder
- 1 teaspoon Italian seasoning
- ½ teaspoon paprika
- ½ teaspoon salt
- ¼ teaspoon black pepper
- ½ cup grated Parmesan cheese
- 1 tablespoon fresh parsley, chopped
- Lemon wedges, for serving
Instructions
Step 1: Prepare the vegetables
Wash and cut the vegetables into similar-sized pieces so they roast evenly.
I like using a mix of bell pepper, zucchini, broccoli, and red onion, but you can easily adjust the vegetables based on what you have in the fridge.
Step 2: Season the gnocchi and vegetables
Add the gnocchi and vegetables to a large bowl. Drizzle with olive oil and sprinkle with garlic powder, Italian seasoning, paprika, salt, and black pepper.
Toss everything gently until the gnocchi and vegetables are evenly coated.
Step 3: Preheat the air fryer
Preheat your air fryer to 390°F (200°C) for about 3 minutes if your model calls for preheating.
Give the basket a light spray of oil if needed to prevent sticking.
Step 4: Air fry the gnocchi and vegetables
Place the gnocchi and vegetables in the air fryer basket in as close to a single layer as possible.
Air fry for 8 minutes, then shake the basket well. Continue cooking for another 7–10 minutes, shaking once more if needed.
The gnocchi should be golden and crisp on the outside, while the vegetables should be tender with lightly browned edges.
Step 5: Add the Parmesan
Sprinkle the Parmesan over the cooked gnocchi and vegetables during the final 2–3 minutes of cooking.
Return the basket to the air fryer and cook until the cheese melts and starts to turn lightly golden.
Keep an eye on it during this final step because Parmesan can brown quickly.
Step 6: Garnish and serve
Transfer everything to a serving bowl or platter. Sprinkle with fresh parsley and finish with a squeeze of lemon juice.
Serve while hot and crispy.
Tips for Crispy Air Fryer Gnocchi
- Don’t boil the gnocchi first: Shelf-stable and refrigerated gnocchi can usually go straight into the air fryer.
- Don’t overcrowd the basket: Too much gnocchi at once can make it steam instead of crisp.
- Cut vegetables evenly: This helps everything finish cooking around the same time.
- Shake the basket: A couple of good shakes help the gnocchi brown on multiple sides.
- Use enough oil: You don’t need much, but a light coating helps the gnocchi become golden and crisp.
- Add Parmesan near the end: This keeps the cheese from burning before the gnocchi is ready.
Easy Variations
Garlic Butter Gnocchi: Toss the finished gnocchi with a little melted butter, fresh garlic, and parsley instead of using only olive oil.
Cheesy Gnocchi: Add shredded mozzarella or a little extra Parmesan during the final few minutes.
Spicy Gnocchi: Add ¼–½ teaspoon red pepper flakes or a pinch of cayenne to the seasoning.
Mediterranean Style: Add cherry tomatoes, sliced red onion, olives, and a little crumbled feta after cooking.
Add Chicken: For a heartier meal, add cooked chicken pieces to the finished gnocchi and vegetables.
Creamy Gnocchi Bowl: Serve the crispy gnocchi with a spoonful of warm Alfredo sauce or a simple garlic cream sauce.
What to Serve with Crispy Gnocchi
This recipe is filling enough to enjoy on its own, but I like adding a simple side when I’m serving it as a full dinner.
Try it with:
- A fresh green salad
- Garlic bread
- Steamed green beans
- Tomato cucumber salad
- Roasted asparagus
- Creamy tomato soup
- Grilled or air-fried chicken
For a cozy dinner idea for a winter night, serve the crispy gnocchi alongside a warm bowl of tomato soup. The combination of crispy, cheesy gnocchi and creamy soup is especially comforting.
Turn It Into a Complete Dinner
If you’re feeding a family or want leftovers, you can easily bulk up this air fryer dinner.
Add extra vegetables such as mushrooms, carrots, Brussels sprouts, or yellow squash. You can also add cooked chicken sausage or leftover roasted chicken for more protein.
For a vegetarian meal, keep it simple with extra vegetables and Parmesan, then serve it with a fresh salad on the side.
Why You’ll Love This Recipe
This air fryer crispy gnocchi with roasted vegetables is one of those easy dinners that doesn’t feel boring. The gnocchi gets wonderfully crisp on the outside while staying soft and tender inside, and the roasted vegetables add color, freshness, and plenty of flavor.
I especially like this recipe for busy winter evenings because there’s no need to boil pasta or spend a lot of time at the stove. Just season everything, let the air fryer do the work, finish with Parmesan and lemon, and dinner is ready.