
Thanksgiving is one of my favorite holidays because it brings everyone together around a comforting meal, and, of course, a table full of dessert. But when there are so many dishes to prepare, I don’t want to leave all the baking until the last minute.
That’s why I love Thanksgiving make ahead desserts. You can prepare many of them a day or even several days before Thanksgiving, so there’s less stress in the kitchen when your guests arrive. From classic pies to creamy cheesecakes and easy fruit desserts, there are plenty of amazing Thanksgiving desserts you can prepare ahead of time.
1. Classic Pumpkin Pie
Pumpkin pie is one of those desserts I can’t imagine Thanksgiving without. It has a creamy pumpkin filling, warm spices, and a buttery crust that makes every bite feel like a holiday treat.
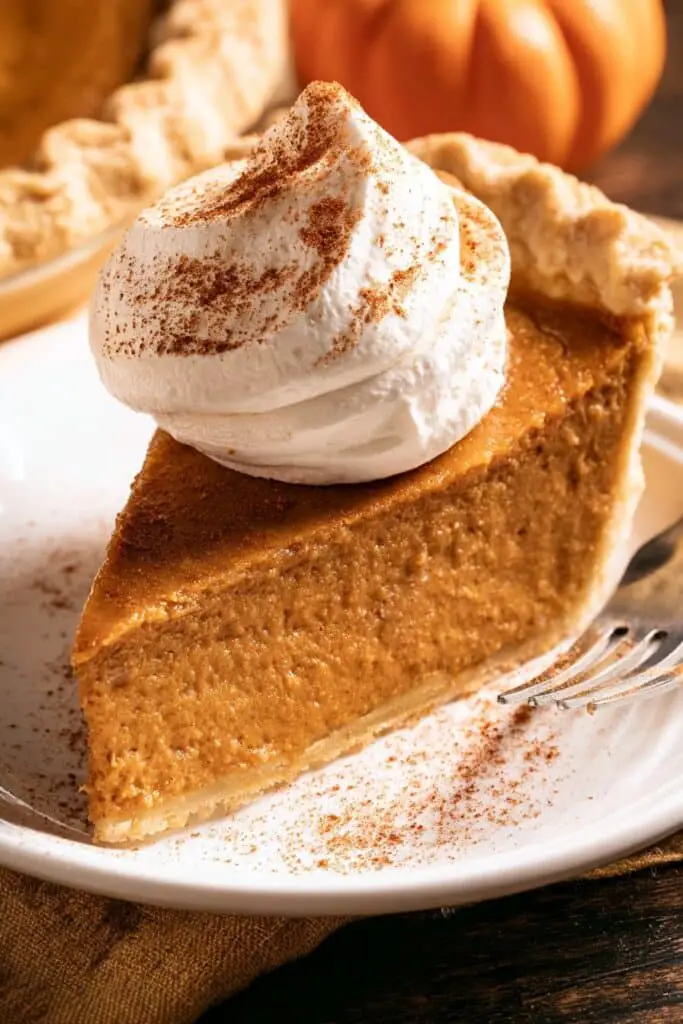
What I especially love about this pie is that it is easy to prepare ahead. You can bake it the day before Thanksgiving and let it chill in the refrigerator overnight, which makes it perfect when you want to keep your holiday cooking simple and organized.
Prep Time: 20 minutes
Cook Time: 50–60 minutes
Total Time: About 1 hour 20 minutes
Difficulty: Easy
Servings: 8 slices
Ingredients
For the Pie
- 1 unbaked 9-inch pie crust
- 1 can (15 ounces) pumpkin purée
- 3/4 cup granulated sugar
- 1/2 teaspoon salt
- 1 teaspoon ground cinnamon
- 1/2 teaspoon ground ginger
- 1/4 teaspoon ground nutmeg
- 1/8 teaspoon ground cloves
- 2 large eggs
- 1 can (12 ounces) evaporated milk
- 1 teaspoon vanilla extract
For Serving
- Whipped cream, optional
- A little extra ground cinnamon, optional
How to Make Classic Pumpkin Pie
- Preheat the oven.
Preheat your oven to 425°F (220°C). Place the unbaked pie crust into a 9-inch pie dish and gently press it into place. - Prepare the pumpkin filling.
In a large bowl, whisk together the pumpkin purée, sugar, salt, cinnamon, ginger, nutmeg, and cloves. - Add the eggs.
Beat in the eggs one at a time until the mixture is smooth and well combined. - Add the milk and vanilla.
Slowly whisk in the evaporated milk and vanilla extract. The filling should be smooth and fairly thin. - Fill the crust.
Pour the pumpkin mixture into the prepared pie crust. Be careful not to overfill the crust. - Start baking at high heat.
Bake the pie at 425°F (220°C) for about 15 minutes. This helps the crust get a good start before lowering the temperature. - Reduce the temperature.
Lower the oven temperature to 350°F (175°C) and continue baking for about 35–45 minutes. - Check for doneness.
The edges of the filling should look set, while the center can still have a slight jiggle when you gently move the pie. - Cool completely.
Remove the pie from the oven and place it on a cooling rack. Let it cool completely before slicing. - Chill and serve.
For the best texture, refrigerate the cooled pie until serving. Add whipped cream and a light sprinkle of cinnamon if you like.
A Few Variations
You can make this pie slightly different depending on what your family likes. For a stronger spice flavor, add a little extra cinnamon or ginger.
You can also serve each slice with whipped cream, vanilla ice cream, or a drizzle of caramel sauce. I personally love keeping it simple with a generous spoonful of whipped cream.
2. Classic Pecan Pie
Pecan pie is another Thanksgiving dessert that always feels special to me. The combination of crunchy pecans, buttery pastry, and sweet, rich filling makes it a perfect choice for a holiday table.
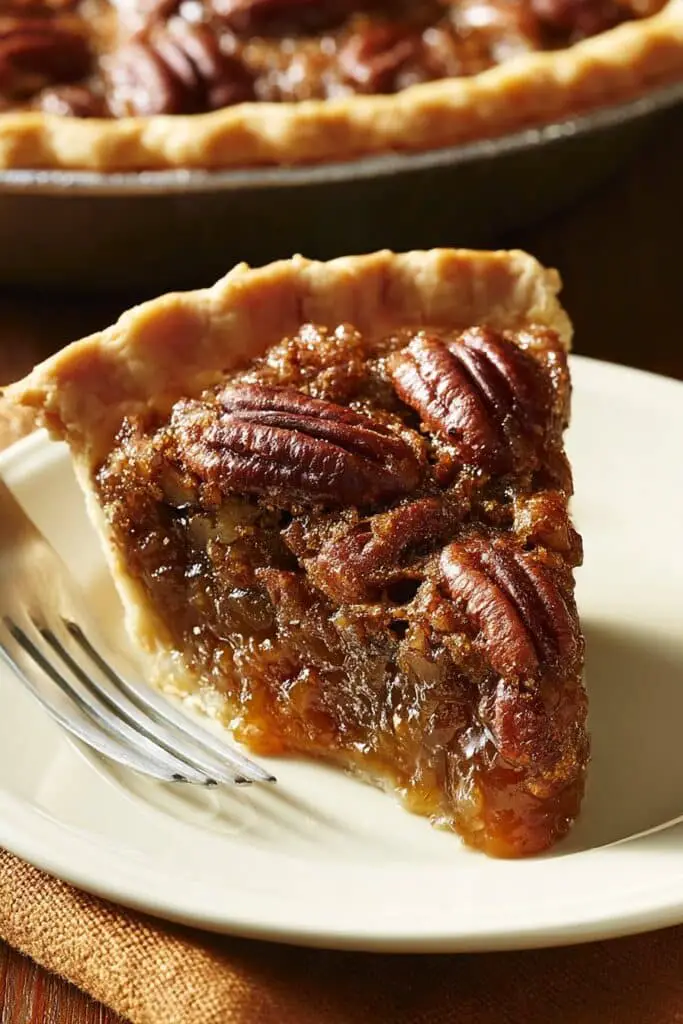
I especially like this pie because it can be made ahead of time. You can prepare and bake it a day or two before Thanksgiving, giving the filling plenty of time to set. That makes it a great option when you want easy Thanksgiving desserts that don’t need much work on the big day.
Prep Time: 20 minutes
Cook Time: 50–60 minutes
Total Time: About 1 hour 20 minutes
Difficulty: Easy
Servings: 8 slices
Ingredients
For the Pie
- 1 unbaked 9-inch pie crust
- 1 cup light corn syrup
- 1 cup granulated sugar
- 1/4 cup unsalted butter, melted and slightly cooled
- 3 large eggs
- 1 teaspoon vanilla extract
- 1/2 teaspoon salt
- 1 1/2 cups pecan halves or pieces
How to Make Classic Pecan Pie
- Preheat the oven.
Preheat your oven to 350°F (175°C). Place the pie crust into a 9-inch pie dish and gently press it into the bottom and sides. - Prepare the filling.
In a large bowl, whisk together the corn syrup, sugar, melted butter, eggs, vanilla extract, and salt. Keep whisking until everything is well combined and smooth. - Add the pecans.
Stir the pecans into the filling. I like using a mixture of pecan halves and smaller pieces because it gives the pie a nice combination of texture. - Fill the crust.
Pour the pecan mixture into the prepared pie crust. Spread the pecans evenly so you get plenty in every slice. - Bake the pie.
Place the pie in the preheated oven and bake for about 50–60 minutes. The center should look set but may still have a slight jiggle when gently moved. - Protect the crust if needed.
If the edges of the crust start browning too quickly, loosely cover them with aluminum foil during the later part of baking. - Cool completely.
Remove the pie from the oven and place it on a wire rack. Let it cool completely before slicing so the filling has enough time to set. - Slice and serve.
Once cooled, slice the pie and serve it as it is, or add whipped cream or vanilla ice cream for an extra special holiday dessert.
My Make-Ahead Tips
Pecan pie is one of those Thanksgiving make ahead desserts that actually gets easier when you prepare it ahead. I usually recommend making it 1–2 days before Thanksgiving so you don’t have to worry about baking another dessert while preparing the main meal.
Once the pie has cooled completely, cover it well and refrigerate it. Take it out a little before serving so it isn’t too cold.
You can also prepare the pie crust ahead of time. If you are planning several make ahead desserts to freeze for Thanksgiving, the unbaked pie dough can be wrapped well and frozen for later use.
3. Apple Crumble Pie
I’ve always loved apple pie, but sometimes I want something a little different. That’s where apple crumble pie comes in. It has the familiar warm apple filling I love, but instead of a traditional top crust, it gets a buttery, golden crumble topping.
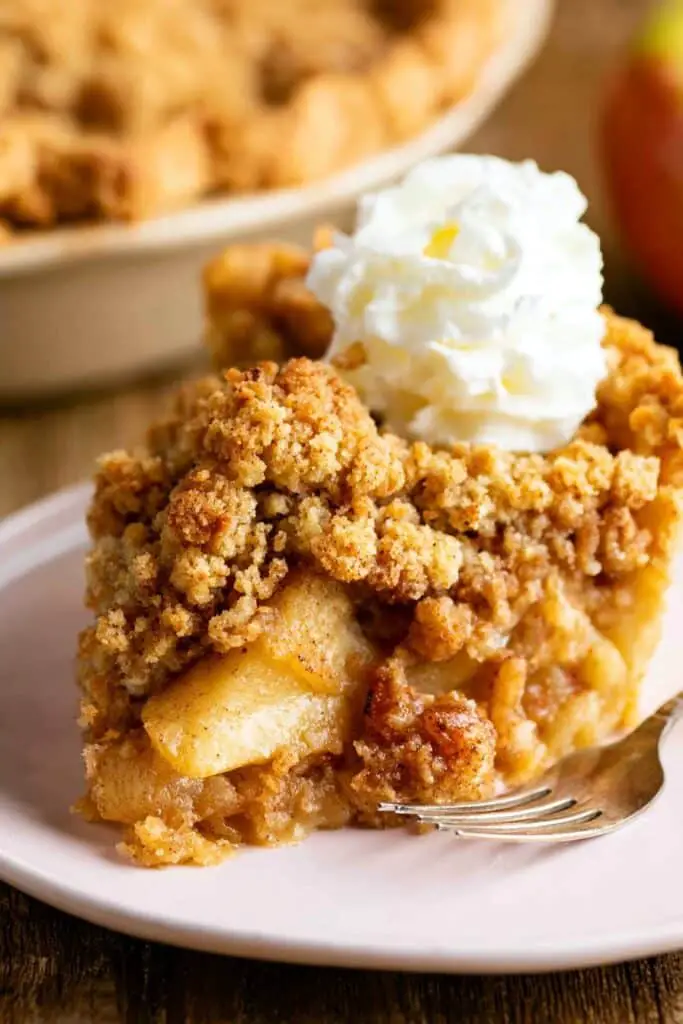
The best part is that this pie works beautifully as a Thanksgiving make ahead dessert. You can prepare it before the holiday and have one less thing to worry about when your guests arrive. The combination of tender apples, warm cinnamon, and crunchy crumble makes it one of those cozy holiday desserts that everyone seems to enjoy.
Prep Time: 30 minutes
Cook Time: 50–60 minutes
Total Time: About 1 hour 30 minutes
Difficulty: Easy to moderate
Servings: 8 slices
Ingredients
For the Pie
- 1 unbaked 9-inch pie crust
- 6 medium apples, peeled, cored, and thinly sliced
- 1/2 cup granulated sugar
- 1 tablespoon lemon juice
- 1 teaspoon ground cinnamon
- 1/4 teaspoon ground nutmeg
- 2 tablespoons all-purpose flour
- 1 teaspoon vanilla extract
For the Crumble Topping
- 3/4 cup all-purpose flour
- 1/2 cup old-fashioned rolled oats
- 1/3 cup packed brown sugar
- 1/4 teaspoon ground cinnamon
- 1/4 teaspoon salt
- 6 tablespoons unsalted butter, melted
How to Make Apple Crumble Pie
- Prepare the oven and crust.
Preheat your oven to 375°F (190°C). Place the unbaked pie crust into a 9-inch pie dish and gently press it into place. - Prepare the apples.
Peel, core, and slice the apples fairly evenly. Using a mixture of sweet and tart apples gives the filling a nice balance of flavor. - Season the apple filling.
Add the apples to a large bowl and toss them with sugar, lemon juice, cinnamon, nutmeg, flour, and vanilla extract. Make sure the apples are evenly coated. - Fill the pie crust.
Transfer the apple mixture to the prepared pie crust. Arrange the apples evenly and gently press them down so there aren’t large empty spaces. - Make the crumble topping.
In another bowl, combine the flour, oats, brown sugar, cinnamon, and salt. Pour in the melted butter and mix until coarse crumbs form. - Add the topping.
Sprinkle the crumble mixture evenly over the apples. Try to cover most of the surface while still leaving a few small spaces for the apple filling to peek through. - Bake the pie.
Place the pie on a baking sheet and bake for about 50–60 minutes. The apples should be tender and the crumble topping should be golden brown. - Watch the crust.
If the edges of the pie crust start browning too quickly, loosely cover them with aluminum foil during the second half of baking. - Let it cool.
Remove the pie from the oven and let it cool on a wire rack. Give it enough time to cool and set before slicing. - Serve and enjoy.
Serve the pie at room temperature or slightly warm. A scoop of vanilla ice cream makes it even better.
Choosing the Right Apples
I like using apples that hold their shape during baking rather than apples that become completely soft and mushy. Granny Smith, Honeycrisp, and Braeburn are good choices, and combining two varieties can give the filling more depth.
The tartness of the apples also works nicely with the sweet crumble topping. This balance keeps the pie from tasting overly sweet, which I think is especially important when you’re serving several Thanksgiving desserts after a big meal.
4. Pumpkin Cheesecake
When I want something a little more special than a traditional pie, pumpkin cheesecake is one of my favorite choices..
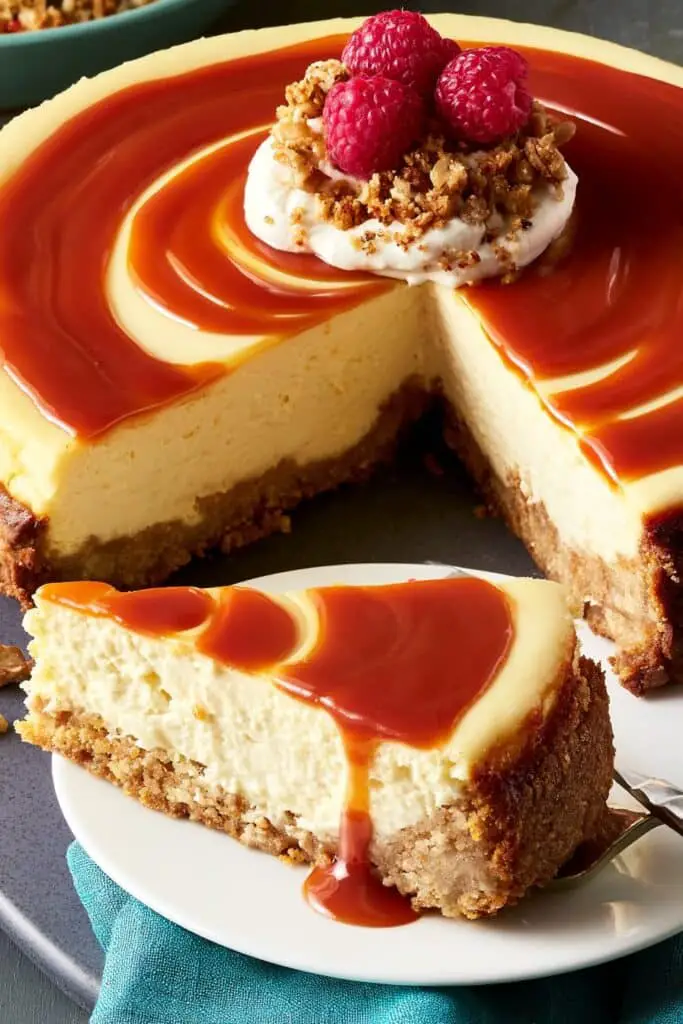
It may look more impressive than some of the other desserts on this list, but it is actually very manageable when you take your time. I also love that it is perfect for making ahead because cheesecake needs plenty of time to cool and chill before serving.
Prep Time: 25 minutes
Cook Time: 60–70 minutes
Chilling Time: At least 4 hours
Total Time: About 5 hours
Difficulty: Moderate
Servings: 10–12 slices
Ingredients
For the Crust
- 2 cups graham cracker crumbs
- 5 tablespoons unsalted butter, melted
- 2 tablespoons granulated sugar
- 1/4 teaspoon ground cinnamon
For the Pumpkin Cheesecake Filling
- 24 ounces cream cheese, softened
- 1 cup granulated sugar
- 1 cup pumpkin purée
- 3 large eggs
- 1 teaspoon vanilla extract
- 1 teaspoon ground cinnamon
- 1/2 teaspoon ground ginger
- 1/4 teaspoon ground nutmeg
- 1/8 teaspoon ground cloves
- 1/4 teaspoon salt
For Serving
- Whipped cream, optional
- A light sprinkle of cinnamon, optional
How to Make Pumpkin Cheesecake
- Prepare the oven.
Preheat your oven to 350°F (175°C). Lightly grease the bottom and sides of a 9-inch springform pan. - Make the crust.
In a bowl, combine the graham cracker crumbs, melted butter, sugar, and cinnamon. Mix until the crumbs are evenly moistened. - Press the crust into the pan.
Transfer the crumb mixture to the springform pan and press it firmly into an even layer across the bottom. Bake the crust for about 8–10 minutes, then remove it and let it cool slightly. - Beat the cream cheese.
In a large bowl, beat the softened cream cheese and sugar until smooth and creamy. Try not to overbeat the mixture once it becomes smooth. - Add the pumpkin and spices.
Mix in the pumpkin purée, vanilla, cinnamon, ginger, nutmeg, cloves, and salt until everything is well combined. - Add the eggs.
Add the eggs one at a time, mixing just until each egg is incorporated. Avoid overmixing, as too much air can contribute to cracks in the cheesecake. - Fill the crust.
Pour the pumpkin cheesecake mixture over the cooled crust and smooth the top with a spatula. - Bake the cheesecake.
Bake for about 60–70 minutes, or until the edges are set and the center still has a slight wobble when gently shaken. - Cool slowly.
Turn off the oven, crack the oven door open slightly, and let the cheesecake sit inside for about 30 minutes. This gentle cooling can help reduce the chance of sudden cracking. - Chill completely.
Remove the cheesecake from the oven and let it cool to room temperature. Cover it and refrigerate for at least 4 hours, preferably overnight. - Serve.
Carefully remove the springform pan before slicing. Add whipped cream and a small sprinkle of cinnamon if you like.
How to Prevent Cheesecake Cracks
There are a few simple things that can make a big difference. First, make sure your cream cheese is softened before mixing so you don’t have to beat the filling excessively.
Also, avoid opening the oven repeatedly while the cheesecake is baking. Most importantly, don’t worry if the center still has a slight jiggle when you take it out—it will continue to set as it cools and chills.
5. Sweet Potato Pie
Sweet potato pie is one of those Thanksgiving desserts that feels simple, comforting, and full of holiday flavor. It has a creamy, smooth filling made with sweet potatoes, warm spices, and a buttery crust.
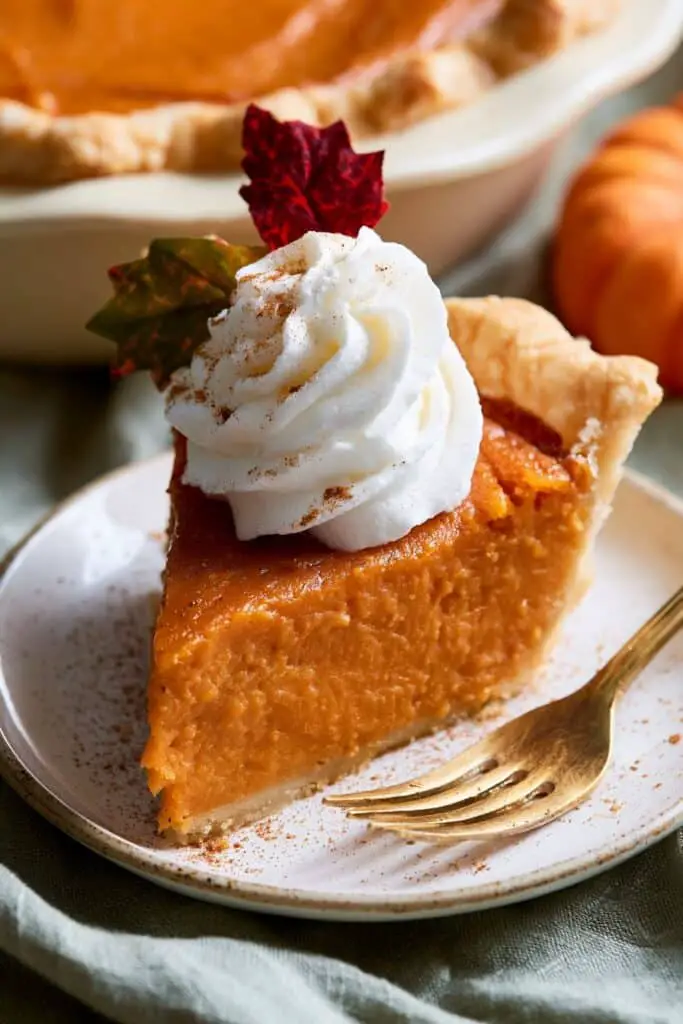
I especially like this pie when I want something a little different from pumpkin pie. The sweet potatoes give it a naturally rich flavor, while cinnamon, nutmeg, and vanilla bring everything together. It is also a wonderful make ahead Thanksgiving dessert because the pie can be baked ahead and chilled until you’re ready to serve it.
Prep Time: 25 minutes
Cook Time: 50–60 minutes
Total Time: About 1 hour 25 minutes
Difficulty: Easy to moderate
Servings: 8 slices
Ingredients
For the Pie
- 1 unbaked 9-inch pie crust
- 2 cups mashed cooked sweet potatoes
- 1/2 cup unsalted butter, melted
- 3/4 cup granulated sugar
- 2 large eggs
- 1/2 cup evaporated milk
- 1 teaspoon vanilla extract
- 1 teaspoon ground cinnamon
- 1/2 teaspoon ground nutmeg
- 1/4 teaspoon ground ginger
- 1/4 teaspoon salt
For Serving
- Whipped cream, optional
- Ground cinnamon, optional
- Chopped pecans, optional
How to Make Sweet Potato Pie
- Prepare the sweet potatoes.
Cook the sweet potatoes until they are completely tender. You can bake, boil, or steam them. Once cool enough to handle, remove the skins and mash the flesh until smooth. - Preheat the oven.
Preheat your oven to 350°F (175°C). Place the unbaked pie crust into a 9-inch pie dish and gently press it into place. - Make the sweet potato filling.
Add the mashed sweet potatoes, melted butter, sugar, eggs, evaporated milk, vanilla, cinnamon, nutmeg, ginger, and salt to a large bowl. - Mix until smooth.
Beat the ingredients together until the filling is smooth and creamy. If your sweet potatoes are fibrous, you can pass the mashed potatoes through a fine sieve for an extra-smooth texture. - Fill the crust.
Pour the sweet potato mixture into the prepared pie crust. Smooth the surface with the back of a spoon or spatula. - Bake the pie.
Bake for about 50–60 minutes, or until the edges of the filling are set and the center has only a slight jiggle. - Cool completely.
Remove the pie from the oven and place it on a wire rack. Let it cool completely before slicing. - Chill before serving.
Once cooled, cover the pie and refrigerate it until you’re ready to serve. - Add your toppings.
Serve each slice with whipped cream, a light sprinkle of cinnamon, or a few chopped pecans if desired.
How to Get a Smooth Sweet Potato Filling
The texture of your sweet potatoes makes a big difference. I recommend cooking them until they are very soft and then mashing them thoroughly before adding the other ingredients.
For an especially silky pie, blend the cooked sweet potatoes in a food processor or pass them through a fine-mesh sieve. This small extra step can make the finished dessert feel much smoother and more delicate.
6. Cranberry Curd Bars With Walnut Shortbread Crust
After all the rich pies and creamy desserts, I like having something with a little brightness on the Thanksgiving table. These cranberry curd bars are a beautiful choice because the cranberry filling has a naturally tart flavor that balances the buttery walnut shortbread crust.
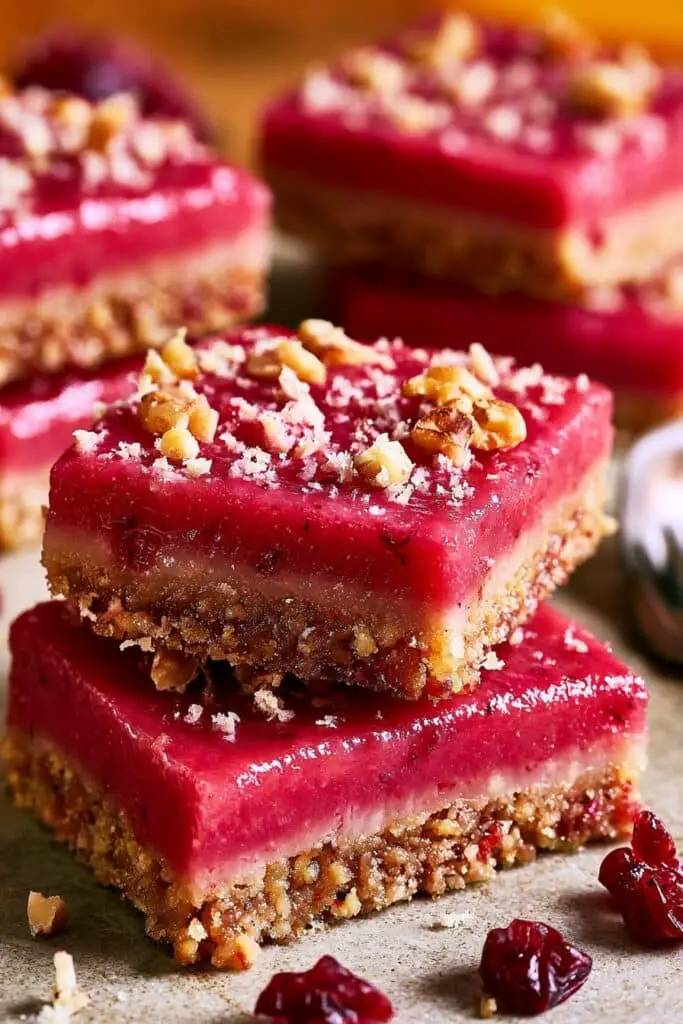
The bright cranberry color also makes these bars stand out among other Thanksgiving desserts. They feel festive without being overly complicated, and you can make them ahead of time, which is exactly what I want when planning a busy holiday meal.
Prep Time: 25 minutes
Cook Time: 35–45 minutes
Chilling Time: At least 2 hours
Total Time: About 3 hours
Difficulty: Moderate
Servings: 16 bars
Ingredients
For the Walnut Shortbread Crust
- 1 cup all-purpose flour
- 1/2 cup walnuts, finely chopped
- 1/3 cup granulated sugar
- 1/4 teaspoon salt
- 1/2 cup unsalted butter, softened
For the Cranberry Curd
- 2 cups fresh or frozen cranberries
- 1/2 cup water
- 3/4 cup granulated sugar
- 3 large eggs
- 2 large egg yolks
- 1 tablespoon lemon juice
- 1 teaspoon finely grated lemon zest
- 1/4 teaspoon salt
- 6 tablespoons unsalted butter, cut into small pieces
For Finishing
- Powdered sugar, optional
- Fresh cranberries, optional
How to Make Cranberry Curd Bars
- Prepare the oven and pan.
Preheat your oven to 350°F (175°C). Line an 8-inch or 9-inch square baking pan with parchment paper, leaving some overhang on the sides so the finished bars are easy to lift out. - Make the shortbread mixture.
In a bowl, combine the flour, chopped walnuts, sugar, and salt. Add the softened butter and mix until the ingredients come together into a soft, crumbly dough. - Press the crust into the pan.
Transfer the mixture to the prepared pan and press it firmly into an even layer. Make sure the corners are well covered. - Bake the crust.
Bake for about 18–20 minutes, or until the edges are lightly golden. Remove the pan from the oven while you prepare the cranberry curd. - Cook the cranberries.
Add the cranberries and water to a saucepan over medium heat. Cook until the cranberries soften and begin to burst, usually about 8–10 minutes. - Make the cranberry purée.
Transfer the cooked cranberries to a blender or food processor and blend until smooth. For an extra-smooth curd, press the purée through a fine-mesh sieve to remove the skins. - Prepare the curd mixture.
In a clean saucepan, whisk together the cranberry purée, sugar, eggs, egg yolks, lemon juice, lemon zest, and salt. - Cook the curd gently.
Place the saucepan over low to medium-low heat and cook, stirring constantly, until the mixture thickens enough to coat the back of a spoon. Don’t let it boil, as the eggs can scramble. - Add the butter.
Remove the saucepan from the heat and add the butter a few pieces at a time. Stir until completely melted and the curd is smooth. - Pour over the crust.
Pour the warm cranberry curd over the baked shortbread crust. Smooth the top gently with a spatula. - Bake again.
Return the pan to the oven and bake for about 10–15 minutes, until the curd is just set around the edges and still has a slight movement in the center. - Cool and chill.
Remove the pan from the oven and let it cool completely. Refrigerate for at least 2 hours so the curd becomes firm enough to cut cleanly. - Cut into bars.
Use the parchment paper to lift the chilled dessert from the pan. Cut into squares or rectangles with a sharp knife. - Finish and serve.
Dust the bars lightly with powdered sugar if desired. Keep them chilled until you’re ready to serve.
Using Fresh or Frozen Cranberries
Both fresh and frozen cranberries work well for this recipe. I usually use fresh cranberries when they are available around the holiday season, but frozen cranberries are a convenient option too.
There is no need to thaw frozen cranberries before cooking them. Just allow a little extra time for them to soften and burst in the saucepan.
7. Pumpkin Pie Bars
I love pumpkin pie, but when I’m serving a bigger group, pumpkin pie bars can be even more convenient. You get the same creamy pumpkin filling and warm holiday spices, but everything is baked in a pan and cut into easy-to-serve squares.
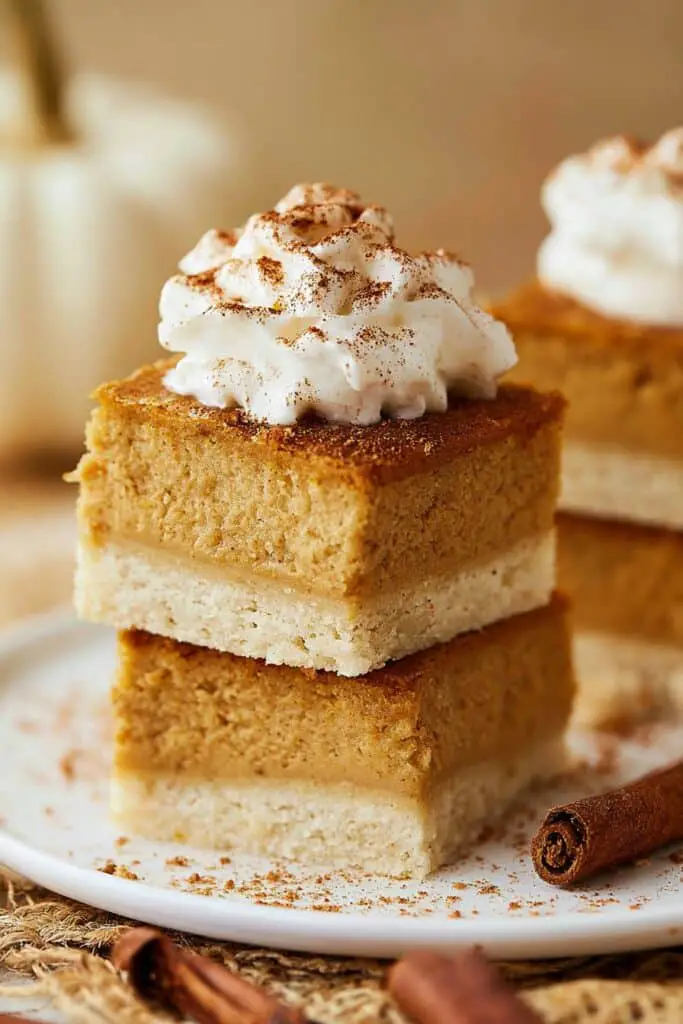
These bars are also one of my favorite easy Thanksgiving desserts when I want to prepare something ahead. You can make them several days before Thanksgiving, chill them until you’re ready to serve, and cut them into smaller pieces so everyone gets a taste.
Prep Time: 20 minutes
Cook Time: 45–55 minutes
Chilling Time: At least 2 hours
Total Time: About 3 hours
Difficulty: Easy
Servings: 16 bars
Ingredients
For the Crust
- 2 cups graham cracker crumbs
- 1/4 cup granulated sugar
- 1/2 cup unsalted butter, melted
- 1/2 teaspoon ground cinnamon
- 1/4 teaspoon salt
For the Pumpkin Filling
- 1 can (15 ounces) pumpkin purée
- 3 large eggs
- 3/4 cup packed brown sugar
- 1 can (12 ounces) evaporated milk
- 1 teaspoon vanilla extract
- 1 teaspoon ground cinnamon
- 1/2 teaspoon ground ginger
- 1/4 teaspoon ground nutmeg
- 1/8 teaspoon ground cloves
- 1/4 teaspoon salt
For Serving
- Whipped cream, optional
- Ground cinnamon, optional
How to Make Pumpkin Pie Bars
- Preheat the oven.
Preheat your oven to 350°F (175°C). Line a 9×13-inch baking pan with parchment paper, leaving some overhang on the sides. - Make the crust.
In a medium bowl, mix the graham cracker crumbs, sugar, melted butter, cinnamon, and salt. Stir until the crumbs are evenly coated and the mixture resembles wet sand. - Press the crust into the pan.
Transfer the crumb mixture to the prepared pan. Press it firmly and evenly across the bottom, making sure the corners are covered. - Bake the crust.
Bake the crust for about 8–10 minutes. Remove it from the oven and let it cool slightly while you prepare the pumpkin filling. - Mix the pumpkin filling.
In a large bowl, whisk together the pumpkin purée, brown sugar, eggs, evaporated milk, vanilla, cinnamon, ginger, nutmeg, cloves, and salt. - Pour over the crust.
Once the crust has cooled slightly, carefully pour the pumpkin mixture over it. Spread the filling evenly with a spatula if needed. - Bake the bars.
Return the pan to the oven and bake for about 45–55 minutes. The edges should be set, while the center should still have a slight jiggle. - Cool completely.
Remove the pan from the oven and place it on a wire rack. Let the bars cool completely at room temperature. - Chill.
Cover the pan and refrigerate for at least 2 hours. Chilling helps the pumpkin filling become firm enough to slice neatly. - Cut and serve.
Use the parchment paper to lift the bars from the pan. Cut them into squares or rectangles with a sharp knife. - Add the finishing touch.
Serve with whipped cream and a light sprinkle of cinnamon if desired.
How to Get Clean Pumpkin Pie Bars
The key is giving the bars enough time to cool and chill. If you try to cut them while they are still warm, the pumpkin filling can be too soft and the slices won’t hold their shape.
For cleaner cuts, use a sharp knife and wipe it with a damp cloth between slices. Chilled bars are much easier to cut than warm ones.
8. Classic Apple Crisp
Apple crisp is one of those desserts I turn to when I want something comforting without making a complicated pie. Tender baked apples, warm cinnamon, and a golden oat topping come together in a simple dessert that feels perfect for Thanksgiving.

I also love that there is no pie crust to roll or shape. That makes this one of my favorite easy Thanksgiving desserts, especially when I’m already preparing several dishes for the holiday. It is simple enough for beginners but still feels special when served warm with a scoop of vanilla ice cream.
Prep Time: 20 minutes
Cook Time: 40–50 minutes
Total Time: About 1 hour 10 minutes
Difficulty: Easy
Servings: 8 servings
Ingredients
For the Apple Filling
- 6 medium apples, peeled, cored, and sliced
- 1/3 cup granulated sugar
- 1 tablespoon lemon juice
- 1 teaspoon ground cinnamon
- 1/4 teaspoon ground nutmeg
- 2 tablespoons all-purpose flour
- 1 teaspoon vanilla extract
For the Crisp Topping
- 1 cup old-fashioned rolled oats
- 3/4 cup all-purpose flour
- 1/2 cup packed brown sugar
- 1/2 teaspoon ground cinnamon
- 1/4 teaspoon salt
- 1/2 cup unsalted butter, melted
How to Make Classic Apple Crisp
- Preheat the oven.
Preheat your oven to 350°F (175°C). Lightly grease a 9×13-inch baking dish or a similar-sized ovenproof dish. - Prepare the apples.
Peel, core, and slice the apples into fairly even pieces. Keeping the slices similar in size helps them cook evenly. - Season the apples.
Place the apples in a large bowl and add the sugar, lemon juice, cinnamon, nutmeg, flour, and vanilla. Toss everything together until the apples are evenly coated. - Transfer the filling to the dish.
Spread the seasoned apples evenly in the prepared baking dish. - Make the topping.
In a separate bowl, combine the oats, flour, brown sugar, cinnamon, and salt. Pour in the melted butter and stir until the mixture forms coarse, crumbly pieces. - Add the topping.
Sprinkle the crisp topping evenly over the apples. Try to cover the whole surface so you get a golden, crunchy layer in every serving. - Bake the crisp.
Bake for about 40–50 minutes, until the apples are tender and bubbling around the edges and the topping is golden brown. - Let it rest.
Remove the crisp from the oven and let it rest for about 10–15 minutes. This gives the apple juices a little time to settle. - Serve warm.
Spoon the apple crisp into bowls and serve warm with vanilla ice cream, whipped cream, or simply on its own.
Choosing the Best Apples
For a good apple crisp, I like using apples that hold their shape during baking while becoming tender. Granny Smith, Honeycrisp, and Braeburn are all useful choices.
You can also combine a tart apple with a sweeter variety. This gives the filling a nice balance and keeps the finished dessert from becoming overly sweet.
9. Pecan Pie Bars
I love pecan pie, but when I’m serving a crowd, sometimes I prefer making pecan pie bars instead. They have the same buttery crust, sweet pecan filling, and crunchy nuts I love in a classic pecan pie, but they are much easier to cut and serve.
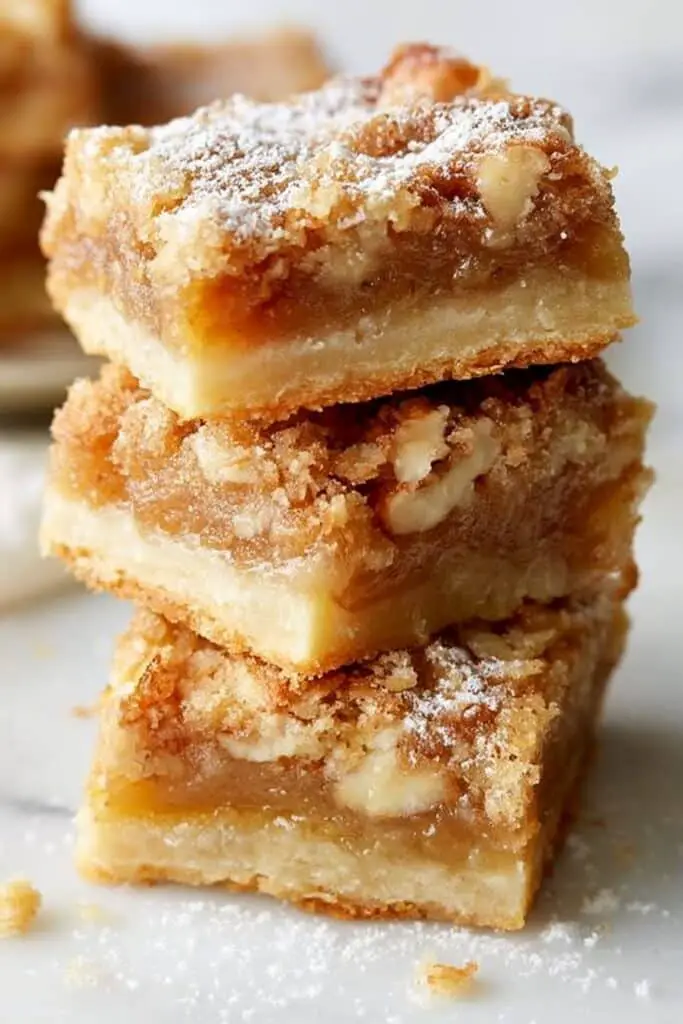
This makes them a really useful choice for Thanksgiving make ahead desserts. You can bake them ahead, chill them, and simply cut them into squares when your guests are ready for dessert. They also look beautiful on a holiday dessert platter alongside other amazing Thanksgiving desserts.
Prep Time: 20 minutes
Cook Time: 45–55 minutes
Chilling Time: About 1 hour
Total Time: About 2 hours 15 minutes
Difficulty: Easy to moderate
Servings: 16 bars
Ingredients
For the Shortbread Crust
- 2 cups all-purpose flour
- 1/2 cup granulated sugar
- 1/2 teaspoon salt
- 1 cup unsalted butter, softened
For the Pecan Filling
- 1 cup light corn syrup
- 3/4 cup packed brown sugar
- 1/4 cup unsalted butter, melted
- 3 large eggs
- 1 teaspoon vanilla extract
- 1/2 teaspoon salt
- 1 1/2 cups pecan halves or pieces
How to Make Pecan Pie Bars
- Preheat the oven.
Preheat your oven to 350°F (175°C). Line a 9×13-inch baking pan with parchment paper, leaving some overhang on the sides for easy removal. - Make the crust.
In a large bowl, combine the flour, sugar, and salt. Add the softened butter and mix until the ingredients form a soft, crumbly dough. - Press the crust into the pan.
Transfer the dough to the prepared baking pan. Press it firmly and evenly across the bottom, paying attention to the corners. - Bake the crust.
Bake for about 15–18 minutes, or until the edges are lightly golden. Remove the pan from the oven while you prepare the filling. - Prepare the pecan filling.
In a large bowl, whisk together the corn syrup, brown sugar, melted butter, eggs, vanilla extract, and salt. - Add the pecans.
Stir the pecans into the filling until they are evenly distributed. - Pour over the crust.
Carefully pour the pecan mixture over the warm baked crust. Spread the pecans evenly if needed. - Bake again.
Return the pan to the oven and bake for about 30–35 minutes, or until the filling is set around the edges and the center has only a slight jiggle. - Cool completely.
Remove the pan from the oven and place it on a wire rack. Let the bars cool completely in the pan. - Chill the bars.
Refrigerate the cooled bars for about 1 hour. Chilling makes the filling firmer and helps you get cleaner cuts. - Cut into squares.
Use the parchment paper to lift the bars from the pan. Cut into squares or rectangles with a sharp knife. - Serve.
Serve the bars at room temperature or slightly chilled. They are delicious on their own, but you can also add whipped cream or vanilla ice cream.
How to Get Clean-Cut Bars
The secret to neat pecan pie bars is patience. Let them cool completely before refrigerating, and give them enough time to firm up.
For cleaner cuts, use a sharp knife and wipe it clean between slices. I also like lifting the entire slab out of the pan using the parchment paper before cutting—it makes the process much easier.
10. Pumpkin Bread Pudding
There is something so comforting about a warm bread pudding on a chilly holiday evening. When you add pumpkin, cinnamon, and other warm spices, it becomes a cozy Thanksgiving dessert that feels made for the season.
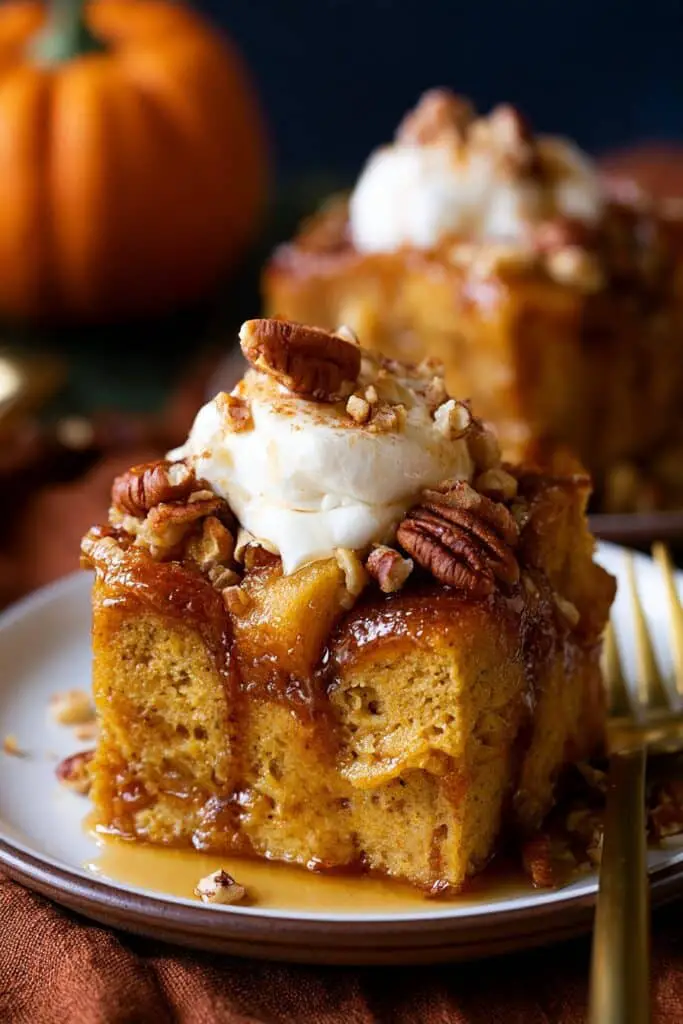
I love this recipe when I want something different from the usual pies. It uses simple ingredients, is easy to put together, and can be prepared ahead of time. The soft pumpkin-soaked bread with its lightly crisp top makes this one of those amazing Thanksgiving desserts that is especially good served warm.
Prep Time: 20 minutes
Cook Time: 45–55 minutes
Resting Time: 10 minutes
Total Time: About 1 hour 25 minutes
Difficulty: Easy
Servings: 8 servings
Ingredients
For the Bread Pudding
- 8 cups day-old bread, cut into 1-inch cubes
- 1 can (15 ounces) pumpkin purée
- 4 large eggs
- 1 1/2 cups whole milk
- 1/2 cup heavy cream
- 3/4 cup packed brown sugar
- 1/4 cup unsalted butter, melted
- 1 teaspoon vanilla extract
- 1 1/2 teaspoons ground cinnamon
- 1/2 teaspoon ground ginger
- 1/4 teaspoon ground nutmeg
- 1/4 teaspoon salt
For Serving
- Whipped cream, optional
- Vanilla ice cream, optional
- Powdered sugar, optional
- Caramel sauce, optional
How to Make Pumpkin Bread Pudding
- Prepare the bread.
Cut the bread into roughly 1-inch cubes. Day-old or slightly stale bread works best because it absorbs the pumpkin custard without becoming too mushy. - Preheat the oven.
Preheat your oven to 350°F (175°C). Lightly butter a 9×13-inch baking dish. - Arrange the bread.
Spread the bread cubes evenly in the prepared baking dish. - Make the pumpkin custard.
In a large bowl, whisk together the pumpkin purée, eggs, milk, heavy cream, brown sugar, melted butter, vanilla, cinnamon, ginger, nutmeg, and salt. - Pour over the bread.
Slowly pour the pumpkin mixture over the bread cubes. Gently press the bread down with a spatula or the back of a spoon so the custard can soak into the pieces. - Let it soak.
Allow the bread to sit in the custard for about 10–15 minutes. This gives the bread time to absorb the pumpkin mixture. - Bake the pudding.
Place the baking dish in the oven and bake for about 45–55 minutes. The center should be set, while the top should be lightly golden. - Let it rest.
Remove the bread pudding from the oven and let it rest for about 10 minutes before serving. This gives the custard time to settle. - Serve warm.
Spoon the warm bread pudding into individual bowls. Add whipped cream, vanilla ice cream, powdered sugar, or caramel sauce if desired.
Choosing the Right Bread
The bread you use makes a big difference. I prefer a sturdy day-old bread that can absorb the pumpkin custard while still keeping some structure.
French bread, brioche, challah, or another sturdy white bread can all work well. Avoid very fresh, soft bread if possible because it can become overly soggy.
11. Pumpkin Roll With Cream Cheese Filling
A pumpkin roll is one of those desserts that always looks more impressive than it actually is. I love the combination of a soft pumpkin sponge, warm spices, and a smooth cream cheese filling rolled into a beautiful spiral.
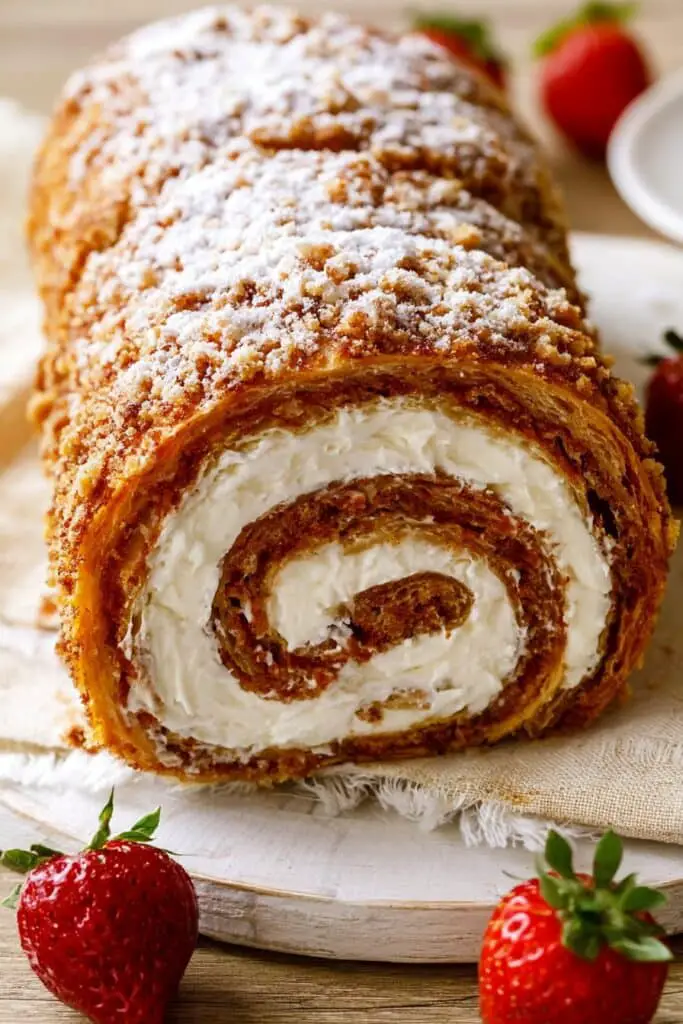
It is a lovely choice when I want my Thanksgiving dessert table to have something a little different from the usual pies. The best part is that it can be prepared ahead, chilled, and sliced just before serving, making it a practical option for a busy holiday.
Prep Time: 25 minutes
Cook Time: 13–15 minutes
Chilling Time: At least 1 hour
Total Time: About 2 hours
Difficulty: Moderate
Servings: 10–12 slices
Ingredients
For the Pumpkin Cake
- 3 large eggs
- 1 cup granulated sugar
- 2/3 cup pumpkin purée
- 1 teaspoon vanilla extract
- 3/4 cup all-purpose flour
- 1 teaspoon baking soda
- 1/2 teaspoon ground cinnamon
- 1/2 teaspoon ground ginger
- 1/4 teaspoon ground nutmeg
- 1/4 teaspoon salt
For the Cream Cheese Filling
- 8 ounces cream cheese, softened
- 1/4 cup unsalted butter, softened
- 1 cup powdered sugar
- 1 teaspoon vanilla extract
For Finishing
- Powdered sugar, for dusting
- Whipped cream, optional
How to Make Pumpkin Roll With Cream Cheese Filling
- Preheat the oven.
Preheat your oven to 375°F (190°C). Line a 10×15-inch jelly-roll pan with parchment paper and lightly grease the parchment. - Prepare the dry ingredients.
In a medium bowl, whisk together the flour, baking soda, cinnamon, ginger, nutmeg, and salt. Set the mixture aside. - Beat the eggs and sugar.
In a large bowl, beat the eggs and sugar until the mixture becomes lighter and slightly thickened. - Add the pumpkin and vanilla.
Mix in the pumpkin purée and vanilla extract until evenly combined. - Add the dry ingredients.
Gently stir the dry ingredients into the pumpkin mixture. Mix only until everything is combined. Avoid overmixing the batter. - Spread the batter.
Pour the batter into the prepared pan and spread it into an even layer, making sure it reaches the corners. - Bake the cake.
Bake for about 13–15 minutes, or until the cake springs back lightly when touched in the center. - Prepare the cake for rolling.
While the cake is still hot, carefully turn it out onto a clean kitchen towel generously dusted with powdered sugar. Peel away the parchment paper. - Roll the cake.
Starting from one short end, gently roll the warm cake up with the towel. Don’t roll it too tightly. Let the rolled cake cool completely. - Make the cream cheese filling.
Beat the softened cream cheese and butter until smooth. Add the powdered sugar and vanilla extract, then beat until creamy and spreadable. - Unroll the cooled cake.
Carefully unroll the cake once it has cooled. Some small cracks may appear, but don’t worry—once it is filled and rolled again, most imperfections won’t be noticeable. - Add the filling.
Spread the cream cheese filling evenly over the cake, leaving a small border around the edges. - Roll it again.
Gently roll the cake back up without the towel. Try to keep the roll firm enough to hold its shape without squeezing out the filling. - Chill the pumpkin roll.
Wrap the roll tightly in plastic wrap and refrigerate for at least 1 hour. Chilling helps the filling firm up and makes the roll easier to slice. - Slice and serve.
Remove the plastic wrap and dust the pumpkin roll with powdered sugar. Slice with a sharp knife and serve chilled or slightly cool.
How to Prevent the Cake From Cracking
Rolling the cake while it is still warm is one of the most important steps. A warm sponge is flexible, while a completely cooled cake is more likely to crack when you try to roll it.
Don’t worry if you see a few small cracks. Pumpkin rolls don’t have to look absolutely perfect to be delicious, and the powdered sugar on top helps give the finished dessert a beautiful presentation.
12. Cranberry Orange Cake
After all the rich pies and creamy desserts, I like having something a little brighter on the Thanksgiving table. This cranberry orange cake is soft, moist, and full of fresh citrus flavor, with tart cranberries adding a beautiful contrast to the sweetness of the cake.
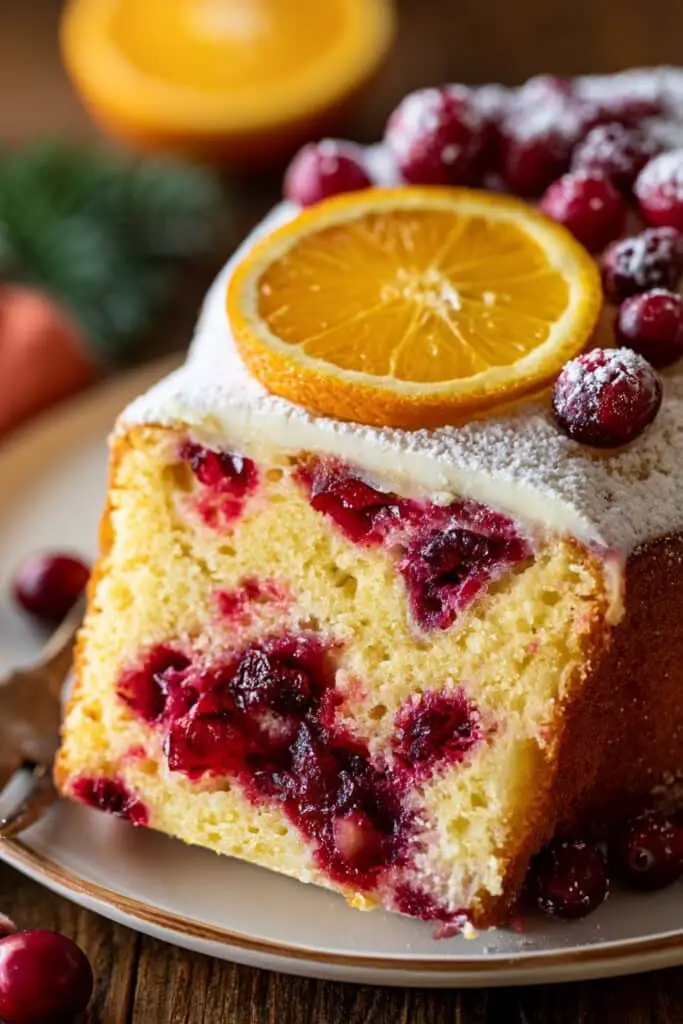
I especially love the combination of cranberry and orange because it feels festive without being too heavy. It is also simple to prepare ahead, so it fits nicely with a holiday menu when you want easy Thanksgiving desserts that can be made before the big day.
Prep Time: 20 minutes
Cook Time: 45–55 minutes
Cooling Time: About 1 hour
Total Time: About 2 hours
Difficulty: Easy
Servings: 10–12 slices
Ingredients
For the Cake
- 2 cups all-purpose flour
- 2 teaspoons baking powder
- 1/2 teaspoon salt
- 1 cup granulated sugar
- 1/2 cup unsalted butter, softened
- 2 large eggs
- 1 teaspoon vanilla extract
- 1 tablespoon finely grated orange zest
- 1/2 cup fresh orange juice
- 1/2 cup whole milk
- 1 1/2 cups fresh or frozen cranberries
For the Orange Glaze
- 1 cup powdered sugar
- 2–3 tablespoons fresh orange juice
How to Make Cranberry Orange Cake
- Preheat the oven.
Preheat your oven to 350°F (175°C). Grease a 9-inch round cake pan or line the bottom with parchment paper. - Prepare the dry ingredients.
In a medium bowl, whisk together the flour, baking powder, and salt. Set the mixture aside. - Cream the butter and sugar.
In a large bowl, beat the softened butter and granulated sugar until light and creamy. - Add the eggs and vanilla.
Beat in the eggs one at a time, followed by the vanilla extract. Mix until everything is well combined. - Add the orange flavor.
Stir in the grated orange zest and fresh orange juice. The orange zest is especially important because it gives the cake a stronger citrus aroma. - Combine the wet and dry ingredients.
Add the flour mixture in portions, alternating with the milk. Begin and finish with the dry ingredients, mixing just until combined. - Add the cranberries.
Gently fold the cranberries into the batter. If you’re using frozen cranberries, there is no need to thaw them first. - Transfer to the pan.
Pour the batter into the prepared cake pan and spread the top evenly. - Bake the cake.
Bake for about 45–55 minutes, or until a toothpick inserted into the center comes out clean or with a few moist crumbs attached. - Cool the cake.
Let the cake cool in the pan for about 10–15 minutes. Then transfer it to a wire rack and allow it to cool completely. - Make the orange glaze.
In a small bowl, whisk the powdered sugar with enough orange juice to create a smooth, pourable glaze. - Glaze the cake.
Once the cake has cooled completely, drizzle the orange glaze over the top. Let the glaze set for a few minutes before slicing.
Fresh or Frozen Cranberries?
Both fresh and frozen cranberries work well in this cake. Fresh cranberries give you a nice firm texture and bright color, while frozen cranberries are convenient when fresh ones aren’t available.
If you’re using frozen cranberries, add them directly to the batter without thawing. This helps prevent them from releasing too much extra moisture into the cake.
13. No-Bake Pumpkin Cheesecake
When my oven is already busy with the Thanksgiving meal, I love having a dessert that doesn’t need to go anywhere near it. This no-bake pumpkin cheesecake gives you that creamy pumpkin flavor I want during the holiday, but without the need to bake a cheesecake.
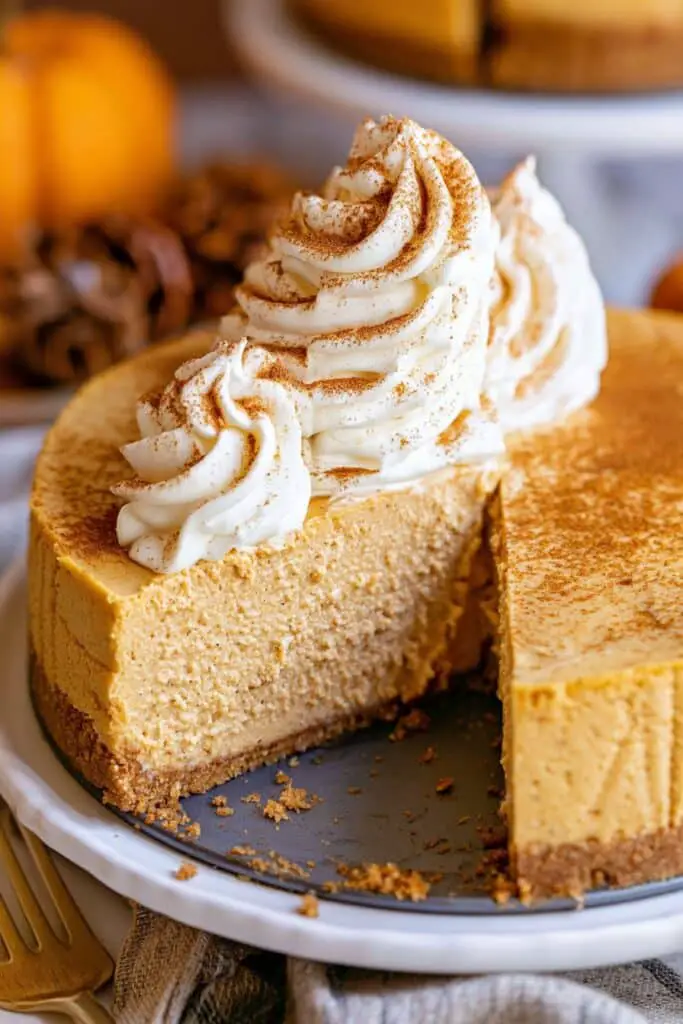
The filling is smooth, creamy, and lightly spiced, while the graham cracker crust adds a nice buttery crunch. It is also one of the easiest Thanksgiving make ahead desserts because it needs time in the refrigerator to set, so you can prepare it well before your guests arrive.
Prep Time: 25 minutes
Cook Time: None
Chilling Time: At least 6 hours
Total Time: About 6 hours 25 minutes
Difficulty: Easy
Servings: 8–10 slices
Ingredients
For the Crust
- 2 cups graham cracker crumbs
- 1/4 cup granulated sugar
- 1/2 cup unsalted butter, melted
- 1/2 teaspoon ground cinnamon
- 1/4 teaspoon salt
For the Pumpkin Filling
- 8 ounces cream cheese, softened
- 1 cup pumpkin purée
- 3/4 cup powdered sugar
- 1 teaspoon vanilla extract
- 1 teaspoon ground cinnamon
- 1/2 teaspoon ground ginger
- 1/4 teaspoon ground nutmeg
- 1/8 teaspoon ground cloves
- 1 cup heavy whipping cream, cold
For Serving
- Whipped cream, optional
- Ground cinnamon, optional
- Chopped pecans, optional
How to Make No-Bake Pumpkin Cheesecake
- Prepare the crust.
In a medium bowl, combine the graham cracker crumbs, sugar, cinnamon, and salt. Pour in the melted butter and mix until the crumbs are evenly moistened. - Press the crust into the pan.
Transfer the crumb mixture to a 9-inch springform pan or deep-dish pie plate. Press it firmly and evenly across the bottom and slightly up the sides. - Chill the crust.
Place the crust in the refrigerator while you prepare the filling. Chilling helps the crust become firm. - Beat the cream cheese.
In a large bowl, beat the softened cream cheese until smooth and creamy. Make sure there are no large lumps before adding the other ingredients. - Add the pumpkin and sugar.
Beat in the pumpkin purée, powdered sugar, vanilla, cinnamon, ginger, nutmeg, and cloves until the mixture is smooth and evenly combined. - Whip the cream.
In a separate bowl, beat the cold heavy cream until it forms stiff peaks. Don’t overbeat it, or the cream can become grainy. - Fold the whipped cream into the pumpkin mixture.
Gently fold the whipped cream into the pumpkin mixture in batches. Use a spatula and fold carefully to keep the filling light and fluffy. - Fill the crust.
Spoon the pumpkin cheesecake filling over the chilled crust. Spread the top evenly with a spatula. - Chill the cheesecake.
Cover the cheesecake and refrigerate it for at least 6 hours. For the best texture, I recommend chilling it overnight. - Decorate before serving.
Once the cheesecake is fully set, remove it from the springform pan if you’re using one. Add whipped cream, chopped pecans, or a light sprinkle of cinnamon. - Slice and serve.
Use a sharp knife to cut the cheesecake into slices. Wipe the knife between cuts for cleaner slices.
How to Get a Firm No-Bake Cheesecake
The most important thing is giving the cheesecake enough chilling time. Don’t rush this step because the filling needs several hours in the refrigerator to firm up.
Make sure your heavy cream is cold before whipping it, and beat it until it forms stiff peaks. Then fold it gently into the pumpkin mixture rather than stirring aggressively.
If you want to prepare it even further ahead, you can freeze the finished cheesecake well wrapped. Thaw it slowly in the refrigerator before serving.
14. Pumpkin Chocolate Chip Bars
If you love pumpkin desserts but also feel like every Thanksgiving dessert needs a little chocolate, these pumpkin chocolate chip bars are a great choice. They are soft, chewy, warmly spiced, and filled with plenty of chocolate chips in every bite.
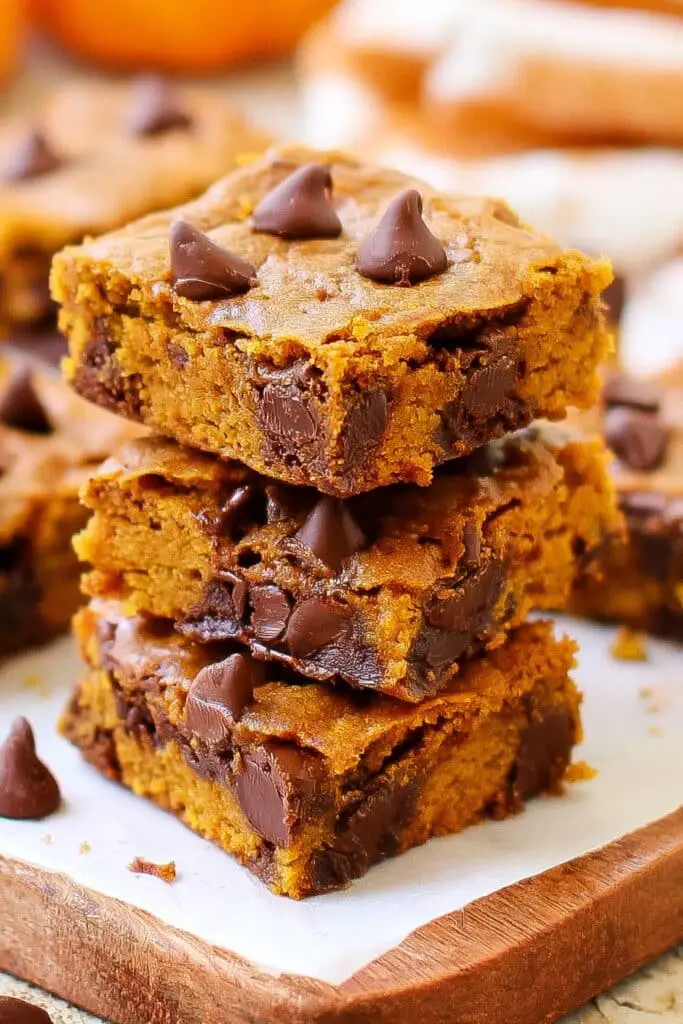
I especially like these bars because they are much easier to serve than a traditional pie. You can bake them ahead, let them cool completely, cut them into squares, and have them ready whenever your guests are ready for dessert.
Prep Time: 15 minutes
Cook Time: 30–35 minutes
Total Time: About 50 minutes
Difficulty: Easy
Servings: 16–20 bars
Ingredients
- 1 cup unsalted butter, melted and slightly cooled
- 1 cup granulated sugar
- 1/2 cup packed brown sugar
- 1 large egg
- 1 teaspoon vanilla extract
- 1 cup pumpkin purée
- 2 cups all-purpose flour
- 1 teaspoon baking powder
- 1/2 teaspoon baking soda
- 1 teaspoon ground cinnamon
- 1/2 teaspoon ground ginger
- 1/4 teaspoon ground nutmeg
- 1/2 teaspoon salt
- 1 cup semi-sweet chocolate chips
How to Make Pumpkin Chocolate Chip Bars
- Prepare the pan.
Preheat your oven to 350°F (175°C). Grease and line a 9×13-inch baking pan with parchment paper, leaving a little overhang to make the bars easier to remove later. - Mix the wet ingredients.
In a large bowl, whisk together the melted butter, granulated sugar, brown sugar, egg, and vanilla until smooth. Add the pumpkin purée and whisk again until everything is well combined. - Combine the dry ingredients.
In a separate bowl, whisk together the flour, baking powder, baking soda, cinnamon, ginger, nutmeg, and salt. - Make the batter.
Gradually add the dry ingredients to the pumpkin mixture. Stir just until combined. Try not to overmix, as this can make the bars heavier. - Add the chocolate chips.
Fold in the chocolate chips, saving a small handful to sprinkle over the top if you like. - Spread into the pan.
Transfer the batter to the prepared baking pan and spread it evenly with a spatula. Sprinkle the remaining chocolate chips over the surface. - Bake.
Bake for about 30–35 minutes, or until the center is set and a toothpick inserted into the middle comes out with a few moist crumbs. - Cool completely.
Let the bars cool in the pan before slicing. This is important because the texture becomes firmer as they cool. - Slice and serve.
Lift the bars out using the parchment paper and cut them into squares or rectangles. Serve them as they are or add a little whipped cream for a more festive presentation.
How to Keep Pumpkin Bars Soft
The key is not to overbake them. Pumpkin adds plenty of moisture, so you want the center to be set but still soft.
Also, let the melted butter cool slightly before mixing it with the other ingredients. Once the bars are completely cool, keep them covered so they don’t dry out.
For extra chocolate flavor, I like using semi-sweet chocolate chips. You can also mix in a few mini chocolate chips for smaller pockets of chocolate throughout the bars.
15. Apple Pie
I don’t think a Thanksgiving dessert table feels complete without a classic apple pie. The combination of tender cinnamon-spiced apples, buttery crust, and that warm homemade aroma is hard to beat.
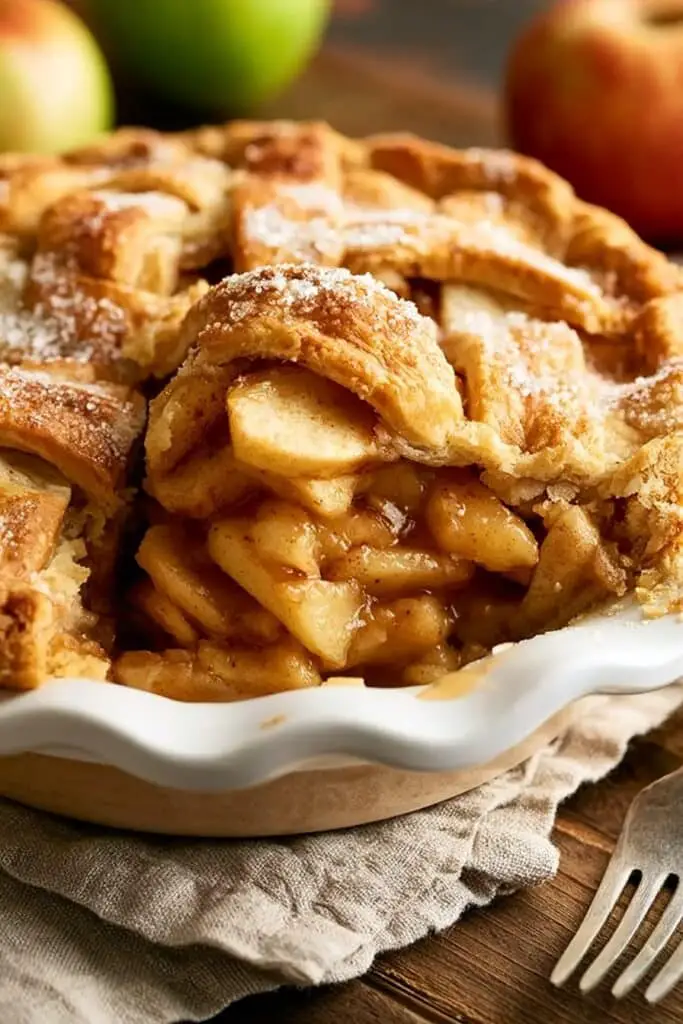
Apple pie is also a great choice when you’re planning Thanksgiving make ahead desserts because you can prepare it before the big day. Make the pie ahead, let it cool completely, and you’ll have one less thing to worry about when Thanksgiving dinner gets busy.
Prep Time: 30 minutes
Cook Time: 50–60 minutes
Total Time: About 1 hour 30 minutes
Difficulty: Moderate
Servings: 8 slices
Ingredients
For the Pie Crust
- 2 1/2 cups all-purpose flour
- 1 teaspoon salt
- 1 tablespoon granulated sugar
- 1 cup cold unsalted butter, cut into small cubes
- 6–8 tablespoons ice water
For the Apple Filling
- 6 medium apples, peeled, cored, and thinly sliced
- 3/4 cup granulated sugar
- 1/4 cup packed brown sugar
- 2 tablespoons all-purpose flour
- 1 tablespoon lemon juice
- 1 teaspoon ground cinnamon
- 1/4 teaspoon ground nutmeg
- 1/4 teaspoon salt
- 1 teaspoon vanilla extract
For the Top
- 1 tablespoon butter, cut into small pieces
- 1 large egg
- 1 tablespoon water
- 1 tablespoon granulated sugar
How to Make Apple Pie
- Prepare the pie dough.
In a large bowl, whisk together the flour, salt, and sugar. Add the cold butter and work it into the flour with a pastry cutter or your fingertips until the mixture looks crumbly with some pea-sized pieces of butter remaining. - Add the ice water.
Add the ice water one tablespoon at a time, gently mixing until the dough starts to come together. Don’t add more water than necessary. - Chill the dough.
Divide the dough into two portions and shape each into a disk. Wrap them and refrigerate for at least 30 minutes. - Prepare the apple filling.
In a large bowl, combine the sliced apples, granulated sugar, brown sugar, flour, lemon juice, cinnamon, nutmeg, salt, and vanilla. Toss gently until the apples are evenly coated. - Roll out the bottom crust.
On a lightly floured surface, roll one dough disk into a circle large enough to fit a 9-inch pie dish. Carefully transfer it to the dish and gently press it into the bottom and sides. - Add the filling.
Spoon the apple mixture into the crust. Arrange the apples evenly and mound them slightly in the center. Dot the top with the small pieces of butter. - Add the top crust.
Roll out the second dough disk and place it over the apples. Trim any excess dough, then crimp the edges to seal the pie. - Cut vents.
Use a sharp knife to cut several small vents in the top crust. This allows steam to escape while the pie bakes. - Brush with egg wash.
Whisk the egg with one tablespoon of water. Brush the top crust lightly with the egg wash and sprinkle with sugar. - Bake the pie.
Bake at 425°F (220°C) for 15 minutes. Reduce the oven temperature to 375°F (190°C) and continue baking for about 35–45 minutes, until the crust is golden brown and the filling is bubbling.
How to Keep Apple Pie From Getting Soggy
A crisp crust starts with keeping the butter in the dough cold. Don’t overwork the dough, and give it enough time to chill before rolling it out.
It’s also important to let the baked pie cool completely before cutting. Slicing too early can release the hot juices before the filling has had time to thicken.
If you’re making the pie ahead, store it properly and reheat individual slices in the oven when you want that fresh-baked texture again.